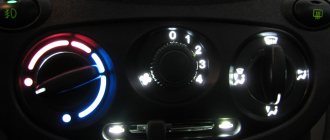
Door hinge play on Lada Kalina, tightening and replacing bolts
Often after use for 2 years, dull knocks appear from the doors, especially those that open frequently.
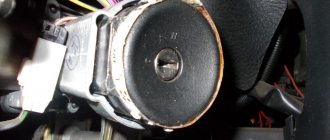
Most likely the reason for this is the weakening of the hinge axis, beyond which the bolt protrudes in the viburnum. Checking for the presence of play in the hinges is simple, you need to open the door and shake it up and down, if there are small knocks and noticeable play, then the problem is in the bolts. The bottom bolts are the ones that loosen the most, but you should definitely check the top ones as well. The top hinge of the door, the bolt comes from the bottom.
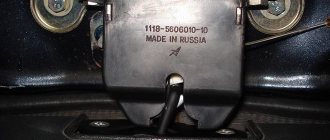
The bottom hinge of the door, the bolt comes from above.
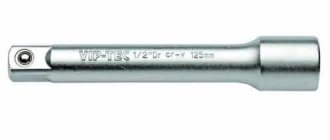
To solve this problem, you only need a 13mm wrench, you need to turn the bolts clockwise, the efforts are strong, but without fanaticism. If you are afraid of breaking the bolt, it is better to first unscrew it slightly counterclockwise.
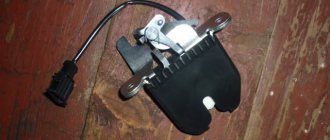
Until 2008, old bolts were installed on viburnums, which had an asterisk instead of the usual 13 head. If tightening the bolts does not help eliminate the backlash, then we buy bolts of a new modification with a cone-shaped working area and grooves for lubrication. The picture on the left shows the new type of bolts, and on the right the old one.
When replacing old bolts with new ones, it is better to do one at a time, that is, first we change the upper one, and only then the lower one. The door is not easy. If you don’t have help holding the door, you can use something to secure the door; my friend got out of the situation like this.
When tightening new bolts, I advise you to lubricate them with lithol and drip a weak thread locker onto the threads. Good luck.
Source of the article: https://www.lada-kalina-faq.ru/articles/view_articles/ljuft-petel-dverej-kalina-remont
Car door hinge repair
A very common defect is sagging door hinges. You can tell that the hinges are sagging by the following signs:
- more force is required to open and unlock doors;
- uneven gaps between the doors and the car body;
- metallic grinding noise when driving over uneven surfaces;
- scratches on the sills.
If you notice one or more of the above symptoms, you should have your car door repaired.
In case of severe damage and deformation, the hinges must be partially or completely replaced. A partial replacement involves changing only the axle.
Adjusting the hinges with your own hands is carried out in several stages:
- Remove the opposite half of the lock.
- Determine the correct vertical position of the doors.
- If there is a defect, loosen the fastening. Then raise or lower the door to the desired level by placing metal plates under the hinge. If the edge of the door is pulled up, then the plates are needed under the top hinge, and vice versa.
- Now determine the correct horizontal position of the doors. If the door is recessed into the body, then move the hinges closer to you, and vice versa.
Check the door opening and closing - there should be a soft bang.
To extend the life of door hinges, regularly lubricate the mechanism and tighten the bolts. Do not lean on the door or hang heavy objects on it.
Removing and installing front door trim
We turn off the lock button by hand.
Having turned the inner handle so that the screw securing it to the lever is accessible, use a Phillips screwdriver to unscrew the screw and remove the handle.
Use a screwdriver to pry off the switch block, pressing the fastening latches
We take it out of the hole in the armrest and, unfolding it as shown in the photo, lower the block into the resulting hole so that it does not interfere with the removal of the door trim.
Using a Phillips screwdriver, unscrew the two screws for the lower fastening of the upholstery.
Use a screwdriver with a thin blade to pry the plug in the armrest and remove it from the hole.
Using a Phillips screwdriver, unscrew the screw securing the upholstery
Unscrew the self-tapping screw for fastening the upholstery located in the armrest niche
With our hands we move the lower edge of the upholstery away from the inner door panel, overcoming the resistance of the pistons.
We remove the upper edge of the upholstery from the groove of the internal glass seal and, lifting the upholstery, remove it from the front door.
Location of the pistons on the inside of the upholstery
If necessary, use a Phillips screwdriver to unscrew the four screws securing the energy-absorbing element of the door
Install the upholstery in reverse order
Car door lock repair
To avoid such problems in the future, lubricate the lock regularly; spray lubricants are best suited for this.
How to repair the lock is shown in the video.
Such a phenomenon as sagging doors is a “normal” phenomenon for “not young” cars. This nuisance can cause its owner a lot of inconvenience.
Removing the front door power window
Remove the front door glass.
Disconnect the wire terminal from the negative terminal of the battery.
Before disconnecting the power window mechanism wire block from the switch block wire block, unroll the wrapping material on the connection of the blocks and disconnect the blocks
Using a 10mm socket, unscrew the 11 nuts securing the power window mechanism.
We remove the power window mechanism from the door through the lower hole in the interior panel.
We install the power window mechanism in the reverse order.
In order to prevent knocking on the doors, we cover the connection of the pads with soft material (foam rubber).
Removal and installation of the external handle and lock of the front door
Front door lock with locking drive and outside handle
Remove the front door trim.
Using a Phillips screwdriver, unscrew the screw securing the base of the inner handle and remove it from the mounting pin.
We bend the edge of the protective material behind the inner door panel.
Using a screwdriver, we disconnect the rod from the cylinder mechanism of the outer handle lock.
Similarly, disconnect the rod of the outer handle.
Using a 8mm socket, unscrew the bolt securing the outer handle.
Use a 8mm socket to unscrew the handle securing nut.
Remove the outer handle.
Using a Phillips screwdriver, unscrew the three screws securing the door lock.
Slide the red block lock up and disconnect the block from the locking drive
Using a screwdriver, press out the rod lock, turning it around its axis.
Having disconnected the rod of the inner handle from the lock, remove the rod.
We remove the front door lock together with the locking drive and rods through the technological opening in the inner door panel
Install in reverse order
Straighten your car door yourself
When repairing a damaged door, first of all, you need to remove everything unnecessary from it: glass, handle, lock, felt, molding.
After the molding, there may be adhesive tape left behind, which is almost impossible to remove with bare hands. You can remove double-sided tape using a screwdriver and a special wheel. Common straightening methods:
- extrusion;
- pulling;
- riveting;
- cooling-heating;
- straightening without painting.
Door straightening: main points
In many cases, to straighten out most of the dents, you will need to remove the upholstery and press out the dent from the inside. The metal will play and fall into place. The more the metal is stretched, the more effort must be applied to completely return the surface to its previous shape.
Small irregularities are tapped with a hammer and various mandrels. Then they are sanded down to metal with a grinder (grinder), and the remaining dents are pulled out with a spotter. If you don’t have such a tool at hand, you can do it the old fashioned way - weld the hinges with a semi-automatic machine and pull them with a reverse hammer.
Straightening the door does not end there, because the work must be completed. After leveling the metal, the door needs to be puttied. In the event that small irregularities remain, you can use putty with fiberglass, as it perfectly fills the recesses and at the same time gives minimal shrinkage.
Next you need to use a universal putty and a finishing putty. It is important to understand that the less putty there is on a part, the less likely it is that it will subsequently peel off . Then the part is primed, and the next day it is processed and painted. If necessary, it is polished after the paint or varnish has dried.
At the end, all the door accessories are installed in place, and the molding is glued with double tape (it is better to buy a branded one, for example “3M”).
The result of door straightening depends not so much on the quality of the tools, but on the skills of the master. In general, modern car straightening allows you to achieve colossal results.
Pieces of tin
A sagging body part can be lifted on almost any car. Most often, the driver's door sags, and when closed, it rises slightly. The pins on the top and bottom hinges wear out over time. You can easily correct such sagging on your own, without having any special knowledge or skills.
Work must be carried out in the following order:
- slightly loosen the two bolts on the lower canopy, which is attached directly to the door;
- take four pieces of tin in the shape of the letter “P”, 1.5-2 mm thick, with a central hole diameter of 10 mm;
- install two of them on each bolt between the canopy and the door, lifting it;
- tighten the bolts by hand;
- check several times how the repaired element closes;
- At the last stage, tighten the bolts well.
This procedure does not take much time, does not require special skills, abilities, or money. The problem can be solved in this way in 5-15 minutes. Compared to washers, such tin spacers are easier to install on a bolt, since it does not need to be completely unscrewed.
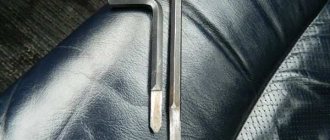
For this method, you only need a bolt corresponding to the diameter of the finger, which is best wrapped with insulating tape in order not to damage the paint. Insert the bolt in the area of the lower hinge between the door surface and the body with the head facing up. After this, gently press on the door surface several times.
It is important not to overdo it, since getting the door back will be much more difficult. As a result of this procedure, it falls into place and the sagging is eliminated.
Thus, the order of this procedure will be as follows:
- place the bolt from the inside on the bottom hinge so that it hangs on its very edge;
- carefully tighten the bolt inside by closing the door;
- completely close the door to evaluate the result.
This simple technology allows you to eliminate sagging in most cases.
The nuances of door straightening
Smooth dents without creases or folds have the least consequences. We can say that the car owner is lucky if the paintwork is not damaged. But such delicate damage can only be caused by relatively “soft” objects.
The dent on the door can be very large, and there is also a so-called “cracker”. In this case, rows of points are placed by welding on the back side of the door with an interval of 15-20 mm. The dots can also be placed on the front side, but then after straightening they will have to be ground off.
Creases or folds are classified as complex damage. It is impossible to straighten them by simply squeezing them out. Most likely, the door will have to be removed and worked on on the slipway. In the most difficult cases, opening the door is required. On the slipway, the geometry of the part is restored using hydraulics.
You can straighten the creases using a special device - a spotter and a reverse hammer, which is hooked onto washers specially welded to the casing. To straighten the door from the inside, you may need to cut out part of its frame, which is then welded back.
The method that involves working with a reverse hammer is traditional. But after such straightening, small bumps may remain on the surface of the door. You can get rid of them with a metal plane followed by processing with an angle grinder with a flap disc.
When a dent is formed after an impact at an angle close to a straight line, the door often moves inward a little. If the blow is strong, then it may not close at all. This is due to the pull of the hinge on the door itself. You can drown them by hitting them with a hammer through a wooden spacer.
Many experts believe that for complex dents without creases, preference should be given to straightening from the outside of the door. In this case, it is easier to control the process, which means that leveling will occur faster. To make it easier to attach the rods, use a spotter or welding washers, welded with low current, so that they can then be easily rolled up.
If the door is straightened from the back side, then the most important point in this case is to control the force of impact. To avoid cutting the door frame, some straighteners resort to the pneumatic method. It involves placing an inflatable cushion (soccer ball) opposite the dent, which, when inflated, will gently straighten the doors.
The decision to choose a straightening method is always made after examining the dent and depends on its characteristics. Sometimes a door dent can be straightened out with a regular pry bar, which is pressed against the stiffener on the reverse side. In this case, you can control the straightening by installing a large mirror opposite the door.
After straightening the door, there is no need to rush into painting. First you need to install it in place and check the gaps. They should be uniform around the perimeter. You should take similar gaps on the door on the opposite side as a sample.
Forceful lifting
If you have no time or desire, you can try the following:
- grab the back of the slightly open door at the lock level and lift it up;
- in this case, depending on the visible result, the applied force should increase;
- You can try to first slightly lift and then sharply pull the door up.
If you don't have enough strength, you can use a jack. Place a wooden block between this device and the bottom of the door. This will prevent possible damage to the paintwork. In this way, you can return the hinged body element to its original position. On the other hand, such a procedure, of course, does not guarantee the durability of the result, so it is better to pay attention to the first two options (with a piece of tin and with a bolt).
Source
Straightening
In body repair, straightening is the restoration of various body elements by editing the geometry of parts using various tools. It is quite difficult to give the original shape of a body part, especially if the damage received in an accident is significant. As a rule, the following elements are straightened:
- doors;
- front rear wings;
- hood;
- trunk door (lid);
- roof;
- metal bumpers;
- thresholds.
It is not always advisable to carry out straightening work - there is no point in restoring parts if:
- there is significant damage, it will take a lot of time to restore it;
- new spare parts in the store are inexpensive - it is cheaper and easier to replace the element.
Straightening tool
Body parts can be restored either using the simplest tools or using professional tools and stands. Simple tools for restoring body geometry include:
- hammers and mallets of various types;
- all kinds of supports (anvils, metal bars of all sizes);
- special spoons for pulling out metal:
- levers and hooks;
- grinding tool.
There is also more complex equipment, as well as entire sets of tools. A standard set of straightening equipment usually contains:
- hydraulic pumps and cylinders;
- nozzles of all shapes;
- impact plates;
- adapters.
In professional body repair, rack-and-pinion platform stocks and special stands are used. Using special equipment, when restoring the geometry of a body element, the impact on damaged areas is achieved with greater force and precision, the metal is straightened faster and with less labor costs, and the straightening is of a higher quality.
Spotter for car straightening
Body repairs, including straightening, can be performed using resistance welding. In this case, a spotter is used as a tool - fasteners are welded onto the deformed surface, with the help of which the metal is pulled out. If in the standard method to level the surface it is necessary to tap the iron from the inside, then thanks to contact welding and a special device the metal surface is leveled from the outside.
Using a spotter provides certain advantages:
- using resistance welding is safer than using a conventional welding machine; practically no sparks fly from it;
- no scale or slag is formed at the welding site; the welding machine does not even burn through thin metal;
- You can weld the fasteners several times, so the fastening washers do not melt from welding;
- Using a spotter increases work productivity - the straightening process takes less time.
Spot welding machines are produced by various manufacturers - the equipment can vary in price, the cost depends on several factors:
- device power;
- country of origin;
- brand;
- degree of equipment (configuration).
The most well-known companies producing equipment are:
It is especially beneficial to use a spotter in a large car service center specializing in body repair. The operating principle of the equipment is as follows:
- the area of the body surface that needs to be leveled is thoroughly cleaned of paintwork;
- The area of the body part where the ground wire of the welding machine will be attached is also cleaned;
- after processing, the metal is cleaned using compressed air, the mass is established - the contact must be reliable;
- then fasteners (washers) are welded to the body surface in the damaged area;
- a hook for washers is installed on the reverse hammer;
- the metal in the damaged area is straightened as follows - the hook hooks onto the washer, and the iron is pulled out with a reverse hammer;
- the washers are then removed and the surface is protected and leveled.
For deep and large dents, an extraction system is used, in this case:
- special washers with an extension are welded onto the surface to be repaired;
- a rod is inserted into the holes of the washers;
- the exhaust system is fixed to the body and connected to the rod;
- Why is the metal in the deformed area pulled out using levers?
Dents can also be straightened using:
- needles for spot welding and reverse hammer;
- welding sprockets to the damaged area;
- welding of wave wire (for long and narrow areas of damage).
A resistance welding machine can also be used for upsetting metal. In a car repair shop, the price of straightening using a spotter is reduced - the work takes less time, straightening becomes less labor-intensive.
Repair and restoration of door seal
The car door seal has many protective functions: heat, noise, waterproofing, and also protects against drafts.
Under the influence of changes in temperature and humidity, the door seal may dry out . Also, mechanical impact causes abrasion and crushing of the material.
Restoration and repair of the seal can be done independently in the following ways:
- Using a soft silicone tube, restore the original volume.
- Partially replace the damaged area.
- Replace the seal with a new one.
Tip: To make the seal last longer, lubricate it regularly with silicone grease.
Restoring the volume of the seal
For repairs you will need the following materials:
- Silicone or rubber tube with a diameter of 7-8 mm. It must be soft so as not to tan in the cold. Experienced car enthusiasts use a silicone tube from a construction hydraulic level of 15 m - this is enough for 4 doors.
- Silicone grease or oil.
- Remove the protection from the car sills to get to the seal.
- Carefully pry off the seal.
- Gradually remove it along the contour of the doorway, pulling it towards you. If the seal is solid (closed in a ring), you will have to cut it.
- Pour or spray a little lubricant inside the seal.
- Insert the tube into the hole.
- After completing the repair, install the seal in place.
Do-it-yourself car straightening
If you really want to, you can straighten body parts yourself, but you need to rely on your strength. If there is no appropriate experience, the owner can ruin the appearance of his car, and in the future the car owner will only complicate the work of the craftsmen.
As a rule, at home the driver does not have special equipment, so a jack and a rubber hammer are mainly used for straightening. The easiest way is to straighten small dents yourself, and if the body element is removable (front fender, door, hood), it is still better to remove it.
The easiest way to straighten the front fender yourself is to level the deformable surface; the part must first be removed from the car. After dismantling, the wing should be placed on a flat surface, covered with thick fabric (felt) - a soft base is necessary here to soften impacts. When striking, you should regularly inspect the wing to check how level the metal can be. If, as a result of straightening, the paint flies off, you need to prepare this area for painting - putty, sand, degrease and then prime.
To straighten out dents on the door, the body element should also be dismantled. After dismantling, the door is disassembled and the door trim is removed from it. If the dent is located approximately in the middle of the door trim, the defect can be easily eliminated - the iron can be tapped from the inside. “Garage diseases” are more difficult to cure, and straightening here should still be entrusted to professionals - it is unlikely that you will be able to do the job well on your own, and a thick layer of putty is not a solution, the putty may fall off.
Possible malfunctions of car doors
As a car ages, all its parts gradually wear out . This also applies to car doors. Most often, car enthusiasts encounter the following problems:
- The door seal is drying out and crushing.
- The locks on the doors do not work well and squeak when closing and opening.
- Door hinges wear out and become warped. This leads to sagging doors.
- The door trim is wearing out. Plastic, leather and fabric upholstery parts are damaged.
All these problems can be fixed with your own hands. We will tell you in detail about each type of repair separately.
Nuances of straightening work
- If a dent forms on a part of the body with double metal, it will not be possible to level the surface with a hammer - it will not be possible to reach the outer iron from the inside. In this case, you can properly straighten the element using a spotter.
- If a “slam” has formed in the center of the rear/front fender or door, you can try to straighten it without using any tools - you need to sharply hit the iron from the inside with your hand. Of course, you can use a vacuum suction cup with a reverse hammer, but not everyone has this tool.
- It also happens that a body part (fender, door, hood, trunk lid) that already has traces of corrosion is damaged. It makes no sense to straighten such an element even due to poverty. It’s better to drive with this defect for now and save money for repairs and a new part. Of course, in this case we are not talking about a serious accident.
- When leveling the surface, it is better not to apply single sharp blows; you should strike lightly and often.
- There are body parts that are inexpensive, so straightening an old hood or front fender is not always justified. But there is one nuance here - many foreign cars sell non-original Chinese spare parts. If the car has an original hood, and it can be straightened, then it is better to restore it than to buy a cheap “non-original” one, which may cause problems: the iron will quickly begin to rust, and the part will be difficult to fit in its place.