Some car enthusiasts began to install a special spacer under the hood of the VAZ 2110. And there are many opinions here, some say that this is necessary, others claim that this device can be dangerous.
Now it’s worth considering the advantages and disadvantages of the front strut strut of the VAZ 2110. You can also install the strut yourself.
Advantages of spacers for VAZ 2110:
- When installed, the car becomes stable at high speed when cornering.
- The body is not subject to deformation on strong uneven surfaces.
- The noise in the cabin is reduced and the trim does not rattle.
- No vibration at high speeds.
- The strut gives rigidity to the body.
- There is less load on the front suspension.
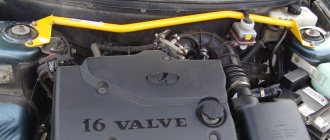
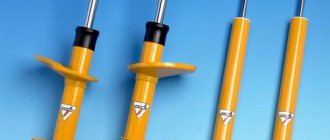
Front strut brace VAZ 2110
Some car enthusiasts began to install a special spacer under the hood of the VAZ 2110. And there are many opinions here, some say that this is necessary, others claim that this device can be dangerous.
Now it’s worth considering the advantages and disadvantages of the front strut strut of the VAZ 2110. You can also install the strut yourself.
Advantages of spacers for VAZ 2110:
- When installed, the car becomes stable at high speed when cornering.
- The body is not subject to deformation on strong uneven surfaces.
- The noise in the cabin is reduced and the trim does not rattle.
- No vibration at high speeds.
- The strut gives rigidity to the body.
- There is less load on the front suspension.
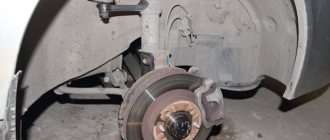
Step-by-step replacement process
Any repair of thresholds, regardless of complexity, goes through the following stages:
- Preparation of the necessary material and tools.
- Dismantling the interior.
- If it is necessary to partially or completely change the thresholds 2112, then prepare a welding machine.
- The part is being dismantled.
- Welding a new threshold or installing a patch.
- Anti-corrosion treatment.
- Painting and installation of overlays.
In order for independent work to proceed quickly, you need to prepare tools and materials. For a full cycle of work you will need a repair kit:
- new threshold, amplifier, metal for patches, price of factory threshold VAZ 2112 from 1000 rubles;
- electric drill, drills with a diameter of 0.8 for drilling out the old element, 1 cm for perforating a homemade amplifier;
- chisel with a wide blade;
- Bulgarian;
- clamps for holding parts when completely replacing the threshold;
If the threshold changes partially, professional craftsmen use pliers to grip the part.
Experienced drivers object to the use of epoxy resin if it is necessary to repair a through hole, rightly believing that the method is used by irresponsible drivers before selling a car. The method allows you to hide traces of destruction, but does not solve the problem; after 3-6 months, the corrosion of the metal will be greater and the owner will need to replace the part completely. The cost of repairs will double.
Individual elements
If it is necessary to eliminate minor corrosion on the threshold or remove a hole in the metal, then welding of metal patches is used. This reliable method allows you to restore the rigidity of the body and ensure a long service life of the part. If the threshold is rotten by more than 40%, it is recommended to cut out the element completely, check the condition of the bottom and install a new replica. Step-by-step process for repairing through holes:
- Disconnect the negative terminal from the battery or remove the battery completely.
- Remove the front and rear doors.
- Dismantle the interior, lift and roll up the floor mat, and hang the windows.
- To raise the car to a level, some drivers simply lift part of the body.
- If the front or rear jack has failed, it is recommended to change part of the threshold and the place for the jack.
- Use a grinder to remove the paintwork from the outer part of the threshold.
- Cut out the rusted part with a chisel. Check the condition of the amplifier.
The difficulty of partial body repair of domestic cars lies in the fact that the tinsmith never knows in advance how damaged the metal is under the anti-corrosion layer, paintwork and how badly the amplifier has rotted. Technologically, the corrosive area must be cut out completely. Therefore, partial replacement often ends with complete overcooking of the threshold and part of the bottom.
Paint the repaired area with auto enamel to match the body color, and, if necessary, install plastic linings or iron moldings.
Entirely
Replacing the entire element is the most common type of repair at a service station; professional craftsmen cut out the metal threshold using welding; when dismantling it yourself, it is recommended to use an angle grinder and a chisel, having previously drilled out the points of the factory fastening. Replacement process step by step:
- Pull out the seats and remove the floor covering.
- Dismantle the sound insulation of the bottom, remove the plastic lining of the interior.
- Remove the front and rear doors.
To maintain the geometry, install a brace between the side posts or lay down a metal channel.
All flammable trims and parts must be removed or covered from the vehicle. When working with electric welding, beginners are advised to keep a couple of buckets of water near them just in case.
When cutting, leave up to 1 cm of the old threshold for overlapping welding of the future overlay. In the area of the central pillar, cut out the old element with the recess, being careful not to catch the central pillar reinforcement. If the B-pillar reinforcement is rotten, it is necessary to cut out the part and weld a new one before welding the main threshold.
During the repair process, it is necessary to pay attention to the condition of the body in the area of the side members and jacks. If necessary, patches are installed on rotten areas, the welding area is cleaned and treated with a thick layer of mastic. Before laying sound insulation on the floor, the bottom surface is additionally protected with anti-corrosive.
Before starting welding work, it is necessary to adjust the semi-automatic welding machine, check the current strength, put on safety glasses, a respirator and gloves.
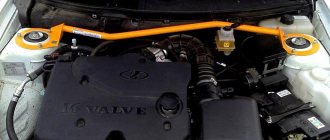
Disadvantages of the VAZ 2110 strut
There are no precisely confirmed deficiencies in such a spacer, and none have been identified at all. But some motorists argue that when hit to the side, both sides of the car will suffer. Of course, this may be what happens, but only in the design of the spacer there is a special hollow in the middle. And it is she who will bend and the blow will not be transferred to the opposite side. There are a lot of myths around this part, but there is one confirmed drawback. These are difficulties when filling brake fluid.
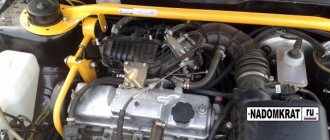
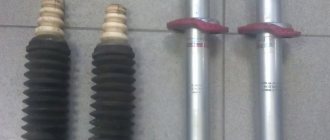
Types of struts for the front struts of the VAZ 2110
There are two types of extension of the VAZ 2110 racks: solid and adjustable. But it is best to use the second option for spacers, since not all solid ones may fit. This happens on older cars when the bowls move inward and the one-piece spacer is not installed. Also, spacers are divided into 2 types according to fastening: two-point and three-point. Two-point ones have a fastening in the form of a glass with a pin, and three-point ones are attached directly to the car body.
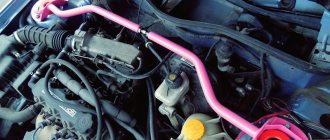
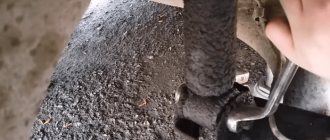
Installing a strut brace on a VAZ 2110 with your own hands:
- At the very beginning, you should unscrew the nuts on the strut spacer on both sides.
- Then the spacer is placed over the support bolts. In some cases the holes don't line up so you can drill. If an adjustable spacer is used, the spacing on the supports can be easily adjusted using the adjusting nut.
At this point, the installation of the front strut extension of the VAZ 2110 is completed.
That seems to be all, the article discusses the main features of the front strut brace on the VAZ 2110. Whether to install this element or not, each driver decides independently. Of course, after installing the device there will be no improvements, but there are still many advantages.
For efficiency, you should think about installing other elements, and if necessary, you can modify the car’s chassis.
Of course, you should consider your driving style before installing this item. For calm, measured driving, a spacer is not needed. For motorists who drive aggressively and at high speeds, it must be installed. But still, for efficiency, additional improvements in the technical plan of the car should be considered.
Source
Pro Tips: Stretching the Rear Struts
First tip: before buying a strut, you need to carefully inspect the mounts; they must fit your car.
Second tip: if you need a durable car, then it is better to give your preference to a non-adjustable strut. If the most important thing for you in your car is comfort, then you can purchase adjustable ones.
And the last thing you should remember is that the fewer fasteners and spare parts in your car, the stronger your car will naturally be. If you cannot install the spacer yourself, then let professionals do it to avoid future problems and breakdowns.
Professionals recommend purchasing a classic type, such as a rectangular spacer, as it is more reliable than others.
Stories from our readers
“Fucking basin. "
Hi all! My name is Mikhail, now I’ll tell you a story about how I managed to exchange my two-wheeler for a 2010 Camry. It all started with the fact that I began to be wildly irritated by the breakdowns of the two-wheeler, it seemed like nothing serious was broken, but damn it, there were so many little things that really started to irritate me. This is where the idea arose that it was time to change the car to a foreign car. The choice fell on the melting Camry of the tenth years.
Yes, I had matured morally, but financially I just couldn’t handle it. I’ll say right away that I am against loans and taking a car, especially not a new one, on credit is unreasonable. My salary is 24k a month, so collecting 600-700 thousand is almost impossible for me. I started looking for different ways to make money on the Internet. You can’t imagine how many scams there are, what I haven’t tried: sports betting, network marketing, and even the volcano casino, where I successfully lost about 10 thousand ((The only direction in which it seemed to me that I could make money was currency trading on the stock exchange, they call it Forex. But when I started delving into it, I realized that it was very difficult for me. I continued to dig further and came across binary options. The essence is the same as in Forex, but it’s much easier to understand. I started reading forums, studying trading strategies. I tried it on a demo account, then opened a real account. To be honest, I didn’t manage to start earning money right away, until I understood all the mechanics of options, I lost about 3,000 rubles, but as it turned out, it was a precious experience. Now I earn 5-7 thousand rubles a day. I managed to get the car buy after half a year, but in my opinion this is a good result, and it’s not about the car, my life has changed, I naturally quit my job, I have more free time for myself and my family. You’ll laugh, but I work directly on the phone)) If If you want to change your life like me, then here’s what I advise you to do right now: 1. Register on the site 2. Practice on a Demo account (it’s free). 3. As soon as you get something on the Demo account, top up your REAL ACCOUNT and go to REAL MONEY! I also advise you to download the application to your phone, it’s much more convenient to work from your phone. Download here.