Anti-roll bars are part of the vehicle suspension structure, the functional purpose of which is to equalize dynamic loads on the body during maneuvering.
Structurally, the struts are located between the stabilizer and the wheel hub, as a result of which they experience serious loads during vehicle operation - failure of faulty parts can provoke loss of controllability and an accident on the road.
| Manufacturer | vendor code | Structural arrangement | Component class | Approximate cost, rub. |
| AvtoVAZ | 1118-2906050 | Front axle | Budget | 450 |
| AvtoVAZ | 2190-2906050 | Front axle | Budget | 510 |
| AvtoVAZ | SS40111 | Front axle | Premium | 770 |
| AvtoVAZ | 2108-2906345 | Rear axle | Budget | 460 |
| AvtoVAZ | 1118-2906050 | Rear axle | Budget | 525 |
| SS20 | SS40134 | Rear axle | Premium | 750 |
Note! When selecting components for the Lada Kalina, it is necessary to check the part numbers with the VIN number of the car - otherwise there is a possibility of purchasing incompatible spare parts that differ in form factor and size from the stock version.
Stabilizer struts for Lada Kalina
Anti-roll bars are part of the vehicle suspension structure, the functional purpose of which is to equalize dynamic loads on the body during maneuvering.
Structurally, the struts are located between the stabilizer and the wheel hub, as a result of which they experience serious loads during vehicle operation - failure of faulty parts can provoke loss of controllability and an accident on the road.
| Manufacturer | vendor code | Structural arrangement | Component class | Approximate cost, rub. |
| AvtoVAZ | 1118-2906050 | Front axle | Budget | 450 |
| AvtoVAZ | 2190-2906050 | Front axle | Budget | 510 |
| AvtoVAZ | SS40111 | Front axle | Premium | 770 |
| AvtoVAZ | 2108-2906345 | Rear axle | Budget | 460 |
| AvtoVAZ | 1118-2906050 | Rear axle | Budget | 525 |
| SS20 | SS40134 | Rear axle | Premium | 750 |
Note! When selecting components for the Lada Kalina, it is necessary to check the part numbers with the VIN number of the car - otherwise there is a possibility of purchasing incompatible spare parts that differ in form factor and size from the stock version.
Lada Kalina - front wheel bearing
The front wheel bearing marking is 6-256707 AKE12.
When choosing a manufacturer of spare parts for the front hub for the Lada Kalina, the question arises about the manufacturers. Let's list Russian manufacturers:
- 23 PZ (Vologda, VBF marking) - good value for money;
- SPZ-4 (Samara, SPZ GROUP marking) - medium quality option;
- EPK (Saratov, marking 3PZ, VPZ) - not an expensive option, choose if you find 23 PZ.
- Craft, APP - not recommended for purchase.
Kalina front wheel bearing price
Of the options presented above, the cheapest third is EPK. The cost is on average 500 rubles. 23 PZ produces such products at a price of 700 rubles. The LSA brand, a Slovak factory, is also sold, expensive but at the same time high-quality products.
Front wheel bearing Kalina - dimensions
Parameters and dimensions of bearing 6-256707: Hole diameter: 35 mm; External diameter: 68 mm; Height: 37 mm; Speed: 3500 rpm.
How to identify faulty racks: diagnostics at home with a guarantee of accuracy
The critical level of wear of the anti-roll bar struts on the Lada Kalina can be diagnosed by taking a closer look at the behavior of the vehicle - it is advisable to replace components in the following cases:
- When overcoming obstacles on the road, shocks are felt or extraneous sounds are heard in the suspension area;
- When moving in a straight line at low speed, the car spontaneously changes its trajectory;
- The car sways when reaching maximum speed or as a result of emergency braking;
- During maneuvering or when entering a turn, a strong body roll is observed;
- You feel a strong vibration load in the steering wheel or have difficulties in driving the car.
If several factors are similar, an urgent diagnostic inspection of the vehicle's chassis and suspension system is required. The best option would be to contact a certified service station, but you can detect the presence of worn-out struts at home - all you need is:
- Turn the steering wheel to the side all the way in any direction and, holding the disc, try to turn the wheel to the side - if you feel play, you need to disassemble the wheel liner and inspect the struts; you may have to change the struts soon;
- Next, we inspect the stabilizer bushings for mechanical deformation or leaks of technical fluid - detection of defects indicates depressurization of the structural unit, which will lead to moisture and small abrasive particles getting inside and grinding down the hinges in the future;
- Then we drive the car into the inspection hole and ask a partner to help - when periodically pressing on the car’s suspension under the fender liner, you need to place your palm on the outside of the strut - the feeling of play indicates the deterioration of the strut hinges and the formation of free space in the area of the wheel hub.
Note! The best option is to carry out a full diagnostic of the chassis every 15,000 km, which will prevent the possibility of accidental breakdown and promptly replace worn out parts.
Remember, if problems with the struts are identified, the parts must be replaced with new ones as soon as possible, otherwise the operation of the vehicle is not safe. Neglecting maintenance only makes the situation worse and increases the cost of future repairs.
Malfunctions
The main sign of a failed support bearing is a knocking sound (dull knocks) in the area of the shock absorber strut. It may indicate that:
- the rubber gasket is damaged or deformed;
- The bearing itself is damaged.
Failure of the support bearing may occur due to:
- resource spent;
- penetration of dirt and moisture;
- exceeding permissible loads;
- mechanical damage due to shock absorber malfunctions.
How to identify a malfunction
To diagnose a support bearing failure, open the hood and remove the “cup” cover. Place your palm on the shock absorber housing and rock the front of the car. If you hear a knock and feel the corresponding vibration with your hand, the bearing is clearly faulty.
When to change
The service life of the “supports” is on average 50-100 thousand km, depending on the conditions in which the car is operated. After this resource has expired, it is recommended to change them. Replacement is also necessary if any malfunctions are detected.
Late diagnosis, as well as ignoring bearing failure, threatens to destroy the shock absorber structure and other suspension elements.
Replacing stabilizer struts on a Lada Kalina with your own hands: detailed instructions for beginners
Dismantling and installing racks on Kalina occurs according to an intuitive scenario, however, if the vehicle maintenance instructions are not followed, inexperienced mechanics may experience some difficulties. The entire front of maintenance work can be easily performed with one pair of hands and will require no more than 40 minutes for each stand. Also, to replace components you will need a lift or a good jack, a set of wrenches or sockets, a hammer, Torx sockets and WD-40 fluid. To install new racks on Kalina you need:
- First, drive the car onto a level area with a solid foundation and place wheel chocks under the second axle of the car. Next, we stick the gearbox selector into the position of any gear and set the handbrake. If you have access to a lift, it will be safest to use it to service the chassis - since during repairs it is possible to pull out the jack from under the car;
Note! When preparing the car for replacing the struts, it is necessary to turn on the parking brake. When lifting the vehicle body, the suspension relaxes, as a result of which the struts lose dynamic tension, which lengthens the spring and interferes with comfortable dismantling. The clamped handbrake allows you to secure the suspension in a static position.
- Next, we release the fixing bolts and dismantle the wheel, after which we proceed to remove the brake mechanism. To make repairs faster, you can unscrew only the upper fastening, and simply release the lower one, which will allow you to turn the mechanism to the side without completely removing the structure;
- Then we clean the strut and bushings from dirt and treat them with WD-40, after which we leave the fixation points to remove any traces of corrosion. It is important not to try to dismantle the oxidized nuts, as this can lead to thread breakage - to remove a rack with a broken thread on the mount, you will have to disassemble the entire chassis of the car, which will significantly increase the repair time;
- After the parts are loosened, unscrew the fasteners and pull out the stand. Next, we clean the seats around the entire perimeter of the structure from dirt, and if desired, treat them with an anti-corrosion compound. It is also recommended to replace the bushings and sealing elements before installing a new rack;
- We install a new rack and assemble all the elements of the car according to these instructions in the reverse order. To increase the service life of components, it is recommended to lubricate all fixing fasteners with any technical composition before installation - this will prevent premature corrosion and reduce the rate of play formation between the connecting elements;
- A similar procedure is carried out with the remaining parts of the suspension. It is important to replace the anti-roll bar struts in pairs, that is, along the perimeter of the suspension axle - otherwise the service life of the new part is reduced and the controllability of the vehicle as a whole is deteriorated.
Replacing struts on a Lada Kalina will not cause difficulties even if you do the repair yourself, which will allow you to save a lot on car maintenance - the average price of this procedure at a service station is approximately $15-25, which is the cost of a full set of “Standard” class struts.
Source
Operations for replacing the wheel bearing of Lada Kalina
The work of replacing the wheel bearing of a Lada Kalina can be carried out on a level surface, but it is more convenient to do so on an inspection ditch or a lift. Remove the hub cap. Using a narrow chisel, straighten the dented shoulder of the hub bearing nut in two places. Apply the handbrake, engage first gear and place shoes under the wheels.
Use a 30mm socket to loosen the hub bearing nut. The nut is tightened with a large torque, so the head and knob must be strong enough to transmit the necessary force. Loosen the wheel mounting bolts. We hang up the front part of the car (namely both front wheels, because otherwise the anti-roll bar interferes with dismantling, pushing the suspension elements up). We remove the wheel, brake pad guide together with the caliper, and tie the brake disc with the caliper so that they do not hang on the brake hose.
Unscrew the hub bearing nut completely and remove the washer. We pass bolts about 130 mm long with an M12 × 1.25 mm thread through two diametrically opposite holes in the brake disc.
We screw the bolts into the holes of the hub to a depth equal to its thickness.
By sharply hitting the bolt heads with the brake disc, we press out the hub.
We unscrew the fastening of the ball joint to the steering knuckle (see the article “Removing the ball joint from Lada Kalina”) and remove the CV joint from the bearing hole.
In another method of dismantling the hub, we first disconnect the ball joint and remove the CV joint from the hub.
Rotating the hub, we knock it out of the steering knuckle through a soft metal drift.
Remove the retaining ring.
Using a puller, we press the bearing into the cup located outside the steering knuckle, while the bolt presses on the inner ring of the bearing through the washer from inside the knuckle.
Almost always, when pressing out the hub, a bearing ring remains on it, which is difficult to remove due to the tight fit on the hub.
You can use a puller if its paws fit into two small grooves on the hub. If the puller does not provide the required force, then...
...pry it up with a screwdriver and remove the dirt protection ring...
...and use a chisel to move the bearing ring.
We remove the ring and, if necessary, use a file to clean out the nicks on the hub.
We install the mud ring and seal it on the hub. Clean and lubricate the inner surface of the steering knuckle.
Use a puller to press the new bearing into the steering knuckle. In this case, the large puller washer rests on the steering knuckle from the inside so as not to damage its mud rings, and when pressing, the new bearing can be pressed through the old bearing, which will transmit force only through the outer ring. Installing the retaining ring
Use a puller to press the hub into the bearing. Now the puller washers rest against the inner race of the bearing and the hub. We carry out further assembly in the reverse order, tighten the bearing nut to the prescribed torque and be sure to lock it by jamming the collar.
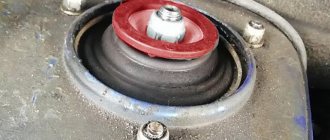
The support bearing is the main element of the upper support of the front shock absorber strut, which serves for its movable connection with the body. While the car is moving, it experiences enormous shock loads, a significant part of which is taken by the “support”, absorbing and distributing them.
The support bearing itself is a rubber cage of a certain diameter with steel balls placed around its circumference. It is protected from above and below by thick rubber gaskets.
Stabilizer struts for Lada Kalina
Anti-roll bars are part of the vehicle suspension structure, the functional purpose of which is to equalize dynamic loads on the body during maneuvering.
Structurally, the struts are located between the stabilizer and the wheel hub, as a result of which they experience serious loads during vehicle operation - failure of faulty parts can provoke loss of controllability and an accident on the road.
Note! When selecting components for the Lada Kalina, it is necessary to check the part numbers with the VIN number of the car - otherwise there is a possibility of purchasing incompatible spare parts that differ in form factor and size from the stock version.
Replacing the anti-roll bar on LADA Kalina
The suspension parts of the LADA “Kalina” wear out when driving on uneven roads and require periodic replacement. The Kalina anti-roll bar is a strong and durable part that requires replacement only as a result of an accident. The repair of this unit consists of replacing the bushings, the rubber of which does not withstand long-term use on our roads.
- What is anti-roll bar LADA “Kalina”
- Signs of malfunction of the anti-roll bar LADA “Kalina”
- What is needed to replace the Kalina stabilizer
- How to replace the Kalina stabilizer
How to identify faulty racks: diagnostics at home with a guarantee of accuracy
The critical level of wear of the anti-roll bar struts on the Lada Kalina can be diagnosed by taking a closer look at the behavior of the vehicle - it is advisable to replace components in the following cases:
- When overcoming obstacles on the road, shocks are felt or extraneous sounds are heard in the suspension area;
- When moving in a straight line at low speed, the car spontaneously changes its trajectory;
- The car sways when reaching maximum speed or as a result of emergency braking;
- During maneuvering or when entering a turn, a strong body roll is observed;
- You feel a strong vibration load in the steering wheel or have difficulties in driving the car.
If several factors are similar, an urgent diagnostic inspection of the vehicle's chassis and suspension system is required. The best option would be to contact a certified service station, but you can detect the presence of worn-out struts at home - all you need is:
- Turn the steering wheel to the side all the way in any direction and, holding the disc, try to turn the wheel to the side - if you feel play, you need to disassemble the wheel liner and inspect the struts; you may have to change the struts soon;
- Next, we inspect the stabilizer bushings for mechanical deformation or leaks of technical fluid - detection of defects indicates depressurization of the structural unit, which will lead to moisture and small abrasive particles getting inside and grinding down the hinges in the future;
- Then we drive the car into the inspection hole and ask a partner to help - when periodically pressing on the car’s suspension under the fender liner, you need to place your palm on the outside of the strut - the feeling of play indicates the deterioration of the strut hinges and the formation of free space in the area of the wheel hub.
Note! The best option is to carry out a full diagnostic of the chassis every 15,000 km, which will prevent the possibility of accidental breakdown and promptly replace worn out parts.
Remember, if problems with the struts are identified, the parts must be replaced with new ones as soon as possible, otherwise the operation of the vehicle is not safe. Neglecting maintenance only makes the situation worse and increases the cost of future repairs.
Replacing stabilizer struts on a Lada Kalina with your own hands: detailed instructions for beginners
Dismantling and installing racks on Kalina occurs according to an intuitive scenario, however, if the vehicle maintenance instructions are not followed, inexperienced mechanics may experience some difficulties. The entire front of maintenance work can be easily performed with one pair of hands and will require no more than 40 minutes for each stand. Also, to replace components you will need a lift or a good jack, a set of wrenches or sockets, a hammer, Torx sockets and WD-40 fluid. To install new racks on Kalina you need:
- First, drive the car onto a level area with a solid foundation and place wheel chocks under the second axle of the car. Next, we stick the gearbox selector into the position of any gear and set the handbrake. If you have access to a lift, it will be safest to use it to service the chassis - since during repairs it is possible to pull out the jack from under the car;
Replacing the stabilizer strut of Lada Kalina
Replacing Kalina stabilizer struts is a fairly common question among VAZ owners. Next, you will learn how to change stabilizer struts on a viburnum.
- First of all, remove the wheel. The front axle needs to be lifted. This means that both front wheels should not touch the ground. To do this, use two jacks or lift the car on a lift.
The stabilizer link is the connecting link between the stabilizer and the wishbone of the front suspension.
The rubber bushings in the stabilizer link wear out or it simply breaks in half. Let's treat it with WD40. A breakdown of the Kalina stabilizer bar is accompanied by extraneous knocking in the front suspension when driving over uneven surfaces and large rolls of the Kalina when cornering.
- Unscrew the lower part of the stabilizer link from the lever. To do this you will need two keys No. 17. With one we unscrew the nut, with the second we hold the bolt from turning.
- We remove the bolt.
- The upper part of the stabilizer is put on the stabilizer rod through a rubber bushing. We remove it by hand, turning it. Or, if it doesn’t give in, we knock it down with a hammer. You can also lubricate the rod with silicone grease.
→ Get useful materials for Lada Kalina
- In the same way, using silicone grease, we put the new strut on the stabilizer bar.
- Insert the bolt, aligning it with the hole in the transverse arm. And tighten the nut using two No. 17 wrenches.
Now we install the wheel. And we can go.
Replacing the wheel bearing Lada Kalina - installing a new part
- After pressing out, we take out the puller; the fist without a bearing looks like this:
- Clean it from dirt and wipe the inside - the seating surface.
- Install the retaining ring on one side.
- On the other side, press in the new wheel bearing using a puller or press and secure it with a locking ring.
- Let's return to the hub, first remove the protective ring.
- Next, we clamp the part in a vice and use a sharp chisel to move the bearing race from the hub of the Lada Kalina by 1 cm.
- Now we hook the clip with a puller and pull it off the hub.
- We press the hub into the inner race of the new part.
- Now the whole assembly is assembled.
- Reassemble the assembly in reverse order. (See points No. 10-No. 1.)
What is anti-roll bar LADA “Kalina”
The suspension of the LADA Kalina, like any modern car, includes an anti-roll bar. This is a rod with a round cross-section. The part, made of high-strength spring steel, is attached to the body with clamps at two points through rubber bushings. Taking into account the location of components and assemblies located in the lower part of the car, the stabilizer has a complex shape, vaguely reminiscent of a U-shaped one. The ends of the stabilizer are connected by wheel suspension arms to redistribute the load between them. When a lateral body roll occurs, one end of the stabilizer goes down, the other goes up, and the middle part twists, providing resistance. The more the Kalina rolls, the stronger the counteraction of the stabilizer. The Kalina transverse stabilizer does not interfere with the vertical and horizontal vibrations of the body while driving. Its task is to reduce roll when turning and improve wheel adhesion to the road surface.
Signs of malfunction of the anti-roll bar LADA “Kalina”
Malfunctions of the suspension stabilizer appear when cornering and driving over uneven roads. The cause of the malfunction is broken bushings or poor tightening of the nuts of the clamps holding the stabilizer bar. This manifests itself as follows:
- there is a knocking noise under the hood when driving through potholes and potholes;
- the car begins to “go to the side” when driving in a straight line and you have to constantly adjust its trajectory (this is especially noticeable at speed);
- the car sways and rolls heavily when turning or braking;
- Excessive roll appears during maneuvering.
You can independently check the bushings and stabilizer mounts as follows:
- turn the wheels to the side until they stop, freeing up space in the wheel well;
- grab the Kalina stabilizer with your hand and pull strongly in different directions;
- If there is the slightest play, the stabilizer bushings must be replaced.
A more detailed analysis of the condition can be made by driving the car onto a pit or lift. This way you can determine exactly where the knocking is coming from and which part needs to be replaced.
What is needed to replace the Kalina stabilizer
To replace the anti-roll bar you will need:
- standard set of socket wrenches (socket wrenches can be used);
- WD-40 liquid;
- jack;
- special device (extension);
- hammer;
- stabilizer bushings “Kalina”;
- stabilizer's pole;
- stabilizer bar.
To access the mounts of the struts and stabilizer, you must place the car on a viewing hole or a lift.
Video - Replacing the stabilizer link
Stabilizer struts are quite important parts of the car. They are responsible for the connection between the car body and its suspension. For example, if you remove these racks, you can even drive a car. But it’s very uncomfortable and even dangerous. Handling will suffer greatly. Noticeable body roll will appear, both longitudinally and transversely. If the stabilizer links are faulty, knocking noises may occur. Usually, play appears in the hinges of the struts - hence the knocking. It is also possible for the joint to become sour. That is, the post finger loses mobility relative to the post itself, resulting in a rigid mount. Extra knocks in the suspension and impacts transmitted to the body are also possible. Well, the worst option is that the stabilizer link breaks. Here, in addition to incomprehensible sounds, control disturbances are possible.
In general, it’s better not to delay replacing the stabilizer struts on the Lada Vesta. They can become unusable for many reasons: fast driving over potholes, bad roads, speed bumps. Defective, low-quality struts, lack of lubrication, lack of boots on the struts - everything leads to damage to these same struts.
On the Lada Vesta, the struts connect the anti-roll bar and the shock absorber strut, which is assembled with a spring.
If you suspect knocking noises from the racks, it is advisable to have them diagnosed. If the stabilizer struts are condemned, it is worth replacing them with a factory original or an analogue that matches the parameters. Preferably in pairs if the racks are made by a different manufacturer. Different lengths are possible, for example. In our case, the already unusable factory stabilizer struts will be replaced with an analogue from the Toyota RAV4. These racks from the Korean manufacturer CTR have catalog number CLT-50. They are slightly longer than the original ones. But this is not a hindrance; many Wests have already “tested” such racks. There are many analogues with a huge range of prices - from a thousand rubles to several thousand per pair (original Toyota). There are also racks from Renault.
Important!
If during the work you find that the bolts and nuts are in poor condition (there are cracks, traces of severe rust, bad threads - approx.), then it is best to replace such elements with new ones, using high-quality steel bolts and nuts with a self-locking element .
Other front suspension elements
The remaining elements of the front suspension, which contain rubber-metal and metal hinges, are replaced immediately as an assembly. These include:
- Spherical bearing.
- Stretch bracket.
- Steering end.
These elements cost about 500 rubles per set, and also do not require specific installation skills.
How to replace the Kalina stabilizer
To replace the bushings and stabilizer on a car, you need to perform the following steps:
- install the car on a lift or inspection hole (in the latter case, you need to place wheel chocks under the wheels);
- treat threaded connections with WD-40;
- unscrew the left and right nuts securing the stabilizer struts;
- unscrew the nuts holding the left and right stabilizer mounting clamps;
- dismantle the struts, bar and stabilizer brackets;
- Unscrew the nuts securing the stabilizer links to the arms;
- knock the stabilizer struts off the rod using a polymer or wooden hammer;
- inspect the stabilizer pads (bushings) and, if necessary, replace them with new ones;
- inspect the condition of the stabilizer bar;
- if the ends of the rod are in different planes or it has other signs of deformation, a new rod should be used;
Tip: when using split pads, the nuts must be tightened until the gap in them is eliminated. To do this, first tighten the front, then the rear fastening nut. - tighten the nuts holding the Kalina stabilizer struts;
- make a final tightening of the threaded connections of the clamps and stabilizer struts (4.5-5.3 kgf and 1.3-1.6 kgf, respectively).
if the replacement work was carried out on a lift, it is necessary to lower the car to load the wheels;
At this point, the replacement of the Kalina stabilizer is completed and the car is ready for use.
Replacing silent blocks on Kalina
Front suspension silent block close up
The silent blocks on the Lada Kalina car are located exactly the same as in the VAZs of previous years. These elements are located generally on or adjacent to the wishbone . You will have to change them either on the entire element at once, or by selecting the most damaged ones. Of course, if there is damage on one of them, the wishbone with rubber (stock – approx.) stabilizers must be removed and replaced with polyurethane analogues.
Removing the wishbone
- In order to begin work on replacing old silent blocks with new ones, you need to place the car on a viewing hole, a lift, or jack it up.
- Next, you need to remove the wheel and spray all the connections on the wishbone with WD-40.
- After the lubricant has penetrated into all hard-to-reach places, we begin to unscrew the bolts.
- First of all, we begin to dismantle the ball joint bolt, but before that we remove the cotter pin from the bolt.
- Then we unscrew the bolt securing the longitudinal tension hinge (where the “daisies” are attached - approx.) and remove it from the seat.
A generously lubricated bolt is a guarantee of success.
When dismantling this unit, there should be no problems.
For the best impact on the bolt, you can use a wrench extension.
Rubber-metal longitudinal tension joint
The rubber-metal longitudinal tension joint, or popularly simply “daisy”, is designed to take the brunt of the impact from uneven road surfaces; despite the fact that this element is very important, it is very easy to dismantle.
Do-it-yourself replacement of stabilizer struts for Lada Vesta
To change struts on Vesta, as on most modern cars, you do not need to have any special knowledge or skills. The work will go quickly and without problems if you apply a penetrating lubricant, for example, WD-40, to the threaded connections ahead of time, after first cleaning the threads and the nut itself from dirt and dust. The only tools you will need are a 16 mm spanner and a Torx T30 bit, as well as new stands.
Mounting the anti-roll bar strut for Lada Vesta: 1-Shock absorber strut; 2-Upper and lower hinges for attaching the stabilizer link; 3-Stabilizer link; 4-Anti-roll bar.
Replacement of anti-roll bar elements Lada Kalina 1117 2004 - 2013
Tools:
- Straight box spanner 17 mm (2 pcs.)
- Driver for socket attachment
- Knob attachment 13 mm
- Soft metal drift
- Small flat screwdriver
- Knife
Parts and consumables:
- Soap
- Water
- Aerosol lubricant type WD-40
- Stabilizer bar cushions
We carry out the work on an inspection ditch or overpass. Removal of the right stabilizer bar link is shown. The left pillar is removed in the same way.
1. Using a 17mm spanner, unscrew the nut securing the stabilizer link to the front suspension arm, holding the bolt with a wrench of the same size.
2. Use a soft metal drift to knock out the bolt.
Soft metal knockouts.
3. To make it easier to remove the strut from the stabilizer bar, unscrew the two nuts securing the stabilizer pad bracket on the right side (as shown below). Lowering the right part of the stabilizer, remove the strut from the stabilizer bar.
Replacement
Tool:
- jack;
- wheel wrench;
- open-end wrench 19;
- open-end wrench 17;
- socket wrench 13;
- pliers;
- ring wrench 22 and open-end wrench 9;
- special puller for tie rod ends;
- 2 special spring ties.
Execution order
- We park the car on a level surface and put it in gear.
- We jack up its front part on the desired side and remove the wheel.
- Using pliers, unscrew the nut securing the steering tip to the strut and unscrew it with a 19 mm wrench.
- Using a tip remover, remove the tip pin from the shock absorber strut. As a last resort, the finger can be knocked out by prying it up with a small pry bar and carefully tapping it from below.
- Using a 19mm wrench, unscrew the 2 nuts securing the strut to the steering knuckle. If necessary, hold the bolt heads with a 17 wrench.
- Using a 13 mm socket wrench, unscrew the 3 nuts securing the support to the body.
- We remove the entire shock absorber.
- We install two ties on the shock absorber spring and compress it until the upper part of the shock absorber is released.
- Using wrenches 22 and 9, unscrew the upper support nut on the upper side of the shock absorber.
- We remove the support, disassemble it, and remove the worn support bearing.
- We install a new one in its place.
- We install the shock absorber in the reverse order.
