Next we look at how to replace the intake or exhaust valve on the 21120 engine. The engine was installed on cars of the “tenth” family, including the VAZ-2112. Our method involves removing the cylinder head. In general, on VAZ-2112 engines, replacing valves does not have the features characteristic of some foreign cars. The only thing is that it is recommended to grind the valves. The advice applies to all VAZ engines, but decide for yourself whether to use it or not.
The method of using lapping paste is shown in the video. Let's see.
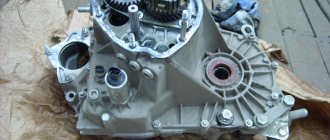
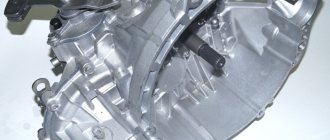
Changing the gearbox oil
The transmission maintenance regulations in the VAZ 2115 operating manual require changing the lubricant in the gearbox after 90,000 km or after 5 years of operation of the vehicle. The transmission oil recommended by the manual for VAZ is REXOL T 80W-85 (API GL-4), VOLNEZ TM 5-12.
But there are now many products from different companies on the market, and it depends on the car owner what kind of oil to pour into the box
It is only important that its quality corresponds to GL-4. Change as follows:
- heat the oil after driving 10 km;
- they drive into a pit;
- crawl under the car, place a container with a volume of at least 4 liters under the drain hole and unscrew the plug with a 17 key;
- wrap the cork;
- remove the oil level indicator;
- through the hole for the pointer, using a funnel with a hose attached to it, pour new oil.
The oil volume in the gearbox is about 3.2 liters. To accurately determine how much lubricant is needed, use a level indicator.
As you can already understand, any driver can easily change the oil in a short time, while saving on visiting a service station.
Owners of domestic cars, in particular the VAZ 2114, and not only, rarely resort to the services of car services to change the oil. This procedure is quite easy and does not require special skills, so changing the oil in a VAZ 2114 engine is quite within the capabilities of even a novice motorist. However, there are a number of questions that arise before starting this work. For example, how often to change the lubricant, what type will be optimal for your car and which brand to give preference to. We will answer these and other questions in this article.
Signs and causes of malfunction of VAZ 2110 engine mounts
- A strong hum in the cabin while the engine is running often indicates hard contact of the power unit with body elements. This phenomenon usually indicates the destruction of one of the supports on which the motor and gearbox connected together should rest. If their rubber cracks or even breaks away from the metal base, then the power unit receives an additional unwanted degree of freedom, creating noise.
- A dull knock can also be heard when driving away sharply, due to the engine being misaligned on torn mounts.
- In turn, the torn support is “given away” by a dull knock. every time you press the accelerator and every time you release the gas and switch to engine braking mode.
Sometimes the problem of extraneous sounds lies in the pressed, deformed crankcase protection. After going outdoors, dirt may accumulate in the gap between the adjacent protective sheet and the pan, which also leads to the appearance of an extraneous hum.
The appearance of so-called fatigue cracks in the engine support, which form over time, is also considered critical. They are usually identified by careful inspection of the pillows.
Are the instructions useful? Yes 2 No
Why do you need to grind valves?
If the procedure is not followed, the valves may not function properly - for example, they may allow gasoline and air to pass into a closed combustion chamber. This will degrade the engine's performance and may lead to breakdown over time. Lapping helps to achieve maximum tightness. Work must be done not only after installing new valves; it is often necessary in cases where the products have not been changed for a long time. The reason for the car's "jerking" at idle may be the difference in compression in the cylinders. Grinding in is the only way to deal with the problem.
Dismantling the cylinder head
First of all, to get to the cylinder head, you need to remove the cylinder head cover. For different 16-valve engines, this operation is different, and the cover part numbers also look different: 2112-1003260 (-10) and 21124-1003260.
Engine cover VAZ-21124 (1.6 l)
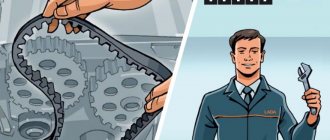
You will also need to remove the timing belt - there are no differences between different engines.
Let's look at how the exhaust manifold can be detached from the cylinder head. On engine 21120:
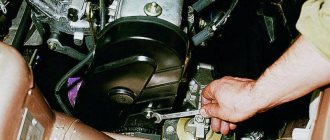
- Remove the exhaust pipe of the muffler: unscrew two nuts 1 (key “13”), remove the clamping bar, unscrew six nuts 2 (key “14”) and dismantle, not forgetting to turn off the oxygen sensor. The photo shows three of the six nuts.
Elements of the exhaust pipe
Everything important is under the screen
Now we will talk about engine 21124:
- Disable both oxygen sensors. We unscrew the three nuts securing the protective screen (with a 10mm wrench) and disassemble the bracket by unscrewing the four nuts with a 13mm wrench.
How to disassemble the mounting bracket
Operation with additional muffler
Here we believed that the VUT hose was disconnected from the intake module. Finally, the spark plugs are unscrewed on any of the engines (a “16” tubular wrench).
The order of unscrewing (left) and tightening the mounting screws
Preparing to remove valves
In the VAZ-2112 (21120), it is easier to change valves if you simultaneously dismantle the cylinder head, because in order to press new guides, the cylinder head would need to be heated. The best option is to leave them in place.
The dismantling process consists of the following steps:
- Disconnect the connector located under the gas tank hatch.
- Start the engine and let it stall.
- Remove the air filter. To do this, you need to loosen the clamps and disconnect the connector.
- Then all that remains is to take a 10mm wrench and unscrew the screw.
All these actions are shown in one photo.
Characteristic signs of breakdowns
Before you begin repairs, you need to make sure that there really is a breakdown. Replacement of VAZ-2110 valve seals (8 valves) is required in cases where the following symptoms occur:
- Increased oil consumption.
- Smoke when starting a cold car engine.
- The lower edge of the spark plug threads is oily.
- When opening the cylinder head, you can see oily black streaks on the camshaft.
All these signs indicate a malfunction of the valve oil seals. The edge on which the spring is located does not perform its functions - oil is not removed from the valves. If the oil seal completely fails, oil consumption will increase significantly. The amount of soot will also increase.
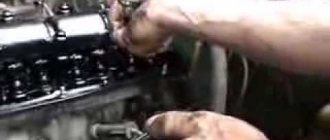
Cleaning valve channels
To remove any valve, you will need to remove the camshaft. All screws on the bearing housing must be unscrewed evenly and tightened with a force of 10 N*m. The hydraulic compensator can be removed with a magnet, and then the valve is desiccated by compressing the spring with a puller (see photo).
There may be carbon deposits in the valve channels. It is cleared:
- Flat screwdriver;
- Sanding felt.
Grinding is carried out as follows: a rubber pipe is placed on the valve, a paste with diamond chips is applied (one drop), then the valve is pressed into the channel and scrolled. It will also be possible to change the valve stem seals (2112-1007026). You can’t do this without a special puller.
On any car, including the VAZ-2112, cylinder head repair comes down to cleaning and checking, as well as correcting geometry defects. In the latter case we are talking about milling. The presence of cracks and chips is a reason for replacement, not repair.
How to adjust valves on a VAZ 2110
There is no need to purchase shims in advance. They are relatively expensive. Initially, you have to establish the size of the gaps and only then buy the required number of washers with the exact dimensions. It is better to carry out work in a garage with good lighting. The roof and walls will protect from unwanted wind and rain, which can carry dirt into the open camshaft.
Disassembly
If everything is ready, then we proceed to the first part of the repair - dismantling the parts:
- disconnect the terminal from the battery;
- remove the air filter housing (on a carburetor engine);
- disconnect the crankcase gas hoses and the throttle cable bracket from the valve cover;
- unscrew the bolts of the timing case. Remove the cover and gain access to the pulley;
- unscrew the spark plugs (this will make it easier to rotate the crankshaft to find TDC and BDC);
- Unscrew the valve cover nuts and remove it.
Before direct tuning, you should remember the mechanism of operation of the timing belt. Namely, the operating order of the valves (in our case, a VAZ 2110 with an 8-valve injector).
| Camshaft rotation angle, degrees | Cam No. (counting from camshaft pulley) | |
| Exhaust (gap 0.35.mm) | Inlet (gap 0.20mm) | |
| 0 plus 2-3 teeth | 1 | 3 |
| 90 plus 2-3 teeth | 5 | 2 |
| 180 plus 2-3 teeth | 8 | 6 |
| 270 plus 2-3 teeth | 4 | 7 |
The sequence of adjusting the gaps in the valve mechanism
Angle of rotation of the crankshaft, degrees N of the cylinder in which the compression stroke occurs (end) N of adjustable valves (cams)
4 8 and 6
180 2 4 and 7
360 1 1 and 3
540 3 5 and 2
The procedure for adjusting the valves on a VAZ 2110 with an 8-valve engine must be performed in the same sequence as in the table. As for installing valves on a VAZ 2110 with 16-valve engines, the diagram looks completely different.
| valve | 1 class (you) | 2 cells (ch) | Zkl (vp) | 4th grade (you) | 5th grade (you) | 6 cells (ch) | 7 cells (vp) | 8th grade (you) |
| Should ±0.05 | 0,30 (0,35) | 0,20 | 0,20 | 0,30 (0,35) | 0,30 (0,35) | 0,20 | 0,20 | 0,30 (0,35) |
| largest gap | 0,25 | 0,35 | 0,40 | 0,35 | 0,40 | 0,30 | 0,30 | 0,40 |
| washer | 4,30 | 3,82 | 3,52 | 4,22 | 4,50 | 4,27 | 3,87 | 4,25 |
| What kind of washer is needed | 4,25 (4,20) | 3,97 | 3,72 | 4,27 (4,22) | 4,6 (4,55) | 4,37 | 3,97 | 4,35 (4,3) |
Adjustment
After removing the valve cover, it is necessary to remove any remaining engine oil near the tappets. This can be done with a medical syringe or a rubber bulb. If there is a retaining rod, you should install it on the two outer studs intended for fastening the cylinder head cover.
Then, we proceed to the second part of the repair and do the following:
- We set the top dead center by aligning the marks of the camshaft pulley and the inner timing case. There are two ways to do this. Hanging and rotating one front wheel. Use a spanner wrench (head) to rotate the camshaft by the pulley mounting bolt, but this operation is dangerous due to breakage of the mounting bolt;
- After finding the top dead center, turn the camshaft slightly so that the pulley moves 40-50° from TDC (this is 2.5-3 teeth). We put our mark, from which we will then rotate the camshaft several more times, making additional marks;
- We measure the thermal clearance of the first valve (exhaust) by slipping one of the feeler gauges (0.35/0.4/0.45 mm) between the camshaft cam and the pusher. Nominal clearance 0.35 mm;
- if the first probe passes freely, then take a larger size (0.4 mm). The pitch is 0.05 mm;
- if the 0.4 or 0.45 probe does not pass, then it is necessary to replace the adjusting washer;
- We turn the pusher with the groove towards us, press it with the lever of the locking rack and take out the used washer with tweezers. Its inner side contains numbers with the original size;
- to calculate the required value, you must use the formula H = B + (A - C). Where:
- H—thickness of the new washer, mm;
- B—thickness of the used washer, mm;
- A - measured gap, mm;
- C—nominal gap, mm.
- The resulting result H is written down in a notepad. You will have to buy a washer of this exact size for the repair valve, rounding up the value;
- according to the table, we move on to the third valve (intake), its nominal clearance is 0.2 mm;
- measure the gap by inserting feeler gauges in order: 0.2/0.25/0.30 mm;
- write down the size of the probe, which is not included in the thermal gap;
- take out the washer and calculate the repair size using the above formula;
- then, according to the table, we turn the crankshaft several times to the indicated degrees and perform the operation with all the valves;
- We go to the store and buy the required number of adjusting washers of the required thickness, according to calculations;
- We install the washers in the pushers, according to the notebook;
- all valve clearances on the VAZ 2110 should be restored to the nominal sizes of 0.2 and 0.35, thanks to the use of adjusting washers;
- checking new thermal gaps;
- after replacing the washers, it is necessary to put the dismantled parts in place;
- we start the engine and observe its operation.
DIY main cylinder block repair
It is noteworthy that all car owners of VAZ cars have a certain skill and dexterity in independently replacing valves and repairing the cylinder block. To make the process even easier, you need to know the established steps. They can be divided into several: preparatory, dismantling, repair itself and installation.
Preparatory work includes the installation of a VAZ-2112 car in a special repair pit. Next, you will need to completely cut off the power supply (disconnect the terminals from the battery), remove the engine crankcase, drain the oil and special liquid for cooling the system. It is necessary to drain the oil into an old unnecessary dish or container by unscrewing the crankcase plugs. It is important to remember that all stages are carried out exclusively after the engine has cooled down. This will help avoid burns, as the oil heats up to + 60...+80 °C.
The dismantling process should begin by removing the equipment of the main cylinder block:
- cooling pipes;
- filter duct;
- manifold (intake and exhaust);
- all wires, including those leading to the spark plugs.
After all of the above, remove the timing belt cover. Having done this, there is open access to the fastening of the 16 valve cover. Next, you need to unscrew the timing belt and alternator pulley, after which the cover protecting the valves is removed and access to the cylinder block bolts is opened. After unscrewing them, the head of the main cylinder (cylinder head) of the VAZ-2112 is freely removed.
After all that has been done, the repair itself begins, namely the disassembly of the cylinder block. To do this, you need to unscrew the fasteners holding the camshaft. After completely disassembling the cylinder head, you will need to clean it of all contaminants. Using a special grinding paste, grind each valve (out of 16). When this process is finished, wipe everything very well with a rag. Now the cylinder block can be completely replaced with parts. Our experts advise you to carefully and responsibly approach the assembly of the gas distribution mechanism (GRM) of the VAZ-2112 and the installation of the cylinder head on the engine.
The installation stage after replacing at least one valve begins with cleaning all surfaces from residues after leakage of special liquids. Next, it is important to install the gaskets (new), after which the head is put on its guides. After this, the fastening bolts are tightened well with wrenches (torque wrenches), belts and attachments are installed in place, oil and coolant (antifreeze) are added.
It is worth drawing the attention of readers to the fact that, when putting everything in place, it is necessary to ensure the correct installation of the exhaust and intake valves of the VAZ-2112. When replacing a valve on this vehicle, the timing belt does not change.
Signs of failure of the cylinder head gasket of a VAZ 2110
There are no specific warranty periods for the use of a cylinder head gasket. Its durability is influenced by such factors as: the degree of operation of the engine, its model, driving style and other reasons. However, there are several symptoms by which you can determine that the gasket has failed:
- There are leaks of engine oil or coolant at the junction of the block and the head;
- using an oil dipstick, foreign light impurities or a foam-like emulsion is detected, which occurs when antifreeze penetrates through the connection with the cylinder head;
- the color of the exhaust changes to bluish-white, which indicates water entering the combustion chamber of the cylinder block;
- presence of oil stains in the coolant reservoir;
- The engine temperature rises due to the breakthrough of hot gases into the cooling system, which immediately heat the coolant.
Tips for replacing the cylinder head gasket
Removal and installation of the cylinder head gasket is carried out with the crankshaft set to TDC. It is also necessary to ensure that both valves of the 1st cylinder are closed.
After unscrewing the mounting bolts from the cylinder block, it is recommended to replace them with new ones, since with repeated use the bolts are pulled out, “metal fatigue” occurs and the bolt breaks under the influence of tension forces. Bolts need to be replaced if their length exceeds 135.5 mm.
It must be remembered that the cylinder head gasket must be changed after each removal of the engine head, even if this is not due to its unsuitability.
The bolts must be tightened in two stages with the sequence shown in photo 16. The first tightening stage is done with a torque of 20 N•m (2 kgf•m), the second with a torque of 69.4–85.7 N•m (7.1– 8.7 kgf•m), the second and third are the final adjustment of the bolts to 90°.
The procedure for replacing the cylinder head gasket on a VAZ 2110 on a 16-valve engine is generally similar to how to change the gasket on an 8-valve engine, but has several nuances:
- The receiver must be dismantled.
- When removing timing belt pulleys, a mark is placed on two pulleys and two pulleys are removed.
- The fuel rail is removed.
- The order and tightening torques are carried out in accordance with the requirements for a 16-valve engine.
Spare parts and tools for work
Before replacing VAZ 2110 valves, please purchase new high-quality parts with the following names and original part numbers
- Gasket set: valve cover (No. 2108-1003270/77) and cylinder head (No. 21083-1003020), intake and exhaust manifold (No. 21083-1008081), exhaust pipe (No. 2103-1203020-04), and oil seal ( No. 2108-1005034) and oil dumper (No. 2108-1007026-86) (the so-called cylinder head repair kit)
- New fuel mixture inlet valve 4 pcs. (Ref. no. 21083-1007010)
- New intake valve for exhaust system 4 pcs. (Ref. No. 2108-1007012)
- Valve guide sleeve 8 pcs. (art. 2108-1007032-87)
- Engine coolant
- New bolts for securing the cylinder head and cylinder block (art. 2108-1003271H/O)
- Timing belt (order number 2108-1006040-86) and alternator belt (order number 1000012562)
- Engine oil and oil filter
Repair work on worn parts is carried out using a standard set of tools, which are usually sold in sets, namely
- Set of ring wrenches with markings from 8 to 21 mm
- Hex key set
- A set of ring wrenches with a diameter of 8 to 24 mm.
- Valve opener.
- Screw valve guide puller.
- Torque wrench (needed to properly tighten the camshaft bolts, cylinder head and camshaft gear).
- Screwdriver Set.
- Electric drill.
- Two types of special abrasives (for coarse grinding of the working surfaces of valves and combustion chambers and for fine grinding).
- Wear gloves to protect your hands from possible injury.
The availability of tools, parts and internal combustion engines will allow you to carry out troubleshooting work yourself, since the price for replacing 8 VAZ 2110 valves ranges from 30 to 45,000 rubles in the fall of 2018 for a non-certified service. At certified service stations of official dealers, such work will cost more than 50,000, which will be a serious blow to the owner’s financial situation.
Everything about Lada repair and maintenance
AvtoVAZ is a national manufacturer that has received recognition both in Russia and in neighboring countries. Many consumers choose domestic cars for various reasons: for some, the determining factor is the relatively low cost, for others they choose it to support the manufacturer, for others they like the design and technical features.
It is worth noting that over the past ten years the company has made significant progress in many directions: cars have acquired improved technological characteristics and modern design. Not long ago, the company began actively supplying some models to European countries.
Other cases in which dismantling of the cylinder head is required
Of course, it is not necessary to remove the cylinder head for every breakdown. This is only necessary if major repairs are needed. Such “major” cases include:
- Gasket wear.
- Formation of carbon deposits on parts.
- Valve deformation.
- Need to replace guide bushings.
- Failure of the camshaft, etc.
Of course, repairing it yourself or through a service in any case involves certain financial costs. To ensure smooth operation of the engine, regular diagnostics of the cylinder head are necessary. It is recommended to use high-quality fuel. In addition, try to prevent the car from overheating - because of this, the cylinder head may lead.
If some points remain unclear to you, then you can visually familiarize yourself with the process of replacing valves by watching the video:
Conclusion
Thus, a major overhaul of the cylinder head of the 16-valve VAZ 2112 engine is being carried out. This process at a car service center will take 1-2 days, but in his garage a car enthusiast can spend much more time, since the lack of tools will affect him. Thus, it is recommended to carry out cylinder head repairs at car repair shops, where everything will be done much faster and with better quality. Of course, this will hit your pocket, since high-quality and major repairs of this part will cost on average about 7,000-10,000 rubles. along with spare parts.
Source
Instructions for adjusting valve clearances
On absolutely any classic engine, including the VAZ 2106, the thermal valve clearances must be adjusted from time to time. If this is not done, then over time some valves may be clamped, or, on the contrary, the gap will be too large and they will knock. To avoid this, adjustments must be made in a timely manner. To begin with, I will give a list of tools that will be needed to complete this work with the VAZ 2106.
- Open-end wrench 13
- 17 open-end wrench
- A set of probes, or rather, we need exactly one probe, 0.15 mm thick
- And also a list of tools needed to remove the valve cover
Step-by-step guide to adjusting valve clearances on a VAZ 2106
Before starting this work, it is worth considering that the car engine must be cold, that is, its temperature should be as close to room temperature as possible. It is also worth noting that the timing chain tension should be normal.
The first step is to remove the valve cover. After this, align the crankshaft and camshaft pulley according to the marks. If the chain was put on correctly, then the marks should match, but it’s still better to check it again. So, the mark on the crankshaft pulley should match the long mark on the front engine cover. This is how everything looks visually:
I specially made it closer so that it could be seen better:
Now we look at the camshaft sprocket and there, too, the mark on the gear should coincide with the protrusion on the cover. The photo below shows everything:
With this position of the crankshaft and camshaft, the piston of the fourth cylinder is at top dead center (TDC). It is at this moment that it is necessary to adjust the clearance of the 6th and 8th valves. If this is your first time, keep in mind that the valve numbers are counted from the left side, that is, from the front of the engine. To understand which valves need to be adjusted in this position, I will show you everything, literally:
Now we take a feeler gauge 0.15 mm thick and insert it between the rocker and the camshaft; the photo below shows all this more clearly using the example of the 8th valve:
If the feeler gauge passes without effort, then the gap is too large and needs to be made smaller. If, on the contrary, the dipstick does not pass between the rocker and the camshaft of the VAZ 2106, then the gap must be reduced to 0.15 mm. The gaps are adjusted using an adjusting bolt and a control nut as follows. First, slightly loosen the locking nut with a 17 wrench, and with a 13 wrench we set the required gap by unscrewing it or, on the contrary, tightening it.
Once you have achieved the required clearance with the adjusting bolt, you can tighten the locknut. But it is worth considering that during tightening the clearance may decrease, so check the clearance after tightening the nut and adjust again if necessary.
The remaining valves are adjusted in exactly the same way, but in a strictly defined sequence, which I will write about in detail below.
The procedure for adjusting valve clearances on a VAZ 2106
The valves are regulated in a strictly defined sequence, as mentioned above. Below you will find data on how much you need to turn the crankshaft (in degrees) to adjust a particular valve:
- Matching marks (initial position) - 6th and 8th valve.
- Rotate the crankshaft 180 degrees - 4th and 7th valves.
- 360 degree rotation - 1st and 3rd valves
- Shaft position rotated 540 degrees - 5th and 2nd valve.
For convenience, you can put your marks on the crankshaft pulley, that is, divide it into two parts, making another mark opposite the factory one.
There is another way to check the shaft rotation angle. You can remove the distributor cover and adjust the valves according to the above data, only each next two valves are adjusted not after 180 degrees of rotation of the slider, but after 90, that is, 1/4 turn. You can make your own mark on the distributor body.
Disassembling the timing belt
The main goal is to remove two camshafts. To do this you need:
- Remove the minus terminal.
- Remove all wires from the spark plugs.
- Disconnect the spark plugs from the coils.
- Remove the ignition module and the hose responsible for crankcase ventilation.
- Remove the bracket securing the injector wiring. It is screwed to the cylinder head cover. The same actions must be performed with harness bracket No. 2.
- Remove the receiver.
- Cover the entire intake manifold with a cloth.
Next you need to disconnect the phase sensor located under the timing pulley. You also need to disconnect the pressure sensor located near the removed bracket. You can take a 17mm wrench and, without touching or turning the pulleys, loosen the mounting screws.
You need to install a screwdriver in the holes - it will be a stop. After this, all that remains is to loosen the tension belts - to do this you just need to unscrew the nut.
Finally, you need to remove the belt and unscrew the screws on the pulleys. All pulleys, without exception, must be removed from the shaft. Then you need to unscrew the three screws that are level with the pulleys.
To dismantle the shaft, several steps must be taken:
- Remove the cylinder head cover.
- Unscrew 20 bolts.
- Take two 15mm wrenches and unscrew the nuts on the upper rod. The same actions must be performed with the nuts located on the nut bracket, but you need a 13mm wrench.
- Remove the bearing housing.
- Remove the camshafts.
Algorithm of actions for replacing valve stem seals on a VAZ 2110
Of course, to carry out such actions you will need certain tools.
First, the caps must be removed:
- The wire should be disconnected from the minus terminal of the power source.
- The camshaft has a pulley with teeth. It needs to be removed.
- The block head is released from the cover.
- The mass must be removed from the studs. To do this, you need to unscrew the two fastening nuts.
- The back cover is removed from the block head. It is secured with a bolt and two nuts.
- The cylinder head is closed with a cover. It along with the sealing ring should be removed.
- The nuts that secure the front and rear bearing housings must be unscrewed evenly.
- Both housings must be removed.
- The next step is to remove the camshaft from the cylinder head.
- It is necessary to remove the oil seal from it.
- The crankshaft should be turned. But this must be done so that the location of the piston is at top dead center.
- Next, you need to unscrew the spark plug. To prevent the valve from falling through, a metal rod must be inserted into the resulting hole.
- Then a device is installed that will compress the valve spring. You will need a nut that does not have a toothed collar.
- When the spring is compressed and two crackers are removed, the device is removed.
Then you need to install the caps:
- The cap must be inserted into the mandrel, but it must first be “bathed” in engine oil.
- The part is pressed all the way into the lower plate.
- After this, the spring is installed.
Install all remaining valve stem seals in a similar manner.
It is easy to see that replacing the oil seals on a VAZ 2110 8 valves without removing the head can be done completely independently, without resorting to the services of a car service. But it must be said that such actions are carried out only if the model is VAZ 2110. If there are other models, such procedures will not be required.
And one moment. Of course, independent work on changing valve stem seals is only possible if the car owner is knowledgeable about technology and is familiar with the tool. Otherwise, there is nothing left to do but seek help from a car service center. Qualified specialists will provide active assistance in this.
How to carry out repairs yourself
Having some skills as a car mechanic, any owner of a domestic car can easily carry out repairs with his own hands, simply by following the instructions below and carefully studying each stage of the work, divided into preparation, dismantling, repair and installation.
Preparatory stage
The first step is to disconnect the vehicle's on-board network, remove the tips for the battery, old oil and coolant from the engine crankcase must be combined into a previously prepared volume through a service plug, which is done by disconnecting the lowest radiator pipe from the cylinder block, the only precaution is to work when it is cool engine, otherwise you may burn your hands!
What is needed to replace the cylinder head gasket of a VAZ 2110 (8 valves)
Replacing the cylinder head gasket is easier to do in the inspection pit if you prepare the necessary tools in advance.
Necessary tools.
- Wrench with ratchet and socket heads “10”; "13", "17", "19".
- Torx head wrench.
- Screwdriver.
- Torque wrench.
- Spark plug wrench.
Matching accessories.
- The TRIALLI gasket set has the article number GZ1017022 and costs 500 rubles.
- The VICTOR REINZ cylinder head gasket has article number 613666000 and its price is 280 rubles.
- The original VAZ cylinder head gasket (VATI) has article number 21083100302020 and costs 140 rubles.
Disassembling the timing mechanism
Our goal is to remove both camshafts. On the VAZ-2112 engine, valves can be replaced even without removing the cylinder head. In any case, however, the shafts interfere with each other. Procedure.
- Disconnect the negative terminal from the battery.
- Remove the wire from the plug and disconnect it from the coil.
- Also remove the ignition module (photo 2) and remove the crankcase ventilation tube (photo 3).
- The bracket holding the injector wiring is screwed to the cylinder head (photo 3). Remove it! Do the same for the second wire harness bracket (DPDZ and ETC).
- It is necessary to remove the receiver (photo 4). And the intake manifold hole is covered with fabric.
Removing the cylinder head on a VAZ-21120 engine
It is necessary to get rid of the fuel rail: unscrew pipe fittings 2 and 3 (photo 1) using a wrench “No. 17” and remove clamp 1.
The ramp must be temporarily dismantled.
Use a screwdriver to remove the screws on the fuel rail. Then remove the rubber ring from the connector. In addition, you need to remove the tube with the organic probe and unscrew the “10” screw here (photo 2). Finally, two beveled head screws are unscrewed.
The main thing is to partially drain the coolant. Then you fill it up! (now unscrewed) Move it to one side and remove the two nuts on the thermostat photo 1 (.
The thermostat shouldn't interfere.
Also remove the thermostat gasket. Also unscrew the nut with the neutral wire with a 13 mm wrench. You can disconnect the ignition sensor connector.
The VAZ-2112 engine is ready to replace the valves: use a “10” wrench to unscrew the bolts on the cylinder head and remove the plate along with the valves. Follow the unscrewing order. Follow the same sequence and torque for the cylinder head assembly.
Dismantling
Cylinder headAssembling the cylinder head begins with removing all components: cooling system hoses, vacuum system, intake and exhaust manifolds, alternator and timing belt. By removing the cover, you will have easy access to the cylinder head and engine crankcase mounting. Next, unscrew the valve cover and cylinder head bolts, then carefully remove them and place them on a workbench, at this point disassembly is complete.
Replacing valves VAZ 2110
The cylinder head is now removed. Now it's time to replace the valves, but to do this you need to arm yourself with a special valve puller.
Of course, if you don’t have such a tool, you can always use the “old-fashioned” method, having a hammer and chisel on hand. But it is better to use a tool similar to the one shown in the photo below.
Special valve puller
Like this.
- Removing the camshaft from the cylinder head.
- We also removed the camshaft.
- Removing the pusher.
- Now take the puller and attach it to the camshaft stud.
- Now place a small iron plate under the spool and unscrew the valve fixing nut.
Note. In this case, you need to be very careful, since the spring is quite strong, and if the device jumps over the plate, the crumbs may fly far and you will have to look for a new one.
- After removing the dryer, you need to remove the plates and springs.
Replacing valve guides for VAZ 2110
- You can also remove the thrust plate located under the spring.
Note. On a VAZ 2110 car, before removing the thrust plate, it is necessary to remove the valve seal using a handle specially designed for this.
Removing the valve seal
The process of removing the stuffing box is carried out as follows:
- While holding the oil seal, press firmly on it, but do not overdo it.
- It should be slightly turned to one side.
Note.
To the right or left, the oil seal should turn upward slightly, it is not recommended to tilt to the right or left, as this will damage the oil seal seating shoulder.
- Remove the old valve.
Replacing bushings
Now you need to replace the valve guide. Doing it again with a hammer and chisel is, to put it mildly, unethical.
And the head itself, acting in this way, can be easily damaged. To achieve an effective result, arm yourself with a special tool.
Note. On the VAZ 2110 engine, the guide is replaced in the same way as on all other VAZ models.
As you know, the guides need to be knocked down. Therefore, amateurs are tempted to use a hammer for this.
Remember that you risk damaging not only the cylinder head, but also the seating surface in the head, so, as mentioned above, you should arm yourself with a special puller. This is what it looks like.
You should know that this puller may vary. In particular, it is customary to separate the impact puller, which needs to be driven in with a hammer, but again, this method does not always work.
Another type of puller, a more common tool, is the screw puller. This tool allows for smooth pressing and quick replacement of bushings.
It can be purchased at any specialized car store, but you can also make it yourself.
Continue with the bushing removal process. Since the tensioning device is universal, a bushing of a certain size should be placed under it.
It was chosen so that its threaded part would protrude 2-3 cm from the guides during the subsequent installation process.
That's why.
- Install the puller ring and secure it with two rotating nuts.
- Hold the center of the extractor with a wrench and press the guide sleeve into place.
Note. In this case, you need to be very careful, since the force applied to the extractor is so great that it makes a characteristic clicking sound.
When this sound is heard, it means the bushing has moved and is coming out of position. Next, you need to continue unscrewing the screw until it comes out.
- Take a new bushing (be sure to treat it with engine oil so that it fits easily).
Replacing valve guides on a Wards 2110
Note. To compress the bushing, it is necessary to use a special bushing with a conical chamfer, which must rest against the valve seat.
There should be two large diameter bushings for the intake valve seat. One of the bushes should be smaller. This should be remembered.
- Install these bushings.
- Install the extractor itself.
Note. It is necessary to select a spacer sleeve for the puller so that its threaded part protrudes two to three centimeters when installing the guide.
Since the top of the guide bushing sometimes has a special collar, it is necessary to use a specially designed nut to push against the guide. Why is this shoulder so important?
This is due to the fact that this flange is used to attach a rubber sealing cap, which, if damaged, can seriously affect the tightness of the seal.
Note. After installing a special nut on the stud, only a few turns of thread remain, and to reduce the load on the thread, another threaded bushing is screwed on.
Please proceed as follows.
- Press the sleeve into place.
Note.
Please note that the bushing is equipped with a locking ring. A “click” sound will be heard as the bushing is put into place.
However, if it becomes tighter while sitting, then do not rush to stop. This is necessary in order not to damage the guide sleeve.
The guide is pressed in, but the work doesn't end there. It needs to be adjusted to the correct seat size.
This is because, after being pressed in, it shrinks slightly and decreases in size by 8mm. Therefore, a reamer with a diameter of 8.00 should be used.
This same reamer will need to be inserted into the guide. The reamer is then screwed in freely without pressure.
Continue.
- After turning the hole, blow it with compressed air (this is done to remove all sawdust).
- Now you need to measure.
Note. The measurement is carried out in order to find out the diameter of the hole in the track. To do this, you need to use a special internal diameter meter.
Typically the indicator will show two percent at the end if the hole size is 8mm. Then you need to measure the thickness of the stem using a micrometer.
If the leg size is 7.99 mm, then three percent is the normal clearance between the guide sleeve and the leg.
Keep moving forward.
- Reinstall the valve.
Note. If you notice that the valve does not reach all the way to the seat, you need to tap the seat with a burr - in other words, sand it down.
Replacing piston rings
The process of replacing piston rings, which most often become unusable due to mechanical damage, is carried out in the following order:
- the valve protective cover is removed;
- the ground wire is removed from the engine;
- the fixing fastener holding the cylinder head bracket is unscrewed;
- The thermostat mount is disconnected;
- the thermostat is carefully moved to the side, the clamps and connecting hoses are removed;
- the tension roller and bracket clamp is unscrewed;
- the timing belt and tension roller are removed;
- the crankshaft must be turned to such a position that the desired piston is in the “dead zone”, for convenient unscrewing of the connecting rod clamps;
- After removing the connecting rod cover, the piston is pulled out, the same process should be done with the remaining cylinders.
Next, all that remains is to remove soot and deposits from the surface, to examine the markings of the piston rings, buy similar components and install them in the reverse order.
As you can see, replacing valves, although labor-intensive, is still not a very complicated process, so every car enthusiast can cope with such work if he follows the instructions and recommendations. A video tutorial on the Internet resource, which you can watch at any time of the day, will further simplify the replacement process and help you find the answer to any question regarding replacing valves for the VAZ-2114.
Some installation tips
The piston of cylinder No. 1 must be placed at its dead top point before installation. The key for 17 will help with this.
The pulleys have grooves and the camshafts have spikes. Each pulley has marks and they should face up. It’s better to place the crankshaft according to the mark that is on the gearbox unit.
When dismantling, it is necessary to note at what angles the tension rollers are fixed. The key plate must be set at the correct angle and the nut must be tightened with a force of 40 N*m.
The screws and their working part must be lubricated with engine oil and tightened in the correct order.
Then you need to turn the screws 90 degrees during the second pass and 90 degrees again during the third pass.
Why is the VAZ-2110 electrical circuit needed?
When replacing or repairing an injector with 8 valves, the electrical diagram serves as a kind of guide, with the help of which you can understand all the nuances in the process of connecting specific wiring parts. In addition, the VAZ-2110 electrical diagram when using an injector with 8 valves allows you to understand the functioning of all electrical wiring devices.
In the diagram, the injector valves are evenly spaced, while the system itself is presented in the form of two combined components:
- Fuel distributor;
- Electrical equipment for the ignition control system.
Also, the diagram with 8 and 16 valves indicates the location of the electronic unit, with the help of which the operation of the above two systems is coordinated. Backup equipment, in turn, protects electrical wiring from overloads and increases the operating efficiency of the entire injection system.
Advice: if you are going to repair the injector, be sure to look at the wiring diagram for the VAZ-2106. This will give you the opportunity to replace any faulty parts without affecting the overall functioning of the vehicle's wiring.
The elements indicated by numbers in the diagram are shown below:
The diagram of electrical wires and fuses gives an understanding of the entire operation of the injection system, and also shows the specific position of each of the elements. It contains the following elements:
- Central nozzle. Acts as a distributor of fuel supply to the system. There is also a special type of fuel regulator that works as a sensor and ensures that the fuel supply does not go beyond the normal limits.
- Diaphragm regulator. Monitors fuel pressure in the ignition system and removes excess fuel back into the tank body.
Advice: make sure that the pressure in the fuel supply system does not exceed 300 MPa. Otherwise, you will see the corresponding icon on the instrument panel and you will most likely have to replace the coolant on the VAZ-2110.
Bypass valve design. It regulates the position of the cross diaphragm, which is subject to constant pressure from three sides: on one side, the pressure of the fuel itself, on the other side, the tangential load from the intake air volumes, and on the 3rd side, the tension from the spring attached to the valve.
Causes of valve malfunction on VAZ 2110, 2112
The main reason is that the timing belt has broken. The consequences that this can cause are the bending of these parts. Although the design of the 8-valve engine on the “tens” does not imply that the valves meet the pistons at the so-called dead center during breaks. But on the 2114(1.3) engine and 16-valve engines 2112(1.5), 2114(1.5) this leads to the inevitable “death” of the valves and quite expensive repairs. Another quite trivial reason is wear of the valve stem, which must have certain dimensions, measured with a micrometer.
If the valve stem during measurement is less than 7.97 millimeters, then the valve must be replaced. You also need to change the valve if it is burnt out or cracked.
Replacing VAZ 2110, 2112 valves is a very responsible matter and requires certain skills from the employee. However, no special equipment is needed. Therefore, a person who is familiar with the tool and has an idea of the design of mechanisms can do it with his own hands, in the garage.
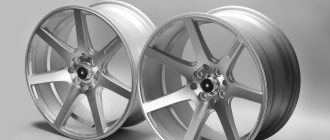
Advantages of a 16-valve engine
The VAZ 2112 with 16 engine valves has a number of advantages over cars of the same brand, but with fewer valves. Its main advantage is the ability to achieve maximum engine power, regardless of the type of the latter. (see picture).
- VAZ 2112 with a volume of 1500 cubic cm, has 77 horsepower.
- A VAZ 2112 of the same volume can have a power of up to 90 horsepower.
Technical specifications
Let's consider the technical characteristics of 8 and 16 valve engines using the example of VAZ models.
Related article Beams 1G FE Engine Specifications
| Technical specifications | VAZ 21116 | VAZ 21126 |
| Number of cylinders | 4 | 4 |
| Number of valves | 8 | 16 |
| Volume, cm3 | 1596 | 1597 |
| Cylinder diameter, mm | 82 | |
| Piston stroke, mm | 75,6 | |
| Compression ratio | 10,5 | 11,0 |
| Power, hp at rpm | 87/5100 | 98/5600 |
| Torque, Nm at rpm | 140/3800 | 145/4000 |
| Petrol | AI-95 | |
| Mixed consumption, l/100 km | 7,3 | 7,0 |
When buying a car aftermarket, you can distinguish a 16-valve engine by its appearance. The engine's wide intake manifold resembles a snail, and is usually covered by a shroud with the company logo and the inscription 16Valve.
Engine diagnostics using spark plugs
When there is a crack on the insulator, or there is damage to the thread or electrode, the spark plug needs to be replaced.
Light brown soot means the spark plug is working properly, just like the engine.
Lack of carbon deposits on the spark plug: a) the engine runs on a lean mixture; b) the ignition timing is incorrectly set; c) the spark plug brand does not match the engine type.
Shiny black carbon deposits from the spark plugs mean that oil is getting into the cylinder. Such spark plugs need to be changed or at least cleaned, and also look for the reason for oil getting into the cylinder
Check the gap between the spark plug electrodes (be sure to use a round feeler gauge). The standard gap is 0.7–0.8 mm. Bending the side electrode
Troubleshooting
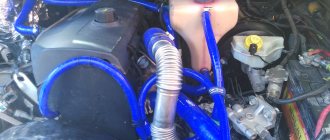
Since the water pump on the VAZ 2114/15 is completely covered by a plastic casing of the gas distribution mechanism, it is impossible to visually determine malfunctions. The main signs of problems with the water pump are as follows.
- While the engine is running, extraneous sounds (humming or grinding) can be heard from the timing belt, which can be produced by a faulty pump bearing. However, a similar hum may appear if the timing belt is tightened after replacement, as well as if the tension roller is heavily worn.
- Traces of antifreeze were found on the timing case, under the car after parking, or on the underbody.
- A sharp increase in engine temperature while driving is a consequence of the loss of most of the coolant. This can happen due to a breakdown of the radiator or the final failure of the pump.
- If the engine stalls while driving and the temperature sensor needle rises to the maximum, most likely the water pump shaft is jammed and problems appear in the gas distribution mechanism.
To make a more accurate diagnosis, you should do the following.
- Using a 10mm wrench, unscrew the three fastening bolts and remove the protective plastic casing.
- Using a nut, loosen the belt tension roller.
- Use your hands to check for play on the water pump shaft. If the gear is loose, the pump must be replaced.
- The presence of traces of antifreeze under the casing is most often a consequence of oil seal wear.
- Difficult shaft rotation indicates bearing wear.
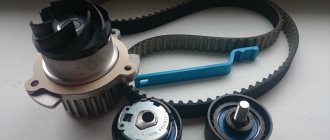
Almost always, diagnosing the water pump is done when replacing the timing belt. According to the technical documentation for VAZ 2114/15 cars on 8V engines, the belt should be changed every 60 thousand km, on 16V engines - every 45 thousand km.
How to achieve results at home
- Using a special machine. In fact, such a unit does not perform grinding - it chamfers the seat and valve, thanks to which it is possible to achieve the tightest possible alignment and ensure precise mating. The result is a high-strength cut profile that ensures high-quality engine performance. The advantage of the method is its simplicity - after processing, all that remains is to wash and assemble the head.
Lapping valves using a machine
Do-it-yourself valve lapping