11.08.2021
You can often see cars on the street equipped with two exhaust pipes at once, often of an unusual type and size. We are talking not only about powerful cars with rear-wheel drive, where this is justified, but also about ordinary VAZs and other cars in the middle segment. Let's figure out what the point is in making a double exhaust, what are the advantages of this, and whether it is possible to carry out this improvement yourself.
A little theory
Why is such a complex exhaust route configuration used? It's all about the operating characteristics of the motors. After all, the efficiency of any internal combustion engine depends on the rate at which exhaust gases are removed. And if when installing a direct-flow muffler on conventional piston engines the effect is insignificant, then with a rotary piston engine there is an almost 30% increase in power.
Installing two routes also allows you to increase the throughput of the exhaust system, while abandoning the use of “forward flow” - that is, leaving the sound level of a running engine within the limits permitted by GOST.
As a rule, double mufflers are standardly installed on cars with displacement engines (from 2.4 liters) with an opposed or V-shaped configuration. There are several reasons why this is necessary:
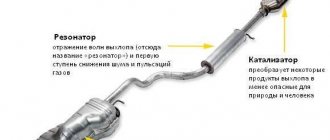
- The need to comply with environmental standards and traffic rules leads to the use of an overly complex design consisting of several resonators, flame arresters, and a neutralizer.
- Each element of the route increases the free-flowing resistance of the exhaust gases, and the only way to increase the throughput is to increase the channels for exhaust gases.
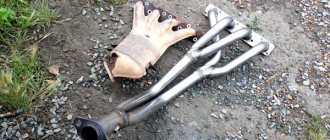
With an opposed or V-shaped engine configuration, connecting exhaust manifolds from several cylinder heads into one pipe is quite problematic: it is much easier and more efficient to remove gases from each head individually.
The dual exhaust gives the car an aggressive and sporty look, which is appreciated by a considerable number of car enthusiasts.
Increasing the efficiency of exhaust gas removal allows, although not significantly, to increase engine power. And if for standard internal combustion engines (volume 1.5–1.8 liters) the power increase is 3–5 liters. is practically unnoticeable, then initially powerful engines can add up to 10–15 “horses”.
You can install 2 exhaust pipes on almost any type of car, regardless of the size and configuration of the engine. This will not only give the car a sporty look, but also in case of serious modifications to the internal combustion engine it is a necessity.
Types of mufflers and their differences
There are 4 types of mufflers based on the method of absorbing acoustic waves:
- reflective;
- restrictive;
- absorption;
- resonator.
The reflective circuit is reverse-flow, the rest are direct-flow.
Reflective
If one muffler is installed in a car, then a reflective version is used. It uses the principle of “breaking” the flow of exhaust gases by creating several partitions, expansion chambers and turns. Exhaust volume is reduced to standard levels. For this reason, the vast majority of factory vehicles are equipped with the reflective type.
most popular for factory vehicle configuration
The disadvantage of this type of muffler is the reduction in engine power due to the resistance of the exhaust system to the flow of exhaust gases.
Resonator
A resonator muffler is installed as the first stage in the exhaust system of powerful engines. It consists of a perforated pipe placed in a housing. The body is divided into two or three sections. The energy of the exhaust gases is weakened due to a stepwise reduction in pressure.
installed as the first stage of exhaust energy suppression
The part reduces the force of sound vibrations and maintains engine power with a free flow of exhaust gases.
Restrictive
In restrictive mufflers, the gas flow passes through a diaphragm or cone narrowing, which leads to a decrease in engine power. The acoustic protection of such devices is low, since the diaphragm does not interfere with the rectilinear movement of the sound wave.
Absorption
The damping function for sound vibrations in the absorption muffler is performed by a finely porous non-flammable material located in the space between the perforated pipe and the housing. The design is similar to the resonator type. This type has little effect on power reduction.
Replacing a return flow muffler with a direct flow one with your own hands
When manufacturing a direct flow, it is advisable to use the positive properties of several types of structures.
Reasons for replacing a standard muffler with a direct-flow muffler
Car owners change the factory muffler to a direct flow one for several reasons:
- obtaining an increase in engine power;
- subjective improvement of acoustic parameters of the exhaust;
- increasing the aesthetic parameters of the car;
- complete modernization of the exhaust channel;
- The installed muffler has failed.
Tools and materials for work
A direct-flow muffler is often purchased, but for lovers of tools and an insatiable thirst for creativity, we recommend making it yourself. It is preferable to make parts from stainless steel with a thickness of 0.8–2.0 mm. Select ferrous metal blanks with a thickness of 1.0–1.5 mm for the case, the rest 2.0–4.0 mm to avoid premature burnout of parts, and also use standard blanks. For the body, use a suitable size: a fire extinguisher, a thermos, an empty gas or scuba cylinder.
To fill the muffler chamber, non-flammable porous material or a combination of them is used:
- basalt or other mineral wool;
- fine mesh metal mesh;
- metal mesh for the kitchen;
- metal shavings.
- angle grinder (grinder);
- drill or drilling machine;
- welding machine;
- consumables: metal discs for grinders, drills, electrodes, etc.
Reworking an old muffler
- We dismantle the old muffler, disassemble it using a grinder, leaving the body parts and the inlet pipe. While preserving the partitions, we drill holes in them for the passage of exhaust gases. The cameras further reduce exhaust volume.
We cut out everything that is not needed from the old muffler
We perforate the inner pipe in an accessible way. The diameter of the perforated pipe is equal to the diameter of the inlet pipe or more up to 30%.
a small number of small holes will help preserve the rich bass rumble from the engine when exhausting
Keep in mind that mineral wool fibers will be “blown out” of the chamber faster through large holes and grooves.
Stainless steel helps to increase the service life of parts and mechanisms several times
In the future, the diameter of the inner pipe can be reduced by simple manipulations, but increasing it is disproportionately more difficult.
cut the length of the pipe to the required size
We put metal mesh for the kitchen in place of the perforation of the pipe.
cover the internal perforation with fine-porous non-flammable material
Wrap the kitchen mesh tightly with metal mesh in 1-3 layers. We fix the mesh with annealed steel wire with multiple twists or crimp it with several clamps.
We enhance perforation, reducing its permeability to mineral wool
We coordinate and clean the welding points, weld the perforated pipe into its regular place.
We carry out welding in compliance with all safety rules
We fill all free space inside the muffler tightly with the selected filler.
the presence of several chambers contributes to greater functionality of the muffler
Working with mineral wool requires personal protective equipment.
the absence of a metal mesh between the holes and the wool will lead to a faster “blowing” of the wool out of the muffler
We grab the edge of the “lid” of the body with two or three tacks to avoid displacement and weld the body.
To protect against corrosion and give it an aesthetic appearance, we paint it with heat-resistant paint in your favorite color.
To make the muffler last longer, we drill one or more holes with a diameter of 1.5–2.0 mm in the housing to drain condensate. To determine the lowest point, the car must be horizontal.
Videos about the muffler
There are many videos on the Internet in which the authors inventively and simply demonstrate how to make a direct flow with their own hands.
Video: how to make a straight-through muffler with your own hands
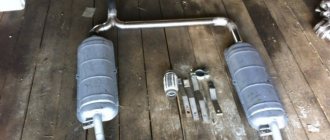
Another clear example of making a muffler from scratch. The straight-through version is made of stainless steel with two exhaust pipes.
Video: how to make a straight-through muffler from stainless steel
Making and installing a flute
The flute (silencer) has more preferable characteristics. It dampens the exhaust pipe clearance much less than a damper. You can buy a flute, knowing the internal diameter of the outlet pipe, or make it yourself. Various silencer designs are shown in the photo.
factory models
Flute mounting options
Possible versions of the flute.
External - for outlet pipe diameters up to 50–60 mm.
method of attaching a flute to a small diameter exhaust pipe
Internal - for large diameters. The diameter of the smaller pipe should be 15–40% smaller than the diameter of the outlet pipe, the length should be from 0.25–0.35 m to 0.50–0.75 m. As a rule, unloading holes are made in it.
a properly designed flute “helps” you ride more quietly
To improve sound insulation of the exhaust, it is possible to wrap the flute with mineral wool. We protect it from blowing out around the perimeter with a fine metal mesh, as we did on a direct-flow muffler. In this case, the loss of engine power will be more noticeable, but the engine will operate more stable than with the throttle closed.
the sound becomes “more pleasant” to the ears of the traffic inspector
Tools and materials for making a flute
Required tools:
- Bulgarian;
- electric drill;
- welding machine;
- spanners.
It is better to choose blanks from stainless steel with a thickness of 0.8–1.2 mm, which guarantees long service life. Blanks made of “ferrous” metals are acceptable with a thickness of 2.0–2.5 mm or less if we plan to use the flute for short periods. As blanks we use two pieces of pipe and sheet metal for the flange.
Making a flute with your own hands
The order of work performed:
- We adjust all parts to the required dimensions. We measure the dimensions of the flange and larger pipe “on site”.
- We drill holes.
the notch divides the gas exhaust into two streams, which reduces the exhaust volume
To further relieve the exhaust system from excess exhaust gas pressure, holes are drilled in the flange.
additional holes allow for a freer exhaust
- We clean it and prepare it for welding.
- We weld the parts ourselves or with the help of a welder and clean the seams.
the flow of exhaust gases is suppressed due to unloading holes and counterflow
To protect against corrosion, we paint the flute with heat-resistant paint.
There is no need to paint stainless steel
We mount the flute on the exhaust pipe and enjoy the sound.
Making your own dual exhaust
If you have the time, materials and necessary technical means, you can make a double exhaust for a VAZ car yourself. You will still have to purchase the main parts of the exhaust system.
However, when manufacturing an exhaust system, you can save significantly, at least on the purchase of parts.
Experienced motorists have long developed two main options for manufacturing double exhaust for VAZs.
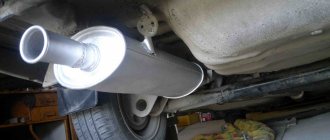
- The first option involves manufacturing an exhaust with different angles of both exhaust pipes. With this option, the second pipe is simply welded from the side into the pipe that comes from the manifold. When the car is idling, the exhaust gases exit the pipes almost uniformly, but at high engine speeds, most of the exhaust exits from a straight pipe that comes from the manifold.
Exhaust with different angles of both exhaust pipes
- A different version of the exhaust system will ensure the same amount of exhaust gases from both pipes. In this case, you need to weld two pipes with the same angles and turns at even angles to the pipe that comes from the collector. This can give the structure a more aesthetic appearance.
Exhaust with equal angles of both exhaust pipes
After choosing your exhaust system design, you need to move on to the next step of installing your own dual exhaust design. When installing a self-made structure, problems may arise with pipes deviating from the location of the old holders. But this is not a big problem, since they can be made and installed independently.
Remember that before installing your own exhaust, it must be wrapped with asbestos cord, which will provide thermal insulation. It is extremely necessary in order to avoid fire, since the fuel system is located dangerously close.
As for the installation process, it is identical to the one mentioned above.
To become more familiar with all the nuances of manufacturing and installing dual exhaust on VAZ cars, we bring to your attention a video with a more detailed description.
Why do they split the exhaust?
A properly designed dual exhaust pipe will provide the owner with the following benefits:
- Increased engine power and torque. The fact is that the level of resistance at the exhaust gas outlet decreases. The exhaust system can be configured as direct-flow or non-direct-flow.
- Change in sound of exhaust gases. At the same time, you can adjust the sound as you wish - make it louder, quieter, softer, lower, or make it “growl”. It all depends on the selected system components and how sound will be absorbed in it.
- Improved appearance. From the side of the bumper, the car will look aesthetically pleasing due to its symmetry. The look is reminiscent of a racing car and can transform even an old Russian model or foreign car for the better. The owner can choose the appearance of the pipes in his own way.
To summarize, a dual exhaust pipe, provided the right design solutions are used, can improve an ordinary car both visually and in performance. With all this, the alteration is considered one of the simplest; the process does not require intervention in other components and mechanisms of the car.
How to make a dual exhaust yourself
I think many of you have at least once noticed that some foreign cars have dual exhausts. Very often such a thing can be found on tuned cars.
However, such tuning of the exhaust system can be done on a regular car. This will only benefit your “iron horse”. Below we will look at how to install a double exhaust on a VAZ with your own hands.
Well, if you decide to install two exhaust pipes on your car, then you will encounter some problems. Namely: how to fix the second exhaust pipe, how to make the correct exhaust distribution for two pipes and how to make such an exhaust system yourself. Since you are far from the first person to decide to make such a tuning, we will rely on those who have already made such modifications. And experienced motorists have come up with 2 options:
The first is to bifurcate the exhaust pipe in the area of the rear beam, namely under it. The diagram is presented below:
The angle of one pipe and the other are different. Therefore, with this method, the exhaust is not distributed quite equally. At idle this is not noticeable, but when the engine speed is high, the exhaust from one pipe comes out noticeably more than from the other.
In the second option, we bifurcate the exhaust system so that the pipes have the same angle. As a result, we will get an even exhaust from one and the other pipe. (In my opinion, this option is more aesthetically pleasing).
Due to the fact that the exhaust system will pass close to the fuel system, the exhaust pipe must be wrapped with asbestos cord for thermal insulation. For the standard pipe, the fastenings remain standard, but for the second one you will have to make the fastenings yourself.
If you don't want to bother making a double muffler, you can just buy a ready-made one. Here we will look at the exhaust system of the Fast and Furious series from NeX. It has 4 83mm chrome tips.
What you will need for installation: regular exhaust system fasteners (a pair of clamps with a metal ring), a pair of muffler pads and a bracket (bracket holder). Below all this and their dimensions are shown in the photo:
What tools do you need to have: a drill with a 1.5 mm drill bit, a 13 mm wrench, a Phillips screwdriver, a pair of 4 mm self-tapping screws.
Direct installation:
Remove the stock muffler. We hang one of the pipes of the new muffler on standard cushions. The input pipe is attached to the resonator with a clamp with a metal ring (do not tighten too much right away).
- Place the second pipe (additional) to the bottom of the car (to the side member) and mark the place for attaching the bracket.
- We drill a couple of holes and fasten the bracket with two self-tapping screws.
- We hang the additional exhaust pipe on the bracket using a cushion.
- We connect the main and additional muffler pipes using a clamp and a metal ring (again, do not tighten too much yet).
Checking the angle of the two exhaust pipes. If they are at the same height from the ground, then tighten the clamps on the input pipe going to the resonator, and on the connection between the main pipe and the additional one.
That's all, the tuning of the exhaust system is complete. It took us a little over 50 minutes to do everything.
Enjoying the sound and the added horses:
https://youtube.com/watch?v=bMzbSCngros
The muffler is an element of the engine exhaust system. Its presence does not depend on the type of fuel the engine runs on - gasoline, diesel fuel or methane. The muffler dampens sound vibrations, helps attenuate, subside and resonantly reduce sound waves from engine exhaust. Interlocutors will not be able to communicate around a running engine without a muffler. The noise of the engine will drown out their speech. Nevertheless, many car owners dream of remaking the exhaust system and making it forward-flowing. Some people can create it with their own hands.
Repair of muffler VAZ 2114/2115
Before replacing the muffler, it is necessary to inspect it for damage. In some cases, you can get by with minor repairs and not spend money on buying a new part. Restoring the performance of the muffler is carried out according to the following algorithm:
- The muffler and weld seams are cleaned with emery cloth.
- The entire part is inspected for cracks, burns, and damage.
- If a defect is detected, use semi-automatic welding and weld the cracks. A metal plate with a thickness of at least 1.5 millimeters can be welded onto the burnout areas. Seal small cracks with high-temperature sealant.
All working areas must be sanded for a better result.
Welding is used if the muffler metal is strong enough. The seams are welded in a thick layer to avoid background and new burnout.
Why is dual exhaust popular?
The bifurcated exhaust of St. Petersburg is in great demand, although it has a greater effect on the aesthetic side than on the performance characteristics of the vehicle. Such car tuning is resorted to for the following reasons:
- The manufacturer does not offer this option by default;
- the desire to give the car the features of a racing car;
- desire to follow automotive fashion.
Many car enthusiasts choose this tuning method simply because of its availability - when they find out how much it costs to bifurcate the exhaust, the decision comes automatically. Intervention in the design is minimal, and the effect is clearly visible. The vehicle owner does not risk driving performance; in return, he receives a visible increase in power, where the effect is created due to the new “sound”.
If you want to get a bifurcated exhaust yourself, you may have questions:
- how to fix the second pipe;
- how to correctly distribute exhaust gases;
- How not to damage the exhaust system.
We will look at all this below.
Hyundai Solaris Fail Project › Logbook › Exhaust. Stage 228
This post will be very voluminous and informative. Lots of photos. Be patient. After the program was sewn up for E2, it was decided to remove the catalyst. Why is it there if the ECU no longer sees it? Now this is an extra node.
Having lit the drive, it became clear that this topic has been described and touched upon quite little. No descriptions of the process or reviews of the consequences of removal as such. And by the way, they are not very small, but more on that later.
Well, OK. Having experience in knocking out a catalyst on a pre-Restayl car, we decided to get down to business. There is nothing complicated about removal and installation. We unscrew the nine nuts from the plate near the block, one bolt securing the can itself to the block and two nuts from the exhaust pipe studs. Accordingly, the heat shield casing and lambda also need to be removed. The lambda can be easily unscrewed with a regular 18mm open-end wrench.
Let's look at the skate. Mileage 4 and a thousand kopecks. Nultsevy.
We take a longer screwdriver and dig the whole thing out from there.
We put everything in place and go test it. The sound of a fart rustling into a tin can appeared. But you can live with this quite calmly and it only appears under load at low speeds or when driving the gas to the floor. Not intrusive, doesn't hurt the ears. You can only hear it if you turn off the music completely. Another side effect appears. The catalyst works as a heat condenser in winter. I turned off the engine, the engine took a long time to release heat, and as a result the engine cooled down slowly. After removing the cathode, the engine cools down much faster. Tested on two machines. I was very surprised that the exhaust does not smell like a catless exhaust. But somehow I didn’t give it any importance.
Binge on butter? He is. But I will not undertake to say that this is precisely from the skate. Perhaps the oil burns away due to frying. I use Petro Canada supreme synthetic 5v30. I won’t say anything about the baby in top hats and the badass. This is an eternal topic and one can argue a lot. And that’s not what this post is about.
There are clearly changes in dynamics. The car rolls easier. At the top I didn’t feel the arrival. But at the bottom and in the middle it is there. Not exactly wah wah, but there.
And now, after a while, riding and thinking that I’m the most fashionable and cool, I find out that there is a second skate. WTF? What x? It can not be. Back then I didn’t know that I would end up with a lot of money and this was just the beginning of the journey.
How to make a split exhaust
Hi all. Today I want to tell you what problems those who want to install a bifurcated exhaust on in-line engines may encounter. The fact is that not only the length and bends of the halves of the exhaust system must be the same, but also the place where the flow is divided must be designed so that the same amount of exhaust gases diverges on both sides.
We encountered this problem when we took on a small project to build a bifurcated exhaust on a Priora.
The highway itself, clearly understood, is simply mirror symmetrical
But what to do with the separator? We solved the problem like this
A simple partition essentially solved this problem. So fans of the same thing should take note;)
There was a lot of other interesting things there, the exhaust had to be routed into the bumper, and therefore a lot of different tricks were used
full report here, enjoy watching
PS: The exhaust is welded from the pipes that the customer brought; internal diameter 50mm; the rear bumper has already been repainted
I had to apply a lot of knowledge and spend just as much effort before I managed to bring my long-standing idea to life, namely, I always dreamed of installing a binary exhaust on my swallow.
I am not an electric welder and have almost no experience, but I welded the structure with my own hands. Well, except that he called his father as an assistant. At the same time, none of us had ever done this before, so we lacked experience.
It took quite a long time to reach the decision to start the business. I spent days and days on various thematic forums, studying photos and videos of craftsmen creating similar elements. I decided to create an equal-length exhaust after the beam. This design will allow exhaust gases to exit synchronously from both sides. Before starting work directly, we had to make hundreds of measurements and calculations.
First, I welded a tee from ordinary bent pipes. It will be located in the center near the fuel filter.
Then, the resulting tee was cut into two parts. In the middle I placed a regular metal plate. This design will allow exhaust gases to enter both banks simultaneously in equal quantities.
Tee divided into parts
Rate what I did. The exhaust gases enter the tee from the resonating device, are divided into equal parts, and here their paths diverge.
Tee operation diagram
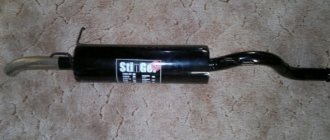
It is worth adding that both cans used are Stinger systems.
Muffler tips
Thanks for subscribing!
The attachments were supplied by Prosport, they had been lying around for a long time and finally they had their time.
That's it, the exhaust is ready.
And so, with my own hands, and with my head, of course, I created such an exhaust. The design does not produce unnecessary sounds, does not tap, does not hum or squeal. So, I did everything as needed. In the future I plan to purchase an updated bumper and counterbore the holes for the muffler tips
I think it will look decent! Thank you for your attention!
Agree, cars that have a dual exhaust system always look very presentable and can indicate the sporting qualities of this vehicle. But what to do if you are the owner of a completely standard, popular VAZ car? The answer is obvious - install a double exhaust on the VAZ 2114.
Today we will look at the pros and cons, and directly touch on the replacement process itself.
Reasons for part failure
The muffler is affected by several different factors that can lead to failure, these are:
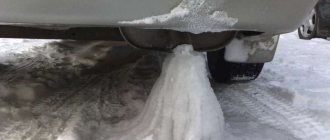
- Atmospheric precipitation, dirt. Precipitation means the occurrence of rain and snow. A mass that periodically falls on a hot pipe causes temperature changes, destroying the strength of the metal. Unfortunately, it will not be possible to protect the muffler in any way; moisture will in any case affect the metal. A smart solution would be to avoid driving through deep puddles and drive slowly on contaminated sections of the road. If the muffler and pipe are dirty, it is necessary to clean it with water (you can use a pressure jet from a hose). After cleaning, it is recommended to start the engine so that any water that has entered the muffler evaporates.
- Condensate. When the unit is idle for a long time, condensation forms in the muffler, causing a corrosive process. This leads to inevitable destruction of the internal parts of the muffler. This happens extremely rarely, but before the trip it is recommended to increase the operating speed by pressing the accelerator several times. The flow of exhaust gases removes moisture from the silencer.
- Chemical influence. As a result of the release of exhaust gas, a lot of toxic chemical particles settle on the walls of the muffler, destroying the metal, and allowing road reagents to get into the muffler.
- Physical influence. Hitting stones and blows from the muffler when driving on roads also lead to a lot of damage.
The chemical and physical effect on the muffler metal is a natural process
It will not be possible to disassemble and clean the muffler, since the container cannot be opened, and only the attention and professionalism of the driver on the road will help protect it from impacts and stones. Diagnosing and eliminating minor damage at the initial stage will help to avoid serious problems in the future.
The influence of various negative factors can lead to damage to the corrugation or other parts of the muffler
Extraneous sounds in the jammer
The causes of various noises and knocks in the muffler can be:
- Fastening the muffler to wire or ties. You should not wrap the muffler on a wire, otherwise rattling and knocking will occur. Use only rubber cushions.
- Foreign objects entering through the exhaust pipe. When driving over rough terrain, deep puddles, or driving in reverse, you should not forget that the exhaust pipe is literally 20 cm from the road surface, which means that various masses and stones can be thrown into the muffler. They often knock and rattle.
- Peeling of burnt metal inside the muffler. As a result of chemical exposure, a layer of soot forms on the walls of the silencer. For this reason, over the years, rattling noises can be heard inside the muffler due to peeling metal.
- Condensation also affects the exhaust sound. Condensation forms as a result of prolonged idling while the engine warms up. Ringing and gurgling are signs of accumulated moisture in the muffler. By increasing the speed several times, the condensate comes out and the signs of the malfunction disappear.
These points are possible factors influencing the exhaust sound of a muffler and are considered the most common.
Repairing and replacing the muffler on a VAZ 2114/2115 is available to every car enthusiast; the only question is confidence and time. It is easy to replace an old part with a new one if you have the tools at hand, but it is recommended to entrust the troubleshooting of the muffler to professionals. Any auto repair shop does this type of work. For little money and a short period of time, your muffler will be repaired. Remember, prevention is a reliable method of treatment!
Dual Exhaust Installation Steps
- First of all, you need to remove the old muffler.
- Afterwards, you should hang the right part of the new muffler on the right side of the car (previously placed on a lift), while using the existing cushions. In this case, the left part does not need to be fastened; you just need to connect the muffler to the resonator using a clamp and seals.
- Next, you need to connect the left part of the muffler to the main part through the pipes. In this case, it is necessary to take into account the location of the fastening rod, and it is also necessary to calculate the place where the holders in the form of brackets will be placed.
- It is necessary to use a drill to make two holes with a diameter of 1.5 mm in the spar. These holes can attach a holder, which is screwed with self-tapping screws.
- The completed operations allow you to move on to attaching the main left part. Fastening is carried out by inserting the muffler cushion directly into the bracket-shaped holder; the exhaust rod is also inserted into the cushion.
- The opposite side of the muffler is secured using O-ring clamps. This fastening should not be too tight.
- All the work done allows us to move on to the process of adjusting and establishing symmetry between the two exhaust pipe tips. Initially, loosely tightening the connections will allow the installation to be fine-tuned.
Workflow Stages
Types of Dual Homemade Silencers
Let's consider the simplest and low-budget method of installing a dual exhaust on a Lada Priora with the installation of outlets from the muffler pipe under the rear beam of the car. Note that here you can choose one of two options:
Distribution of pipes of different lengths with welding of branches to the main muffler.
This is interesting: Marks on a driver's license
Two pipes of different lengths are welded to the main muffler pipe
Welding two pipes with similar lengths, angles and number of turns to the main muffler pipe.
Two identical pipes are welded to the muffler pipe. Remember that different pipe lengths, although they affect the amount of gases released (this will be especially noticeable at high engine speeds), do not affect the operation of the engine itself.
Preparing for work: tools and materials
To carry out a full cycle of work, we will need to prepare a set of simple tools and a number of inexpensive materials:
- wrench (socket, open-end, socket) to “13”;
- electric drill with 1.5 mm drill;
- Phillips screwdriver;
- self-tapping screw 4 mm - 2 pcs.;
- standard exhaust system fasteners (clamp + ring);
- muffler cushion - 2 pcs.;
- fastening bracket (holder - bracket).
Clamp with O-ring, homemade bracket, muffler cushion
At the preparatory stage of work, you need to take the necessary measurements and draw up a simple diagram of the design of the double exhaust. There is simply no universal drawing that would be suitable for each individual project. Professional craftsmen advise taking all measurements at the place of work, transferring the data onto paper in a form convenient for you.
Diagram of a homemade dual exhaust outlet bracket
Note that the exhaust system of the Lada Priora sedan and station wagon differs from the same equipment installed on hatchback cars in the length of the main muffler pipe. Installing a dual exhaust on a car with such a body for the first two modifications will result in the system pipes protruding from under the bumper by 150–160 mm.
How to make it yourself
Let's look at the process of installing a bifurcated muffler using the example of a finished sample - all the steps we performed are suitable for installing any structure of this type. The only nuance that can affect the progress of work will be the possible deviation of the pipes of the independently manufactured system from the fastening elements of the original muffler. However, this is not a problem, since all brackets can be easily made and mounted with your own hands.
We install the car on a lift or inspection hole, prepare all the necessary tools, be patient and get to work:
- We dismantle the original main muffler by disconnecting the clamp at the point of its attachment to the resonator (additional muffler).
- We will hang the right part of the new structure on its seat, installing it on the existing cushions (replacing them in case of critical wear).
We do not attach the left side of the muffler yet, but only connect the common terminal of the dual exhaust to the resonator, slightly “baiting” the clamp and the O-ring. Installation of a part of the structure on the seat of the original muffler - Let's attach the left bend to the side member on the bottom of the car, mark the attachment point of the bracket-bracket.
Left part of the structure, mounting bracket and muffler cushion - Using a drill, drill two holes and securely fasten the bracket with self-tapping screws.
Preparing holes for installing the bracket-holder - We hang the muffler outlet on the bracket using a fastening rod, after inserting the cushion into the holder bracket.
Installing an additional muffler outlet - In our case, the elements of the dual exhaust need to be connected to each other using a clamp with O-rings (do not tighten too much).
We exclude this stage of work when installing a solid structure. Connecting the branches to each other using a clamp - It remains to check the angle of the dual exhaust outlets relative to the ground. After making sure that they are at the same level, tightly tighten the clamps at the junction of the inlet pipe with the resonator and at the junction of the two pipes (if such an element is in the design).
This is interesting: Kia Sportage: the best is the friend of the good
Checking the angle of the taps relative to the ground
Symptoms
How to check whether your muffler is burnt out or not? It's very easy to do. If the muffler burns out, you will immediately hear a characteristic exhaust noise. It will become louder and more obnoxious. Sometimes accompanied by sharp pops. Also in winter, we may notice smoke coming from under the bottom of the car. These gases can also penetrate into the cabin, making the ride uncomfortable (and simply harmful to health). Another sign is a decrease in engine power. Opinions are divided regarding fuel consumption. For some, the figure remains stable with a burnt-out engine, for others it increases by 1-2 liters. Therefore, the most basic symptom is increased exhaust noise.
Work order
Routing a muffler on both sides is a serious job that does not tolerate mistakes. Very often, inexperienced craftsmen choose a pipe of the wrong diameter. This leads to disruption of the exhaust system, which leads to problems with the engine. If you do not want to face such a situation, then entrust your car to the RamFlow specialists. Our specialists will split the exhaust system of any car. Work includes:
- exhaust system diagnostics;
- selection of the optimal wiring diagram;
- performing calculations to prevent possible negative consequences;
- selection of a new muffler;
- exhaust system wiring;
- final testing to eliminate problems;
- registration of guarantee.
Dividing the exhaust system into two sides in RamFlow is a guarantee that the work will be done competently, quickly and professionally. The cost depends on the complexity. Prices from 12,000 to 40,000 rubles.
What to choose?
There are several options for muffling devices that can be used as a replacement for the old element on the VAZ 2114.
- From the factory, VAZ vehicles are equipped with an aluminum muffler, the service life of which is up to 6 years. Inexpensive, fairly reliable solution.
- More expensive variations made of heat-resistant stainless steel. They cost more than factory ones, but are distinguished by reliability and an extended service life of up to 10-15 years.
Unfortunately, it is not uncommon that replacing a given device does not give the expected result, because instead of the expected high-quality stainless steel element, buyers are faced with counterfeits. They are made from ordinary low grade black iron. The service life of such products is no more than a year.
To give the appearance of expensive products, low-quality mufflers are coated with special paints. Therefore, we recommend purchasing parts from trusted, certified auto parts stores.
Workflow Stages
Types of Dual Homemade Silencers
Let's consider the simplest and low-budget method of installing a dual exhaust on a Lada Priora with the installation of outlets from the muffler pipe under the rear beam of the car. Note that here you can choose one of two options:
Distribution of pipes of different lengths with welding of branches to the main muffler.
This is interesting: Rating of the most stolen cars in Moscow for 2017-2018
Welding two pipes with similar lengths, angles and number of turns to the main muffler pipe.
Preparing for work: tools and materials
To carry out a full cycle of work, we will need to prepare a set of simple tools and a number of inexpensive materials:
- wrench (socket, open-end, socket) to “13”;
- electric drill with 1.5 mm drill;
- Phillips screwdriver;
- self-tapping screw 4 mm - 2 pcs.;
- standard exhaust system fasteners (clamp + ring);
- muffler cushion - 2 pcs.;
- fastening bracket (holder - bracket).
Clamp with O-ring, homemade bracket, muffler cushion
At the preparatory stage of work, you need to take the necessary measurements and draw up a simple diagram of the design of the double exhaust. There is simply no universal drawing that would be suitable for each individual project. Professional craftsmen advise taking all measurements at the place of work, transferring the data onto paper in a form convenient for you.
Note that the exhaust system of the Lada Priora sedan and station wagon differs from the same equipment installed on hatchback cars in the length of the main muffler pipe. Installing a dual exhaust on a car with such a body for the first two modifications will result in the system pipes protruding from under the bumper by 150–160 mm.
How to make it yourself
Let's look at the process of installing a bifurcated muffler using the example of a finished sample - all the steps we performed are suitable for installing any structure of this type. The only nuance that can affect the progress of work will be the possible deviation of the pipes of the independently manufactured system from the fastening elements of the original muffler. However, this is not a problem, since all brackets can be easily made and mounted with your own hands.
We install the car on a lift or inspection hole, prepare all the necessary tools, be patient and get to work:
- We dismantle the original main muffler by disconnecting the clamp at the point of its attachment to the resonator (additional muffler).
- We will hang the right part of the new structure on its seat, installing it on the existing cushions (replacing them in case of critical wear).
We do not attach the left side of the muffler yet, but only connect the common terminal of the dual exhaust to the resonator, slightly “baiting” the clamp and the O-ring. Installation of a part of the structure on the seat of the original muffler - Let's attach the left bend to the side member on the bottom of the car, mark the attachment point of the bracket-bracket.
Left part of the structure, mounting bracket and muffler cushion - Using a drill, drill two holes and securely fasten the bracket with self-tapping screws.
Preparing holes for installing the bracket-holder - We hang the muffler outlet on the bracket using a fastening rod, after inserting the cushion into the holder bracket.
Installing an additional muffler outlet - In our case, the elements of the dual exhaust need to be connected to each other using a clamp with O-rings (do not tighten too much).
We exclude this stage of work when installing a solid structure. Connecting the branches to each other using a clamp - It remains to check the angle of the dual exhaust outlets relative to the ground. After making sure that they are at the same level, tightly tighten the clamps at the junction of the inlet pipe with the resonator and at the junction of the two pipes (if such an element is in the design).
This is interesting: Checking ventilation and air conditioning systems
Replacement
If you realize that the muffler has already served its purpose and needs to be replaced, be sure to carry out a number of preparatory measures.
Paying attention to the signs of breakdown that appear, check what exactly the fault is and where it occurred. Buy a new device to replace the old one. Be sure to make sure in the store that you bought a genuine product and not a fake. Buy new mounting pads made of rubber
Even if the old ones are in satisfactory condition. Under the influence of temperature and exhaust gases, rubber cushions quickly lose their characteristics. Therefore, it is not worth taking risks. Additionally, buy a metalgraphite ring. It is mounted at the place where the muffler pipe is connected, directly under the clamp. This is done to ensure better tightness. Having a complete repair kit is a very useful thing.
The preparation is complete, so you can start dismantling the old one and installing the new one:
- Place the car in the pit;
- Prepare for dismantling the clamp that connects the resonator and the muffler pipe. To do this, the two mounting bolts are cleaned with a wire brush, and the nuts are treated with the almighty WD40. If you don't have it, get some brake fluid or a rust remover. This is a problem area that makes removal difficult;
- Using two 13mm wrenches, remove the two nuts that hold the clamp;
- If all the manipulations carried out did not produce results, the fasteners will have to be cut off with a grinder. It is not difficult. Replace the clamp with a new one, of course;
- After dismantling the clamp, remove the o-ring made of metal;
- Disconnect the muffler pipe from the resonator;
- Now you can easily remove the muffler itself;
- Installation of a new exhaust system element is carried out in the reverse order;
- Be sure to lubricate the gasket ring. Moreover, it must be a special sealant for exhaust gases. This way the tightness of the connection will be at the maximum level.
How to choose muffler tuning
There are no specific rules for choosing. Here you need to build on your personal desires and preferences, and also take into account the characteristics of the car itself. If your car belongs to a series of sports cars, then adding sonority to it is simply necessary. And if you are not a fan of organizing races and taking part in them, then you can focus on the appearance by tuning the muffler
. Today in auto stores you can find many attachments for this part, having a variety of shapes and colors. And if you have problems with the choice, and you are simply lost among the abundance of tuning products on offer, you can always contact our specialists, who will definitely help you with your choice, you can try on the attachments directly on your car.
Causes of malfunction
Why does this element fail? There are several reasons for this. Firstly, the muffler constantly heats up to high temperatures. Heating can reach 350 degrees Celsius or more. As a result, the aluminum-coated paint applied at the factory simply fades away. The muffler is also susceptible to corrosion. It is located in the area of the wheel arches, from where dirt and water constantly flow. Even installing fender liners doesn't help the situation. There may also be external deformations. You need to be careful on steep descents and climbs (especially if you have a lowered suspension). The muffler is the lowest point in the rear of the body, which is easily subject to impacts. In addition, the gases themselves create a destructive effect. The muffler vibrates when the engine is running. This also affects its resource. In order to somehow provide it with free movement, the design includes rubber cushions.
Taken together, all these reasons cause the muffler to burn out or crumble its walls. The rubber cushions also wear out and the mounting bolts break.
Composition of the output unit
The exhaust system for a VAZ 2110 car consists of the following elements:
- Exhaust manifold;
- Lambda probe;
- Receiving type pipes;
- Neutralizer;
- Two mufflers: main type and additional.
Not all exhaust components are disassembled; some parts, such as the converter, as well as both mufflers, are replaced entirely.
Exhaust system of VAZ 2110
Description of individual components
To make the structure of such an element as the discharge system clearer, it is necessary to give a detailed description of all components:
- Neutralizer. A unit designed for effective purification and suppression of emissions of harmful substances into the environment. When driving, a car produces substances such as non-combustible hydrocarbons, oxide compounds of nitrogen and carbon. The work of this system is aimed at eliminating them. The design itself is a combination of two ceramic-type components. The surface of these components is coated with special afterburning catalysts, which include rhodium, palladium and platinum. These substances make it possible to purify exhaust gases emitted into the environment by almost 100%;
- Lambda probe. It is a special sensor whose task is to control the composition and amount of fuel that enters the engine. The lambda probe thereby controls the purifier. If the lambda probe does not work properly, then the entire output assembly will quickly become unusable, after which it will have to be replaced;
- Reception pipe. Designed for forced removal of exhaust gases from the cylinders of a power unit. The pipe is made of stainless steel, and its fastening to the collector is carried out using special pins, of which there are four in total. The studs guarantee reliable fastening of the two outlet pipes and the element. In order to combine the exhaust pipe and the neutralizer, as well as an additional muffler, hinged fasteners are used;
- An exhaust manifold. A component that is cast from pure cast iron. The manifold is secured with four studs in the exhaust pipe. Heat-resistant gaskets reinforced with metal are installed between the manifold and cylinder heads.
- Silencers. Necessary for effectively suppressing the exhaust rate of burnt gases. This is necessary in order to significantly reduce the noise level in a type of transport such as the VAZ 2110. The distribution device in this part of the unit is carried out as follows: the additional one is followed by the main one. These two components are connected to each other by clamps and sealing rings and are covered with a special casing on top.
Nuances of operation
There are some points that need to be taken into account when operating the VAZ 2110 system:
- Under no circumstances should the vehicle be refueled with leaded fuel, as this will cause damage. It is very sensitive to lead compounds;
- When operating a VAZ 2110 car, you also need to monitor the proper, precise operation of the ignition, since its poor-quality operation leads to the neutralizing part being removed from its working condition. Fuel that does not burn when a spark passes during ignition enters the converter and burns out there. For this reason, the ceramic coating of the component quickly deteriorates;
- Frequent malfunctions will sooner or later lead to complete or partial blockage of the output system, in turn to the failure of the engine and its repair or replacement will be required.
Silencer - purpose, device, operation
An important element of the exhaust system is the muffler; operating a car without it is impossible. As a rule, the muffler is located at the rear of the vehicle and, in conjunction with the exhaust system, serves to remove harmful gases from the engine, bypassing the vehicle interior.
Car mufflers are made from stainless, aluminized and regular black steel. Stainless steel “silencers” are practically not available for sale due to their high cost and long service life (their service life is 10–15 years). Aluminized mufflers are installed on VAZ 2114/2115. They are common in the domestic and European markets (service life 3–7 years). Regular black steel mufflers are cheap substitutes and last only a few months, so are rarely used.
What is a “glushak” for?
Main functions of the muffler:
- reduction of noise during fuel processing;
- reduction in the rate of gas release and their temperature.
The muffler is attached with special rubber pads to curved metal hooks, softening vibrations from the car exhaust
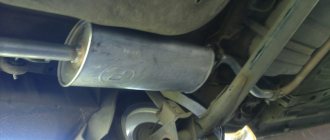
All elements of the exhaust system are exposed to high temperatures, so the coating (anti-corrosion paint, mastic) that is applied to the muffler burns out. The exhaust system of the VAZ 2114/2115 is mounted under the body on the bottom of the car.
The resonator is an important part of the exhaust system; it directly affects engine power. The faster the exhaust gas is removed from the resonator, the faster and more power the car develops.
The design of the pipe consists of all the necessary elements, therefore, when exhausted, the exhaust gas is correctly distributed throughout the exhaust pipe
The muffler on the VAZ 2114/2115 is attached to the bottom of the car with special rubber bands, clinging to flat hooks on the side and top. Why is an elastic band used, and, say, not a metal fastener?
For the VAZ 2114/2115, the muffler is a volumetric sealed metal chamber, divided inside by various partitions. The entire exhaust gas flow passes through the muffler sections and is finally extinguished and cleaned. If you look at the muffler diagram, it will look almost the same on all cars.
The principle of removing exhaust gases from a car muffler