Lighting devices (optics) of the VAZ 2110 are of great importance when driving outside the city or even in the city itself behind any car, in some cases it does not lead to anything good, because the front cars are a very high source of danger, since when driving For example, on gravel at high speed, the front car can cause good damage to the rear one, since all the stones from under the wheels will fly into the rear moving car and thus they can damage the hood, radiator grille, headlights, fog lights of the car that is driving behind and after that You will have to change some parts.
In today's article we will talk to you about when it is necessary to replace headlights 2110-2112, which optics are better to choose and how to replace the low and high beam lamps with your own hands
Design and arrangement of lighting devices VAZ 2110 – 2112
The car uses two block headlights, in which reflectors for high and low beam lamps are installed in a single housing. For high and low beams, single-filament halogen lamps AKG12-55-2 (H1) with a power of 55 W are used. In the low beam sections, A12-5-2 (W5W) front side light lamps are additionally installed. Headlight units from different manufacturers may differ in the design of the low beam section. The vehicle must have headlights of the same design. The headlights are turned on by a switch installed on the instrument panel trim. The high and low beam headlight lamps only light up when the ignition is on. When the ignition is turned off, only the side light lamps can light in the headlights. The headlights are switched from high beam to low beam using the left steering column switch lever
Diagram for switching on headlights on a VAZ 2110, VAZ 2111, VAZ 2112: 1 – left headlight; 2 – right headlight; 3, 7 – to power supplies; 4 – mounting block of fuses and relays; 5 – headlight switch; 6 – external lighting switch; 8 – relay for turning on fog lights; 9 – to the mounting block (block Ш1, pin 6); 10, 11 – rear fog lamps; 12 – control lamp for fog lights; 13 – fog lamp switch; 14 – ignition switch; 15 – high beam indicator lamp; K4 – headlight low beam relay; K5 – headlight high beam relay
To adjust the direction of the low beam beam, there are two screws with plastic handles on the rear wall of each headlamp unit. The screws allow you to change the direction of the light beam in the horizontal and vertical planes. The headlights are equipped with a hydraulic luminous flux direction corrector, which allows you to change the vertical direction of the light beam from the passenger compartment in accordance with the vehicle load. Some cars are equipped with fog lights, which are mounted in the niches of the front bumper. The fog lamp switch is installed in the instrument panel trim on the left side. When the fog lights are turned on, the warning lamp located next to the switch lights up. The headlights can be equipped with lamps of the type AKG 12-55-2 (HI) or AKG 12-55-1 (NZ). The relay for turning on the fog lights is installed in the mounting block.
Diagram for switching on fog lights on a VAZ 2110, VAZ 2111, VAZ 2112: 1 – Fog lights; 2 – control lamp for turning on fog lights; 3 – relay for turning on fog lights; 4, 7 – to power supplies; 5 – mounting block of fuses and relays; 6 – external lighting switch; 8 – to the light switch; 9 – fog light switch
On a car not equipped with fog lights, their installations are covered with plastic plugs. The front direction indicators are mounted on the outer sides of the headlight units. They are equipped with lamps of type A12-21-4 (PY21W) with orange light bulbs. Turn signals are duplicated by side turn indicators (repeaters) mounted on the front fenders. The side turn signals have baseless lamps. Moreover, if the lantern’s diffuser is orange, then lamps of type A12-5-2 (W5W) are used, and if the diffuser is colorless, then with an orange bulb of type A12-5-3 (WY5W). The turn indicators are activated by the left steering column switch.
Scheme for switching on external lighting on a VAZ 2110, VAZ 2111, VAZ 2112 car: 1 – side light lamps in the headlights; 2, 6 – to power supplies; 3 – mounting block of fuses and relays; 4 – external lighting switch; 5 – ignition switch; 7 – indicator lamp for external lighting; 8 – side light lamps for rear lights; 7 – brake signal lamps; 9 – license plate lights; 10 – instrument lighting switch; 11 – to instrument lighting lamps; 13 – brake light switch; 14 – display unit of the on-board control system; K1 – lamp health monitoring relay
The VAZ 2110 with a sedan body and the VAZ 2112 with a hatchback body are equipped with combined rear lights, which consist of two parts. One part is the external light, installed in the rear fender niche and consists of two sections: the upper - the turn signal section with the A12-21-3 (P21W) lamp and the lower - the side and fog light sections. There are two lamps installed in the lower section: A12-21-3 (P21W) and A12-4-1 (T4W). The other part is the internal light, installed on the lid (or door) of the luggage compartment and also consists of two sections: a reversing light section with a colorless lens and a brake signal section with a red lens. Both sections are equipped with the same type of lamps - A12-21-3 (P21W).
Diagram for switching on direction indicators and hazard warning lights on a VAZ 2110, VAZ 2111, VAZ 2112: 1, 2 – direction indicator lamps in the headlight unit; 3, 6 – to power supplies; 4 – mounting block of fuses and relays; 5 – ignition switch; 7 – alarm switch; 8 – left side direction indicator; 9, 10 – direction indicator lamps for rear lights; 12 – left steering column switch; 13 – indicator lamps for direction indicators; KZ – relay-interrupter for turn signals and hazard warning lights
On a VAZ 2111 station wagon, the interior light also consists of two sections with A12-21-3 (P21W) lamps, but instead of the brake signal section there is a fog light section. The external lamp has three sections: the upper one - side light with lamp A12-10 (R10W); middle – brake signal; the lower one is the turn indicator. The two lower sections contain the same type of lamps A12-21-3 (P21W).
Scheme for turning on the sound signal on a VAZ 2110, VAZ 2111, VAZ 2112 car: 1 – sound signal; 2 – sound signal switch; 3 – mounting block of fuses and relays; 4 – cooling system fan wire block; 5 – to power supplies
A lighting lamp is installed on the ceiling of the cabin. It turns on automatically when you open any of the side doors using limit switches installed in the door openings, or forcibly when you press the lamp diffuser. An AC12-5-1 (C5W) type lamp is installed in the interior lighting lamp. The same lamps are used in license plate lamps, glove box and luggage compartment lamps. The license plate is illuminated by two lamps.
The license plate lamps and luggage compartment lamps light up when the side lights are turned on. The luggage compartment lamp can be turned off forcibly, for which there is a switch on the lamp itself. The glove box light comes on when the ignition is on and the glove box lid is open.
Adjustment algorithm
We sequentially perform the following:
- Cover the right headlight with cardboard or other material that does not transmit light;
- Turn the hydraulic corrector to the first position (I);
- Open the hood, find the screws used for adjustment, and turn them. At the same time, if the left headlight is adjusted, then it will be correct if its light at the top reaches the line N, and at the bottom – P;
- Having adjusted one, the adjustment of the other begins, closing the previous one.
Remember, if the headlights shine too low, they need to be raised, otherwise you may not notice the pedestrian in time, especially if there is slush on the street and he is wearing black clothes. If the light is set high, that is, you deign to raise them high, oncoming drivers will not thank you because you will blind them. Therefore, do-it-yourself adjustment on the VAZ must be done very carefully.
Reasons for replacing headlights on VAZ 2110 – 2112
The VAZ 2110 -2112 model's lighting devices periodically break down - there is no low beam, insufficient brightness, or the lights simply do not light.
After several years of operation, car enthusiasts note the failure of the standard hydraulic corrector for factory optics. This is due to sudden sub-zero temperature changes and poor quality of device seals.
Correctors lose working fluid and need to be replaced. In rare cases - less than 10% - there is a factory defect in the standard dampers and block.
A complete description of the process of adjusting car headlights
Undoubtedly, it is better to entrust the adjustment of headlights to specialists working at a service station. However, the disadvantage of this option is that for this process, like for one or another, you need to pay a set amount of money. But there is also an advantage of this method - service station workers have professional equipment that will allow you to efficiently and correctly adjust the operation of your car’s headlights.
If you do not have the necessary funds or want to save money on this procedure, you can make the adjustment yourself. Below are the steps required for this process.
Preparing the car. In order to correctly set the signal lights, the vehicle, in any case, is subject to basic preparation, which consists of several simple steps. First, you need to clean the head optics from stains and dirt, and then walk over them with a dry, clean rag. The surface of reflectors and lenses must be free of defects, as they impede the correct formation of the light flux. The tires must have the same pressure and size, which can be found in the vehicle's operating instructions, as well as tips and recommendations from the manufacturer. You will need to fill the fuel tank with a special mixture at least 50%. Also, the weight of the car should be the same as during its daily use.
However, care must be taken to ensure that there is no overload on any axis.
Organization of the site.
It is necessary to find and prepare a perfectly flat horizontal area for the car so that the adjustment process can be carried out accurately. To provide auxiliary fixation of the car, it is necessary to add wheel chocks (chocks) under the wheels.
Preparing the main screen.
A flat wall would be ideal for placing a car headlight adjustment circuit, but a garage door or a sheet of plywood would also work great.
How to install the corrector adjustment circuit yourself
- It is necessary to drive the car close to the wall;
- The center of the machine itself is marked on the wall;
- Then two points mark the central axis of each lamp;
- Having driven a car away from the screen at a distance of 7.5 meters, through three given points it is necessary to draw three vertical lines, let’s call them “A”, “O”, “B”;
- Then draw a horizontal line on the wall numbered “1”, which will connect the center points of the lamps;
- The horizontal line numbered “2” will be located 5-7.5 cm below the first;
- The points marked with the letter “E” show the intersection of lines “B” and “A” with the straight line numbered “2”.
Adjusting car headlights.
We have now reached a key stage in our process. Despite the apparent complexity of this action, this is one of the simplest stages, even for those who are encountering this for the first time. So, the list of necessary actions:
- First, turn on the low beam;
- One of the headlights must be covered with some dense material or something similar that you have in your arsenal;
- To adjust the luminous flux so that the point located in the center of the upper border coincides with the points marked with the letter “E” in our diagram, you need to use the adjusting screws, they are usually located on the inside of the headlights;
- The other headlight is adjusted in the same way.
From all of the above, we can conclude that adjusting the headlight with your own hands is a simple process; this procedure does not require special equipment and it will not take much time; even a novice driver can handle it.
Selection of lighting fixtures VAZ 2110 – 2112
Drivers, first of all, always need a good low beam. Kirzhach headlights are equipped with a lens for low beam and, accordingly, a reflector for high beam. Bosch uses reflectors in both cases. Unlike a reflector, the lens has a much clearer light line; in addition, Kirzhach lighting devices can be legally “equipped” with xenon, which is not provided for Bosch.
However, if we compare the results of the review of experts and the opinions of car owners, it is worth noting that they are somewhat different. “Bosch” headlights have weak flare from the side in the low beam, but besides this, they are the ones that cause preference. In addition, they have a large surface for low beam due to the reflector. This has the best effect on the quality of automobile road lighting in cloudy weather.
In order for lighting to be as productive as possible at night, choosing high-quality optics is not enough. The headlights should be adjusted correctly, and the glass should be clean (the glass should be secured with a sealant, but on Bosch they are held on by sealants. This makes the process of replacing glass easier). However, the best option would be to use bright halogen lamps for car lighting.
Necessary tool
Headlight VAZ-2110.
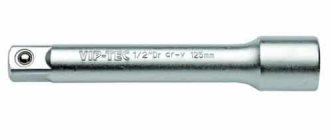
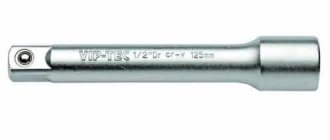
To begin with, you should understand that you will need structural knowledge of the car. To remove a headlight from a VAZ-2110, a motorist needs to assemble a set of tools, namely a 10mm wrench and a ratchet with an extended head.
Before work, the headlight must be washed to prevent dirt from getting inside.
Replacing low and high beam lamps VAZ 2110 -2112
Before you start, you should definitely know some nuances that relate to light lighting in a car, namely, the low beam lamp and the high beam lamp are absolutely identical, so if you come to the store and hear the answer: “Do you want a low beam lamp or a high beam lamp? “, then in this case, explain to the seller or leave the store, because these two lamps are installed identically from the factory on these models, namely, the lamps are installed only “H1”!
Disassembling the headlight and removing the Bosh glass - do it yourself
- The glass on a Bosch headlight is very easy to remove, since it is not sealed with sealant. Unfasten the headlight latches.
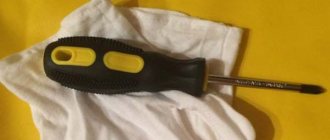
- To remove the reflector, you need to unscrew the adjustment screws and pull out the cap that covers the low beam bulb; to do this, pry it off with a screwdriver from the other side.
- You have to adjust the headlight beam quite often, especially on station wagons, when the car trunk is heavily loaded and the light is directed into the eyes of oncoming drivers. If at one point you notice that the reflector has fallen and the light adjustment does not work, then you can try to repair the 2110 headlight yourself .
Disassembling the headlight and removing the Kirzhach glass - do it yourself
So, the first thing you need to do is remove the glass from the headlight. I consider this stage to be the longest and most dangerous. Dangerous because if you are not careful you can break the glass.
- We insert a screwdriver or knife into the edge of the headlight, between the glass and the plastic block.
- This will create a small gap through which you can insert a utility knife and begin cutting the sealant.
- Be careful, do not rush, do not insert the screwdriver too deeply, otherwise the headlight glass will simply crack.
- We go through the entire perimeter of the headlight with a knife. If the sealant does not yield, you can warm up the headlight with a hairdryer.
- When the sealant has been slightly trimmed around the entire perimeter of the headlight, you can carefully push the screwdriver deeper into the headlight or insert a thicker screwdriver.
- And again we go through the entire contour with a knife. (I played with the first headlight for 2 hours, with the second one less, either I gained experience, or there was less sealant. The second one succumbed to me in half an hour).
- When the glass has completely come off, remove it from the headlight. Be careful, as the glass caught on the chrome plastic inside the headlight. And then it is fastened behind the headlight with three bolts. Therefore, if this happens to you, pry it with a stationery knife so that it comes unstuck from the glass.
- Remove the chrome insert. To do this, unscrew 3 bolts from behind the headlight.
- If you need to remove the headlight module and reflector, then remove the spring through the hole for the hydraulic corrector.
- Now tighten the adjustment screws as much as possible, insert the screwdriver handle and unscrew the adjustment screws.
- Now you can remove the board from the plastic headlight housing
Basic principles
It doesn’t matter what kind of engine the Lada is equipped with - it could be a VAZ 2110 injector or a 2110 carburetor - the basic electrical components in this model will not be different.
Below are the main features that the VAZ 2110 wiring has:
Carburetor models
One of the main points that must be taken into account when replacing a carburetor with an injector is the connection of the fuel pump. In order for the fuel pump to always work correctly, it is necessary to additionally install wiring to power it to the control unit.
Injector
In addition to the fact that the electrical wiring in the carburetor and injection versions is virtually identical, the injector has certain features. For example, it is equipped with fuses, and also in the injection versions of the car there are a larger number of sensors.
In fact, as a result of the fact that these vehicles are equipped with a large number of different sensors designed to provide ECU functionality, the system itself is more complex. It should be noted that carburetor versions do not have an electronic control unit. To repair the system if necessary, you need to clearly know about all its components and their installation locations. The electrical circuit itself in any car is divided into the engine compartment and the interior. Above you can familiarize yourself with the electrical circuit diagram, and below are its main symbols.
How to replace the headlight on a VAZ 2110 - 2112 - step-by-step instructions
In order to replace the headlight on a VAZ 2110 - 2112, do the following:
- At the very beginning of the operation, open the hood of the car and unscrew all the bolts or screws (different everywhere) that secure the radiator grille to the car; for clarity, the grille mounting bolts are indicated in the photo below by arrows:
- After the bolts have been unscrewed, remove the grille from the car and begin unscrewing the bolts securing the headlight unit itself; to do this, take the extension with a cap head in your hand and use it to unscrew the two top and one side bolts securing the headlight unit.
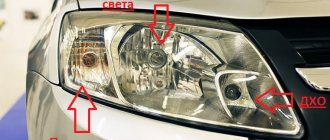
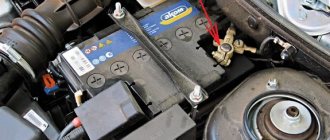
- Then, on the reverse side, find two blocks of wires that are connected to the headlight, one of these blocks is indicated by a red arrow in the photo, but the second one is not visible from the angle, since it is connected to the turn signal and therefore is not visible in the photo because of the body, so after you find both pads and disconnect them, you will have to remove the hydraulic corrector from the headlight (the corrector is indicated by a blue arrow), to do this, press the latch that holds the corrector and then turn it clockwise about 90 degrees, remove it from the hole in which it is located.
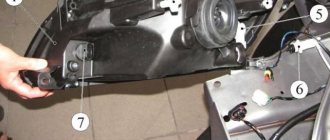
- Now again move to the outside of the headlight block and remove the cover from the block, in order to remove it, grab it with your hand as shown in the main figure below and then move it to the center by about 3-4 centimeters, and after it moves to center to the required distance, press your hand on its lower part and push it further until you completely remove it from the car as shown in the small photo below:
- Next, when the cover of the headlight block is removed, take the extension cord and put the cap on it and then unscrew the last nut that secures the headlight block itself (Indicated by an arrow in the small photo), and when this nut is unscrewed, pull it towards you and thereby completely remove the entire unit from the vehicle.
Disassembly
After removing the device, it can be replaced with a new one, the old one can be repaired, or the optics can be tuned. Here the decision depends entirely on your needs and wishes.
Foggy
Disassembling the headlight unit is not a tricky task. But there are some peculiarities:
- Unscrew the two screws that are responsible for fastening;
- Disengage the two hooks located on the turn signals from the headlights;
- Thus, the optics is disassembled into two components.
Repair
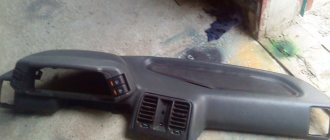
How to remove a torpedo on a VAZ-2110: step-by-step instructions
The design of the headlight is simple; a car enthusiast can easily carry out some types of repairs on his own step by step. Disassembling VAZ lamps:
- Use a knife to remove the glass.
- Use a screwdriver to unscrew the reflector bolts.
- From the rear, remove all the wires and the hydraulic corrector spring.
- Pull it towards you to remove the module.
After 3–5 years, the rear lights, like the front lights, require major repairs or complete replacement. How to replace a VAZ 2110 headlight:
- Disconnect the minus from the battery.
- Unscrew the radiator grille from the car.
- Unscrew the block mounting bolts.
- On the reverse side, find the wire connectors and disconnect them.
- Remove the hydraulic corrector.
- Remove the trim from the outside of the headlight unit.
- Unscrew the block itself and remove it from the car.
You can also repair the hydraulic corrector yourself. The block is a vulnerable part of the head optics of the VAZ 2110. The algorithm is as follows:
- Remove the headlight.
- Take the light bulbs out of it.
- Pull out the glass (secured with sealant).
- Remove the spring from the reflector.
- Remove the reflector.
- Identify the worn part and replace it.
How can you improve your headlights yourself?
Only after the luminous flux has been adjusted can you, with simple modifications, independently improve the illumination of the headlights on your car. Initially, the headlight is removed, and the improvement is carried out in the following sequence:
- The protective glass is removed. To make it easier to remove the protection, it is recommended to heat the glass using a regular hair dryer. A warm air flow will heat the sealant, after which the panel can be easily separated from the headlight using a sharp knife;
- the reflective pad is carefully removed;
- Using the appropriate tool, you need to move the lens approximately 15 mm towards the reflector or slightly shorten the modular ring on a lathe.
Such actions will help not only improve the light of the headlights, but also increase the luminous flux and even make it several times wider. Both adjusting the headlights and improving the luminous flux, as you can see, is a fairly simple process that every car owner can do.
Method one, metallized film
Convenient and inexpensive method. It works almost the same as gluing foil, with the only difference being that you don’t need to use any glue. Everything has already been done before us. The film is sold in rolls or skeins of different widths, and in appearance and in the method of sticking it is very similar to simple adhesive tape. The surface of the reflector must be prepared, and before you can clean the reflector, you must reach it. Along the way, you can process the lampshade from the inside, and also insert an LED into the headlight reflector.
To do this, you need to dismantle the headlight or halogen lamp, and to dismantle the lampshade, you will have to heat the perimeter of the headlight with a hair dryer until the sealant becomes soft and allows you to separate the lampshade from the body. The reflector is thoroughly cleaned and then degreased with solvent or white spirit. It is not easy to make a pattern of complex shapes, and to save time, it is better to glue the tape in place and try to avoid folds. Without them, of course, it won’t work, but there should be a minimum of folds, otherwise the reflector will scatter the light flux anywhere, but not where it’s needed. Pasting with foil is done in the same way, but you need to apply a layer of glue to the surface and do not assemble the headlight until the glue has dried.
Buy or restore
... then in 90% of cases it will have to be replaced with a new one. The point is this. Now we will look at several methods for restoring the surface of a reflector; they are completely different in price, different in labor intensity and in results. But you need to be prepared for the fact that restoring a headlight reflector with your own hands will become just another experience and an attempt to delay the purchase of new optics. It's all about the price.
Restoring the reflector of any headlight in more or less factory conditions will cost at least 1000 rubles, most likely more. New optics, say, for a VAZ 2105 will cost 2,400 rubles. No one can guarantee the result of the restoration, and if the workshop is located in another city, you will have to pay for shipping, in a word, not a penny either. Therefore, the only reliable option for restoring the headlight is to replace it. But if you have, for example, a 1938 GAZ M1, then there is only one thing left to do - restore it.
instructions with photos and videos
Tuning the headlights on your VAZ-2110 with your own hands will not be difficult if you approach this procedure wisely. In this case, the result will please the owner, and his previously unattractive car will look much more modern. The main thing in this matter is to strictly follow the instructions in order to avoid mistakes.
This brand, as a rule, has optics of such types as “Kirzhach” and “Bosch”. The procedure for dismantling old headlights consists of the following steps:
- First you need to disconnect the blocks with wires and remove the upper part from the radiator grille. To do this, take a key of 10.
- After this, you need to remove the boxes with the wires connected to the direction indicators. Immediately after this, the headlight hydraulic corrector is pulled out using a special latch.
- Next, you need to unscrew the headlight mounting bolts and remove the edge from the place where it engages with the wing.
- After completing this work, the headlight of the car is carefully pulled out.
We looked at the procedure for removing a Bosch headlight. Now let’s find out how to remove the Kirzhach optics. This work consists of the following stages:
A flat screwdriver is inserted into the corner of the headlight, as well as a utility knife, which is used to cut off the sealant. If you can’t cut with this tool, you can use a hair dryer;
then we proceed to remove the reflector
This is done like this: unscrew 3 bolts around the perimeter and unfasten 4 latches; then the headlights are carefully removed
As we can see, removing the headlights on a VAZ-2110 car is absolutely easy.
The situation is different with the modernization of optics
It is very important to understand what is suitable in a particular case and what is not. Let's try to understand this issue
Do-it-yourself headlight tuning on a VAZ-2110: tinting
After dismantling the old headlights, it is necessary to remove the spring in the hydraulic corrector hole. Next, the adjusting screw is unscrewed, after which the optics module with reflector is removed. Before you start painting the part, you need to clean it thoroughly. A degreasing primer is suitable for this. It is not advisable to paint with enamel, since the temperature inside the headlight is always very high. In this case, heat-resistant paint is perfect.
It is advisable to carry out the painting procedure itself in a dry room, very carefully, keeping this part at a distance from you
“Angel Eyes” - a new type of tuning
Installing “angel eyes” on a car yourself is not at all difficult. There are several options for this procedure:
- buy finished products;
- make them yourself using LED strip;
- make it yourself using a transparent tube.
As practice shows, it is much better to make “angel eyes” yourself, since stores sell very low-quality and short-lived products. You can buy a ready-made LED strip and glue it to the inside of the optics with special glue or sealant. But it will still be more effective and brighter if you use an LED ring made of a plastic tube.
The work in this case consists of the following stages:
To begin with, the plastic tube is heated using a hair dryer. This must be done so that it bends well. However, you also need to understand that if the product is overheated, it will become deformed.
After this, use pliers to bend the tube around the can, so you get an even circle. When the part has cooled, the edges are sawed off. Resistors and LEDs are assembled using the same circuit
It is important to sand the ends thoroughly. Then, using a hacksaw, notches are made around the perimeter at approximately a distance of 2-2.5 mm
The ends are covered with foil and a special tube. Next, the made ring is attached with glue around the optic lens. It is important that the notches are on the inside.
If you clearly follow the instructions and correctly carry out all stages of the work, the updated headlight will have a very presentable appearance and will be able to last about 7 years without replacement.
Removing glass
Changing glass
The removal procedure depends on the type of flashlight you are dealing with.
Replacing glass on Bosch optics looks quite simple. You need to press the latches, after which the glass can be easily removed.
But when installing a new one, do not forget to look at the condition of the rubber seal. This is a consumable item that is best replaced immediately. Additionally, craftsmen advise using a sealant. This procedure is not mandatory, but it improves the quality of installation and protects the interior of the headlight from the same condensation, for example.
But if you have Kirzhach, we sympathize a little. In this situation, it will be much more difficult to remove the glass. But this does not make the procedure impossible.
- Arm yourself with a flathead screwdriver and insert it into the corner of the glass. This will create a gap of sorts.
- With your other hand, take a sharp utility knife, thereby cutting off the sealant.
- If the sealant has hardened firmly, try heating it with a regular hairdryer. Hurry up with removal, as the composition will quickly harden.
- In any case, you will have to dig deeper into the headlight. Be careful not to damage the glass. If it is already cracked and needs to be replaced, you can resort to more aggressive glass removal methods.
- When installing new glass, use a softer sealant that is used in construction.

