Comments: no Published: 02/13/2016
Rating:
Tags:LADA LargusDaytime running lights
Seeing a car moving on the road in time is one of the main conditions for preserving the lives of pedestrians and motorists. Many countries around the world have included the light designation of a moving vehicle as mandatory in their road safety regulations.
Daytime running lights Lada Largus
Choosing DRLs for Lada Largus
In the case when the Lada Largus is not equipped with DRLs at the factory, they can be installed using two methods:
- Contact a specialized service station.
- Install with your calloused hands.
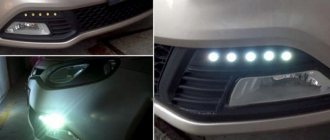
Lada Largus, which was equipped with DRLs
Your choice should be on reliable DRL models. Parts from China will cost less, but European lights will last longer . Here you need to choose depending on your wallet. Experts note that high-quality domestically produced lights are quite difficult to find.
Factory version according to GOST
The most reliable and most expensive! The original kit from dealers will cost at least 5,000 rubles.
It includes:
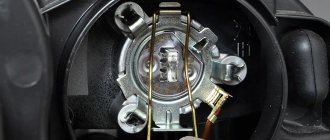
- Lamps for fog lamps (2 pieces).
Replacing standard trims with PTF with DRL - DRL control unit.
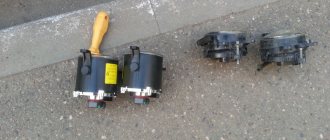
Original DRL control unit
Connection diagram
DRL connection diagram for Largus
Ordinary lamps from CHINA
Option for installing DRL lights in fog lamp covers
The cheapest and most unreliable option. But the cost of 250 rubles is very tempting.
The installation of such DRLs is as simple as possible - they are simple, the positive wire is thrown to the ignition (in the relay), the negative wire is connected to the ground of the car.
The easiest to install DRL option on Largus
Installing factory daytime running lights
If you have at least basic skills and knowledge of the car’s electrical system, then you can do the work of installing DRLs on your own. The work will take no more than an hour.
If the lights were purchased in a store, then installing them will not be difficult. The kit includes instructions for their installation, and therefore all actions should be performed according to the rules described there. If any difficulties arise in this, you should contact the service station.
Algorithm
- We install the DRL ignition unit under the hood.
We carefully attach the ignition unit under the hood - Pull the black wire to ground.
- The yellow wire is “parallel” to the low beam power supply (necessary so that when the low beam is turned on, the DRLs shine at half their power).
- We connect the positive wire to the ignition relay.
For reliability, check the voltage on the block in the relay when turning on the ignition
Homemade daytime lights
Those who do not want to spend money on purchasing factory DRLs can make them themselves, following these recommendations:
- You need to prepare the wires, LED strip and plugs for the headlights.
- The tape should be cut to the required sizes.
- Holes for the strips are drilled on the plug.
- The wires are soldered to the strips.
- The strips themselves are attached to the plugs.
- The wires are being connected in the engine compartment.
- The wires can be connected to the fuel pump relay. In this case, the lights will light up automatically when the ignition is turned on.
DRL connection
How to connect daytime running lights so that they meet GOST requirements? There are many such connection methods. We decided to publish the simplest of them, which uses only one 5-pin relay. The general connection diagram for DRLs is as follows:
It is worth noting that using the connection points from the diagram, all connections are made in the engine compartment; it is not necessary to lay wires into the car interior. Electrical diagrams may also be useful (Lada Priora, Lada Kalina, Lada Granta, Lada Largus)
As a result, the DRL operating mode will be as follows:
- Once the ignition is turned on, the DRLs light up. They continue to light even after the engine is started.
- After turning on the headlights, the DRLs are turned off.
- After switching to low beam, the DRLs are also disabled.
- If you turn off the low beam and side lights, the DRLs light up automatically.
- We turn off the car and take the key out of the ignition - the DRLs go out.
Let us remind you that the easiest way to tune headlights is to install eyelashes.
Keywords: headlights Lada Granta | headlights Lada Kalina | headlights Lada Largus | headlights of Lada Priora | 4x4 headlights | headlights of Lada Vesta | headlights lada xray | external lighting for Lada Granta | external lighting for Lada Kalina | external lighting for Lada Largus | external lighting for Lada Priora | external lighting 4x4 | external lighting for Lada Vesta | external lighting Lada XRAY | Niva headlights | external lighting Niva | universal article
Found an error? Select it and press Ctrl+Enter..
- Does Lada XRAY have a future?
- Installation of calipers from Volga (GAZ 3110) on Lada Priora, Granta and Kalina
- If the power windows of the Lada Largus do not work
- Hidden menu “TEST MODE” on the MediaNav Evolution radio (Lada XRAY)
General requirements for DRL
DRL scheme according to GOST
These elements have special requirements that must comply with GOST, namely:
- The lights should turn on automatically.
- It should be possible to force the lights to turn off.
- DRLs should turn off automatically when you turn on the lights in the car.
- Emitters must have an area of no more than 40 centimeters.
- The light power should not be more than 800cd.
- The light should be white.
- There should be no more than 2 headlights.
Making changes to the car design
When installing running lights yourself, you should also remember that their installation will be considered as making changes to the design of the car. If the car does not have DRLs, then during the daytime you can turn on the low beams or fog lights.
But it is recommended to use daytime lights, since this option is the most rational. If you turn on the lights or fog lights, this will lead to wear and tear on various elements of the car, for example, side lights or instrument panel lights. When switched on, DRLs do not require additional fuel consumption. They can work autonomously and save gasoline.
Do-it-yourself DRL for Lada Largus for 3 rubles 50 kopecks
ElectricsBatteryBattery chargingStarterStarter malfunctionsGenerator - device, checkGenerator - removal and installationInstrument clusterExternal rear view mirrorWindshield washersFront wiper and its motorRear wiper and its motorAdjusting the headlightsReplacing the headlight bulbsReplacing the headlightHeadlight correctorReplacing the fog light bulbReplacing the fog lightP TF in automatic DRLs Side turn signal Replacement of rear light bulbs Replacement of rear light Sound signal Brake light additionalLicense plate lightingInterior lightingGlove box lightingFusesReplacing the radiator fan motorRemoving the driver's airbagRemoving the airbag passenger Removing the airbag control unit Seat heating switch Removing the door speakers Removing the radio Removing the antenna Switching unit Replacing the radiator fan motor Instrument panel wiring harness Rear wiring harness Ignition wiring harness Left cargo door wiring harness Front bumper wiring harness Modifying the engine harness
Experience of car owners (authors: Eduard76 and bademus)
This method is only suitable for those who have fog lights on their Largus. Those who don’t have them will have to think about how to connect a relay to automatically turn on the low beam (relay 719.3777-02 is best suited for this purpose)
So, yesterday I installed a relay on my Largus that turns on the PTF 5 seconds after the car started. They go out immediately after the ignition is turned off.
To do this, I ordered relay 719.3777-01 and a mini-relay adapter for it (that’s what it’s called - adapter for 719.3777-01). Manufactured by Energomash CJSC.
1. Parcel contents
2. I take out the standard PTF relay and put it away until better times
3. I take out the fuel pump relay.
4. I took the red wire with fuse from the box that came with the kit. I removed the fuse, stripped the tip of the wire and bent it a little.
4. I insert a stripped wire with a terminal at the end into the hole in contact No. 1 of the fuel pump relay. You can solder it, but I didn’t, and the voltage from the red control wire to the auto light relay is tiny - 0.5 microAmps.
... I return the relay to its place.
5. Next, I connected the auto light relay to the mini-relay adapter, and installed it all in place of the standard PTF relay and connected the red wires with plugs. All. Looks like that.
Previously I tried connecting this relay through the standard fuses and through the heater fan relay. But these attempts were not crowned with success.
I advise you not to experiment if you don’t understand electrics like me, because... I did everything at random!
5-7 seconds after starting the engine, the PTF lights up, as does their indicator on the dashboard. The PTF (DRL) switches off after turning on the headlights and flipping the switch, first to on. PTF, then to off, and the DRL light goes out.
Instead of xenon, good PTF diode lamps are perfect as DRLs. As a last resort, you can leave the standard lamps, especially since traffic regulations allow driving with fog lights on during the daytime, instead of DRLs! Turning on the side lights during the day is not necessary!
Question: Do the PTFs light up when “+” appears on the red control wire, and when the lights are turned on, do you have to turn off the PTFs manually, forcibly?
Question: What if you need to turn on the low beam together with the PTF?
Answer: No problem! Apart from automatically turning on the PTF, everything else works as normal.
Feedback: Thank you for your work. I ordered the same kit, they upgraded something there, it came with a different adapter. There are only 4 wires at the output (there is no block itself to insert into the socket). In general, in the end, everything is simple - on both relays there is a contact designation: 1235 and in brackets 1 (86) 2 (85) 3 (30) 5 (87) on the standard one and on the purchased one 86.85.30.87. All! It's impossible to make a mistake. We solder our dads and poke them according to the numbers.
Review: Today I received a relay and an adapter (with four separate wires) and did everything in 10 minutes, everything works perfectly. But on the good side, of course, I will have to solder the wiring to the mini block, I’ll buy some cheap mini-relay, cut it out and solder it properly, otherwise it’s not reliable if it’s separate. This is a necessary thing, and of course you can make the adapter yourself. But on the relay that I received there is a clasp that fits well into the groove next to the spare fuses, you just need to work with a file for one minute (whoever installs it will understand) and then nothing will dangle and there is no need to secure it with anything additional. Good luck to all.
A Lada Largus car that is sufficiently marked on the road surface is a guarantee of safety for both pedestrians and other drivers. In most countries, in order to indicate a car moving on the road, special lighting devices called daytime running lights have been regulated. Many car owners are interested in the question of how to install running lights themselves.
What should the owner of the practical Lada Largus do?
This Lada Largus model allows you to identify yourself with the following lighting devices:
- low beam;
- anti-fog lighting devices;
- daytime running lights (when they are structurally present in the car).
From the above list of means, running lights are the most rational solution. This is confirmed by the fact that turned on headlights, fog and side lights waste the life of their own lamps much faster. Also, the switched-on state of these lighting devices encourages the car to consume more fuel. Running lights operate autonomously in relation to the specified lighting devices. Next, we will tell you how to install the lights yourself.
How can a car owner solve this issue?
"Lada Largus" allows you to do this using:
- dipped headlights;
- fog lights;
- daytime running lights (if they are installed on the car).
From this list, we recommend the last option for regular use, as the most rational. The remaining examples are inferior to this solution. When using them, the dashboard lighting elements and side lights come into play additionally and unnecessarily wear out. When switched on, they require additional fuel consumption . Running lights, working independently from other lighting devices, will save fuel. Yes, the reduction in consumption is small, but it is also your money.
Running lights for Lada Largus
Mounting options
If the factory version of the Lada Largus model does not provide for the presence of the designated lighting devices, then when installing them, they usually use two methods:
- apply for the service of a service station, where they can offer the whole range of work, starting with purchase and ending with direct installation;
- install DRLs yourself.
The latter option also contains two solutions:
- installation of a kit purchased from a retail chain;
- installation of self-made DRLs.
Installation options
So, if the Lada Largus is not equipped with this lighting system at the factory, then to resolve the issue of installing it, you can go in two ways:
- Contact a service station, where you will be offered a full range of services - from purchase to installation.
- Install them yourself. In this case, there are also two options: installing a kit purchased in a store or making it yourself. The homemade version will be discussed below. To be able to carry it out, it is necessary that the government regulations in force in the territory of your residence do not contain a ban on making such changes to the Lada Largus car.
If the Lada Largus is equipped with this system at the factory, then try it in motion. Most likely, you will want to replace this lighting equipment with a more efficient one.
Daytime running lights for Lada Largus LED
How to choose equipment?
The owner of the Lada Largus model, as expected, strives to provide his car with the opportunity to stand out in traffic even on a sunny day. For this purpose, you will need sufficiently powerful running lights that can meet the following requirements:
Replacing the cabin filter Lada Largus with air conditioning
- provide a luminous flux in the range of 400 - 800 Cd (this indicator can be achieved using two diffusers with dimensions of 100x20 mm;
- consume current with a force of 1 Ampere and above;
- have a metal case with efficient cooling.
For the Lada Largus model considered here, sets of running lights are manufactured by various manufacturers. The choice may be influenced by the cost of the products. Chinese analogues are cheaper, but cannot surprise you with their quality. European DRLs are much more reliable, but their price can be steep. Self-made options also have a right to exist, but are not always the best choice.
Equipment selection
The Lada Largus car should stand out well on the road during daylight hours, especially on a sunny day. To do this, you need daytime lighting equipment that meets the following requirements:
- emitted light intensity - not less than 400 and not more than 800 Cd;
- dispersion area - more than 40 cm square. This is achieved by two diffusers measuring 10x2 cm;
- current consumption - at least 1 ampere;
- lights in a metal housing with a cooling radiator.
Lada Largus can be equipped with sets of running lights from different manufacturers. Choose according to the thickness of your wallet. China is cheaper, but worse.
Europe is more expensive, but more reliable. It is also very difficult to select high-quality domestic models. Homemade is also an option, but not always the best.
Set of running lights and electrics for them for Lada Largus.
How to install DRL yourself?
If the owner has a minimum amount of knowledge in the field of automotive electrical equipment and the necessary tools, then solving the problem in this case will not take more than two hours of time. To avoid poor quality work, before selecting products and starting installation, we recommend that you familiarize yourself with the basic requirements in detail. Errors that may manifest themselves during the installation of DRLs can cause significant complications, both during road traffic and during the investigation into the causes of an accident (if it occurs).
Installed running lights must be equipped with the following functions:
- the ability to turn on and off when starting and stopping the engine, respectively;
- ability to activate without the use of additional tools;
- automatic deactivation when the head optics are turned on, leaving the possibility of short-term activation to provide a signal on the road;
- compliance with the required geometry after direct installation:
- the distance between these light sources should not exceed 600 mm;
- the same dimensions to the extreme point of the body (width) - no more than 400 mm;
- in height to the road surface, the minimum parameter should be 250 mm, and its maximum value should be 1500 mm.
Having familiarized yourself with these regulatory requirements, you can safely begin installing DRLs on your Lada Largus car yourself.
How to install lighting fixtures with your own hands
With basic knowledge of the Lada Largus electrical system and skills in using plumbing tools, you will solve this issue in no more than an hour.
But before you buy components for Lada Largus and begin installation, study the basic requirements so that the work is not in vain. Mistakes when doing it yourself can lead to complications both while driving and during the investigation after a possible accident.
Mounted daytime running lights of the Lada Largus must provide:
- automatic switching on and off. When the engine starts, the lights turn on, and when the engine turns off, they turn off;
- the ability to turn this function off and on without any additional tool;
- automatic extinguishing when the main light is turned on, except for cases of short-term use of it to provide a light signal to other traffic participants;
- the necessary geometry for installing light sources: between them - at least 600 mm, from the extreme point of the body side - no more than 400 mm, from the road surface - at least 250 mm, maximum - 1500 mm.
Now that you know the basic requirements for the results of the work, you can get started.
Installation methods
Option #1. It provides for the installation of self-made running optics.
Such products can be prepared using the following algorithm:
- we purchase an LED strip that acts as an emitter (we use 4-watt 5050 diodes with a voltage of 12 V or 14 V);
- for placement on the plug, we cut 2 strips, the length of which is 250 mm and 6 strips of shorter length
- 100 mm each;
- Next, we drill holes in the plugs for cable exit, corresponding to the size of the strips themselves;
- carefully solder the wire ends to the edges of the strips (they should be secured using silicone and staples for safety);
- we bring out the specified cables to the back side of the plugs;
- in order to preserve the integrity of the emitters to the maximum, we use a polyvinyl chloride tube (we place the light source itself in it);
- After performing primitive communications, we connect the assembly of the resulting circuit with the fuel pump relay.
This solution allows you to have the ability to turn on and off the running lights depending on whether the engine is starting or stopping.
At this point, the process of manufacturing and installation of this equipment can be considered complete. As you can see, do-it-yourself DRLs are not that difficult.
Option No. 2 – use of original running lights used for Lada Largus.
Such options include conventional LED lamps, which have become an affordable product for every owner. Here you can also do without the help of a corresponding workshop, because the procedure for replacing lamps is quite primitive. Be careful when purchasing, as the color tone of the emitted light must be identical from both sources (mandatory requirement).
Option No. 3 – installation of a kit purchased from a retailer.
At first glance, it may seem that the procedure is endowed with a minimum of complexity. Proceed in accordance with the instructions. Before starting manipulations, you will need to weigh the level of your knowledge in the field of electrical equipment of the Lada Largus model. If you lack confidence in your own capabilities, then contact service specialists.


