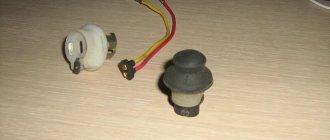
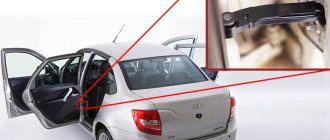
The Lada Granta Liftback car in the “Standard” configuration is equipped with only one limit switch at the driver’s door. The remaining three doors have built-in rubber plugs.
The “Norma” configuration has a similar arrangement, but the owner can additionally install limit switches on the Grant Liftback independently. To do this, first remove the decorative inserts on the thresholds. Only the “Lux” configuration provides a full set of functional limit switches for four doors.
The operating principle is as follows:
- when the driver's door is activated, the limit switch contacts open, the indicator on the dashboard lights up, and the interior lighting turns on;
- When the remaining three doors are activated, only the interior lamp lights up.
Characteristics of door limit switches Grants
Apart from the driver's side, there are no door limit switches on the Lada Granta in other opening structures. There aren't even any buttons or standard wiring. The operation of these mechanisms determines the activation of the door open lamp, which lights up on the dashboard. Moreover, the interior light and car alarm react to the actions of the driver or passenger. The average cost of limit switches starts from 150 to 200 rubles. Article 1118-3710199 is the original number and its price is lower than its analogues. The Lada Granta has this device, but it all depends on the modification:
- The “Norma” package implies the installation of this device in all door structures.
- The “Standard” package does not imply the presence of limit switches on the seats. There they are replaced with plugs.
- The “Lux” package will delight the buyer with a full set of sensors, even a rear one.
The activation sensor transmits information using light indicators.
Alarm connection
We study the alarm circuit from the kit and the electrical circuit of the Lada Grant.
- In the ignition switch harness we connect the ignition, starter and alarm power
- We connect engine operation control to the ignition module
Lada Granta alarm connection points:
| Chain | Color | Polarity | Location |
| + 12V | Pink | Positive | Egnition lock |
| IGN_1 | Blue | Positive | Egnition lock |
| Start | Red | Positive | Egnition lock |
| +12 V (constant) | Pink | Positive | Ignition relay |
| +12 V (from ignition) | Blue | Positive | |
| Turns | Blue ; Blue/black | Positive | Left threshold |
| Gasoline pump | Grey | Positive | |
| Driver limit switch | Red Green | Negative | |
| Handbrake | Brown/blue or red/black (luxury) | Negative | |
| Driver limit switch | Red Green | Negative | Instrument cluster |
| Handbrake | Brown/blue | Negative | |
| Trunk | White black | Negative | Harness in the trunk (install the diode) |
| Tachometer | Brown/red | Impulses | In the configuration, the standard can be taken on the EUR block |
- It is always necessary to take only a constant “+” to the alarm unit, and it should not be protected by a fuse.
- It is best to place the light indicator not on the dimensions (as stated in the instructions), but on the chain of direction indicators.
Installation of limit switches on Lada Granta
An activation sensor in all doors will provide additional comfort. To carry out the installation procedure, you will need special equipment and available materials: lubricant, rubber tips, screwdriver, rag.
Step-by-step algorithm of actions:
- Remove the rubber tip.
- Open the housing and remove the limit switch.
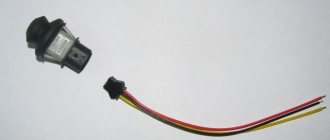
- Remove the block with wires and disconnect.
- Install a new sensor.
- Reassemble.
After the basic steps, you need to check the functionality of the device. To connect the limit switch to the power circuit, you will need to connect two terminals: first “+” and then “-”.
If you need to replace the trunk limit switch, then the instructions are identical, you just need to open the trunk lid.
Where is the trunk limit switch of the Lada Granta Liftback
The trunk lid activation sensor is located on the left side, closer to the lamp. However, it is installed only in the “Lux” configuration. Rubber plugs are inserted into “Standard” and “Norma”.
In order to prevent sudden activation of the central locking and door locking, owners optionally install sensors. Considering the simplicity of the procedure, you can do this either independently or by contacting a service station for help from specialists. After installing the trunk end switch into the seat, we lay and connect the electrical wiring. “Plus” is powered from the side lights of the lamp, “minus” can be from the body or on the block with wires. Black with a white stripe is “minus”, red is “plus”.
In the Luxury package, the sensor is built into the trunk lid lock by default. When the lid is closed, the sensor automatically turns off the power from the light.
Finalization of the scheme
The installation or modification scheme will require special equipment to test the electrical circuit. The first place on the list of accessories is a tester and a soldering iron. You will also need a screwdriver, additional wires, electrical tape and a new sensor. When connected, the driver can use the button in the threshold or the door lock contacts.
To do this, you first need to open the sensor housing with a screwdriver and remove the element, remove the block with wires using a screwdriver. Then replace the wire and solder. Insulate the ends and assemble the structure in reverse order. The process is carried out in parallel so that the process involves elements that go to the working positions of the door.
To measure the circuit resistance with a tester, you need to alternately press and release the spherical protrusion.
Design solution to the problem
When replacing or connecting, you only need to restore the originally designed circuit. If no modifications are carried out, then the need to disassemble the locking mechanism and use insulating materials is immediately eliminated. Step-by-step instruction:
- Open the hood.
- Loosen the bolt connections and disassemble the device.
- Unscrew the terminals.
- Connect the wires from the battery.
- Pull the limit switch out of the hole.
- Pull out the switch.
- Stretch the wires and connect them.
- Bring the ends out through the hole.
It is important that the wires are no shorter than ten centimeters.
After this, you should check the functionality of the device, and then carry out final assembly.
Solution options
However, reality diverges from the factory’s conclusions, which forces car owners to independently resolve the issue with Lada Vesta door limit switches. And then they found several ways out of the situation:
- Replacing anthers;
- Dismantling;
- Spring installation;
- Sawing.
Each of these methods has the right to life, as it allows you to normalize the operation of the system.
Replacing anthers
Some go to replace the boot with some kind of analogue. One of the most popular is a product from the Toprun brand, which can be found under article number 104035756. The price of such a limit switch varies from 50 to 100 rubles. We remind you that the original boot is sold under article number 11190-3710206-00.
Analogous to the standard limit switch.
The end cap itself is the same as the standard one, but the boot is made of much more elastic rubber, which guarantees its flexibility in severe frost. Moreover, it is not worth replacing the limit switches directly, if the standard ones are working properly, of course. It is enough just to install other anthers.
The boot is installed instead of the factory one. It is not necessary to change the limit switch itself.
Dismantling
This option captivates many precisely because of its simplicity. It would seem that you just need to remove the factory cuffs and be done with it. But the problem is that this element protects the limit switches themselves from contamination, so you will have to constantly monitor their cleanliness. A compromise option is to dismantle it only during frosty periods.
You can simply remove the boot from the end switch.
Spring installation
This method of solving the problem is tempting because there is no need to waste time searching for an analogue. If you have small springs that are about 12mm in diameter and about 18mm in length, you can use them. To do this you need to place a spring under the boot.
It will prevent the cuff from remaining compressed in the cold.
Spring under the limit switch cuff.
Sawing
Another option for independently modifying the limit switches of the Lada Vesta. If you remove the boot and turn it inside out, you will see a small spike in the center, a couple of millimeters long. It needs to be carefully cut off, then use a file to slightly grind off the boot from the inside - this will make the edge of the cuff thinner. Afterwards, all that remains is to lubricate the treated surface with anti-silicone and put it back.
As you can see, there are enough options, so every car owner will be able to modify the limit switches of his Lada Vesta in the way that he considers optimal.
Source
Troubleshooting
Drivers may encounter various types of malfunctions. Even though the sensor is protected, it is not as reliable as the manufacturers claim. In addition to silicone lubricant, other measures can be used:
- Install the spring under the rubber cover. If this element is elastic, it will protect the mechanism even at very low temperatures.
- Remove the protective caps for the winter, but there is a danger that the element will quickly become clogged with dust and dirt.
- Treat with protective liquid.
Often drivers replace their original limit switch with a part from another manufacturer or install a boot. In this case, the body of the new element is inserted into the standard connector and secured with a self-tapping screw.
What's the matter?
Owners of the Russian sedan began to notice that in cold weather, when opening the doors, the light in the car either did not come on at all, or came on, but with a noticeable delay. In addition, there are interruptions in the functioning of the alarm system. This is due to the not entirely successful design of the Lada Vesta door limit switches.
The bottom line is that the same end switches are purchased for Vesta, Kalina 2 and Granta. However, at low temperatures, the elasticity of their protective anthers is clearly not enough for correct operation. As a result, the limit switch rod is unable to come out, which is why Vesta’s electronics believe that the doors are still closed.
How to extend service life
Craftsmen are constantly coming up with new ways to extend the service life of factory elements. Some people put coins under the rubber band, fasten the parts with tape, or insert washers. To prevent the switch from freezing or becoming deformed, there are several effective techniques to consider:
- Spring insert.
- Replacing standard caps with elements from foreign manufacturers.
- Silicone Grease.
You should not assume that these actions will grant immortality to the limit switch, but these measures will significantly increase its service life.
Source
Solving problems with door limit switches on Lada Vesta, Granta and Kalina 2
With the onset of frost, some drivers face some problems. For example, the light in the cabin does not light up when the door is opened, the alarm system does not work correctly, etc. The cause of these malfunctions is the door limit switches. Let's look at several ways you can modify them yourself.
Question to AVTOVAZ: How to solve the incorrect operation of limit switches, which become dull in the cold, and the time frame for elimination?
Answer: According to test results at temperatures up to - 30°C, there are no changes in functioning. At temperatures down to -40°C, switching on may occur with a slight delay.
Lada Vesta, Granta and Kalina 2 cars use the same type of door switches. At sub-zero temperatures, their rubber boots (protective rubber caps 11190-3710206-00) freeze and lose their elasticity. As a result, the limit switch rod cannot come out of the housing and the car’s electronic systems believe that the door is closed. Here are some ways to solve the problem:
1. Remove the anthers from the door ends.
No rubber, no problem. But it is worth remembering that the rubber cap is designed to protect the end switch from moisture and dirt. On the other hand, you can remove the anthers only for a short time, while it is frosty outside, and during this period, keep them clean.
2. Replace the limit switch anthers with an analogue one.
It is proposed to install protective caps from another end switch, for example, Toprun (catalog number 104035756, price 50-100 rubles/piece). This end cap is a copy of the original one, but its anthers are made of a material that does not lose elasticity in cold weather. There is no point in changing the limit switches themselves; it is enough to change only the rubber caps.
3. Install the spring under the limit switch boot.
Another budget option for solving the problem, especially when you have springs about 18 mm long and 12-13 mm in diameter at hand. We install them under the rubber caps on the limit switch rod. Now the spring will not allow the boot to remain in a compressed position all the time.
Have you encountered similar problems? How was it solved?
4. Install new type limit switch caps.
From 09/25/2020 On cars of the Lada Vesta family, new caps for limit and door switches began to be installed from the factory.
The product is distinguished by a higher quality, elastic material that is not afraid of even the most severe frosts.
Let us remind you that in order to protect doorways from dirt, it is recommended to install additional door seals (instructions for Vesta, Kalina/Grant). By the way, Vest owners can connect the heated windshield to an additional alarm channel.
Share on social networks:
Found an error? Select it and press Ctrl+Enter..
Source
Electrics, sensors, battery Lada Vesta
Products from the Dustershop77 range on the topic of the article:
| Name | Manufacturer | Price | Availability | Add to cart |
| intro iso ant-1 | Antenna adapter Intro iso ant-1 | INTRO | 500 / 350 rub. Discount: 300 rub. | 2 |
| OBD-BT01 | Bluetooth OBDII - adapter for diagnostics | China | 1500 / 1000 rub. Discount: 900 rub. | >10 |
| multi-vc731 | On-board computer Multitronics vc731 | Multitronics | 8500 / 7500 rub. Discount: 6700 rub. | 2 |
| multi-c590 | On-board computer Multitronics C590 | Multitronics | 6900 / 5900 rub. Discount: 5490 rub. | 2 |
| multi-cl590 | On-board computer Multitronics CL590 (without voice synthesizer) | Multitronics | 5900 / 5500 rub. Discount: 4990 rub. | 1 |
| multi-vc730 | On-board computer Multitronics vc730 | Multitronics | 7500 / 6500 rub. Discount: 5500 rub. | 2 |
| DC691-LA6-V003 | Anti-theft protection for the electronic unit for Duster 2022, Largus, Logan 2, Sandero 2, Vesta, Xray, Arkana | 4900 / 3900 rub. Discount: 3400 rub. | 7 | |
| PU-4TC-BLACK | Multitronics PU-4TC parking sensors for on-board computers (sensor color: black) | Multitronics | 3500 / 3200 rub. Discount: 2850 rub. | 2 |
| DC1250 | Set of small fuses (10 pcs) | Analogue | 200 / 150 rub. Discount: 100 rub. | 4 |
| DC689 | Anti-theft protection with lock for OBD2 connector | 5000 / 4000 rub. Discount: 3500 rub. | 2 | |
| DC190 | Monitor for rear view camera, foldable | China | 2500 / 2000 rub. Discount: 1700 rub. | 2 |
| DC954-8200719629 | Manifold absolute pressure sensor MAP sensor for 2.0 and 1.6 engines - F4R/K4M original 8200719629 | Original | 2500 / 1900 rub. Discount: 1700 rub. | 2 |
| DC1195 | Fuse set 180pcs in a plastic box | China | 1000 / 700 rub. Discount: 600 rub. | 1 |
| DC1134-7700427640 | Door limit switch (switch) original 7700427640 | Original | 1300 / 900 rub. Discount: 800 rub. | 2 |
| DC485-497612479R | Power steering fluid pressure sensor original Renault 497612479R | Original | 1800 / 1400 rub. Discount: 1200 rub. | 1 |
| DC990-8200060049 | Seat heating switch original 8200060049 | Original | 800 / 700 rub. Discount: 600 rub. | 1 |
| DC1143 | Renault mirror control button (joystick) | Original | 700 / 500 rub. Discount: 450 rub. | 5 |
| PU-4TC-GRAY | Multitronics PU-4TC parking sensors for on-board computers (sensor color: gray) | Multitronics | 3500 / 3200 rub. Discount: 2800 rub. | 2 |
| DC997-255678753R | Steering column switch right article number 255678753R | Original | 2800 / 2700 rub. Discount: 2700 rub. | 1 |
| DC1360-7711238598 | Rechargeable battery original Renault 7711238598 | Original | 9000 / 8000 rub. Discount: 7489 rub. | 1 |
| DC1404 | Trunk lid and door lock activator (Asam/MANOVER analogue 7700712901) | Analogue | 1400 / 900 rub. Discount: 700 rub. | 1 |
| DC634-601986892R | Speed sensor (plug) for cars with ABS original 601986892R | Original | 1900 / 1650 rub. Discount: 1450 rub. | 1 |
| DC996-255675128R | Steering column switch left article number 255675128R | Original | 4700 / 4300 rub. Discount: 3800 rub. | 2 |
| DC1027-8201167988 | Left steering column switch with PTF article number 8201167988 / 255400337R | Original | 6000 / 4700 rub. Discount: 4000 rub. | 1 |
| DC623-8200547283 | Speed sensor original Renault 8200547283 / 6001548870 (without ABS) | Original | 1600 / 1100 rub. Discount: 900 rub. | 1 |
| DC1520 | Solenoid relay 1.6 H4M | Analogue | 1900 / 1600 rub. Discount: 1400 rub. | 1 |
| DC1665-21800141301000 | Manifold absolute pressure and temperature sensor MAP sensor 1.6l VAZ 21129 original 21800141301000 | Original | 2800 / 2200 rub. Discount: 1900 rub. | 1 |
| intro iso fr-12 | Adapter for connecting a radio | INTRO | 500 / 450 rub. Discount: 400 rub. | |
| OBD-WF01 | Wi-Fi OBDII ELM327 - adapter for diagnostics | China | 1700 / 1500 rub. Discount: 1300 rub. | |
| INTRO-PT-04 | Parking sensors with rear view camera included (black) | INTRO | 5200 Discount: 5200 rub. | |
| Incar-VDR | Rear view mirror with DVR and monitor | INTRO | 25000 / 19900 rub. Discount: 19,000 rub. | |
| INTRO-PT-05 | Parking sensors with rear view camera included (gray) | INTRO | 5200 Discount: 5200 rub. | |
| VR-518 | DVR VR-518 | INTRO | 3600 Discount: 3600 rub. | |
| DC129 | Rear view mirror with DVR and rear view camera included | China | 8500 Discount: 8500 rub. | |
| DC653 | On-board computer Ancel (Ankel) | China | 3800 / 3200 rub. Discount: 2700 rub. | |
| DC642 | 2.4G Wireless RCA Video Transmitter-Receiver (Camera to Monitor Kit) | China | 1700 / 1300 rub. Discount: 1000 rub. | |
| VCO-2-02 | Headrest with monitor for Renault Duster (black) | 8800 Discount: 8800 rub. | ||
| VCO-1-01 | DVR VICO-SF2 for Renault Duster | VICO | 4700 Discount: 4700 rub. | |
| VCO-1-02 | DVR VICO-TF2 PREMIUM for Renault Duster | VICO | 5900 Discount: 5900 rub. | |
| VCO-1-03 | DVR VICO-TF2+ PREMIUM for Renault Duster | VICO | 6700 Discount: 6700 rub. | |
| VCO-1-04 | DVR VICO-WF1 for Renault Duster | VICO | 8000 Discount: 8000 rub. | |
| VCO-2-01 | Headrest with monitor for Renault Duster (gray) | 7800 Discount: 7800 rub. |
Installation of door limit switches for Lada Granta and Lada Kalina
In some configurations of Lada Granta/Kalina cars, only one limit switch (switch) is installed on the driver's door from the factory. In some cases (for example, when installing an alarm system), it may be necessary to have limit switches in the rear doors and the front passenger door. You can install them yourself in several ways.
There are two options for installing door limit switches:
- Install separate limit switches in the door sills on the body.
- The limit switches are already installed in the door locks, they just need to be connected.
Method No. 1 (separate limit switches)
Required
: limit switches (article 104 035 756 or 1119-3710200), 4 meters of wire.
- Stretch the wires from the driver's limit switch to the other limit switches in the sills.
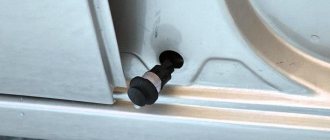
- Remove the plugs in the thresholds and install limit switches instead.
- Connect the limit switches parallel to the driver's door limit switch (you can have one wire to ground, the other to the driver's door limit switch).
The rubber bands of the end switches can harden in the cold (see modification of the end switches).
Method No. 2 (limit switches in locks)
Required
: 4 meters of wire, terminals from the ISO connector of the radio, remove the door trims.
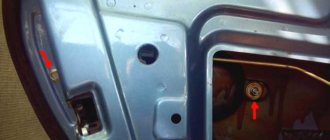
- Remove the block by pressing on the plate.
- Open the plug on the connector.
- Insert the terminals into pins 1 and 3 until they click.
- Remove the block, pull the fungus down.
- Open the plug on the connector.
- Insert the terminals into contacts 1 and 4 (or 4 and 6 depending on the configuration and year of manufacture of the vehicle) until it clicks.
We connect the limit switches parallel to the driver's door limit switch (you can have one wire to ground, the other to the driver's door limit switch).
If you cannot disconnect the connector without removing the lock:
- Remove three bolts securing the lock and one bolt securing the glass guide.
- Remove the door handle and door lock button.
- Disconnect the rods and remove the lock.
Source
Lada Granta "SONN" › Logbook › Connecting standard door switches
Good day to all!
Like many non-luxury grant drivers, after the purchase I learned with horror that the car only has one door switch, on the driver’s side. Of course, when installing the signaling, 3 more missing limit switches were installed. But who knew that they were already installed in the locks. Even the alarm installer was not in the know. AVTOVAZ simply regretted running the wires into the doors to connect them. At first I thought that the limit switches were even better in rapids, but winter put everything in place. In winter, the rubber band on it becomes stiff and the end switch “sticks” when pressed. But that's not all. I noticed that when the car is loaded (5 people in the cabin), when making sharp turns, sometimes the light in the cabin comes on, so the body plays and the door moves back a little, releasing the limit switch. As a result, almost immediately I wanted to convert everything to limit switches in the locks. But it took me a long time to get ready, the car is almost two years old and I just got around to it. But the work took less than two hours, I did it alone. For now I limited myself to the rear doors. The front ones are completely noisy, I don’t want to open them. YES and they work better.
Installation: As it turned out, the terminal blocks do not have terminals for limit switches, so in addition to the wires, you also need to install terminals. In the vastness of the drive I found that the terminals from the ISO connector of the radio are ideal for this task. Thanks bimulyk for this.
ISO connector of the radio. Carefully remove the terminals from the connector of the radio, do not look at the bottom part in the photo above
