The main function of the clutch in a car is to connect the transmission with the engine. This part of the internal combustion engine accounts for most of the loads that occur during the transmission of torque to the gearbox. This is the reason for its rapid wear. Moreover, no car owner will be able to avoid this. That is why the clutch is considered a consumable item.
Signs that a new clutch needs to be installed:
- reduction in engine power;
- incomplete engagement of the clutch;
- clicks, jerks, extraneous sounds when turned on;
- independent clutch release;
- vibration when pressing the pedal.
The following describes the process of self-installation of a new VAZ 2110 clutch without draining the oil and removing the box.
Required tools:
- jack;
- a viewing hole/lift is required;
- socket and open-end wrenches at “17” and “19”;
- mount/pipe amplifier.
Preparatory stage
Before changing the clutch on a VAZ 2110, you need to prepare a place for repairs and tools. For this process, the most suitable solutions are: a car lift or an inspection hole. If there are no such conditions, due to a hopeless situation, it is possible to replace the clutch with a 2110 in “Spartan conditions”. It is enough to find a flat surface area in a garage box, a parking space or in the yard.
Clutch diagram for VAZ 2110: 1 - release bearing guide sleeve; 2 — gearbox input shaft; 3 — cable lead; 4 — clutch release fork; 5 — fork axle bushing; 6 — pressure disk assembly (basket); 7 — driven disk; 8 - flywheel; 9 — clutch pedal; 10 — mechanism for automatic adjustment of cable length; 13 — clutch release clutch (release bearing); 14 — lower tip of the cable sheath; 15 — bracket installed on the gearbox housing; A - the displacement distance of the leash, checked when installing the cable (27 mm).
Also, for repairs you will need:
- locksmith set with open-end wrenches and sockets up to 22 mm;
- a jack and several short boards (wooden blocks);
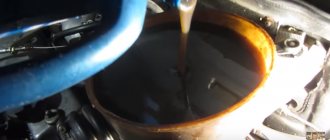
- container for possible draining of transmission oil from the gearbox;
centering shaft (mandrel).
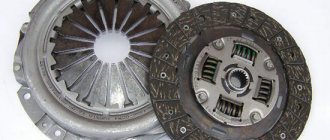
As for the clutch itself, it is sold in sets (3 in one, 2 in one) and parts separately.
The system includes 3 replaceable elements:
- release bearing;
- clutch disc;
- basket.
Self-replacement of VAZ 2110 clutch
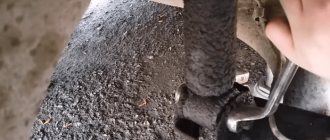
- Loosen the mounting bolts on the left wheel, jack up the front part of the wheel, and place it on the sawhorses.
Replacing a VAZ 2110 clutch without removing the box and draining the oil
- Remove the wheel, unscrew the 2 bolts securing the lower ball joint.
Replacing a VAZ 2110 clutch without removing the box and draining the oil
- Remove the negative terminal from the battery.
- Remove the mass air flow sensor, loosen the clamp that secures the mass air flow sensor corrugation, and remove the air filter.
How to replace the clutch of a VAZ 2110 without removing the box with your own hands
- Remove the clutch cable from the clutch fork. Loosen the two mounting nuts securing the cable to the bracket on the gearbox.
How to replace the clutch of a VAZ 2110 without removing the box with your own hands
- Unscrew the bolt that secures the starter to the gearbox and remove the first gearbox mounting bolt.
Replacing the VAZ 2110 clutch without removing the gearbox
- Find the second mounting bolt on the gearbox and loosen it. Also loosen the top bolt that secures the starter.
Replacing the VAZ 2110 clutch without removing the gearbox
Replacing the VAZ 2110 clutch on your own
- Remove the connector from the speed sensor, unscrew the speedometer cable.
We change the VAZ 2110 clutch on our own without draining the oil
We change the VAZ 2110 clutch on our own without draining the oil
- Remove the longitudinal brace and lever.
How it works and what it consists of
Device diagram
The factory clutch system for the VAZ 2110 is called VIS. Many people complain about it because it doesn’t work very effectively, although others are sure that there is no more worthy alternative for the “ten”. So opinions differ on this matter.
The main components of the system include:
- casing;
- Crankcase with a cover and supporting planes with which the unit is attached to the frame;
- Driven and pressure plate;
- Release bearing. It disengages the clutch;
- Flywheel;
- Shutdown plug;
- The cable wire that goes to the pedal (far left in the car interior).
Set
Today the market is represented by an extensive list of alternatives made in Europe and China. We strongly do not recommend using Chinese spare parts, but European analogues should be considered as a replacement for VIS.
According to a study conducted among VAZ 2110 owners, the five best kits for the domestic “ten” were determined:
As we have already noted, VIS is installed as standard and works quite well. An important advantage compared to European counterparts is financial accessibility. But if your wallet allows it, replace the old clutch with a better and more expensive one.
Also check out
- How to replace a VAZ 2110 timing belt and tension roller at home
- Installation of a new VAZ 2110 starter
- How to make heated seats on a VAZ 2110 without going to a service station
- Unscrew the bottom bolt that secures the starter.
Replacing a VAZ 2110 clutch without removing the box and draining the oil
- Remove the 3rd transmission mounting bolt. Unscrew another nut located near the right CV joint.
- Remove the torque rod mounting bolts. There are 2 of them.
Replacing the VAZ 2110 clutch
- Loosen the nut located on the box control drive rod clamp and remove the rod from the box.
Replacing the VAZ 2110 clutch
- Place the support under the engine, unscrew the 2 nuts that secure the rear cushion (the purpose of this is to avoid a possible breakthrough of the hoses).
Self-replacement of VAZ 2110 clutch at home
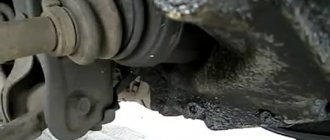
- Carefully remove the gearbox from the engine and release it to the floor. It should hang on the axle shafts.
Self-replacement of VAZ 2110 clutch at home
Self-replacement of VAZ 2110 clutch at home
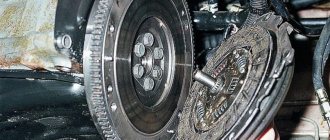
- Alternatively, replace the clutch release bearing immediately.
Clutch VAZ 2110
Clutch VAZ 2110
- Assess wear, replace the disc, install a new clutch basket if necessary, check the paddles.
Assembly is performed in reverse order.
Thus, the installation of a new VAZ 2110 clutch without removing the box and draining the oil was successful.
Self-replacement of the clutch of a VAZ 2110 car on video:
Popular problems and their solutions
There are several characteristic faults that occur on the VAZ 2110. Let's try to understand the reasons for their occurrence, and also consider ways to solve the problem.
- The clutch drives. The reasons may be: The pedal has insufficient travel, the tension is too tight. To eliminate this, you need to adjust the drive;
- The driven disk is deformed. Only replacement will help here;
- The driven disc hub sometimes gets stuck. If so, try washing it and lubricating the input shaft splines. If the element or the shaft itself is worn out, then replace them;
- The friction linings are broken and the rivets are loose. The best solution is a complete replacement of the casing, which includes a spring and a disk;
- The pressure plate is warped or warped. Replace the linings, but first make sure that there are no deviations in the end runout of the disk;
- There were problems with the cable. Pull it up. If there is no result, replace with a new one.
- The friction linings on the driven disk often burn or wear out. There is only one solution - replacement;
- Oil has reached the surface. We have already described how to solve the problem above;
Lada 2112 Sochi › Logbook › Cleaning the throttle assembly on a VAZ 21124
In general, my problem was that the car stalled when I released the gas pedal.
Preface:
How does contamination of the inner surface of the throttle pipe (TP) affect engine operation? The main working element of the throttle pipe is the throttle valve (VV). It is she who, when opening, changes the flow area of the pipe. This ensures the supply of air volume necessary for complete combustion of fuel in the engine.
But even when closed, with the gas pedal completely released and not pressed, the throttle body must allow a certain amount of air to pass through, which is necessary for the engine to operate at forced idle speed (FID) and idling speed (IDL). To do this, during the production of the DP, the closed position of the DP is adjusted so that there is a small gap, called thermal, between the internal and walls of the DP and the DP itself. The thread of the screw that regulates the thermal gap is coated with a special sealant to prevent spontaneous or intentional rotation in the future. Another purpose of the gap is to prevent the DP from biting against the DP walls when closed. When the DS is closed, air also flows bypassing the DS, through the bypass channel (the gap between the walls of the calibrated hole and the tip of the idle air control (IAC) rod). During engine operation, the position of the IAC rod is constantly changing, providing IAC regulation. The volume of air passing through the DP when the DP is closed is rigidly fixed in the controller firmware, so an actual change in air compared to a constant may make it impossible to regulate the idle. In practice, this usually leads to the following rather characteristic interruptions in engine operation:
1. The engine has difficulty returning to idle speed when the gas pedal is released. For example, when braking or coasting in neutral gear. The engine speed, instead of a smooth return to XX speed, suddenly drops sharply to 400-600 revolutions, after which the engine stalls or shakes violently, and XX speed is difficult to restore.
2. Hot starting of the engine is very difficult, and if measures are not taken in a timely manner, cold starting. When trying to start the engine, you have to turn the starter for a long time. The exhaust pipe already smells of gasoline, but the engine still won’t start. But as soon as you open the remote control slightly, by 2-10%, by pressing the gas pedal, a miracle happens, the engine starts, “wasting” the first few seconds.
The cause of the above malfunctions is a mixture of dust microparticles and oil particles passing through the air filter, coming from the crankcase ventilation system. During vehicle operation, this mixture gradually settles on the inner surface of the diesel engine, in those places where there is the greatest air turbulence. Those. immediately behind the remote control and on the IAC rod. As a result, over time, the thermal gap at the DZ becomes overgrown with dirt and the cross-section of the IAC bypass channel decreases. Thus, as a result, we get the following: the cross-section of the air channels is reduced, the composition of the mixture is enriched.
When dirt accumulates above a certain critical level, different for each engine, when the speed control system can no longer cope with the flow area in the combustion chamber that has changed due to dirt (which it also knows nothing about), characteristic interruptions begin to appear. Throttle pipes operating in systems controlled by GM controllers are much less susceptible to loss of functionality in the presence of dirt. In them, gases from the crankcase ventilation system are supplied to the throttle space. It should be noted that on 1.6-liter engines, due to changes in the channels of the crankcase ventilation system, several times more oil vapor began to flow into the combustion chamber
From practice, dirt in the DP should be taken into account as one of the possible reasons for the unstable operation of the engine at IH and IH after 10-15 thousand kilometers. Naturally, this value may vary somewhat depending on the areas in which the vehicle is used.
Some site
Process:1.
Unscrew the cap from the expansion tank to relieve pressure in the system.
2.
Remove the plastic cover on the engine
3.
We unscrew the trunk clamps on the remote control, on the mass air flow sensor and on the crankcase purge hose.4.
In general, we unscrew all the clamps going to the remote control
5.6.7.After cleaning the insides of the unit looked like this:
With two flashlights and screams about some mother, in the dark we put everything back together and checked
Result:
Two days, the flight is excellent, the engine keeps the revs rooted to the spot, does not stall while driving, does not stall at idle, and the car itself has become much faster...
Results
If there is an overpass or lift, the operation is carried out quickly and efficiently, and when there is a reliable assistant, it is also fun. However, not everyone has such capabilities, and this is where engineering ingenuity comes into play.
Some car enthusiasts practice repairing the clutch without removing the gearbox; for this purpose, instead of the upper standard mounting bolts, they screw in longer bolts. For this, for example, two bolts from the upper arm of the front suspension of the “VAZ classic” are suitable. By screwing them into the upper holes, the box can be moved back by 14-15 cm with a pry bar. In this case, the transverse rod should not be unscrewed, because the rear part of the gearbox will lie on it. These conditions are quite enough to replace faulty parts.
If repairs are necessary, experts recommend doing a complete replacement of the entire assembly along with the release bearing, especially since the choice of clutch kits is quite wide. This position is explained simply - an old part left behind threatens to fail at any moment. The procedure, as you yourself saw in the video, is quite labor-intensive, and repeating it over and over again is not a pleasant pleasure, except for real “homemade people.”
What's the result?
Taking into account the above information, it becomes clear that the VAZ 2110 clutch is a relatively easy-to-maintain unit. This means that it is quite possible to fix any problems that arise on your own. The main difficulties are often associated only with dismantling the gearbox.
Finally, we note that in parallel with replacing the clutch, experienced specialists also recommend changing the oil in the manual transmission, as well as adjusting the rocker. Ultimately, an integrated approach allows for clear and smooth operation of the gearbox, which significantly increases the comfort when operating a car with a manual transmission.
Car clutch: purpose, types, design, principle of operation. Frequent clutch malfunctions in the vehicle transmission system, signs of problems.
Clutch: basket, release, clutch disc. Purpose and design, principle of operation of the clutch basket. How to increase clutch life.
Clutch disc: purpose and device. How to replace a clutch disc, replace this element yourself. Recommendations.
How is the clutch implemented in the transmission device on cars with automatic transmission compared to a manual or robotic transmission. Features and differences.
The purpose and principle of operation of the clutch on a car with a manual transmission. Features of the driver's work with the clutch, how to move away.
Car clutch and design overview: clutch pressure plate, driven disc, release bearing. Types of clutch drives on manual transmissions and manual transmissions.
Causes of brake failure
So:
- If your car suddenly loses its brakes, do not rush to blame the master cylinder.
- The cause may be a leaking slave cylinder. If it is leaking, the liquid may flow out gradually, or maybe much faster.
- Check the brake fluid level in the reservoir and the condition of the main brake.
- If traces of leaks are visible on the master cylinder, then this is the cause.
- The cause of a brake fluid leak may also be a broken brake line. The rubber brake hoses may fray or the tubes may become rotten or ruptured.
Brake hoses fray
The working cylinders could also be jammed.
If the master cylinder does not work:
- It will show traces of brake fluid leaks.
- The brake pedal will not be pressed.
- Also, the brake pedal can simply move to idle without creating any effort.