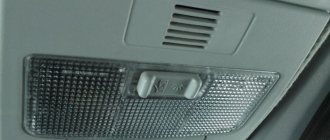
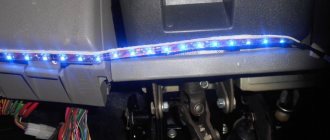
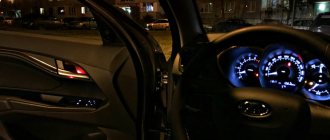
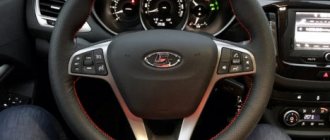
Owners of Lada Vesta and XRAY cars from the first days of operation are faced with a lack of illumination of the rear row of seats. In connection with this, the manufacturer will introduce the corresponding option on the Lada Vesta (Comfort and Luxe trim levels) in 2022. Drivers of simpler trim levels can modify the interior lighting with their own hands.
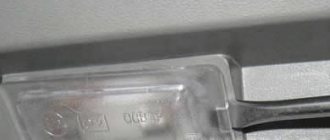
The article number of the standard lamp for the rear passengers of Vesta is 8450031513, photo:
How does the interior lighting of the Lada Vesta work?
You should start getting acquainted with the main lighting unit located above the dashboard. The following functions can be controlled from the driver's and front passenger's seats:
- general lighting;
- switching mode when doors are open;
- lighting of the driver and passenger seats.
When equipped with atmospheric interior lighting, the following options are available:
- lighting for the driver's and front passenger's footwells;
- LED inserts for door handles;
- illumination of the shelf under the climate control unit.
Photo source: https://rus-auto26.ru/product/avtomobili-lada/lada-vesta/lada-vesta-cross/
A separate Vesta rear lamp is provided only in the “Lux” configuration and has two buttons:
- turning on the lighting;
- switching mode when doors are open.
You can make the illumination of the rear seats yourself if you have the lamp itself, wires, a sharp blade (knife), thick wire, a flashlight and a set of screwdrivers.
content .. 61 62 69 ..Lada Vesta. INTERIOR LIGHTING
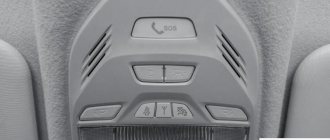
Description of the functions of the interior lighting unit 1 - area where the microphone of the in-vehicle emergency call system is located;
2 — area where the in-vehicle emergency call system loudspeaker is located;
3 — emergency call key for the in-vehicle emergency call system;
4 — status indicator of the in-vehicle emergency call system;
5 — front passenger seat belt unfastened indicator;
6 — indicator of the disabled front passenger airbag;
7 — key for turning the general interior lighting section into “on” mode;
8 — key for turning on the general interior lighting section in the “on when the door is open” mode;
9 — key for turning on the individual driver’s seat lighting;
10 — key for turning on the individual lighting of the front passenger seat;
11- section of individual lighting of the driver’s seat;
12 — section for individual lighting of the front passenger seat;
13 - general lighting section.
General lighting
The interior lighting unit performs the functions of general interior lighting, illumination of the driver's and front passenger's seats, as well as communication functions with the operator of the ERA GLONASS system.
When you press the icon key, the general lighting mode is turned on. When you press a key with an icon, the “on when the door is open” mode is activated. If both keys are pressed, the key has priority
with pictogram
Each section of individual lighting is activated by a corresponding key with an icon for the driver
or for the front passenger.
Switching operating modes of individual lighting occurs by pressing the corresponding key again.
Signaling devices and indicators as part of BOS
— front passenger airbag deactivated indicator, signal color yellow.
— indicator that the front passenger seat belt is not fastened, the color of the signal is red.
ψ — red in-vehicle emergency call system status indicator. Lights up for 5 seconds each time the ignition is turned on, and then goes out. The indicator also lights up if there is a malfunction in the in-vehicle emergency call system.
Emergency call system
Your vehicle is equipped with an in-vehicle emergency call system (hereinafter referred to as SVES), designed to automatically (in case of an accident) and manually call an operator of the ERA GLONASS system. A microphone and loudspeaker are used to communicate with the operator of the ERA GLONASS system.
SOS - the key to call the operator of the "ERA GLO-NASS" system is located in the interior lighting unit. Push-button switch with non-fixed “on” position. The key press time to initiate an emergency call is 2 seconds.
In standby mode (with the ignition on), SVEOS carries out self-diagnosis, receives signals from the GLONASS and GPS navigation satellite systems, and constantly calculates the time, speed, direction of movement and coordinates of the vehicle's location.
In a variant version, the car is equipped with an interior lighting unit without the function of the ERA GLONASS telecommunications system.
Automatic emergency call
In the event of a road traffic accident (RTA), if the airbags are deployed, SVEOS generates a minimum set of data containing information about the coordinates and parameters of the vehicle at the time of the accident, the time of the accident, the VIN code of the vehicle and other information necessary for emergency response , and transfers it to the operator of the ERA GLONASS system. After transmitting the minimum set of data, the operator is dialed for voice communication. While making a call to the operator,
The SOS key light flashes red. When transmitting a minimum set of data and during voice communication with the operator, the backlight of the “SOS” key lights up continuously in red.
When making voice communication, SVEOS turns off the sound reproduction of the standard (or additionally installed) radio receiver (multimedia system, radio), if sound reproduction was made before the emergency call was made.
SVEOS makes an automatic emergency call only when the ignition is on.
Manual emergency call (SOS key).
A manual call can be made with the ignition on, as well as with the ignition off, if less than 72 hours have passed since the ignition was turned off. To make an emergency call manually, press the “SOS” button on the interior lighting unit and hold it pressed for at least 2 seconds. The operating algorithm of the SVEOS for a manual emergency call is similar to the algorithm described above for an automatic emergency call.
During a call (while the SOS button is flashing red) initiated by pressing the SOS button, if you press the SOS button again and hold for at least 2 seconds, the emergency call will be canceled (the SOS button is illuminated in red will be turned off).
Off mode
The SVEOS is in this mode if no emergency call is made, if the ignition is turned off and at least 72 hours have passed since the ignition was turned off. In the “Off” mode, the “SOS” button is not backlit, and the system status indicator ψ does not light up. In the “Off” mode, the SVEOS does not respond to pressing the “SOS” button. The SVEOS exits the “Off” mode when the ignition is turned on.
Test mode
The testing mode is intended to check the functionality of the SVEOS components. In the testing mode, the functionality of the SVEOS status indicator, the microphone and loudspeaker in the interior lighting unit, the backup battery and other internal components of the SVEOS are checked. If you wish, you can independently check the performance of the SVEOS by running the test mode. To start testing mode you must:
— make sure that the engine is turned off;
— turn the key in the ignition switch (33) to the “Ignition on” position and wait 1 minute;
— from the “Ignition on” position, switch 33 6 times between the “Ignition on” and “+ACC” positions according to the algorithm described below for no more than 5 seconds:
№
| Starting position 33 | Action to be performed | End position 33 | |
| 1 | Ignition included | Turning on “+ACC” (ignition off) | +ACC |
| 2 | +ACC | Turning on the ignition (1) | Ignition on |
| 3 | Ignition included | Turning on “+ACC” (ignition off) | +ACC |
| 4 | +ACC | Turning on the ignition (2) | Ignition on |
| 5 | Ignition included | Turning on “+ACC” (ignition off) | +ACC |
| 6 | +ACC | Turning on the ignition (3) | Ignition on |
After the 3rd ignition switch (switch 33 No. 6), the SVEOS goes into test mode if the engine did not start during the entry procedure.
The sound prompt “Testing procedure has started” will be played.
During testing, the functionality of the microphone and loudspeaker will be checked. After playing the sound prompt “Say the control phrase”, you will need to say any phrase lasting no more than 5 seconds. Immediately after this, the “Playing Password” audio prompt will be played and then the phrase you spoke will be played. The audio prompt “Enter your verification result” will then play. If testing of the microphone and loudspeaker was successful, then it is necessary to switch 33 2 times according to the algorithm described below within no more than 3 seconds:
| № | Starting position 33 | Action to be performed | End position 33 |
| 1 | Ignition included | Turning on “+ACC” (turning on the ignition) | +ACC |
| 2 | +ACC | Turning on the ignition | Ignition on |
If, during testing of the microphone and loudspeaker, any errors occurred (the spoken phrase was not reproduced, it was played too quietly or with distortion, etc.), then after playing the sound prompt “Enter the test result,” no switching 33 needs to be done within 7 seconds.
If any errors are found at the end of the testing procedure, contact your dealer to have the problem corrected.
ATTENTION!
If a malfunction is detected in the operation of the SVEOS, we strongly recommend that you immediately contact your dealer to identify and eliminate the malfunction! When operating a vehicle with a malfunction in the SVEOS, its operation in the event of an accident is not guaranteed!
Backup battery
The SVEOS control unit contains a backup battery, which is necessary to ensure the operation of the SVEOS in the event of damage to the vehicle battery during an accident. When the ignition is turned on, the charge level of the backup battery is monitored, as well as recharging it if necessary.
The backup battery life is 3 years.
Replacement of the backup battery is carried out only by certified dealers.
If any faults are detected with the SVEOS, you should contact a certified dealer to have the fault rectified.
System status indicator ψ
When the ignition is turned on, the system status indicator ψ
lights up in red for 5 seconds, then goes out. The indicator also lights up in red when any errors are detected in the functioning of the SVEOS.
After turning on the ignition, the internal modules of the SVEOS are initialized and self-diagnosis is performed. This process takes no more than 1 minute. While initialization and self-diagnosis are in progress, the system status indicator ψ
does not light up, even if errors were previously detected. Therefore, to determine the presence of errors after turning on the ignition, you must wait 1 minute. The table below describes the operating modes of the alarm. Table - indication of the state of the SVEOS and operating mode
| Character malfunctions | SVEOS operating mode | SOS button illumination color (white/red) | Indicator status ψ |
| Everything is fine | Initialization (when ignition is turned on) | White | Lights up for 5 seconds. |
| Standby mode | White | Does not burn |
| Everything is fine | Dialing | Red, flashing | Does not burn |
| Voice communication | Red, lit | ||
| Malfunction components SVEOS | Standby mode | White | Lit |
| Dialing | Red, flashing | ||
| Voice communication | Red, lit |
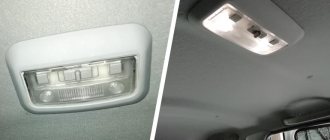
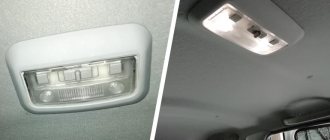
In a variant version, the car is equipped with a lamp that serves as additional lighting for the rear part of the cabin (Fig. 1). When you press the icon key, the general lighting mode is turned on. When you press the button with the icon, the “On when the door is open” mode is activated. If both keys are pressed
the key with the icon has priority. Lighting mode switches are push-button type with a fixed “On” position.
Fig.1. Rear seat lamp
1- key for turning the interior lighting section into On mode”;
Use electrical appliances only with plugs (sockets) shown in Figure 16 or with connectors suitable for use with SAE standard connectors.
2. Do not leave electrical appliances connected to the outlet if the driver and passengers leave the car or the car is parked (stored) for a long time.
3. Do not connect electrical appliances that generate electric current (such as batteries).
4. Connected electrical appliances must comply with DIN VDE 40839 in terms of electromagnetic compatibility, otherwise malfunctions in the operation of the vehicle may occur.
5. Close the cover of the outlet for connecting additional electrical equipment when the outlet is not in use. Inserting objects other than the appropriate plugs, foreign objects, or any liquid into the outlet may cause the vehicle's electrical system to malfunction or cause a short circuit.
content .. 61 62 69 ..
How to make backlighting for the back row of Vesta
You can install a rear light on the Lada Vesta:
- native, which comes in the “Lux” package (article number 8450030708/8450031513);
- any analogue for Kalina and Granta models.
Installing additional lighting for rear passengers on Vesta and Vesta Cross begins with determining the location where the lamp will be located. It is best to do this approximately at the level of the backs of the front seats, so that the light is directed towards the feet:
- Using a pre-prepared stencil (put the lampshade on cardboard and outline its back), transfer the outline to the ceiling upholstery.
- Using a sharp blade, carefully cut along the line.
- Wrap the soldered wires from the rear lamp with a tight seal so that “crickets” do not form during the operation of the car.
- Wrap their end to the wire, push it into the cut hole to the place where the front lighting unit is located.
Now remove this block and find the necessary wires in the block:
- White and pink is a plus. It loses power a few minutes after the ignition is turned off (for your safety, turn off the car).
- Blue-black is a constant minus.
- White is a minus for door switches.
There is a standard diagram that clearly shows the connection.
Photo source: https://www.drive2.com/l/494120526596276644/
All that remains is to use self-tapping screws to secure the rear lamp to the upholstery and insert the front lighting unit into place.
You can add lighting to the back row of Vesta and Granta Sport by connecting the lampshade to the trunk lighting:
- ground - black wire;
- the second +12V.
In order not to confuse the purpose, it is better to ring the wires first.
Installation of a lampshade
Options for additional interior lamps:
- standard, which is installed on the Vesta “Lux” from the factory (not yet listed in the spare parts catalogues);
- from Priora Lux (catalog number: 21700-3714010-01) together with mounting frame (21700-3714014-01);
- from Sable or GAZelle (CA 453.0031);
- lamps from a foreign car (for example, with this number: 3b0947291).
We choose a place to mount the lampshade in the rear of the car. If the lamp will be supported on the ceiling trim, then in Vesta the best place to place it will be immediately behind the trim fasteners (the roof reinforcement prevents the lamp from being moved forward, and the insufficient distance from the trim to the iron prevents it from moving backwards).
If you decide to attach the lamp to the stiffeners, then do not rush to cut the casing (instructions for Vesta or XRAY), it is better to remove it and confidently determine the location for installation. An example of installing a ceiling lamp on a Priora car:
On Vesta you can attach the ceiling from Priora differently. The lamp frame will hold well to the ceiling trim using screws:
It is not necessary to place the lampshade in the center of the roof; you can install a couple of lamps at the edges above the rear doors. We stretch the wiring using wire.
Why are the lights not on in the Vesta cabin?
In addition to the lack of standard lighting for the rear row (except for the “Lux” configuration), the domestic car has several unpleasant features. One of them manifests itself as follows: the light in the Lada Vesta’s interior does not turn on, regardless of the position of the lighting keys.
This is due to the limit switch located in the doors - the rubber that protects it has different hardness and in some places may not reach the sensor.
It is a misconception that the fuses may blow and therefore the lighting does not work - it is powered directly from the TsKBE.
Way to solve the problem
On a Lada Vesta, when the interior light is not on, do the following:
- Remove the boot from the end cap. A simple option, but you just need to know that if dirt gets in, the sensor may again incorrectly read the door position.
- Replace the limit switch itself if, even with the rubber band removed and the surface clean, the problem with the light remains. Just pull it out, disconnect the terminal and connect a new one.
The owner can do all this independently.
Photo source: https://www.drive2.com/l/496319000096014965
Front panel illumination
The front panel backlight is activated when external lighting devices are turned on. Car owners note that they experience some inconvenience when reading indicators when exposed to direct sunlight. Car owners are trying to independently improve the LED lighting of Lada instruments. Car enthusiasts should take into account that any intervention, modification or improvement of lighting fixtures will result in loss of warranty coverage. If the owner nevertheless decides to improve the lighting, it is necessary to adhere to the algorithm of actions.
Sequence of events
Remove the glove container. To do this, open it and press out the latches that hold the lid. Apply a little force, pull the cover towards you, it will come off. Remove the glove box light. Using a small screwdriver, press out the lamp and disconnect the wires. Unscrew the five bolts and remove the glove compartment. To improve lighting, purchase two 600 V LEDs. Unscrew the hook and screw securing the body of the pulp and paper machine. In connector c1 you need to cut the dark blue wire. In connector c2, strip the blue-red wires. Connect two diodes. In the received kit, connect the dark blue wire to the end of the wire of the same color in connector C1. The green wire is connected to the end of the dark blue wire, which is located inside the harness. The red wire is connected to the end of the blue-red wire in connector c2. Next, the steps are performed in reverse order. If all steps are followed, the panel illumination will be improved. Switching on will be done by turning the ignition key.
Foot light
If there is no lighting in this area, the driver of the car will be able to install the lighting for the feet independently, if he deems it necessary. To perform such a procedure does not require large expenses. The driver will only need a piece of LED strip. Before purchasing a strip, decide what color and power of light you want.
Stages of implementation
Divide the profile into four parts. Each of them is approximately 25-35 cm in diameter. Degrease the surface of the profile. Attach the LED strip to the parts (use available means - glue, adhesive double-sided tape). Connect the LEDs to the standard lighting lamp, or central lighting unit. If you want to install backlighting for the rear row of seats, it is better to place LEDs under the driver’s and front passenger’s seats.
Why doesn't the light in the cabin turn off?
This problem is also associated with sensors on the doors; it most often appears in the cold season, when the rubber hardens. In this position, the limit switch sticks and the system “thinks” that the doors are open, and the light in the cabin does not go out.
Way to solve the problem
There are two fairly simple options for dealing with this situation:
- Install an additional spring under the rubber band, which will act on the stiff boot.
- Purchase an alternative Hans Pries 104 035 756 sensor. All you need from it is the rubber band itself, which must be replaced in place of the old one. On analogues this part is softer and more elastic.
The price for solving the problem is from 70 to 100 rubles.
Lada Vesta lamps
Products from the Dustershop77 range on the topic of the article:
| Name | Manufacturer | Price | Availability | Add to cart |
| DC348-64210-01B | Lamp for low beam headlights OSRAM H7 55 W 64210-01B | Original | 500 / 400 rub. Discount: 350 rub. | 9 |
| DC346-OSRAM2825 | W5W OSRAM lamp for front side lights, license plate lights (Duster, Captur, Logan, Sandero, Largus, Terrano) | Original | 100 / 60 rub. Discount: 50 rub. | >10 |
| DC347-1987302201 | Lamp for side lights, rear brake lights, reversing light - BOSCH P21/5W | Original | 100 / 50 rub. Discount: 40 rub. | >10 |
| DC1574 | Instrument and heater illumination lamp w1.2w baseless with socket | Analogue | 90 / 60 rub. Discount: 50 rub. | 4 |
| DC1463 | Instrument panel and heater illumination lamp (W1.2W original) | Original | 80 / 50 rub. Discount: 40 rub. | 9 |
| DC349-64150-01B | Main beam lamp OSRAM H1 55 W 64150-01B | Original | 500 / 400 rub. Discount: 250 rub. | >10 |
| DC1571 | Double-filament lamp (dimensions-DRL or dimensions-brake) 21W5W | Analogue | 130 / 70 rub. Discount: 60 rub. | >10 |
| DC1283-FORTLUFT2825 | W5W Fortluft lamp for front side lights, license plate lights (Duster, Captur, Logan, Sandero, Largus, Terrano) | Analogue | 50 / 30 rub. Discount: 15 rub. | 3 |
| DC1570 | Turn signal lamp front=rear PY21W orange | Analogue | 130 / 70 rub. Discount: 50 rub. | 7 |
| DC1929-6025370411 | Illumination lamp for the control unit Largus, Logan, Duster, etc. 6025370411 original | Original | 200 / 150 rub. Discount: 120 rub. | >10 |
| DC1573-P21W | Lamp P21W 12V (for foot, fog, reverse, etc.) | Analogue | 100 / 70 rub. Discount: 50 rub. | 8 |
| DC1575 | PTF lamp socket H11 (Duster 2011-2015 and analogues) | Analogue | 290 / 250 rub. Discount: 200 rub. | 4 |
| DC1572-921NA | Lamp WY16W 12V 16W Osram 921NA | Analogue | 160 / 120 rub. Discount: 100 rub. | 6 |
| DC1577 | Additional brake light bulb w16w 12v | Analogue | 90 / 60 rub. Discount: 50 rub. | >10 |
| DC1576 | PTF lamp socket H16 (Duster 2015- and analogues) | Analogue | 900 / 700 rub. Discount: 500 rub. | 2 |
| DC1528 | BOSCH turn signal lamp WY5W 12V-5W orange glow | Analogue | 200 / 150 rub. Discount: 100 rub. | 9 |
| DC2055-7701040849 | Lamp for low beam headlights Duster, etc. H7 55 W halogen original 7701040849 | Original | 900 / 700 rub. Discount: 500 rub. | 3 |
| DC2056-7703097176 | Lamp for high beam headlights Duster, etc. H1 55 W halogen 7703097176 | Original | 500 / 400 rub. Discount: 250 rub. | 5 |
| DC2057-262923820R | PTF lamp socket H16 (Duster 2015-, 2021-, etc.) original 262923820R | Original | 1900 / 1600 rub. Discount: 1400 rub. | 1 |
| DC1860 | Button illumination lamp Logan, Largus, Sandero (1 pc.) | Original | 50 / 30 rub. Discount: 20 rub. | 0 |
| DC299 | Set of LED lamps | 1700 / 1000 rub. Discount: 700 rub. | 0 | |
| DC671 | LED board in a lampshade with three lamps (cold light 5500K) | 1300 / 1000 rub. Discount: 800 rub. | 0 | |
| DC666 | LED board in a lampshade with one lamp (warm light 4000K) | 1200 / 800 rub. Discount: 700 rub. | 0 | |
| DC668 | LED board in a lampshade with two lamps (warm light 4000K) | 1300 / 850 rub. Discount: 750 rub. | 0 | |
| DC669 | LED board in a lampshade with two lamps (cold light 5500K) | 1300 / 850 rub. Discount: 750 rub. | 0 | |
| DC667 | LED board in a lampshade with one lamp (cold light 5500K) | 1200 / 800 rub. Discount: 700 rub. | 0 | |
| DC670 | LED board in a lampshade with three lamps (warm light 4000K) | 1300 / 1000 rub. Discount: 800 rub. | 0 |
The interior light turns on over bumps and holes
Another trouble that owners of Kalina, Vesta or Granta may encounter is that when driving over sensitive uneven road surfaces, the interior lighting may come on. The problem is solved independently, without visiting a service station.
Way to solve the problem
First you need to find the hood opening sensor; it is located on the right side when you stand facing the car. On the hood itself there is an elastic band that presses on it, it is adjustable, you can twist it and tighten it. In the case when the light turns on in the pits, you need to unscrew the rubber band a little. This will ensure the limit switch is closed and solve the problem.
Photo source: https://www.drive2.com/l/496319000096014965
It should be adjusted so that when the hood is completely closed, the light does not turn on, but when closed by one click, it continues to light.
Interior lighting
LED lighting of the Lada's interior is represented by lighting in the recess on the front panel, lighting of the driver's foot area and the passenger sitting next to the driver. A special feature of the backlight is its operating mode in light-music mode.
Standard interior lighting is represented by a lampshade, which is located at the top, above the front panel. There are five control keys on the lampshade. With their help, you can turn on the lights on the driver's, passenger's side and fully turn on, turn off, and set the backlight mode when opening the car doors. In addition, the car is equipped with lighting fixtures at the bottom of the door for the driver and the passenger sitting next to him. The backlight lights up every time the door is opened.
How to remove the ceiling light on Vesta
In order to remove the ceiling light on the Lada Vesta without damage or visible defects, you should act very carefully and consistently:
- We insert a flat-head screwdriver between the upholstery and the block frame and gently press it down.
- After this, we pull the frame towards the glass to remove the rear latches.
- Using a Phillips screwdriver or a torx wrench, unscrew the screws securing the block.
- We insert a flat-head screwdriver into the hole located in the upper part of the case and press the latch.
- Disconnect the block with wiring.
If difficulties arise with this process, it is better to watch a video of how the owners carry out all these steps with their own hands.
Parts to improve the lighting of the rear of the car
The closest “relative” of the Polo sedan in the model range of the German concern, which can boast of rear lighting, is the Volkswagen Passat. The expensive “German” Poliku still has a long way to go. But considering that the “Kaluga resident” is gradually acquiring Jetta’s character traits, everything is not so hopeless for the young “state employee”. Moreover, in the skillful hands of an experienced fish specialist, a “native” from the Kaluga plant can easily turn from an ugly duckling into a beautiful swan. Subject, of course, to the availability of financial resources.
In the cabin, one of the first steps towards transformation may be the installation of lighting on the ceiling for rear passengers. With an elegant lampshade, the sedan's spartan interior will look stylish and lively. Well, you shouldn’t forget about the practical benefits of internal equipment parts either. If, God forbid, something falls into this “Dante’s hell” (a pen, keys or other small thing), it will never return. At least until dawn.
Many owners of the Polo sedan, whose hands grow from the right place, as a rule, prefer the lighting element from the “older” sedan - the Passat. The rear light of a 2015 car in Europe looks expensive and modern. It will undoubtedly add premium chic to the budget Kaluga sedan.
The set of parts required for installation includes:
- Courtesy light VAG (3C0947291EY20). Today a lighting device costs about 1,700 rubles.
- Installation frame for fixing the device to the ceiling (1K0867599D). A branded VAG will cost about 230 rubles.
- Special connector (3B0972705) with three contacts (N10335807). All together will cost 300-400 rubles.
- Standard cheap male-female terminal (20-30 rubles).
- Those who are used to saving on energy can replace conventional light bulbs in the ceiling with LEDs. There are three elements installed inside.
READ MORE: Installing DRL on a Volkswagen Polo sedan
