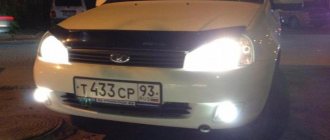
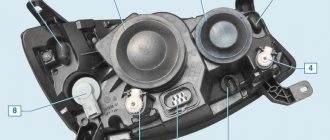
Daytime running lights are a type of optics used to identify a vehicle on the road at any time of the day. Since the installation of this lighting is mandatory in our country, our compatriots have many questions regarding their operation. Read more about in what cases the DRL lamp of a Lada Granta W21/5W is changed and how to replace it yourself.
Common DRL faults
What are the signs of a malfunction of Grant's DRL:
- The glow of the LED elements has become dimmer. If this problem appears on only one headlight, then it is necessary to check the wiring and the quality of the contacts, although the possibility of wear cannot be ruled out. If both lights begin to burn dimmer, then most likely the problem is that the optics are close to failure as a result of having reached the end of their service life.
- The running lights do not turn on. In this case, the problem may lie in the inoperability of the optics, poor contact with the electrical circuit or damaged wiring. The reason can also be found in a non-working switch or DRL activation button.
- The diode elements do not light up, but blink, and the light may disappear. Such problems are usually caused by poor contact between the optics and the on-board network or worn-out light bulbs (video author - Alexander Kordyukov).
What can cause daytime running lights to fail:
- failure to observe polarity when installing lighting sources;
- for some reason the turn signal channel stopped working;
- the safety element or relay has failed, it is necessary to check its functionality;
- filament burnout;
- wiring damage;
- failure or poor contact on the steering column switch or headlight switch.
Replacement instructions
So, if you want to achieve a better glow and increase the service life of your optics, just change the lighting sources in it. As practice shows, the most popular option in this regard is to replace traditional halogen lamps with diode light sources. But before you begin this process, you need to understand that simply installing a diode instead of a halogen will not be enough .
After all, this process has certain features:
- Typically, for installation it is necessary to tear off the base previously installed on the diode element in order to transfer it to the required hole.
- Replacing Lada Granta DRL lamps also involves checking the polarity of the lighting sources in order to maintain the functionality of the safety element. If you do not do this, the fuse will fail in any case, thus de-energizing the safe operation of the on-board network.
Does it make sense to change working running lights?
Many car owners are interested in the issue of replacing standard DRL bulbs with more advanced ones, since the former are characterized by certain disadvantages:
- Dim lighting with yellowish tint. Firstly, in practice, such light often spoils the aesthetic appearance of the car as a whole, and secondly, its lighting does not have the best effect on the visibility of the car in front.
- Low service life of such lighting sources. So sooner or later you will have to face the need to replace light bulbs.
It is for these reasons that our car owners decide to replace traditional incandescent lamps with more advanced lighting sources. If you decide to install diode light elements instead of incandescent lamps, then when choosing, you should pay attention only to their base - replacing a light bulb involves using the appropriate connector (the author of the video is the City&Country Style channel).
It should also be noted that the main disadvantage of DRLs is that this type of optics is not fixed in any way in the current legislation, in particular, we are talking about lighting sources. Therefore, you must be prepared for the fact that you may encounter an inspector who wants to fine you for this. It must be taken into account that certain types of lighting devices must be manufactured in full compliance with GOST and standards. So if the technical specifications of the light bulbs being installed do not match those that should be installed, then this is fraught with possible problems in the future.
What other requirements for LED installation?
The requirements for installing LED lamps include the elementary correct adjustment of the headlight angle. But there is no fine for an incorrect angle, although you will be in trouble on the road from other drivers whom you may blind.
The main requirement for installing LED bulbs in low and high beam headlights is that the headlight must be equipped with an auto-tilt angle correction and a washer. This is what we are prescribed by clause 1.3.7 of the Technical Regulations:
1.3.7. Adaptive front lighting systems that perform the function of low beam, regardless of the light source used, low beam headlights with LED light sources, as well as low beam and fog headlights with light sources of any class having a rated luminous flux of more than 2000 lumens, must be equipped with automatic correction device for adjusting the headlight angle.
Low beam headlamps having light sources with a rated luminous flux of more than 2000 lumens must be equipped with an operable headlight cleaning device.
Video “How to ensure bright DRL lighting in Grant without modifications?”
The video below presents recommendations for ensuring the brightest illumination of daytime running lights in a Lada Granta car (the author of the video is TheLadaGranta channel).
- January 11, 2016 11:30:17
- Reviews:
daytime running light lamp is combined with the dimensions. Standard socket 4 pin w21/5w. 21 W – running lights, 5 W – dimensions. It seems like install an LED lamp of this size and that’s it. But no...
AvtoVAZ loves to come up with the best schemes and non-standard solutions. It's the same this time. The pinout on a standard base is completely non-standard. Therefore, if you install an ordinary LED lamp , then the following options are possible: either the running light (or dimensions) will not work, or it will start to smoke..
There are several options for solving this problem.
Option 3. The most barbaric. Drill out the entire base from the standard Granta connector. Glue the light bulb there tightly and either solder the wires as needed, or buy an additional connector and solder it on it.
The most correct option is to use special non-polar LED lamps . This means that no matter how “+” and “-” are supplied, the electronics inside the lamp will determine how to supply power to the chips.
Rate it! Luminous flux - 720 Lm (halogen low beam lamp gives a flux of 1200 Lm) Chips - American made CREE, 6 pcs Multi voltage from 12 to 24 V Non-polar Claimed service life of more than 30,000 hours.
We connect the LEDs. How and which ones are best to install on Kalina 2
Many motorists love to spend their free time alone with their iron friend. And, if there are no problems with the car itself, then they are engaged in tuning it. In such cases, almost everything can be replaced, from the appearance of the car to the parts of its engine.
It is quite common to replace manufacturer-installed side lights with LEDs. However, this decision is quite wise, since LEDs are much more durable and consume less energy. But, on the other hand, they do not glow like lamps do.
In addition, they are safer than standard lamps, since the power supply of the LED lamp is instantaneous, which allows the driver behind to react to the light faster.
However, replacing an LED is a little more difficult in reality than in the text, since you can simply buy an LED cluster and replace standard lamps with it. Replacement will require some effort. Now we’ll figure out step by step how to replace LEDs and which ones are best to choose for installation on Kalina 2.
Among the many LED options, the best ones for Kalina 2 are those marked W21/5W, P27/7W (3157, 7443) and the abbreviation SRCK. You shouldn't have any problems installing these LEDs.
About lamps with increased visual comfort
For the Lada Granta, such a running light lamp is a conventional lighting device, made using standard halogen technology, but having a more pleasant white light spectrum. Their main drawback is reduced visibility in rainy weather. This is explained by the tendency of white light to produce more glare from wet surfaces and raindrops compared to a yellow tint.
To be more specific at this point, among the most common halogen products that are readily purchased by many owners are the following:
- OSRAM and General Electric;
- "Mayak" and "Philips";
- "Narva", "IPF" and "Hella".
This is not the entire recommended list of devices. If you ask about the priorities of the car manufacturer, they like OSRAM H4. These devices have two versions:
The first version has full compliance with legislative regulations in terms of ensuring safe conditions of use, including: current strength, cut-off line, illumination, beam delivery geometry and power.
The second option has an advantageous difference from the first in terms of increased resource, but is inferior in the power of the light beam. However, purchasing devices is one thing; you need to know how to change the running light bulb with your own hands.
If replacement of lamps is required, it is carried out using the following simple method.
We answer the question of how to change the running light bulb on your own.
- We provide comfortable access to the lighting device on the left (upstream) side. For this purpose, we remove the housing of the filter component of the air intake tract and disconnect the sensor, its supply cables and pipes.
- The body itself is forced to move upward and to the left.
- To provide access to the headlight on the right side of the car, it is necessary to remove the decorative engine cover. Here we temporarily unscrew the oil filler plug, then unscrew the 4 fastening units and pull the cap (snap it off).
- Removing a used DRL lamp involves first rotating the socket counterclockwise, after which it is removed from the socket. Having taken out the old lamp, we mount the new element into the cartridge groove. Now we screw the cartridge itself into the block.
Attention! Changing halogen devices does not “tolerate” touching the surface of their bulbs with your fingers.
This is due to the risk of leaving marks from sweat and fat, which negatively affects the service life of the device. We recommend using cotton gloves when working that do not have rubber coating on work areas. Before installing lamps on LADA Granta, wipe their bulbs with alcohol-containing wipes. This is exactly how the running light bulb is replaced.
LED running lights
The indicated process of replacing lamps on a Lada Granta does not imply that the owner has super abilities, but is associated with some minor nuances.
- Replacing the running light bulb with LED analogues involves performing it simultaneously in both headlights.
- When installing LED devices, it is necessary to observe the polarity of their connection.
Attention! If you do not take into account the need to ensure polarity, this leads to instant failure of the lighting device itself. In addition, the fuse protecting the DRL circuit falls into the risk zone.
To check the polarity of the lights on the LADA Granta, you should use a tester with the voltmeter mode turned on. Before removing the used lamps, turn on the DRLs. When the contacts of the receivers receive voltage, we bring the voltmeter probes (red and black) to their surface. We look at the readings and, if we find a negative value, this indicates a violation of the order (polarity) of the connection. In this case, the digital tester displays a “minus” on the screen, and the analog one “drives” the arrow below “zero”.
conclusions
The standard DRL lamps are quite good.
Standard DRL lamp
Standard DRL lamp in headlight close up
They shine well, diodes shine better, but no one has ever used DRLs before. This is all marketing necessary in order to equip the car with additional mandatory elements for which you will have to pay. Replacing a DRL lamp is simple; a regular lamp costs about 100 rubles, while diode lights will cost you a couple of times more!
I would only consider replacing if I had problems with the stock hardware!
For me, the most important advantage of an LED lamp is that if one diode burns out, the remaining diodes will continue to work. This means you can continue moving!
Features of installation of LED DRLs
If you couldn’t find devices for the Lada Granta without bases, then you can stop at using conventional products. Here you will need to manually remove the base, and its released contacts will need to be adjusted to the mounting holes.
Once the procedure is completed, replaced devices should not be thrown away. This is explained by the need to comply with regulations governing regulatory and technical requirements for aspects of daylighting, which requires a visit to the technical center. If this is neglected, then there is a possible risk of prohibiting the operation of a car with lighting equipment modified in this way during the next technical inspection.
Today, the market network is able to offer a lot of LED devices for LADA Granta, with different lighting spectrums. However, regulations say that only white or yellow tints are permissible for DRLs, and other alternatives are prohibited.
Devices based on LED technology, including DRL lamps, differ from halogen lamps in having relatively lower energy consumption. This will further reduce the load on the battery. If you forget to deactivate the DRL at night, you will still minimize the risk of draining the battery.
The design of the Lada Granta lighting system requires the presence of a relay in the circuit, which is responsible for ensuring the DRL functionality. In addition, this device provides power to the brake lights and injector. Due to the reduced power consumption of LED devices on LADA Granta cars, the relay is capable of generating incorrect readings, complaining about a malfunction of the DRLs. With such a picture, the running lights lamp on the “tidy” will be activated with an annoying frequency, and the built-in diagnostic complex will emit sound signals. To eliminate the problem, you will need to replace the standard panel with an export analogue installed in European versions of the Lada Granta. We described above how to change the running light bulb.
Scheme 3
Here, the running lights turn on after the engine starts. The relay, battery and generator are involved. We connect the negative of the DRL to the car body, and the plus to the relay contact marked 30. We connect the relay contact marked 87 to the positive of the battery. We connect the relay contact marked 85 to vehicle ground through the DRL. And with mark 86 we connect to the reed switch, the second contact of which is connected to the plus of the generator. After starting the engine, move the reed switch around the generator so that the relay is activated and the running lights turn on. After this, we pack the reed switch in thermopolymer and attach it to the generator. It is very important that the reed switch is attached exactly in the place of the generator where the relay operates.
Connection diagram for running lights from the generator
