Dismantling and repair
In the event of a minor traffic accident, when the headlight housing is not damaged, only the glass can be replaced. To do this you will have to dismantle the element. How to do it?
- Remove the front bumper.
- Disconnect the connectors of the wires supplying power to the headlight.
- Unscrew the lower fasteners.
Unscrew the lower headlight mount
Unscrew the top fastenings of the headlight unit
After installing the headlight in place, be sure to re-adjust it so as not to blind oncoming traffic and not “shine into the milk.”
Glass repair will take a maximum of half an hour.
We take out the headlight towards ourselves
So, let's move on to the sequence of actions.
- Carefully remove the rubber seal.
- As practice shows, it is glued and to dismantle it you will have to cut through it with a thin knife.
- When the glass and the body are separated, it is necessary to clean off the old seal and glue residues.
Disconnecting the headlight housing and glass
The repair has been completed and the headlight can be installed in the reverse order.
Replacing head lamps
Each lamp has its own resource, the value of which depends on many factors. Over time, devices break down and require replacement. And then the question arises: how to disassemble the headlight?
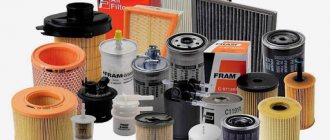
The replacement procedure is simple, but before that you need to choose the right lighting devices from the mass of products offered on today's market. Although sometimes all you need is to replace the headlight glass.
So, if the headlights are purchased, then we change:
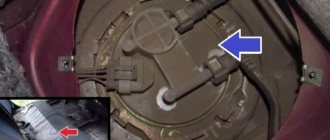
- Remove the protective cover from the headlight housing. It's rubber, so it's easy to pull off if you pull on one of the three tags.
- Disconnect the power connector.
- Release the spring clip.
- How to remove the headlight? We take out the lamp and install a new element in its place.
- If contact occurs, it is necessary to wipe the surface of the flask with a cloth moistened with alcohol.
- Changing side lamps
- We also remove the cover and disconnect the corresponding cartridge from the on-board network.
- We remove the lamp and install a new one in its place.
How to disassemble the headlight on a Lada Granta, Kalina 2 (replace glass, mask)
05 October 2022 Lada.Online 19,479
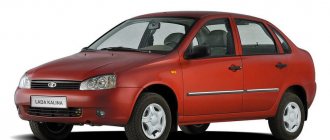
Granta and Kalina headlights are considered non-separable. If a crack appears on the glass, the headlight unit is replaced as an assembly. However, with a strong desire, it is still possible to disassemble it. Let's look at how to remove the glass and headlight mask with your own hands. The process is shown using the example of a Lada Granta headlight. On the Lada Kalina 2 headlight, all actions are performed in the same way.
You will need: remove the headlight, prepare a Dremel (disc diameter 20 mm), sharp knife.
Headlight glass mounting diagram:
New Lada: Unstable operation of the LADA Kalina engine - LADA forum (VAZ) Kalina
The sealant that holds the original headlight glass in place is heat resistant. That is, you won’t be able to loosen its “grip” by heating it with a hairdryer or in the oven. In addition, there are four fastening brackets on the edge:
How to replace headlight glass:
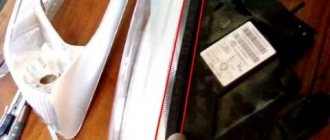
- Seal the glass with masking tape to prevent damage during work.
- We cut off about 7 mm of the U-shaped fastening (using a Dremel), and then remove the remaining sealant (photo No. 1).
- We cut off about 2 mm of the sealant between the glass and the plastic using a Dremel (photo No. 2, color green).
- We remove the remaining sealant using an L-shaped blade (you can bend an ordinary knife after heating), photo No. 3.
When reassembling, we use a transparent glass sealant (for example, ABRO).
What it looks like in practice:
The process is also shown in the video:
How to remove the mask from the headlight:
- The inner mask is attached using a spring mechanism, which is connected to a hydraulic corrector.
- The outer mask is held in place by 4 Torx screws.
Now it becomes possible to install powerful LED or flexible DRLs. Have you ever had to disassemble the headlights on a Grant or Kalina yourself? How did you manage to do this?
Photo: wowic87 logbook
Keywords: headlights Lada Granta | headlights Lada Kalina | turn signals Lada Granta | turn signals Lada Kalina
1
3
Found an error? Select it and press Ctrl Enter..
- How much will you have to pay extra for Lada Largus Cross Quest
- AvtoVAZ named the reasons for overheating of the starter, and when it is replaced under warranty
- Installing a seal on the rear shelf of Lada XRAY
- “Sores” Lada Vesta according to autorambler
Headlight design for Lada Kalina
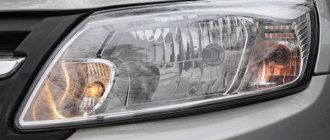
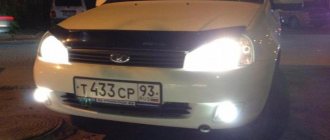
Headlight unit installed on a car
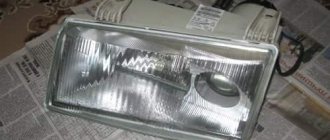
Like most new generation cars, VAZ 1117-1119 models are equipped with headlights of a simple design. Let's look at what elements are included in this node:
- Outer glass that protects the light bulbs and prevents water and dirt from getting inside.
- A plastic case to which all the main elements are attached.
- The rubber seal between the glass and the body provides good water and dirt resistance.
- Lamps for signaling turns, as well as low and high beam.
- There is a plastic reflector installed inside the case, which has a mirror surface and reflects the light of the bulbs.
New Lada: Clutch malfunctions. Self-adjustment of clutch on Lada Kalina | VAZ REPAIR
Each headlight unit is equipped with light bulbs, which are well, one might say tightly, fixed in the housing, which ensures their resistance to vibration.
Headlight diagram with explanation
Other causes of breakdowns
The reasons for the loss of light may be a broken wire, loose contact of connectors, breakdown of controls, etc. If the problem cannot be visually detected, it is recommended to test the wiring to identify network breaks. Calling did not bring results - contact an auto electrician. Neglecting the problem can aggravate the situation and lead to breakdown of other electrical elements in the network, then repairs will cost much more.
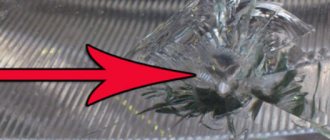
Kalina's headlight glass may fog up, which leads to a decrease in light brightness. If frequent fogging is observed, there is a high probability of depressurization of the headlight housing. It is recommended to remove it and thoroughly coat the joints with sealant.
The procedure for dismantling the lights
You should know that the Lada Kalina 1118 flashlight system consists of:
- housings;
- glass (polycarbonate);
- lamps;
- reflector;
- wiring;
- lamp plugs;
- decorative inserts (masks).
As for the ease of removal and subsequent replacement of the lamp on the 1118 model, the process usually involves removing the front bumper. After this, the screws on the top and bottom of the lighting fasteners become accessible. After dismantling them, you can immediately remove the headlight unit, not forgetting to first remove the blocks with wires.
However, not all car enthusiasts have a lot of time to replace the lighting system or experience in removing the bumper. For this reason, a more popular method is to change the Kalina headlight without removing the bumper.
To do this you will need to use:
- key for 8 and 10;
- a set of screwdrivers (flat and Phillips);
- new lighting system component.
In order to adjust the block lighting on the Lada. You will need to complete the following steps:
- Remove the air filter housing, as well as the coolant unit.
- Remove the PTF plug using a screwdriver.
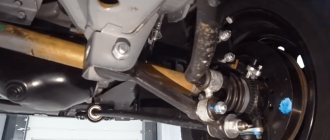
- Unscrew the bolt on the lower fastener of the lighting component using a 10mm wrench. Insert your hand into the PTF hole.
- Remove the bolts located on the upper fastener of the light block component. They are located closer to the radiator. Use the key at 8.
- Unscrew the screw securing the product to the car fender using a large Phillips screwdriver.
- Expand the Lada Kalina headlamp so as to move the part closest to the radiator closer to the car engine. This measure will allow you to remove the lower fasteners from the seat.
- Remove the lower iron fasteners of the headlight. To do this, you will need to remove a couple of bolts with a short head.
- Remove the car light by moving towards you. At the same time, try not to damage the paint layer, since during dismantling the lamp will be located as close as possible to the bumper and fender.
After this, you can install a similar device in reverse order.
Rules for adjusting light
After installing the headlight, you need to adjust the luminous flux. You can do this yourself or by contacting a specialist. When making adjustments yourself, you should direct the light from the headlight to the wall with the markings. There should be 5 meters between the car and the wall.
We measure the distance from the ground to the car headlight (H), draw a vertical line on the wall parallel to the center of the car, then draw a horizontal line equal to the height H+10 cm. Set the Kalina headlight adjustment switch to position 0 and turn on the lamps. Using the adjustment screws, we adjust the luminous flux as shown in the figure.
Replacing a headlight on a Kalina with a little skill and patience is a simple process, although it takes several hours. Basic recommendations: put screws and bolts in one place to prevent their loss, check the functionality of the lamps before assembly, do not be nervous.
Disassembling the headlights of the Lada Kalina (Kirzhach)
You will need: hair dryer, utility knife, flat screwdriver.
Removing the glass of these headlights without breaking it is not an easy task, requiring time (sometimes up to 6 hours) and patience. The difficulty of disassembly is that the sealant in this case is more “difficult”. Often, heating it with a hairdryer causes the plastic of the headlight housing to melt faster, so many people resort to other disassembly methods.
If you don’t have a hairdryer at hand, then a regular oven may come in handy. Turn it on at 150-160C and wait 5 minutes. Then put the headlight in the oven on a wooden board and bake it for about 15 minutes. Then, wearing gloves, we pull out the headlight with a slightly softened sealant, and using slotted screwdrivers of different sizes, we pry the glass around the entire perimeter of the headlight. The black plastic that runs along the perimeter will change its original shape, you should not be afraid of this, since it will then level out. After about 10 minutes, the sealant will begin to harden, so we work quickly. Did not have time ? Not then we take the headlight into the oven again (this procedure can continue up to 10 times). We remove the mask (backing) of the headlight by unscrewing all the adjusting bolts (asterisk) from the outside. After disassembly, you can begin tuning Kalina's headlights.
Replacing head lamps
Each lamp has its own resource, the value of which depends on many factors. Over time, devices break down and require replacement. And then the question arises: how to disassemble the headlight?
Dimensions Kalina
Fog lights Kalina
The replacement procedure is simple, but before that you need to choose the right lighting devices from the mass of products offered on today's market. Although sometimes all you need is to replace the headlight glass.
So, if the headlights are purchased, then we change:
- Remove the protective cover from the headlight housing. It's rubber, so it's easy to pull off if you pull on one of the three tags.
- Disconnect the power connector.
- Release the spring clip.
- How to remove the headlight? We take out the lamp and install a new element in its place.
Attention! When replacing a halogen lamp, avoid touching the bulb with your hands. This may damage the device
Over time, greasy fingerprints will cause the glass to darken, causing the lamp to overheat and eventually burn out.
- If contact occurs, it is necessary to wipe the surface of the flask with a cloth moistened with alcohol.
- Changing side lamps
- We also remove the cover and disconnect the corresponding cartridge from the on-board network.
- We remove the lamp and install a new one in its place.