Farah Kirzhach
Many motorists, faced with malfunctions of the VAZ 2110 headlight, try to repair the headlight themselves, so to speak, with their own hands, or to improve the performance of the headlight, expanding its capabilities. However, finding high-quality optics is not so easy. Most often, cheap headlights from China or Taiwan come onto the market. Especially xenon headlights or lamps. They do not shine with quality workmanship, and durability leaves much to be desired; according to test results, they are inferior to standard classic copies. The price of high-quality illuminators is considerable, however, they last several times longer. You can make repairs or modifications to the optics that you already have if you want to save money. You can easily do this yourself; the work does not require special knowledge or additional skills. Headlights for the VAZ 2110 differ in technology and manufacturer. Standard headlight brands:
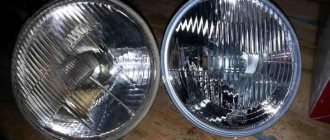
- Bosch headlights (contain reflectors only, no focusing lens)
- Headlights from Kirzhach (including a focusing lens and reflector)
The most common headlight malfunctions:
- Broken hydraulic corrector, which is more practical to replace with an electric corrector;
- Trembling of the light beam;
- Lost adjustment of the light beam.
Tuning and repair of VAZ 2110
The information presented in this article will concern the disassembly of the VAZ 2110 headlight. Why do you need to disassemble the headlight?
In my case, I did this in order to insert the diode strip inside the headlight. This will also be useful for those whose headlights sweat. The reasons may be different. I will not describe how to remove a headlight from a VAZ 2110 in this article, since you can find detailed information about this HERE.
Well, let's get down to the process itself. In order to disassemble the VAZ 2110 headlight, you need to be patient. Since the parsing process is simple, but it can take a while.
First, let's look at how to disassemble the headlight of a VAZ 2110 (Kirzhach)
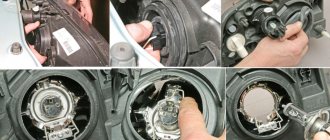
- So, the first thing you need to do is remove the glass from the headlight. I consider this stage to be the longest and most dangerous. Dangerous because if you are not careful you can break the glass.
A) Insert a screwdriver or knife into the edge of the headlight, between the glass and the plastic block.
B) This will create a small gap through which you can insert a utility knife and begin cutting the sealant.
C) be careful, do not rush, do not insert the screwdriver too deeply, otherwise the headlight glass will simply crack.
D) We go through the entire perimeter of the headlight with a knife. If the sealant does not yield, you can warm up the headlight with a hairdryer.
D) When the sealant has been slightly trimmed around the entire perimeter of the headlight, you can carefully push the screwdriver deeper into the headlight or insert a thicker screwdriver.
E) And again we go through the entire contour with a knife. (I played with the first headlight for 2 hours, with the second one less, either I gained experience, or there was less sealant. The second one succumbed to me in half an hour).
G) When the glass has completely come off, remove it from the headlight. Be careful, as the glass caught on the chrome plastic inside the headlight. And then it is fastened behind the headlight with three bolts. Therefore, if this happens to you, pry it with a stationery knife so that it comes unstuck from the glass.
We've sorted out the glass, let's move on.
2. Remove the chrome insert. To do this, unscrew 3 bolts from behind the headlight.
3. If you need to remove the headlight module and reflector, then remove the spring through the hole for the hydraulic corrector.
4. Now tighten the adjustment screws as much as possible, insert the screwdriver handle and unscrew the adjustment screws.
5. Now you can remove the board from the plastic headlight housing.
That's all, now let's look at the analysis of the VAZ 2110 (Bosh) headlight . Everything is much simpler with her.
- The glass on a Bosch headlight is very easy to remove, since it is not sealed with sealant. Unfasten the headlight latches.
3. To remove the reflector, you need to unscrew the adjustment screws and pull out the cap that covers the low beam bulb; to do this, pry it off with a screwdriver from the other side.
Removing glass
In fact, replacing headlight glass on a VAZ 2110 is not a rare event. It may be required if a large number of microcracks have formed on the glass, it has become cloudy or simply cracked due to an impact, collision or careless parking.
Changing glass
The removal procedure depends on the type of flashlight you are dealing with.
Replacing glass on Bosch optics looks quite simple. You need to press the latches, after which the glass can be easily removed.
But when installing a new one, do not forget to look at the condition of the rubber seal. This is a consumable item that is best replaced immediately. Additionally, craftsmen advise using a sealant. This procedure is not mandatory, but it improves the quality of installation and protects the interior of the headlight from the same condensation, for example.
But if you have Kirzhach, we sympathize a little. In this situation, it will be much more difficult to remove the glass. But this does not make the procedure impossible.
- Arm yourself with a flathead screwdriver and insert it into the corner of the glass. This will create a gap of sorts.
- With your other hand, take a sharp utility knife, thereby cutting off the sealant.
- If the sealant has hardened firmly, try heating it with a regular hairdryer. Hurry up with removal, as the composition will quickly harden.
- In any case, you will have to dig deeper into the headlight. Be careful not to damage the glass. If it is already cracked and needs to be replaced, you can resort to more aggressive glass removal methods.
- When installing new glass, use a softer sealant that is used in construction.
Replacing headlights is not as difficult as it might seem at first glance. Such repairs have their own nuances and features, but if you follow the instructions and be careful, you will definitely be able to do everything with your own hands.
Repair of headlight unit for VAZ-2110 car
The VAZ-2110 can be equipped with a Bosch or “Avtosvet” type headlight unit.
Headlight units vary in design.
Low beam headlight "Avtosvet" - with a flat screen and a lens between the lamp and the lens, the lens of the headlight unit is glued to the body, the side light lamp is located in the main beam headlight.
Bosch low beam headlight - without a lens, with a screen-cap on the lamp, side light lamp - in the low beam headlight.
The turn indicators for both headlight units are the same, the mounting points are the same: at the top - with bolts to the upper cross member of the radiator frame, at the bottom - with a nut to the stud on the mudguard bracket and a bolt - to the radiator frame strut.
The headlights are equipped with single-filament low and high beam lamps.
When you turn on the low beam of the headlights, the low beam lamps light up, and when you turn on the high beam, all the lamps (both low and high beam) light up.
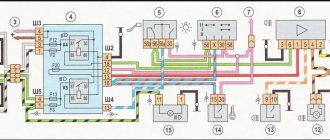
The voltage for the low and high beam lamps is supplied respectively through relays K4 and K5 of type 904.3747-10, located in the mounting block.
The relay switching voltage at a temperature of 20±5°C is no more than 8 V, the winding resistance is 85±8.5 Ohms.
Voltage is supplied to the relay windings if the exterior lighting switch key is fully pressed (then the choice between low and high beams depends on the position of the steering column headlight switch) or, regardless of the position of the switch, if the driver pulls the steering column switch towards himself (then the high beam turns on headlights).
Features of operation
The new corrector will last a long time and will not need repairs for a long time if the replacement is done correctly. During operation, the corrector must be checked regarding the integrity of the pipeline. If a leak is detected, the entire set must be replaced again.
Depending on how loaded the vehicle is, the headlights can be directed higher or lower. To adjust the light flux, special devices are used - hydrocorrectors. If the car is loaded, the headlights should be turned down so that the flow of light is directed not upward, but onto the road. This ensures the necessary illumination of the road surface and prevents the driver of an oncoming car from being dazzled. In the case of a minimal vehicle load, when the rear part of the frame is raised, the headlights should be turned upward.
Removing and disassembling the headlamp, replacing lamps
Disconnect the negative cable from the battery.
Disconnect the two electrical connectors of the headlight unit.
Using a 10mm wrench, unscrew the two bolts of the upper headlight mounting.
Remove the radiator grille.
Unscrew the lower mounting bolt.
Carefully pry off the decorative trim with a screwdriver.
We move the trim to the center of the car and remove it.
Using a 10mm socket, unscrew the nut securing the headlight unit to the bracket
Headlights for VAZ 2110
Poor quality light causes accidents. You need to know how to select and repair headlights on a VAZ 2110, since the car is popular and such questions arise often. The lighting function in a car is performed by all kinds of devices. Well-chosen head lighting will reduce the number of dangerous situations on the road.
There are few factory options:
- Kirzhach (cost from 2500 rubles);
- Bosch (about 3000 rubles).
Choosing a headlight manufacturer for VAZ
Light is very necessary for the driver. Products from the first company with a lens for near and a reflector for far. Bosch only has a reflector. In “Kirzhachnaya” the light line is clearer, and devices from this company make it possible to equip cars with xenon elements. Products from the second manufacturer do not have this option; they are characterized by slight illumination from the side under the low beam. But preference is often given to them. They have a larger overall surface; their low beam reflector is better in cloudy weather conditions.
Correct adjustment of the devices is important; they must be cleaned of dirt. The “Kirzhach” ones are secured with a sealant, the second ones with a sealant, they are easier to replace.
The best choice is bright halogen lamps.
You can improve and modernize light devices (headlights for VAZ) by cleaning them. Adhering dust is unnoticeable, but it greatly degrades the light, this also applies to more noticeable dirt and swamps.
A jet headlight washer is also installed; it is not available in the factory version. Volgovsky ones will fit perfectly. The jet headlight washer is installed as follows: remove the bumper, make holes, push in the washer modules, tighten the fasteners. The tubes are connected to the washer tank. They connect the button and the fuse for the device, they are located in the cabin.
In addition, the glass of the device is carefully inspected for cracks; if there are any, there is only one solution - replacement. Pull out the block by disconnecting the minus terminal from the battery. The device is cleaned as follows: using a construction hairdryer, the sealant is carefully softened around the edges, then the glass is pryed up and removed. The sealed mixture is removed, the glass and frame are degreased, a fresh sealed mixture is applied, and the device is carefully pressed into place.
An unusable peeling reflector must be replaced: the glass covering of the frame is removed, the lamp is unscrewed and taken out, then the reflector is removed, then a working reflector is mounted, and the device is assembled.
Simple lamps are being replaced with halogen lamps; they are brighter, more economical and more durable. They can also be replaced with xenon; such devices have different power and brightness. Install daytime running lights. You should only use those models that are recommended for the car.
Preparing for adjustment
To get started, we recommend watching a video on adjusting headlights on a VAZ 2110. Training lessons will allow you to understand the nuances of the procedure in more detail and pay attention to the important points of the operation.
Everything is not as complicated as it might seem at first glance. First, prepare the car appropriately for adjusting the optics.
- Wash your car headlights to keep them as clean as possible.
- Examine the condition of the optic glass. In some cases you will have to polish it. The procedure is not complicated, but requires a careful and careful approach.
- Now check the reflector for defects or damage. If they are, it is better to immediately replace it with a new one.
- If the car has been in use for a long time, then the existing lamps are unlikely to be modern and highly efficient. Experts recommend using modern halogen bulbs, which do an excellent job of illuminating the road surface.
- Pay attention to the standard indicators specified in the owner's manual for your vehicle. Before adjusting the headlights on a VAZ 2110, you must: fill the fuel tank, inflate the wheels to the required levels, and check the spare wheel.
Having completed the preparation to obtain the necessary conditions, you can proceed directly to the settings.
Washer: main aspects
Many drivers install jet headlight washers themselves. You can choose OFS-12P.
for this you need:
- up to 4 m of hose;
- about 15 worm clamps;
- relay, fuse with holder, terminals, wiring.
The washer reservoir has two pumps, but another additional one is mounted, which is connected to the battery via a relay and fuse. The jet headlight washer is connected to hoses and wiring. Its operating time is dosed manually.
Good light clearly illuminates surfaces and objects, and has a direction that does not blind oncoming motorists. This will ensure high-quality adjustment; there are rotating screws for it that fix the device horizontally and vertically. The best way to do this is to use mobile light devices, and also use a screen.
Instructions
Wash your headlights. Adhered dirt is very often the main reason for the sudden deterioration of headlights. If you don't want to constantly wipe your headlights, then install headlight washers. Install this option on your VAZ
2110, unfortunately, is not available. Therefore, you will have to be an inventor a little. Volga washers are quite suitable for the “ten”. Remove the bumper, drill holes, insert washer modules into them, tightening them with bolts. Connect the hose to the washer reservoir. Also connect a button in the cabin that will control the operation of the washers. Connect it only through a fuse.
Examine the integrity of the headlight glass. If it is cracked, install a new one. To do this, remove the headlight unit, having first disconnected the negative terminal from the battery. Wash the headlight. Take a hair dryer and turn it on to maximum power. Apply heat to the edge of the headlight glass using smooth, circular motions to soften the sealant. Use the blade of a plastic screwdriver to pry up the glass and remove it from the headlight. Remove old sealant from the glass and headlight housing. Degrease the body and edge of the new glass. Apply a layer of new sealant. Carefully press the glass onto the headlight housing.
Replace the reflector if the old one has peeled off. To do this, you need to remove the glass from the case. Unscrew and remove the light bulb. Unscrew the bolts holding the reflector from the back. Remove the old reflector by opening the latches. Install the new one and reassemble the headlight in reverse order.
Replace the factory bulbs with halogen ones. They shine much brighter. It is also worth noting their durability and efficiency. Instead of halogen bulbs, you can install xenon. Xenon lamps come in different wattages, which determine the brightness of the light. Install only those types of light bulbs that are recommended for use in your car model.
Many owners of this car complain about poor light, so upgrading the Kirzhach headlights on the VAZ 2110 will be an opportunity for them to improve it. There are many complaints from drivers about it; they note the poor light of products from Germany, a narrow luminous flux and some other shortcomings. The situation cannot be corrected by installing more powerful lamps, so owners are forced to resort to various tricks.
If there are problems with optics, alternative proposals appear, but their cost is high.
Modification of Kirzhach headlights on VAZ 2110
is a real proposal for a way out of this situation. If you take the time to search for suggestions on how to improve the lighting on this car, you will find many suggestions. With our advice, we will try to help drivers improve the illumination of the road, and therefore increase the safety of themselves and other road users.
About affordable lighting equipment for dozens
Today, the automotive market is filled with lighting equipment from various manufacturers, with the help of which you can not only improve the illumination of the roadway, but also transform the appearance of the car thanks to their updated appearance. Most owners choose products from two companies. This is domestic, Kirzhach optics from this company receives good reviews, and German branded from Bosch.
No one can say for sure which one is better, but some features of these products should be mentioned. The optics are expensive, but have a built-in lens for the low beam lamp. Its presence allows you to focus the light flux, which means improving your visibility of the roadway. These headlights lend themselves well to numerous tuning options. Also for these products there is a legal installation of xenon.
If, to improve illumination, we take original products from Bosch as a basis, then it does not have all of the above features and advantages. Manufacturers do not produce modifications of these products, but their price is somewhat lower than domestic products. Bosch optics are more susceptible to contamination, since their glazing area is larger than that of a domestic headlight.
Let's talk about remodeling
For those who decide to upgrade their lighting, products from the Kirzhach brand are the most suitable option. They allow several modification options, and there is also the possibility of installing xenon. Thanks to such modifications, the efficiency of the headlight and its light output increases. Having the skills to work with various plumbing tools, you can perform such alterations yourself.
In order to begin upgrading these products, you must first remove the headlights from the car. Next, you will need to completely disassemble the removed optical elements. First of all, you need to carefully separate the glass from the headlight housing. It is attached to the body using a special sealant. This work must be done carefully so as not to damage the glass, otherwise you will have to buy a new one.
About disassembling headlights
After completely separating the glass from the body, the procedure will be something like this:
- We begin to remove the reflector; to do this, we need to unscrew several screws;
- Now you can remove the connectors and remove all the wires from the rear of the headlight;
- The spring near the hydraulic corrector is removed to make it possible to remove the frame from the body;
- Using a screwdriver, remove the low beam module from the housing and completely disassemble it.
A little about the improvement
The purpose of such an operation can be only one, improving the illumination of the roadway. Experts break it down into several stages, they can be as follows:
- Work to move the lens closer to the reflectors;
- Refinement of curtains;
- Changing the shape for the reflector.
Only carrying out all stages of refinement can lead to achieving the desired results in improving Kirzhach optics.
We need to talk about these stages separately. How to move the lens?
This operation is carried out to move the lens to reduce its area that receives illumination from the lamp. This achieves a decrease in the curvature of the lens. This can be done this way:
- It is necessary to completely disassemble the module and remove the lenses from it. Cuttings must be made at the proposed new location for installing the module. At this time, it is necessary to carefully monitor the position of the curtain; it should always be at a distance of 50 mm;
- In the marked place, you need to saw off the module and strengthen the lens; for this, previously made cuts are used, and the module becomes somewhat shorter. It is important to take this point into account; the lens heats up, so the optimal approximation size will be 10 mm.
About altering the curtains
It is needed to prevent blinding of drivers ahead. To do this, the curtain is made straight. First, a template is cut out of cardboard, then a metal product is made from it. The finished product is installed on the module, before which it can be covered with foil for better dispersion of the light flux.
If desired, you can find several more additions to this modification in different sources. Do-it-yourself modification of Kirzhach headlights on a VAZ 2110 also brings moral satisfaction for the owners. Therefore, be careful and prudent, and everything will work out for you.
Quite often, motorists have to deal with such a problem as damage to the headlight glass. As a rule, assembled headlight units are installed on VAZ cars. It is sealed, the glass is firmly glued to the body, and many car enthusiasts, if the glazing is damaged, simply replace the headlight assembly. Such repair of VAZ-21099 headlights, like other models (2105, 2107, 2108, 2109, etc.), as they say, “will cost a pretty penny.” A more profitable option is to replace the glazing. This procedure is easy to do yourself.
Fog light
A very useful device, provides light in bad weather environments. The factory version is supplied for the VAZ 2110 “Lux” configuration. In other versions you need to install them yourself. At the same time, the place in which they will be placed is determined. Most often, this is the bottom of the bumper, there are holes for fastenings.
- transparent - they give light in spots, they are a little worse;
- corrugated - scatter light well on the road surface.
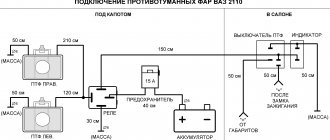
They purchase frames, relays, a power button, and wires for them. The latter are placed under the hood from the instrument panel, they are connected to the connectors on the instruments, they are isolated, the instruments are fixed in frames and secured to the bumper, and the wires are connected. The button is mounted in the break of the supply wire. Then the devices are adjusted.
Daytime running lights for VAZ 2110 headlights
For daytime running lights (they consist of LEDs and LED devices) there are several location options:
- at the bottom of the radiator grille;
- inside the top or bottom of the radiator lining (for diode strip);
- the perimeter of the cladding is decorated with individual devices;
- installation of LED strips or individual devices inside headlights;
- directly in front of the headlights.
Only the last two options fit the technical standards. Daytime running lights have nothing to do with side lights; their job is simply to improve the light. You can design both the front and rear headlights this way.
Rear light tuning
We offer one of the options. For this you will need:
- LEDs;
- knife;
- organic glass;
- tape measure, ruler, flexible meter;
- pencil, compass (marking);
- resistors, silicone.
Here's how to remove the headlights: the devices are disassembled, the glass is fixed by soldering, not glue, so the corner is cut off. When the knife is inside, the glass is removed. Then the headlight parameters are determined and plexiglass blanks are made from them. Holes are marked, drilled, diodes are glued in with superglue, resistors are soldered in, and then the whole thing is sealed with silicone glue. Then everything is assembled and glued, the seams are sealed with a silicone compound, thanks to which water will not get in there.
Installation and selection of bi-xenon devices on the VAZ 2110
There are many options for Chinese or Taiwanese headlights on the market; they are worse than branded ones, but they can be used on a VAZ 2110. Installing a bi-xenon module will be better than a simple brick light. The module is chosen with wide lenses. They recommend the BMWE 60 lens system, it is high quality and practical.
To replace, you need lenses (2 pcs.), a set of ignition devices (2 pcs.) and xenon lamps, ignitors - 2 pcs.
An alternative solution to xenon is LEDs, they are cheaper.
Installation of xenon on a VAZ 2110 includes the following activities:
- adjusting the landing site for new devices;
- fixing the power supply in a suitable place (there are many grooves in the machine; any recess is chosen that is reliable);
- the electrical wiring and its circuit are the same, the devices are connected in the same way as conventional ones;
- The installation angle is checked and adjusted.
Types of breakdowns of VAZ 2110 lighting devices:
- malfunction of the hydraulic corrector (replace with an electric corrector);
- vibrations, trembling;
- poor adjustment;
If a malfunction of the hydraulic corrector is detected, you must first remove the headlight. Those. glass elements, clamps and bobbins are dismantled and removed, old sealants are removed. Then the sloping glass build-up is cut off (it is U-shaped) and the screws and the paper reflector itself are removed from the inside.
Next, the spring is removed near the hole in the hydraulic corrector and the rosette of the reflective “spinners”. The ball is snapped into place, and the bobbin is also snapped into the groove; this will prevent the adjustment from being too unscrewed. If you overdo it, the metal latch will break, the ball will fall out, and so will the headlight. The essence of the work is to replace the unusable metal element with a gasket. Suitable for plumbing, but it also won’t let you see when the adjustment has reached the extreme position, so they modify it: insert a wire cotter pin between the petals of the plastic part. Reassembly is performed and new sealant is applied.
Another method for VAZ 2110:
- the screws for adjusting the headlights are equipped with a new M3 thread;
- screwed into the device, washers are installed;
- remove the plastic fasteners, fix the headlight modules;
- a washer is fixed at the top, a spring element, a washer again, a lock nut is used, everything is tightened, fixed with an anaerobic sealed mixture.
Eliminating headlight shake
Many owners of the VAZ 2110 find that the light flickers when the car is moving. Such a breakdown most often occurs in Kirzhach headlights, but in Bosch parts such a breakdown rarely occurs.
There is only one reason: reflector rattling. To eliminate light flicker, check:
- Is the reflector in place in the latch;
- The presence of an adjusting bolt rod;
- The emphasis is on the seating recess of the hydraulic corrector rod;
- We check the sagging of the thread (swap the high beam and low beam bulbs);
- Integrity of the tube in the hydraulic corrector (it may fray).
The most successful ways to eliminate jitter:
- We replace the hydraulic corrector with an electric corrector;
- We increase the length of the hydraulic corrector rod to tighten the spring.
This method allows you to get rid of light flicker by placing a cap on the hydraulic corrector rod
.
Instead of a cap, use:
- Plastic dowel, eight millimeters long;
- The cap removed from the brake fitting;
- Different plastic cap.
Here's what we do:
- We remove the hydrocorrector itself from the illuminator;
- Place the cap tightly on the corrector rod. The main thing is that the cap does not jump inward;
- Install the corrector into the mounting socket
Removing faults without disassembling headlights
Fixing the ball in plastic can be done without removing the glass parts, through the holes for replacing lamps on the back side.
Those. a hole is made opposite the latch on top of the device and a screwdriver is pushed into it, the adjusting part is snapped onto the ball and the hole is sealed. Next, take a loop to fix it on the furniture wall. It is about 5 cm in size and has holes for fixing on furniture, a groove on top for fixing the wall. The canopy is inserted into the groove of the adjusting screw, it moves and the groove ends up in a narrow area of the canopy.
Then the bolt is turned out strongly, but the canopy is held in place. In this way it is fixed and positioned horizontally.
A 3 mm hole is drilled in the base of the metal device in a place that coincides with the canopy hole, a not very long self-tapping screw is fixed there, it should not rest against the reflector. Basically, such a slot secures the screw securely and it will not break.
We repair the light fixture without disassembling it
You can snap the ball into place without removing the glass, through the holes of the light bulbs on the back side of the illuminator:
- We drill a hole exactly opposite the latch at the top of the headlight;
- Insert a screwdriver into the hole;
- Attach the collet to the corrector ball;
- We seal the hole we drilled;
- We attach a hinged loop from a furniture cabinet (hinges 5-6 centimeters long, with mounting holes and a cutout on top on which it is attached) to each broken corrector unit;
- We insert the canopy into the slot of the adjustment screw;
- We move the screw so that the slot is in a narrow place of the canopy;
- Holding the canopy, unscrew the screw until it stops with force. This is how the canopy is fixed, which needs to be placed in a horizontal position;
- Using an electric drill, using a 3 mm drill, we make a hole in the base of the light where there is a hole on the canopy;
- We screw a shortened screw into the hole so that it does not reach the high beam reflector. This slot secures the adjustment screw securely; it can be broken again.
Additional points
Sometimes it is necessary to correct the vibration of the VAZ 2110 headlights. More often, Kirzhach products suffer from this. The reason for this is poor fixation of the headlight reflector.
At the same time they believe:
- is the reflector latched, is the adjustment rod in good working order;
- the hydraulic corrector rod must be in place for landing;
- the filament in the lamp should not sag;
- Is the corrector tube working?
Elimination and repair involve installing an electric corrector instead of a hydraulic corrector and lengthening the corrector rod. This action will tension the spring. Next, a cap is put on the rod. This is an 8 mm plastic dowel or similar parts. The corrector is pulled out, the cap is fixed to the rod, care is taken that it does not slip, everything is inserted back.
If you intend to replace the VAZ 2110 lighting fixtures, then first remove: the wire of the (negative) battery terminal, the radiator grid and the wire block. Next, the latch on the cylinder is pressed, turned clockwise 90 degrees against the stop, and the cylinder is pulled out without touching the hoses themselves.
Then they unscrew the fastening, move the module back, and the trim to the center of the car (to do this, loosen the bolts on the upper buffer, push it forward) by 4 cm - its hook will come out of the hitch from the fender.
Next, the area at the bottom of the lining is pressed, the flange comes out of the hook and the lining is completely removed. Unscrew the nut of the device from below, the block is disconnected from the turn signal and the device is moved toward you, and then removed. The headlight is disconnected from the turn signal, and the hooks from the hook with the optics are placed on the frame. Finally, reassemble and install in reverse order.
Often they also do tinting, i.e. tuning of VAZ 2110 optics. It can be different and consists of painting the mask, glasses, and processing with a film coating.
ProSport tuning devices, black and chrome, are already on sale. The choice is up to you.
Kolodiychuk Andrey
, especially for ByCars.ru
When using this material, a link to https://bycars.ru/ is required.
Published 01/01/70. This page has been viewed 16673 times
Replacement procedure
For inexperienced drivers, replacing the corrector often causes difficulties, as evidenced by numerous discussions on VAZ owner forums. And yet, changing the hydraulic corrector is not so difficult. This is done in this order:
- Fastenings. First you need to disconnect all the clamps securing the hydraulic corrector tubes to the body;
- Cabin management. Remove the corrector switch handle located on the panel in the passenger compartment. To do this, just pull it towards you;
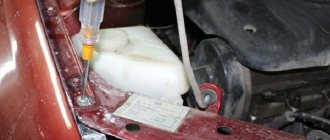
- Space for renovation. In the VAZ 2110, repairing the headlight hydraulic corrector is difficult precisely because of the inconvenient location of the hole through which the corrector tubes are threaded. At this stage, the whole process “slows down” for many. To get to the hole, you need to somehow remove the antifreeze reservoir. You just need to clear the “approach” from above so that you can work;
- We take out the cylinder. Further repairs take place from the interior. On the panel you need to sharply pull the switch towards you (pull it off), it will come off. Then unscrew the cylinder using the “22” socket. Open the cover with the fuses located there and, pulling, pull out the cylinder so that it hangs on the hoses;
- We take out the hydraulic corrector. The hydraulic corrector has a latch for the actuator cylinder; you need to press it. Then turn clockwise until it stops (90°) and remove it from the socket. Do the same steps with the other headlight;
- Push it inside the cabin and remove the hydraulic corrector;
- The new corrector is installed in the reverse order;
- Control. Check how the new hydraulic corrector works. Be sure to test whether the new device changes the angle of the headlights. If the repair is successful, then the luminous flux will be optimal and obedient to your adjustments.
Adjusting headlights VAZ 2110
Quite often, motorists have to deal with such a problem as damage to the headlight glass. As a rule, assembled headlight units are installed on VAZ cars. It is sealed, the glass is firmly glued to the body, and many car enthusiasts, if the glazing is damaged, simply replace the headlight assembly. Such repair of VAZ-21099 headlights, like other models (2105, 2107, 2108, 2109, etc.), as they say, “will cost a pretty penny.” A more profitable option is to replace the glazing. This procedure is easy to do yourself.
Changing the type of optics (tuning)
Car enthusiasts often tune their car headlights to improve their appearance. High-quality tuning gives the car a fashionable look and beauty. If you choose the right accessory, the appearance of dozens will change completely.
The most popular among car enthusiasts is tuning headlights in the form of tinting. It is carried out in a variety of ways that have virtually no effect on the brightness and quality of road lighting. Types of headlight tinting:
- Painting of the headlight mask;
- Glass painting;
- Glass tinting film.
The process of such tinting is best shown in a video. For those who don't want to paint or tint their headlights themselves, there are ProSport headlights. They are already sold in black or chrome. You just need to install them instead of the standard headlights. Only they cannot boast of high quality or bright light.
VAZ car
2110 is one of the most popular AvtoVAZ models.
This is not surprising, because this machine is unpretentious and inexpensive to operate. However, many owners of "ten" are dissatisfied with the light
. This can be easily corrected by slightly upgrading the car.
Replacement of headlight glass VAZ -2105 (2107) and 2108 (2109, 21099)
If the glazing of a VAZ-2107 or VAZ-2105 headlight is damaged, the headlights are repaired by replacing the glass.
To do this, we buy new glazing, sealant, prepare the appropriate tools and gloves. Experts advise using a colorless adhesive sealant, such as ABRD. Repair of VAZ-2107 (2105) headlights by replacing damaged glass is carried out in the following order:
- We remove the headlight and remove the sealant.
- For convenience, unscrew the black plastic holder located on top of the block.
- Carefully remove the damaged glass and its fragments.
- We remove the remaining sealant from the case, but you need to be careful, as small fragments may remain on it.
- We clean and degrease the housing grooves in which the glass is placed.
- Fill the grease-free areas with sealant.
- We take new glass and seal the sides around the perimeter with tape. This is necessary in order not to stain the glazing with sealant.
- Carefully insert the new glass and seal the top with sealant. At the same time, we control the absence of voids and air bubbles.
- After gluing, it is recommended to press the glass against the body with a heavy object.
- After drying, remove the tape and remove the remaining sealant around the perimeter of the case.
- We install the headlight block on the car.
You can repair a VAZ-2109 headlight if the glazing is damaged directly on the car. To do this, you will need a minimum of tools and materials: new glass, colorless sealant, a knife, gloves and napkins.
- First, carefully tear off the remaining glass from the headlight housing.
- Use a knife to completely remove the old sealant from the body.
- We wipe the headlight reflector from dust and dirt.
- We degrease the edge of the case around the perimeter where the glass will be glued.
- We take new glazing and apply a thick layer of sealant into the grooves on the inside, without voids or gaps.
- Carefully apply the glass to the body and press firmly.
- In just 5 minutes the headlight will be ready for use.
As you can see, this procedure is quite simple and does not take much time. Therefore, if you have such a problem on the road, repair of VAZ-2108 or 21099 headlights can be done right on the spot, if you have spare glass and sealant.
Reasons for replacement
Replacing glass on a VAZ 2110 headlight
Why do you need to change the glass on your headlights? Here are just a few reasons:
- A separate glass will cost much less than a whole headlight, and the reason why you have to replace the glass is a small stone that hits and breaks the headlight glass. A crack in the glass causes the headlight to shine dimly and the road illumination becomes poor at night.
- Over time, the glass of your car's headlights can become significantly dull, which also leads to poor road illumination at night. Polishing the glass is unlikely to help in this situation; it is much easier to buy new glass and replace it on the headlights.
- The easiest way is to find glass for a headlight on the private market and buy it second-hand. It will be much cheaper than in a store, and it’s not profitable to buy the headlight itself in auto stores; it will cost at least five thousand rubles for each headlight.
- The headlights fog up and do not have time to dry on short trips. A regular flashlight may sweat, but it dries completely after a short trip. If this does not happen, it means moisture is somehow getting into the headlight. This can happen either through a damaged case or through a crack in the glass.
Repair of optics on classic 2106
If the light bulbs fail, repair of VAZ-2106 headlights is carried out in the following order.
- We de-energize the car.
- Use a flat-head screwdriver to remove the black plastic sidelight.
- Using a Phillips screwdriver, unscrew the screws securing the iron headlight rim so that you can turn it.
- Turn the rim clockwise to the removal position and remove it.
- After this, the headlight is removed.
- Carefully disconnect the power plug.
- Remove the clamp and take out the faulty light bulb.
- We install a new lamp and mount the headlight in the reverse order.
Tuning headlights Kirzhach
The uniqueness of Kirzhach headlights is that with a little modification their glow can be significantly improved. By changing individual elements, experienced car enthusiasts expand the light output and make it brighter. To repair the Kirzhach VAZ-2110 (2112) headlight, first remove it, then disassemble it in the following order:
- Particular attention should be paid to removing the glass. It is glued to the sealant, so you first need to heat the sealant with a hairdryer, and then carefully remove the glass using a sharp knife.
- Unscrew the 3 bolts and remove the reflective gasket.
- There is no need to remove all the internals, or completely disassemble the modules. For modernization, we only need low beam units. We unscrew them using a screwdriver.
Repair of the VAZ-2110 (2112) headlight unit by modification can be performed in various ways:
- Moving the lens.Repairing headlights 2110 (2112) by shifting the lens towards the reflector will lead to a decrease in the curvature of the reflection area. Thus, the angle of incidence and reflection of the rays will change for the better. It should be remembered that excessive lens displacement can lead to overheating. An offset of 10 mm is optimal.
- First, we take measurements and mark the cut location on the module.
- We saw off and make cuts for fastening.
- We attach the lens to the module.
Such repair of the VAZ-2112 (2110) headlight will make the module shorter. Accordingly, the luminous flux will increase in width and height.
2. Sewing the modular ring . In the standard version, the edges of the modular ring, which are located under the lens, cover the light flux. If you repair VAZ-2110 (2112) headlights by grinding off the ring by 1 mm, you can increase the luminous flux by 10-15%. This procedure will not affect the strength of the module structure.
3. Changing the shape of the reflector. Repairing headlights 2112 (2110) by changing the shape of the reflector will increase the width of the luminous flux of the headlights. The reflector has a round shape and is made by stamping from sheet metal. If you squeeze it with your hand, resting it on the floor, you get an oval.
It must be remembered that the width of the flattened part should be no more than 93.2 mm. Otherwise, the light beam will be severely deformed. In order for all the fastenings to match, the reflector fastening should also be made oval.
All these modifications can be done either individually or in combination. In any case, after the modernization is completed, it will be necessary to repair the headlight adjustment of the VAZ-2110 (2112).
Remember that unqualified modifications can lead to disastrous consequences. If you are unsure of your capabilities, entrust the issues of modernizing your car to professionals.
Step-by-step removal of headlights
Whatever manufacturer makes the light unit, every car owner should know exactly how to remove the headlight on a VAZ-2110 before starting work. It is carried out in stages:
- Having opened the hood, you need to disconnect the “–” terminal from the battery in order to completely cut off the power to the car;
- it is necessary to remove the protective lining from the radiator very carefully and slowly;
- lighting devices are disconnected from the block and wires;
- The fixing element of the hydraulic corrector must be pressed tightly and turned to the right at a right angle. Next, the hydraulic corrector is simply removed from the socket, and there is no need to unscrew the connecting hoses;
- using a wrench of the appropriate size, unscrew the bolts securing the headlight in order to be able to move the block to the side;
- the fixation of the upper connecting bolts that hold the car bumper is weakened;
- by pressing on the lining, you need to ensure that the flange is disconnected from the buffer so that the lining can be freely removed;
- the lower headlight clamp is unscrewed;
- The reflector must be disconnected from the block and the block can be quietly pulled out by pulling it towards you.
If the removal of headlights is carried out step by step and according to the rules, then you will not break parts, but installing new parts or repairing old ones, and maybe even making original tuning, is within the power of anyone. You can learn more about the algorithm of actions in the video, which was made by professional machine masters.
The headlight unit can be dismantled for repair, replacement with a new one, or for tuning or modification. In this article we will talk about the removal and disassembly of a VAZ headlight of the tenth family, depending on its manufacturer (Bosch or Kirzhach).
Adjusting headlights on a VAZ
Headlights should provide the most comfortable conditions for driving while at the same time not blinding oncoming drivers. To adjust the luminous flux, special screws are provided on the headlight housing. For example, for a VAZ-2115 headlight, repair by adjusting the luminous flux is provided by two screws, which are located in the upper part of the unit body. By rotating the left screw, the angle of inclination of the optics in the vertical plane changes. The right screw allows you to shift the direction of the light horizontally. The design of the VAZ-2114 headlights is the same, the adjustment of which is repaired in the same way.
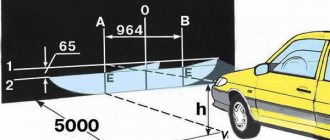
You can adjust the headlights yourself using a special screen. A fully equipped car with standard tire pressure and a load in the driver's seat of 70-80 kg must be placed on a flat horizontal platform perpendicular to a wall or a specially constructed shield-screen at a distance of 5 m. Make markings on the wall or screen in the form of three vertical lines :
- “O” - along the axis of the car;
- “L” - center of the left headlight;
- “P” is the center of the right headlight.
Draw a horizontal line at a distance from the floor to the center of the headlights. Then, 65 mm below it, draw another horizontal line “P”.
Adjusting the headlights:
- Cover the right headlight with cardboard and turn on the low beam.
- Using the adjusting screws, we set the center of the light beam of the left headlight (the intersection of the inclined and horizontal sections) to the point of intersection of the lines “L” and “R”. In this case, the upper limit of the luminous flux should coincide with the lower line “P”.
- We adjust the right headlight in the same way.
Oracal No. 351 and how to paint the headlight
Polyester film is quite elastic and adheres well to the treated and degreased surface. You can make a pattern, but as a rule, the reflector is of too complex a shape, so it is best to cut a piece of film with a margin and the third time you should be able to cover the surface with a minimum of wrinkles. To do this, you need to use a hair dryer, heat the film evenly and methodically remove air bubbles from under it and smooth out wrinkles.
Oracal tolerates high temperatures well and can last a season or two if the lampshade is properly sealed after gluing and assembly. The film does not like moisture.
For the laziest, there is another simple way - painting the reflector from a spray can with chrome paint. Frankly speaking, this method is not very useful, since the paint quickly fades and becomes dull, but for the first few days it will create the illusion of a dense beam of bright light, the main thing is not to overheat the headlight. Take optics seriously and they will provide excellent visibility in the most difficult conditions. Good luck on the roads and bright headlights!
