Many drivers do not pay enough attention to adjusting the optics on their car, not understanding its importance. The article discusses the question of why adjusting headlights on VAZ 2114 cars is important, how to adjust headlights, and what a headlight hydraulic corrector is.
Why is it important to adjust headlights?
Adjusting the headlights of the VAZ 2114 is very important for creating safe conditions on the road for road users, this is especially true in conditions of poor visibility. Russia is characterized by poor quality of roads. Due to the constant shaking, the light gets confused and falls at the wrong angle. Therefore it requires adjustment.
If the light is not adjusted correctly, the following problems may occur:
- the road surface is not fully illuminated;
- insufficient road visibility range;
- the risk of creating an emergency situation due to blinding drivers of oncoming cars;
- formation of a light wall in front of a moving vehicle.
It is recommended to adjust the headlights on the VAZ 2114 every two months.
DIY adjustment instructions
Before carrying out the procedure, the following conditions must be met:
- tires must be well inflated;
- the tank is at least half full, there should be a spare wheel and tools in the trunk;
- place an assistant in the driver’s seat, and in his absence, place a load equal in weight to the owner of the car;
- rock the car so that the suspension and springs are installed.
This will create operating conditions for the machine. To carry out the adjustment, the car must be placed on a flat horizontal platform at a distance of 5 meters from a strictly vertical wall on which markings must be applied.
Marking the wall
To configure, you need to turn on the low beam. Then each headlight unit is adjusted one by one using adjustment screws. It is necessary to combine the beam of light emanating from the lanterns with point E.
Adjusting screws for VAZ 2114
If you are not confident in your abilities, contact a service station - they will adjust it correctly.
Headlight hydrocorrector
During operation of the vehicle, depending on its load, the condition of the vehicle itself and the suspension, the direction of the light flux may change. To correct it, a hydraulic corrector is installed on the VAZ 2114 (the author of the video is Pavel V. M.).
Design and principle of operation
The device is a non-separable device that regulates the position of the light beam by changing the fluid pressure inside the nozzles. The unit cannot be disassembled, so if it breaks, it is replaced with a new device.
The design of the corrector consists of the following elements:
- master cylinder;
- working fluid;
- pipes containing liquid;
- cylinders
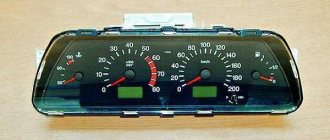
The headlights are adjusted using a hydraulic corrector by the driver using the corrector wheel located on the dashboard. By turning the wheel you can raise or lower the lamp.
Corrector wheel in the cabin
Features of DIY repairs
You can calibrate the corrector yourself using the instructions that come with it.
Before changing the device, you should find out the cause of the malfunction and try to restore the functionality of the hydraulic corrector. To do this, you must first inspect all the tubes and elastic bands; no defects are acceptable. If there is no leak, the cylinders are inspected and the stroke of the rod is checked. If the measures taken do not bring the device into working condition, then it is possible that the main unit is faulty and the hydraulic corrector needs to be changed.
Hydrocorrector of headlights VAZ 2114
Installation and modification
To install a new corrector, follow these steps:
- Having loosened the clamps, remove them from the pipes with the working fluid;
- in the cabin we dismantle the handle on the main cylinder;
- Having unscrewed the mounting bolts, remove the main cylinder;
- At the last stage, we remove all the working cylinders and take them out through the interior.
Refinement and repair of the headlight hydraulic corrector consists of checking the position of the adjusting bolt. It must be set so that the light can be adjusted with minimal effort.
Instructions for replacing the corrector
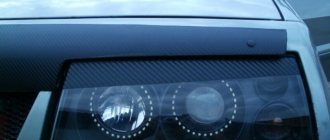
Many drivers want to tune their car. You can tune your car with angel eyes and eyelashes on the headlights. Tuning headlights is upgrading the corrector. To do this, replace the standard hydraulic headlight corrector with an electric corrector. Having removed the headlight on the VAZ, change the bulbs. After performing tuning on a VAZ 2114 car, replacing the headlight glass, you should adjust the optics.
Electric corrector installation kit
Replacing the VAZ 2114 headlight hydraulic corrector consists of the following steps:
- The car's power is turned off by disconnecting the negative terminal from the battery.
- Next, the main cylinder is unscrewed, and then the device is removed along with the lever.
- The O-ring is replaced.
- An electrical corrector is screwed into its standard place.
- Next, the negative wire is connected to the car body, and the positive wire is attached to terminal “20” on the cable block.
- The wiring is then routed to the headlight motors.
Thus, knowing how to remove the headlight to replace the optics, as well as how to adjust the light on a VAZ 2114 with your own hands, you can achieve ideal road illumination. A properly adjusted light will not blind drivers on oncoming traffic.
Correct adjustment of headlights on a VAZ 2114 with your own hands
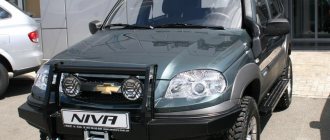
Headlights are an important element of every car. Especially when it comes to moving in the evening and at night. Today we offer magnificent xenon for the VAZ 2114, as well as a number of other attractive options. Although some opt for conventional factory devices, and they simply need to adjust the headlights of the VAZ 2114.
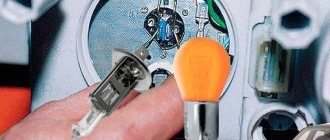
Dimensions in turn signals using a double-filament lamp
Perhaps this is the easiest way to complement the side lights with the glow of the turn signal lights or move them to the latter. To do this, you will need a double-filament lamp, which should be installed instead of the standard one, and a corresponding socket. Instead of using a socket, you can use soldering, simply soldering wires to the terminals of the lamp, but in this case it will be difficult to change it.
The wires going to the turn signal should be connected to the more powerful lamp filaments, and the side light wires to the less powerful ones. You can connect the latter in parallel, then the direction indicators will complement the standard side lights, or simply switch the wires of the “dimensions” to the lamps in the “turn signals”. The last option is the “American” tuning, in which the side lights and direction indicators are combined.
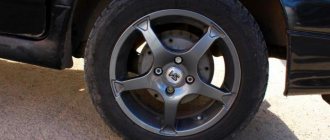
Kinds
If we are talking about the “fourteenth” model, then you should know that today for this car produced by the domestic auto giant AvtoVAZ there are about 20 headlights unique in design and execution, designed specifically for 2114.
But for some reason the Taiwanese manufacturer Pro Sport has gained particular popularity. Two series of its headlights have LED turn signals or reflectors of classic dimensions and shapes. The first option allows you to achieve a certain similarity between the 2114 and the German beauty Audi A5.
Of course, the market offers a much wider range than these two options. Therefore, the first thing you should start with is to decide which bulbs to put in the headlights of your VAZ 2114. These can be regular bulbs, xenon, halogen or even modern LEDs. Although there may be problems with the latter, since now only the most expensive cars have LEDs as the main source of head light.
One way or another, the choice is yours. Think, analyze the market, choose among the available options the one that most attracts you.
Installation of LEDs on strip
In order to install LEDs on a strip on your car, you need to follow this scheme:
- 1) The optics should be removed from the car and divided into two halves. This is easy to do with a good burning tool. The result of the work will be a thin and neat seam.
- 2) Remove the reflectors and reflectors through the resulting hole.
- 3) We completely disassemble the headlights and outline the places where the diodes will be installed.
- 4) Inside you should stick round pieces of self-adhesive film with a diameter of 15 cm.
- 5) The surface of the markers and brake lights should be coated with silver paint. After it has dried, the self-adhesive can be removed.
- 6) The reflector must be attached with epoxy glue. For prevention, you can coat all optics with sealant to prevent dust, dirt and moisture from entering, and for better fastening.
- 7) Boards with LEDs are attached to the car wiring and placed in the optics. Next, a stabilization circuit is installed that will regulate the operation of the diodes.
 At the last stage, you can assemble the rotating blocks and connect them to the rear optics. If the headlights work properly, then the tuning of your car is complete. Enjoy the result!
Fog lights
When thinking about installing headlights, do not forget about foglights. If the eyelashes on the headlights of the VAZ 2114 play a more decorative role, then in our conditions and even with our automobile legislation, driving without fog lights is at least not safe.
Manufacturers of headlights did not come up with any special features for them, so they were not included in the general headlight block of the VAZ 2114. Consequently, they will have to be mounted on the bumper, separately from the main road lighting system.
The peculiarity of fog lights on a car is that their beam has a flat and wide form of illumination, and allows it to break through snow and fog, providing high-quality illumination of the roadway. Conventional headlights cannot cope with this because they literally crash into the wall of light. This is the process of reflecting light from snow or a fog curtain.
VAZ 2114 cars are equipped with front fog lights from the factory, but their quality is not always at a decent level. Plus outwardly I would like more. Therefore, when replacing headlights, we advise you to also think about installing more efficient and effective fog lights.
Components of rear optics
Many people are not satisfied with the standard optical equipment, because the previous VAZ 2109 body model was identical. The optical elements are easily removed and you can improve them with your own hands. But before we begin to consider tuning the headlights, we should consider the elements of the rear optics separately.
The taillights are presented in the form of a headlamp unit (that is, with several components). The rear headlight unit includes: side lights (they always light up when the lights are on), brake lights (when you press the brake pedal they start to light up, warning the car behind you) and turn signals. Fog lights and reversing lights are installed separately from this unit.
Replacing the headlight
If the condition of the old headlights leaves much to be desired, or you just want to add something new to the appearance of your car, then replacing the headlights with a VAZ 2114 can be an excellent solution.
It is not necessary to do this at a service station. Many car owners do similar things in the garage, without unnecessary help or financial costs. You won’t have to spend a lot of time on this, but very soon your iron horse will acquire new, bright optical instruments.
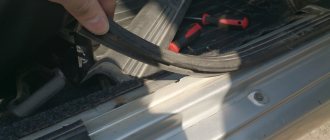
- First, let's figure out how to remove the headlight on a VAZ 2114. First, you need to dismantle the front grille and also remove the rear trim.
- Now the cover glasses are removed and the VAZ 2114 headlight hydraulic corrector cylinders are removed.
- The windshield wiper reservoir can also be removed so that it does not interfere with the work process.
- Disconnect the terminals from the battery contacts.
- Disconnect the power wires from the headlights.
- Using a regular Phillips screwdriver, the headlight housing is removed. It is held on to the body by a screw.
- From the engine compartment side, unscrew three more nuts that hold the headlight housing.
- Now all the fasteners have been removed, which allows you to simply pull the old headlight towards you and thereby remove it.
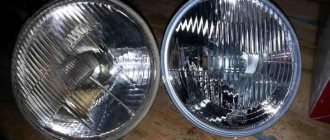
- Now unlock the special latches on the headlights and remove the protective glass.
- Installation of the new kit is carried out in reverse order. There shouldn't be any difficulties.
It is important to check the condition of the elements of the headlight system. You may need to replace the headlight glass on a VAZ 2114, or a complete replacement of the entire unit. It depends directly on what exactly you are striving for.
Instructions for installing LED tuning
- 1) the rear optics need to be covered with tape, and then the fiberglass should be covered with it;
- 2) diode pads will be mounted into the fiberglass fabric, which needs to be impregnated with epoxy glue. The glue should be applied in 2, or preferably 3 layers, and wait until it dries completely, approximately 12 hours;
- 3) after you are sure that the glue has completely dried, mark the contours of the tuning element with a felt-tip pen. Then, using scissors, cut out the shape from the workpiece. Next is putty. Sand the workpieces with fine sandpaper. Next, the structure is covered with a primer and a main layer of paint;
- 4) after all layers have dried, apply protective varnish and the LED tuning elements are ready for installation.
Hydrocorrector of headlights for VAZ 2114
The use of an electric headlight corrector on a VAZ 2114 is possible, although a hydrocorrector performs quite similar functions there.
It's no secret that, depending on how loaded the car is, the ground clearance changes somewhat. Because of this, the position of the headlight level changes. If you are driving on a highway or highway, violating the correct level of glow can lead to dire consequences for oncoming traffic. After all, if the light is higher than the required level, it will simply start shining oncoming drivers directly in the eyes, disturbing and distracting them from the road.
The hydraulic corrector serves to change this angle depending on changes in the vehicle's suspension. It adapts to the current state of the car and brings the headlights to the required level of illumination. The design of the hydraulic corrector consists of cylinders interconnected by tubes. The main cylinder is mounted on the dashboard inside the cabin, and all the others are mounted in the headlight unit.
Antifreeze circulates through the pipes. This prevents it from freezing during the cold season. The entire system is hermetically sealed, so no air enters. Alas, it will not be possible to replace individual structural elements, so a failed hydraulic corrector will have to be replaced completely.
Installation of LEDs on strip
In order to install LEDs on a strip on your car, you need to follow this scheme:
- 1) The optics should be removed from the car and divided into two halves. This is easy to do with a good burning tool. The result of the work will be a thin and neat seam.
- 2) Remove the reflectors and reflectors through the resulting hole.
- 3) We completely disassemble the headlights and outline the places where the diodes will be installed.
- 4) Inside you should stick round pieces of self-adhesive film with a diameter of 15 cm.
- 5) The surface of the markers and brake lights should be coated with silver paint. After it has dried, the self-adhesive can be removed.
- 6) The reflector must be attached with epoxy glue. For prevention, you can coat all optics with sealant to prevent dust, dirt and moisture from entering, and for better fastening.
- 7) Boards with LEDs are attached to the car wiring and placed in the optics. Next, a stabilization circuit is installed that will regulate the operation of the diodes.
- At the last stage, you can assemble the rotating blocks and connect them to the rear optics. If the headlights work properly, then the tuning of your car is complete. Enjoy the result!
Headlight adjustment process
The car owner is personally responsible for his own safety and level of comfort while driving. Therefore, he should be the first person to think about adjusting the headlights.
Anything can happen on the road, so having experience in adjusting lighting devices never hurts. It is not difficult to do this, and now you will see for yourself.
- Place the car on a perfectly flat surface. Well, or at least as smooth and flat as possible.
- Make sure all tires are inflated evenly. Pump up if necessary.
- A special screen is placed about five meters opposite the car. Also make sure it is level.
- It is advisable to make the screen from plasterboard, plywood or fiberboard. That is, the surface should be matte.
- Apply two vertical lines to this material, which will correspond to the symmetry axes of the car's lighting fixtures.
- The distance between the centers of the headlights is 1180 millimeters. This is if we talk about the VAZ 2114 model.
- Make this distance between two marks on the prepared screen.
- Draw a horizontal line from the floor surface to the center.
- Now move 10 centimeters down this line, where another horizontal line is drawn.
- At the points where two types of lines intersect (horizontal and vertical), you need to make two more lines directed to the left and right, maintaining an angle of 150 degrees.
- You should first remove the glass from the headlights and turn on the low beam.
- Now use the capabilities of the glow angle adjustment screw. Tighten it until the strip of light from the low-beam headlights coincides with the horizontal line, and the line drawn at an angle is in the center of the headlight spot.
Don’t be afraid, during the adjustment process you can make a small error, since finding a perfectly flat surface is quite problematic.
Adjusting or replacing headlights is a rather interesting process that has its own difficulties. However, doing it yourself is not as problematic as it might seem at first glance. But if you are not sure, it is better to entrust the installation and configuration to specialists.
Instructions for installing LED tuning
- 1) the rear optics need to be covered with tape, and then the fiberglass should be covered with it;
- 2) diode pads will be mounted into the fiberglass fabric, which needs to be impregnated with epoxy glue. The glue should be applied in 2, or preferably 3 layers, and wait until it dries completely, approximately 12 hours;
- 3) after you are sure that the glue has completely dried, mark the contours of the tuning element with a felt-tip pen. Then, using scissors, cut out the shape from the workpiece. Next is putty. Sand the workpieces with fine sandpaper. Next, the structure is covered with a primer and a main layer of paint;
- 4) after all layers have dried, apply protective varnish and the LED tuning elements are ready for installation.
Features of tuning headlights on a VAZ 2114
Every car owner wants his personal equipment to be the most noticeable and vibrant. Updating the design, replacing classic factory spare parts with modern ones is a long-standing occupation of men. The fourteenth is recognized as one of the popular models of the domestic automobile industry. This technique is similar to foreign models. The most common action is tuning the headlights on a VAZ 2114. It is worth noting that the light fixtures of the 14th and 15th models are identical.
Tuning rear and front light structures
Very often, car owners want to tune the optics of a VAZ 2114. But this does not mean that they need to purchase new devices in the store: it is possible to improve the existing parts.
Replacing standard headlights with tuning ones
After purchasing a car, you can modify the standard lighting devices. In addition, it is possible to replace factory devices with tuned ones. This is not difficult, because the modified optics are the same size as the factory ones.
Reworking headlights
Tuning the VAZ 2114 headlights is possible in several ways:
- Install xenon. This modernization should be used with caution, as the bright light can blind an oncoming driver, which can lead to an accident. Xenon is prohibited by law, and owners of these lamps will be required to pay a fine.
- Apply LED overlays. The simplest option is to glue an overlay onto the factory elements, which transforms the overall appearance of the standard instruments. In this case, you will not have to interfere with the factory design.
- Install the pads. An option for changing lighting fixtures, in which the covers are mounted on the headlights.
- Install new diodes. Experts advise disassembling the device and replacing standard diodes with modernized ones.
Factory designs often leave the factory without fog light elements. This is a convenient lighting design for the car owner. It is recommended to carry out reconstruction and install PTF in the car bumper.
Taillight modifications
There are many options for upgrading rear optical devices. Tuning the rear lights of a VAZ 2114 with your own hands is not difficult:
- A common method is to replace classic lighting units with modernized ones. The main difference will be that the light bulbs will be screwed in different places and the lighting devices will be of a different type.
- The second way to change the rear lights of a vase is to disassemble the factory devices and replace the filling in them. Next, diffusers - LED strips - are applied to the glass and everything is connected to the electrical circuit.
- The third option is the use of LEDs, which significantly improve the light performance of the VAZ 2114 headlights.
Intervention in optics must be consistent with safety precautions. This will save life and property.
Advantages of tuning lighting elements
When producing equipment, many companies want to make their products as affordable as possible; they try to save on expensive spare parts by equipping models with cheap components. This also applies to lighting structures installed at the Volzhsky enterprise. Independent modification of the optics of the iron horse gives it an attractive appearance. If there is a desire to distinguish equipment from the same type, then a simple modernization of the lights on the VAZ 2114 and tuning the headlights of the VAZ 2115 are allowed. By upgrading these devices and other parts of the car, you will transform the car, getting a unique, interesting car.
Lighting devices are an important part of any car; when modernizing, you need to preserve the functions assigned to them. This will ensure the safety of road users.
Tuning rear and front light structures
Very often, car owners want to tune the optics of a VAZ 2114. But this does not mean that they need to purchase new devices in the store: it is possible to improve the existing parts.
Replacing standard headlights with tuning ones
After purchasing a car, you can modify the standard lighting devices. In addition, it is possible to replace factory devices with tuned ones. This is not difficult, because the modified optics are the same size as the factory ones.
Reworking headlights
Tuning the VAZ 2114 headlights is possible in several ways:
- Install xenon. This modernization should be used with caution, as the bright light can blind an oncoming driver, which can lead to an accident. Xenon is prohibited by law, and owners of these lamps will be required to pay a fine.
- Apply LED overlays. The simplest option is to glue an overlay onto the factory elements, which transforms the overall appearance of the standard instruments. In this case, you will not have to interfere with the factory design.
- Install the pads. An option for changing lighting fixtures, in which the covers are mounted on the headlights.
- Install new diodes. Experts advise disassembling the device and replacing standard diodes with modernized ones.
Factory designs often leave the factory without fog light elements. This is a convenient lighting design for the car owner. It is recommended to carry out reconstruction and install PTF in the car bumper.
Taillight modifications
There are many options for upgrading rear optical devices. Tuning the rear lights of a VAZ 2114 with your own hands is not difficult:
- A common method is to replace classic lighting units with modernized ones. The main difference will be that the light bulbs will be screwed in different places and the lighting devices will be of a different type.
- The second way to change the rear lights of a vase is to disassemble the factory devices and replace the filling in them. Next, diffusers - LED strips - are applied to the glass and everything is connected to the electrical circuit.
- The third option is the use of LEDs, which significantly improve the light performance of the VAZ 2114 headlights.
Intervention in optics must be consistent with safety precautions. This will save life and property.
Types of tuning
There are a certain number of ways to change the appearance of lighting structures that look quite attractive. This is both internal and external tuning. The most commonly used option is angel eyes on the VAZ 2114. Tuning significantly improves the appearance and attracts the attention of others. Carrying out the production process yourself will provide valuable experience.
Tuning VAZ 2114 headlights and tuning VAZ 2115 optics involves replacing classic factory-installed parts with more powerful ones, or tinting with film. Many people install xenon. This improves lighting performance at night, but is contrary to traffic regulations, so installation of such bulbs is possible only on rear lighting devices. Installation of bixeon lighting structures is allowed.
How to make diode rings
To create rear optics with your own hands, you will need durable epoxy glue, diode rings or tape as a base, small and large reflectors, and paint of the color that the car owner prefers.
- 1) Diode rings need to be installed in a cylinder, which can be conveniently made from coffee cans or canned food. To do this, you also need to cut off the bottom and protect the sharp edges. After all the manipulations, you should get something like two rings, and if you made the larger one from a coffee can, then the inner one can be made from a simple plastic half-liter glass, which you paint in your favorite color.
- 2) Simple cataforts need to be placed in the inner ring. They provide illumination of the optics according to the usual scheme: orange is the color of the turn signals, white is the idle speed, red is the fog system. The elements that remain after installation will look great inside the structure.
- 3) Installation of reflectors and LED rings.
- 4) Additionally, you can put additional headlight illumination on the plexiglass, and secure it all with epoxy.