Instrument panels on the VAZ 2109 are of at least three types:
- Low panel;
- High panel;
- Electronic panel on nines with Europanel.
Europanel
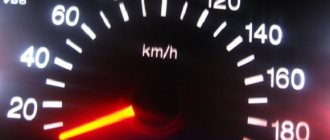
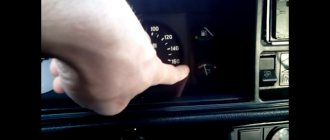
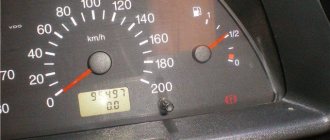
Dashboards with a high panel do not have an econometer, but the speedometer is also based on a mechanical cable drive.
Why doesn't it light up?
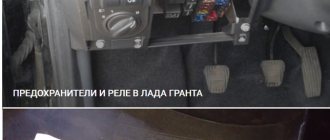
- First, remove the cover of the mounting block and make sure that the fuse is intact. The fuse markings are located on the inner surface of the cover. You should look for fuse F16 or F5, depending on the year of manufacture of your VAZ 2109.
- If the fuse is intact, be sure to check whether the contacts of the fuse you are looking for have not oxidized. It is not uncommon for shields to fail due to broken contact.
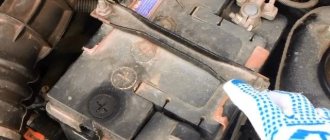
- Check if there is power to the dashboard. To do this, you will need a warning light and the ignition on. Disconnect connector X4 in the mounting block and check for voltage at pin 3. The disadvantage of the VAZ 2109 design is that when it rains, the mounting block immediately becomes wet. This causes oxidation of the contacts in the pads, which causes the electrics to stop working. Sometimes not only the contact is oxidized, but also the board of the Nine mounting block.
If none of the above actions yielded results, you will have to be disappointed. After all, now you need to remove the dashboard and check the condition of the wiring, contacts, and negative connections. Here it is better to trust a professional electrician or set aside a whole day to troubleshoot problems yourself. There is no need to rush here.
Simple cases
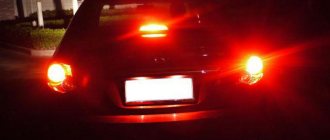
The main thing is to notice in time that the feet have failed, before an accident occurs. The most likely and, one might say, common reasons will be the following.
- Light bulb burnout
. A simple inspection will not give results; outwardly it may seem functional. Take a new lamp that works exactly and screw it in instead of the problematic one. If it lights up, the cause has been found; - Oxidation of contacts
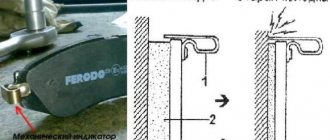
in the wire block, which is placed on the terminals of the board (track) of the headlamp. The actions are similar to point 2, only they are done with the block: it is removed and put on again 3-4 times. Or the contacts are cleaned manually; - Burnt out tracks
. Visible upon visual examination. There are 2 options: buy a new board and replace the damaged one or restore the existing one by soldering wiring of the appropriate thickness onto the damaged track; - The brake light sensor (the so-called “frog”) has failed. In the VAZ 2109 it is located under the brake pedal. To check, both wires are removed from the DSS and short-circuited directly with a piece of wire. If the stops work, then we go to the auto shop for a new sensor. If there is no response, we look further for the reason. O in the entire system is the most vulnerable point (except, perhaps, the light bulbs). Many VAZ owners begin their search for the cause of non-working brake lights with it.
Oxidation of contacts directly in cartridges. Detected visually. To clean, the light bulb rotates in the socket several times - the layer gets knocked down and the stops light up. To guarantee, you can unscrew the lamps and go over the contacts with fine sandpaper. In some cases, hopeless damage to contacts is detected; in this case, the cartridge itself will need to be replaced;
We looked at the simplest and most likely breakdowns. Next, brake lights that do not light up require a more serious check.
Electrical faults of the VAZ 2109 and their elimination
Instrument panel and its diagram
A common electrical problem on the VAZ 2109 is the instrument cluster. It is built into the dashboard on the driver's side and includes a system of instruments that monitor the current condition of the car. These could be devices such as an oil pressure sensor, an engine speed sensor, or simply a series of warning lights.
VAZ 21093 electrical faults
Signposts
- If the temperature and fuel level gauge does not work, the cause may be a malfunction of the light bulbs or sensors themselves, or an open circuit in the power supply.
- Treatment: test the entire circuit and check the fuses. If it doesn’t help, then check the functionality of devices and sensors, and then replace them.
Fuel tank arrow
- It also happens that you have just filled up at a gas station, but the indicator arrow returns to the beginning of the scale.
- We check whether the float limiter has been knocked down. It also happens that it is incorrectly installed or adjusted (limiter).
- We remove the sensor and re-adjust.
- If this same arrow constantly jumps and finally drops to the zero mark, the problem is a weak contact of the resistor. There may be another reason: a break in the resistor.
- Treatment: replace the fuel level regulator with a new one.
Light bulbs
- Another popular malfunction associated with the constant burning of this light bulb. The reason may be a short circuit in the sensor itself or its flexible bus.
- Treatment: disassemble the regulator, straighten the busbar and eliminate the short circuit.
Warning lamps
- If the indicator lamps on the instrument panel do not work, then they may have burned out or are loose in their sockets.
- Treatment: lamps are replaced or their contacts are tightened.
- It is possible that the contacts have oxidized. In this case, it is necessary to clean them thoroughly.
Note. In general, in this case it is recommended to test all wiring with a tester.
Problems with the speedometer
- An equally common malfunction that requires the following operation: replacing the cable.
- Before replacing, it is recommended to check the tightness of the tip nuts.
- It also happens that noise is heard when the speedometer operates. In this case, most likely, the flexible shaft was deformed.
VAZ 21093 electrical equipment malfunction
At this point, checking and troubleshooting the VAZ 2109 electrical faults can be considered a completed task. It is extremely important when working with your own hands that you do not ignore the instructions for the car. In addition, it will be useful to study various photo and video materials. If you learn how to fix such problems yourself, you can save a lot of money on your family budget, because the price for services of this kind from auto electricians is excessively high these days.
Popular faults
If we talk about the dashboard of VAZ 2109 cars, then they are characterized by certain problems. We will tell you about them, and also tell you how to act correctly in a given situation.
| Fault type | Your actions |
| Gasoline level and temperature indicator does not work | In most percent of cases, this situation occurs due to breakdown of devices, sensors of these devices, or an open circuit of the power supply. Therefore, first check the circuit for continuity, make sure that the fuses have not blown. If this is not the case, check whether the gas level and temperature sensors are working. Only if none of the actions allowed you to get rid of the breakdown, you can begin to replace the devices themselves. No options, the problem lies in them |
| When the fuel tank is full, the arrow points to zero | If you have worked on the fuel level sensor, the fault most likely lies with you. When manipulating this device, the float limiter is often knocked down. Either the limiter is installed incorrectly or adjusted, causing the resistor winding to end. To resolve the problem, remove the sensor and then adjust the limiter again |
| The fuel gauge needle regularly jumps and ends up at zero | Here, most likely, the resistor has weak contact with the current collector. Another possible option is that there is a break in the resistor. To resolve this situation, we recommend replacing the hot level sensor with a new measuring device |
| The fuel level lamp is constantly on | If this lamp is constantly on, there is probably a short circuit in the fuel level sensor supply wiring to ground. Another option is that the sensor’s flexible bus is shorted to the fuel intake pipe. You will have to disassemble the device to align the bus and get rid of the resulting short circuit |
| Indicator lamps do not work on the dashboard | There is a high probability that the light bulbs have simply burned out, or they are poorly held in their seats due to loose contact. Replace the bulbs, but first try tightening the contacts. Traces of oxidation may be detected. When cleaned, the light bulbs can work normally again. Also, do not exclude the possibility of wiring breakage or oxidation of the tips of the supply wiring. Try going over the wires with a tester, cleaning the contacts if necessary. |
| The speedometer does not work, the flexible shaft is noisy | In such a situation, you will have to change the speedometer drive cable or replace the entire speedometer assembly. But before you bother so much, check that the fastening nuts of the tips are tightened correctly and properly. The flexible shaft may make noise during operation due to deformation or violation of the permissible bending of the shell of less than 10 centimeters during installation |
The instrument panel of the VAZ 2109 is not so complicated that you cannot figure it out on your own. But in the absence of experience, it is better to entrust the repair to specialists, or to enlist the support of a partner who understands this matter.
Didn't find the information you are looking for? on our forum.
Instructions for installing a new panel
If you want to replace a low tidy with a more advanced, high one, then in any case you will have to change the entire center console.
Removal and installation instructions look like this:
- First, you need to turn off the power to the on-board network; to do this, disconnect the battery, remove the steering wheel, as well as the steering column switches and the ignition switch. You will also need to disconnect the ignition relay.
- Next, unscrew the two bolts that secure the control panel visor and remove it.
- Now you need to compress the spring and remove the shield itself from the center console. Disconnect all wires and connectors connected to the dash, including the speedometer cable, the econometer hose, and the odometer cable. After this, the tidy can be moved to the side.
- Then remove the regulator from the hydrocorrector of the optics light, the tidy light switch knob, as well as the interior heater and fan regulators. To do this, pull the controls towards you.
- After this, unscrew the two bolts securing the center panel trim on the sides; the trim itself can be moved towards you. Then you need to disconnect the connectors.
- Now the key in the lock should be turned to position “0”, this will disable the anti-theft system. A connector with wires is connected to the lock itself; it must be disconnected. Next, unscrew the two nuts and two bolts, after which you can remove the steering column pipe with the switch.
- Remove the choke handle located under the instrument panel. Pull it towards you so that you can feel the pull. You need to unscrew the two bolts that secure the damper guide rod, after which the choke can be removed.
- Now you can unscrew four more screws that secure the heater control panel in the car. Unscrew the bolts located on the side of the shield on both sides. Also unscrew the lower console mounting bolts with nuts that secure the control panel lighting switch and the optics hydraulic corrector. To do this you will need a 22mm socket wrench, it must be high.
- After completing these steps, you need to unscrew the bolt that secures the center console in the glove compartment. Then all you have to do is unscrew one bolt at a time on each side securing the center console. The console itself can then be dismantled.
- As for installing a new high panel with tidy, this process does not present any particular difficulties. All dimensions at the mounting points on the body are the same, but this procedure also has its own characteristics. To install your new console, you will need the appropriate wiring harness. If you use an existing harness, then you will need to rearrange the terminals in it, taking into account the connection diagram. In addition, it will be necessary to change the cables leading to the heater to longer ones, the same applies to the speedometer cable. If you are installing a new console, you will also need other roof pillar side trims, these must be installed before you install the console. Since the new dashboard will not use a flow meter, the tube from it will need to be plugged. In addition, the signal to the tachometer will need to be supplied from wire K on the coil, which is connected to the speed sensor cable bracket.
- Immediately before installation, you should reassemble the new console, and wrap the connection points of the blowers with electrical tape and, preferably, glue them with foam rubber or anti-creaking agent. It is also necessary to change the foam rubber of the heater, since the old one will no longer be able to perform its functions. Also make sure that the choke can close completely and remember that the cable from the new speedometer should be installed before you install the console. The assembly procedure begins with laying a new wiring harness and connecting all connectors. Before you finally assemble everything, turn on the dashboard and check how all the indicators and gauges work. After this, the console can be put back in place.
Panel tuning options
If you decide to tune your instrument panel, then most likely you will be interested in knowing what options exist for doing it. The tuning shield, as you know, pleases the driver’s eye, so this issue is relevant for many car owners.
Dismantling the shield
To tune the dashboard, you first need to remove the device itself.
To do this, you only need to disconnect eight fasteners; to do this, you can use a regular knife:
- First, the fastenings on the driver’s side are disconnected;
- then you need to release the latches located there, on top;
- after this you can disconnect the middle part of the tidy;
- the panel itself is dismantled (the author of the video is Artem Volivach).
Improvement and replacement of backlight
To perform backlight tuning on a VAZ 2109, the lighting sources must be replaced after removal; in this case, it is advisable to use diode bulbs, and if necessary, the scale itself can be modified.
The tuning procedure includes the following steps:
- First, dismantle the standard insert where the scales are located. Remove all the arrows and set them aside, then make corresponding holes for them in the new pads. To prevent the arrows from sticking when operating the instruments, the holes can be made wider.
- Next, you need to remove all the standard lighting sources - just dismantle the entire circuit and install diode devices instead of the old light bulbs. When installing new sources, observe the polarity, since if it is confused, this will lead to the inoperability of the device as a whole.
- Once the lamps are installed, you can begin to refine the scales. Take the new pads and, using fluorescent paint or a marker, paint the numbers on the scales. Such a marker or paint will be required so that when the instrument is illuminated with LEDs, the numbers glow more brightly and stand out.
- After the backlight tuning is completed, you will need to carefully install the circuit and install new overlays on top of it. When installing, be careful not to damage the panel elements.
Why doesn't it light up?
- First, remove the cover of the mounting block and make sure that the fuse is intact. The fuse markings are located on the inner surface of the cover. You should look for fuse F16 or F5, depending on the year of manufacture of your VAZ 2109.
- If the fuse is intact, be sure to check whether the contacts of the fuse you are looking for have not oxidized. It is not uncommon for shields to fail due to broken contact.
- Check if there is power to the dashboard. To do this, you will need a warning light and the ignition on. Disconnect connector X4 in the mounting block and check for voltage at pin 3. The disadvantage of the VAZ 2109 design is that when it rains, the mounting block immediately becomes wet. This causes oxidation of the contacts in the pads, which causes the electrics to stop working. Sometimes not only the contact is oxidized, but also the board of the Nine mounting block.
If none of the above actions yielded results, you will have to be disappointed. After all, now you need to remove the dashboard and check the condition of the wiring, contacts, and negative connections. Here it is better to trust a professional electrician or set aside a whole day to troubleshoot problems yourself. There is no need to rush here.
Simple cases
The main thing is to notice in time that the feet have failed, before an accident occurs. The most likely and, one might say, common reasons will be the following.
- Light bulb burnout
. A simple inspection will not give results; outwardly it may seem functional. Take a new lamp that works exactly and screw it in instead of the problematic one. If it lights up, the cause has been found; - Oxidation of contacts directly in cartridges. Detected visually. To clean, the light bulb rotates in the socket several times - the layer gets knocked down and the stops light up. To guarantee, you can unscrew the lamps and go over the contacts with fine sandpaper. In some cases, hopeless damage to contacts is detected; in this case, the cartridge itself will need to be replaced;
- Oxidation of contacts
in the wire block, which is placed on the terminals of the board (track) of the headlamp. The actions are similar to point 2, only they are done with the block: it is removed and put on again 3-4 times. Or the contacts are cleaned manually; - Burnt out tracks
. Visible upon visual examination. There are 2 options: buy a new board and replace the damaged one or restore the existing one by soldering wiring of the appropriate thickness onto the damaged track; - The brake light sensor (the so-called “frog”) has failed. In the VAZ 2109 it is located under the brake pedal. To check, both wires are removed from the DSS and short-circuited directly with a piece of wire. If the stops work, then we go to the auto shop for a new sensor. If there is no response, we look further for the reason. O in the entire system is the most vulnerable point (except, perhaps, the light bulbs). Many VAZ owners begin their search for the cause of non-working brake lights with it.
VAZ 21099 (carburetor) panel flashing
#1 Nikolay1493760682
- Author
- Posts: 0
- Top
- Name or Quote
#2 Slaven
- Name: Vladislav
- City of Yaroslavl
Very little input. You need to look for the reason somewhere in the wiring. Moreover, it is quite likely that the problem is completely trivial, maybe a mass is leaking somewhere, and this is what results in such a garland followed by stopping the engine.
- Top
- Name or Quote
#3 Igor1957
- Name: Igor
- Rostov-on-Don
Most of all, it looks like either a mass is coming off somewhere or some kind of contact, but I’m leaning towards the fact that the mass is coming off. So it’s worth looking under the dash first, there should be several ground wires there. I won’t tell you the exact location, since I don’t remember now.
- Top
- Name or Quote
#4 Anton
it happened, the shitty armor wires pierced and touched the connector on the distributor, everything blinked and died))
- Top
- Name or Quote
#5 Tezipe
- Name: Andrey
- City Novosibirsk
Was the dash blinking because of the explosive wires?
This is the first time I've heard of this, to be honest.
- Top
- Name or Quote
#6 Tiran90
- Name: Anatoly
- Vladivostok city
There is no ground somewhere or there is a problem with the connectors on the fuse block, most likely they have oxidized. That's why the car behaves this way.
- Top
- Name or Quote
#7 Padik
- Name: Igor
- Moscow city
VAZ 21099 (carburetor) on bumps the panel flashes and the car stalls. Please tell me where to look for the reason?
There are a lot of people walking around somewhere – that’s 90%. This happened to me on 2108, somehow the mass began to come off, but I don’t remember where. As a result, I had to reconsider all the braids of the mass and decided that there was a problem with it. The dashboard was also flashing, the car was also stalling.
- Top
- Name or Quote
Tidy 21099 injector: icon designations
There are more lights and indicators here than on the carburetor. Additional light bulbs available:
Tidy 21099 carburetor: designations
The decoding described at the beginning of the article can be fully used as an example for this point.
Stop light on the dash 2109
The lamp signals the driver about the presence of unexpected problems in the on-board circuits. When such an inscription is activated on the device, it is recommended to immediately go to a service station and look for the cause.
How to remove the instrument panel
It's okay if the testing mode does not produce results. On some cars it is not there at all, and therefore there are other ways to repair the speed sensor. Here is one of them: drive the car into the garage, set it to the parking brake. After opening the hood of the car, disconnect the battery from the wire with the minus sign . This will allow you to avoid short-circuiting the on-board network. Now you need to pull out the instrument panel. Remove the trim, and then carefully unscrew the steering wheel. After this, you need to remove the switches that are located under the steering control. Having done the above, you need to unscrew all the self-tapping bolts that hold the instrument panel in place.
Having completed all the above steps, you can remove the dashboard on which the instrument panel is mounted. To do this, you need to grab it by the edges and then pull it slightly in your direction. Now disconnect all the wires attached to the dashboard. But before you disconnect them, label each wire. This is necessary in order to avoid mistakes when putting the entire structure back together. After disconnecting the wires, pull out the dashboard.
The instrument panel is attached to the dashboard with several bolts. Unscrew them to disconnect it. Now you need to remove the glass, which is held in place with glue-sealant. The place that connects the glass and plastic needs to be heated with a hair dryer. After completing these steps, you can easily detach the glass.
Warning icons on the panel
The steering wheel icon can light up in two colors. If the yellow steering wheel is on, then adaptation is required, and when a red image of the steering wheel with an exclamation mark appears, you should already be concerned about the failure of the power steering or power steering system. When the red steering wheel lights up, your steering wheel will probably become very difficult to turn.
The immobilizer icon usually blinks if the car is locked; in this case, the indicator of a red car with a white key signals the operation of the anti-theft system. But there are 3 main reasons if the immo light is constantly on: the immobilizer is not activated, if the tag on the key is not read or the anti-theft system is faulty.
The handbrake icon lights up not only when the handbrake lever is activated (raised), but also in cases where the brake pads are worn out or the brake fluid needs to be topped up/replaced. On a car with an electronic handbrake, the parking brake light may come on due to a glitch in the limit switch or sensor.
The coolant icon has several options and depending on which one is lit, draw conclusions about the problem accordingly. One red lamp with a thermometer scale indicates an increased temperature in the engine cooling system, but a yellow expansion tank with waves indicates a low coolant level in the system. But it is worth considering that the coolant lamp does not always light up at a low level; perhaps there is simply a glitch in the sensor or float in the expansion tank.
The washer icon indicates a low fluid level in the windshield washer reservoir. Such an indicator lights up not only when the level actually decreases, but also if the level sensor is clogged (the sensor contacts become coated due to poor-quality liquid), giving a false signal. On some vehicles, the level sensor is triggered when the washer fluid does not meet specifications.
The ASR icon is an Anti-Spin Regulation indicator. The electronic unit of this system works in tandem with ABS sensors. When such a light is constantly on, it means the ASR is not working. On different cars, such an icon may look different, but often in the form of an exclamation mark in a triangle with an arrow around it or the inscription itself, or in the form of a car on a slippery road.
Catalyst icon
It often lights up when the catalytic element overheats and is quite often accompanied by a sharp drop in engine power. Such overheating can occur not only due to poor cell throughput, but also if problems arise in the ignition system. When the catalyst fails, high fuel consumption will be added to the burning light.
The exhaust gases icon , according to information from the manual, indicates a malfunction in the exhaust gas purification system, but, as a rule, such a light starts to light after poor refueling or the presence of an error in the lambda probe sensor. The system registers misfires of the mixture, as a result of which the content of harmful substances in the exhaust gases increases and, as a result, the “exhaust gases” light comes on on the dashboard. The problem is not critical, but diagnostics are worth doing to find out the cause.
The backlight of the instrument panel of the VAZ 2109 does not light up
ktotam 03 Oct 2007
Hello! When you turn on the side lights, low beam, high beam, the panel is not illuminated (neither the priority panel, nor the sidebar/low beam key, nor the heater panel), but the green light is on (that the lights are working) and when the high beam is on, the blue light is on (that the high beam is on) . I looked through the book lengthwise and crosswise, then diagonally, except for the electrical diagram of the panel itself, and how to fix a problem like “if the lamp does not light, then replace it,” I did not find anything. I rang the board, checked/replaced the light bulbs, what should I do? Maybe there is some kind of sensor? Or maybe it's the button? A cliff cannot form on its own.
Information icons
The machine icon may light up differently; it happens that the “car with a wrench” icon, the “car with a lock” icon, or an exclamation mark are lit. About all these notations in order:
When such an indicator lights up ( a car with a key ), it informs about malfunctions in the engine (often a malfunction of a sensor) or the electronic part of the transmission. To find out the exact cause, you will need to perform diagnostics.
A red car with a lock lights up , which means that problems have arisen in the operation of the standard anti-theft system and it will be impossible to start the car, but if this icon blinks when the car is locked, then everything is normal - the car is locked.
A yellow vehicle indicator with an exclamation mark notifies the driver of a hybrid vehicle that there is a problem with the electric drive. Resetting the error by disconnecting the battery terminal will not solve the problem - diagnostics are needed.
the open door icon lit when a door or trunk lid is open, but if all the doors are closed and the light on one or four doors continues to shine, then often the problem should be looked for in the door terminals (wire contacts).
The slippery road icon begins to flash when the stability control system detects a section of slippery road and is activated to prevent slipping by reducing engine power and braking the slipping wheel. There is no need to worry in such a situation. But when a key, a triangle, or a crossed out skid icon appears near such an indicator, the stabilization system is faulty.
The dashboard of the VAZ 2114 is out of order, what should I do?
If on a VAZ-2114 car on the instrument panel none of the indicators installed on it work (speedometer, odometer, tachometer, fuel level and coolant temperature indicators), then the first thing the driver will have to do is check the integrity of fuse F3, which is located in the mounting block. If it has burned out, then before replacing it, you need to find the reason why it burned out, otherwise the newly installed new fuse will have the same fate as the previous one. Most often, fuses burn as a result of a short circuit.
Even if the fuse is intact, then do not be lazy to take it out and check the condition of the contacts. There are cases when the contacts oxidize, and the electrical circuit in this place is interrupted. After making sure that the fuse is intact, the next step is to check the ignition relay, which is located inside the car to the left of the steering column. It is attached to a pin upside down. In the block where this relay is inserted, you can try to short-circuit the power wires using a jumper. If the instrument panel comes to life, the ignition relay will have to be replaced.
If the ignition relay is working properly, there are only two possible reasons for the instrument panel not working: the ignition switch and the mounting block. Before installing the ignition relay on the VAZ-2109 car, the lock contacts burned quite often, and they had to be cleaned by disconnecting the contact group from the lock itself. After changes were made to the principle of supplying voltage to the ignition switch, its contacts began to burn very rarely, but the likelihood of this phenomenon still remained. On the mounting block, in its board, tracks may burn out; in order to see this, the mounting block will have to be removed from the car.
In addition to the reasons listed above, which can lead to failure of the instrument panel, it is also necessary to check the reliability of fastening the ground wire.
general information
VAZ 2109 electrical faults
Let's start with general information. You should know that the VAZ 2109 has two power sources - the battery and the generator. The battery is designed to supply current when starting the power unit of a car, as well as to power the starter and other 12 V consumers when the engine is not running. When the engine starts, all the “initiative” goes to the generator. Now this element provides current to all consumers, even the ignition system and battery.
When the generator does not provide current
Note. Every driver must know that if the red charging lamp is on on the instrument panel, then no charge is supplied from the generator to the on-board network, that is, the stored battery energy is consumed. It is clear that the supply is limited and depends on the size of the battery and its capacity. Of course, in this case you can drive home without a generator, but you can no longer turn off the car and you will have to drive non-stop.
Work order
- First of all, you need to check whether the alternator belt is in place. It happens that it breaks off.
- If the belt is in place, intact and undamaged, then it is recommended to check its tension. To do this, press with your thumb from above and notice how much the belt is bent. 10-15 mm is the norm.
- We arm ourselves with the appropriate wrench and unscrew the nut securing the generator to the body. Then we insert the pry bar between the generator and the engine cylinder block. Using the lever method, we move the generator and tighten the fastening nut.
Working with a generator
- You need to check whether the corresponding fuse has blown. If yes, then replace it with a new one (more about fuses below).
- We start the power unit and check whether the battery charging lamp goes out. If it goes out, it means everything was done correctly.
- If it does not go out, then you need to check the cable that runs from the generator to the battery (positive). This could be where the problems lie.
Note. There are two wires coming from the battery: the thick one connects the battery to the starter, and the thin one is the one we need.
- We check the integrity of this wire. Maybe it's broken or something.
- You also need to carefully check contacts that may have become oxidized over time.
- All these faults, if found, are corrected. We start the engine and see if charging appears.
- If yes, then have a nice trip!
If there is no charging again, then you need to check the generator itself (see VAZ 2109: malfunctions on the generator and how to eliminate them). To do this, it is better to contact specialists or follow the advice that can be found on our portal.
Advice. As mentioned, you can drive with a damaged generator to a service center or your own garage. In order to minimize the battery current consumption, it is necessary to turn off all devices at this moment, such as the car radio, unnecessary lighting fixtures, fan, air conditioner, heater, etc.
Regulator check
If the motorist is experienced, then he can be advised to check the generator voltage regulator. This component is required to maintain the generator voltage within specified limits, even if the speed and load changes. It is possible that it has “worked out” and the generator is not functioning correctly. By car:
- We arm ourselves with a voltmeter equipped with a scale of up to 15-30 V.
- We always measure the voltage after some operation of the engine at medium speed.
- We measure the voltage with the headlights on, in the place between the corresponding terminal and the generator ground. The norm is thirteen/fourteen V.
- Otherwise, if the value is lower or higher, the regulator will need to be replaced.
Checking the removed regulator:
- We dismantle the regulator.
- Let's check it according to the diagram.
Voltage regulator test circuit
Note. If the regulator on a VAZ 2109 was produced before 1996, then it is better to check it together with the brush holder. This will make it possible to immediately detect broken brush leads and poor contact between the ends of the regulator.
- Turn on the test lamp between the brushes.
- We supply a current of 12 V to terminals B and B and the regulator body.
- Then we will double the current, the voltage is already 15 V.
- If the regulator is faulty, the lamp should not light up at a voltage of 15 V and light up at a voltage of 12 V.
- If it lights up in both cases, then the regulator is faulty and you can even accurately determine that there is a breakdown in it.
- If the lamp does not light in both cases, there is a break in the regulator.
Instrument panel device
On the instrument panel of the VAZ-2112 there is:
- Speedometer.
- Tachometer.
- Fuel level indicator.
- Direction indicator.
- Liquid temperature indicator in the cooling system.
- Control lights.
- Blocks for connecting wires.
Before you start doing any work on the dashboard, it is recommended that you familiarize yourself with its pinout. In other words, you first need to understand where each wire goes and what it is intended for.
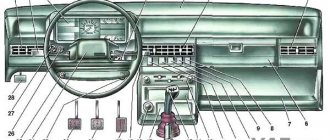
Pinout and instrument panel diagram
Instrument panel pinout
1 — fuel reserve warning lamp; 2 — instrument cluster lighting lamps; 3 — right turn indicator lamp; 4 — left turn indicator lamp; 5 - backup warning lamp; 6 — coolant temperature indicator; 7 — indicator lamp for external lighting; 8 — control lamp for the carburetor air damper; 9 — oil pressure warning lamp; 10 — parking brake warning lamp; 11 — battery charge indicator lamp; 12 — tachometer; 13 — control lamp “CHECK ENGINE”; 14 — speedometer; 15 — brake fluid level warning lamp; 16 —hazard warning lamp; 17 — control lamp for high beam headlights; 18 — fuel level indicator.
Posts 1 to 20 of 26
1 Reply from kope'ech 2008-12-19 16:58:45
- kope'ech
- User
- Offline
- Registered: 2008-11-11
- Messages: 101
- Reputation: [ 0 | 0 ]
Re: STOP light comes on
Why is this board needed at all? Those. In what cases should it light up?
2 Reply from Evil 2008-12-19 17:15:57
- Evil
- User
- Offline
- Registered: 2008-11-08
- Messages: 2,120
- Reputation: [ 6 | 0 ]
Re: STOP light comes on
As far as I remember, the stop light on the OP lights up together with the handbrake, oil and brake. liquid.
3 Reply from kope'ech 2008-12-19 17:35:41
- kope'ech
- User
- Offline
- Registered: 2008-11-11
- Messages: 101
- Reputation: [ 0 | 0 ]
Re: STOP light comes on
4 Reply from MarkuS_98rus 2008-12-19 17:51:40 (2008-12-19 22:43:57 edited by MarkuS_98rus)
- MarkuS_98rus
- User
- Offline
- Registered: 2008-11-10
- Messages: 298
- Reputation: [ 0 | 0 ]
Re: STOP light comes on
on high, the same thing lights up with one of the three lamps.
As it is written in the book, it lights up if there is insufficient brake fluid level, insufficient pressure in the engine lubrication system and if the handbrake is raised.
as Evil wrote
Everything is correct. The handbrake button may need to be replaced, it may have a short circuit, or the brake fluid level sensor may be acting up.
5 Reply from Driver 2008-12-21 06:04:20
- Driver
- User
- Offline
- Registered: 2008-12-08
- Messages: 460
- Reputation: [ 0 | 0 ]
Re: STOP light comes on
It would then light up together with another lamp (brake fluid level, oil pressure or handbrake)
6 Reply from Evil 2008-12-21 09:50:56
- Evil
- User
- Offline
- Registered: 2008-11-08
- Messages: 2,120
- Reputation: [ 6 | 0 ]
Re: STOP light comes on
It just doesn't light up. Either the one with which it should light up does not work, or there is a glitch somewhere.
7 Reply from NoVa 2008-12-21 11:40:50
- NoVa
- User
- Offline
- Registered: 2008-11-17
- Messages: 30
- Reputation: [ 0 | 0 ]
Re: STOP light comes on
And when I turn on the wipers, reverse gear, lights and something else, the voltmeter starts jumping and the battery stash lights up ((Is it supposed to be like that?
8 Reply from ZenD 2008-12-22 05:57:50 (2008-12-22 06:14:34 edited by ZenD)
- ZenD
- User
- Offline
- Registered: 2008-11-18
- Messages: 94
- Reputation: [ 0 | 0 ]
Re: STOP light comes on
And when I turn on the wipers, reverse gear, lights and something else, the voltmeter starts jumping and the battery stash lights up ((Is it supposed to be like that?
Not at all. just a bad wire connection
in general, the voltmeter on the low dashboard is powered by a fuse with headlights and wipers and something else there
It's worth worrying about the current when the light bulb burns brightly and constantly.
9 Reply from Shnaps 2009-04-14 21:25:00
- Shnaps
- User
- Offline
- Registered: 2009-02-20
- Messages: 98
- Reputation: [ 0 | 0 ]
Re: STOP light comes on
What if the STOP VP lights up dimly while driving? 97 year carburetor brakes are normal, oil seems to be too.
10 Reply from ALL777 2009-06-18 15:28:29
- ALL777
- User
- Offline
- Registered: 2009-05-26
- Messages: 37
- Reputation: [ 0 | 0 ]
Re: STOP light comes on
I have a high panel engineer. STOP is constantly on. How can this be cured?
11 Reply from vilatik 2009-06-19 02:37:26
- vilatik
- Vasochist
- Offline
- Registered: 2008-11-10
- Messages: 2,461
- Reputation: [ 8 | 0 ]
Re: STOP light comes on
Something together with the stop should burn. Look at that and see for yourself.
12 Reply from ALL777 2009-06-19 05:40:46
- ALL777
- User
- Offline
- Registered: 2009-05-26
- Messages: 37
- Reputation: [ 0 | 0 ]
Re: STOP light comes on
I've already looked at everything, all that remains is to try installing a different instrument cluster.
13 Reply from vilatik 2009-06-19 05:52:14
- vilatik
- Vasochist
- Offline
- Registered: 2008-11-10
- Messages: 2,461
- Reputation: [ 8 | 0 ]
Re: STOP light comes on
Take your time, you checked this: as it is written in the book, it lights up if there is insufficient brake fluid level, insufficient pressure in the engine lubrication system and if the handbrake is raised.
It’s not a fact that there is no brake fluid level or the handbrake is raised, maybe the sensor or limit switch is jammed.
14 Reply from barsyya 2009-06-19 06:06:48
- barsyya
- Administrator
- Offline
- Registered: 2008-11-06
- Messages: 2,179
- Reputation: [ 2 | 0 ]
Re: STOP light comes on
There is also a pad wear sensor, they installed it on luxury cars,
or the wires from them where the thread sticks out, and short to ground
15 Reply from MaZZ 2009-08-19 10:40:21 (2009-08-19 10:45:37 edited by MaZZ)
- MaZZ
- User
- Offline
- Registered: 2009-08-06
- Messages: 18
- Reputation: [ 0 | 0 ]
Re: STOP light comes on
I'll raise this thread so as not to create a new one.
21093i 2003, seems like a luxury one. The brake fluid level lamp plus STOP is on. I topped up the brake fluid a little below max, it went out, but after a couple of weeks it came on again. I start it, drive, everything is ok, but as soon as I slow down, it lights up and then stays on constantly. The level in the tank has not decreased. The sensor in the tank does not seem to be stuck, it moves easily, the float floats up. Murzilka is silent, I rummaged through the Internet (and specifically here), but there are no specifics yet.
Question: is this same lamp triggered by current from the sensor in the tank or are there other options (such as wear on the pads, although it seems like another lamp should be on then).
In the message above - “there is also a pad wear sensor, they installed it on the luxes, or the wires from them stick out where the thread is and are shorted to ground” - could this somehow be connected with my lamp?
The car brakes normally. The check engine light is constantly on, but there is no money for diagnostics and repairs yet, I constantly monitor the fluids and temperature and drive like that. Won't I kill anything in the machine?
Private situations
General signs do not always indicate specific breakdowns. There may be exceptions.
If individual devices refuse to work, it is quite possible that this is their personal problem. You'll have to parse the specific pointer. It may have a cracked gear that needs to be replaced.
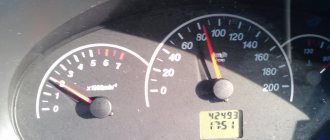
Also, why doesn’t the instrument panel of the VAZ 2114 work? If the fuel gauge and tachometer are capricious (either they function, or they don’t react at all), the contacts and the mounting block are normal - you need to do a small check.
Reset is pressed and held, and the ignition is turned on at the same time. Raised arrows indicate the need for further searches. Lifeless - that microcracks have appeared in the shield itself. You will have to remove it and examine all soldering and traces under a magnifying glass. In principle, these are all the main options. If calling all the listed components and parts did not lead to the revival of the instrument panel, your case is individual, and you will have to determine the situation in the company of an experienced auto mechanic.
Why does the VAZ 2114 instrument panel not work? A massive problem in our auto industry
And is it necessary to create additional troubles and the risk of accidents on the road? So the majority of those to whom this incident happened still get to work (or wherever they were going) by public transport in order to return to solving the problem in the evening on their own or with the help of a familiar mechanic.
Why does the VAZ 2114 instrument panel not work?
Offhand, we can name several reasons. However, they may not exhaust the entire list, since the individual characteristics of the car may appear. We will try to talk about this and many other equally interesting things in our article today.
Before digging into the inside of the car, check how securely the ground wire leading to the front panel is secured. A restless passenger in front often simply pulls him out of his place with his feet. To prevent the situation from repeating itself, after fastening it is worth insulating the wire from reach. The situation is a little more complicated
Its signs are very characteristic:
All pointers do not work:
speedometer, tachometer, odometer, fuel level recorder, ;
The rest of the equipment - optics, radio, even the panel backlight - turn on normally and do not act up;
The ignition works properly, the car does not refuse to start;
Fuse F3 is almost 100% blown. It is located in the mounting block and will have to be changed. But first you need to find out why it was covered, otherwise the new one installed will suffer the same fate. In most cases, a short circuit is to blame for burnout. On well-used VAZ-2114 after each wash. Instead of carrying a spare one, you need to figure out where moisture is getting into it.
Hard case
Until now, situations have been sorted out when the torpedo still showed some signs of life. If non-working power windows, turn signals, and windshield wipers have been added to the devices, the issue is no longer a matter of relays and fuses.
There may be 2 options:
- The contacts on the ignition switch are burnt
. In principle, after installing the relay (even on the VAZ-2109 version), this problem rarely arises. However, the possibility remains. The lock is removed, the contacts are checked and, if necessary, cleaned; - Mounting block
. There may be burnt tracks on its board. The only thing that will save you is replacing it with a new one. However, the cost is by no means astronomical, and the installation is available as a standalone option.
Dismantling
There may be several reasons for dismantling the low panel of the VAZ 2109:
- Body repair;
- Repair of panel components;
- Car noise insulation;
- The desire to replace the old torpedo with a new one, etc.
Regardless of the reasons that forced you to remove the panel yourself, the work should be carried out strictly according to the instructions.
We offer you a step-by-step guide that will allow you to remove the low type of panel installed on the VAZ 2109 without outside help.
- Remove the stove control knobs. A total of three.
- Remove the heater fan switch knob. To do this you need to pull it towards you.
- Unscrew the 2 fasteners of the dashboard trims on both sides of the console. The cover needs to be pulled towards you.
- Disconnect the wiring block from the rear fog light switch.
- Disconnect a couple of power connectors and one power wire from the rear window defroster switch.
- Disconnect the wiring block from the hazard warning light switch.
- Remove the wiring harness from the exterior light switch.
- Disconnect the power supply for the cigarette lighter illumination.
- Disconnect the cigarette lighter wiring harness and remove the panel trim.
- Remove the 4 heater control panel fasteners.
- Unscrew the 2 fasteners of the instrument panel visor.
- Remove the instrument cluster visor itself.
- The spring clamps must be compressed.
- Remove the instrument cluster housing from the panel.
- Unscrew the speedometer mounting nut, and then disconnect the speedometer cable.
- Disconnect the block with wires (it is white) from the instrument panel.
- Remove the hose from the econometer fitting, and then remove the cotter pin.
- Disconnect the cable from the speedometer that resets the odometer for the day.
- You now need to disconnect the red block from the instrument cluster.
- Remove the instrument panel light switch handle and the headlight hydraulic adjustment handle. They need to be pulled towards you.
- Unscrew the mounting nut of the instrument backlight switch.
- Unscrew the fastening nut of the headlight hydraulic corrector socket.
- Remove the steering wheel and its paddle shifters.
- Insert the key into the ignition and turn it to position 1. This will disable the anti-theft device. Only after this can you turn off the power supply to the ignition switch.
- Unscrew the 2 mounting bolts and 2 nuts of the steering column tube.
- Remove this pipe, taking the ignition switch along with it.
- Pull the choke handle towards you (we are talking about carburetor suction). There should be a craving. After this, the handle is removed from the rod.
- Unscrew the 2 choke guide rod fasteners holding it to the instrument panel.
- Remove the mounting screw on the left side of the dashboard.
- Unscrew the fasteners for the lower panel fixation on the left.
- Similarly, remove the fasteners from the side and bottom on the right side of the dashboard.
- Unscrew the panel fastening screw, which is located inside the glove compartment.
- There remains one fastener on both sides of the panel, which must be unscrewed in order to eventually remove the tidy.
Common instrument panel faults
The instrument cluster on the VAZ 21099 or 2109 is a fairly reliable unit. However, even this can fail over time.
The main malfunctions characteristic of the VAZ instrument panel:
- The lights on the instrument panel of the VAZ 2109 stopped lighting. If only a few light bulbs refuse to work, then most likely the reason lies in their burnout. If the instrument panel lighting stops working completely, then most likely the problem is a poor power supply. As practice shows, power problems are usually caused by either damaged wiring or oxidation of contacts at connections and connectors. If this is the case and the backlight does not light up due to oxidation, then you can get rid of this problem by cleaning the contacts or replacing them. If the problem lies in the lighting sources, then replacing the lamps will solve it.
- Another problem, oxidation on the circuit board, is common in older vehicles or vehicles with moisture present. Due to oxidation of the board, the backlight and some instruments may not work, in particular, fuel level and coolant temperature controllers, tachometer, etc. If the needles do not rise on the tachometer, speedometer, fuel consumption sensor and generator voltage, or they work chaotically, then you need to carry out a full check of the dashboard.
- VAZ 2109 cars are characterized by the problem of a non-working speedometer. As a rule, it appears as a result of wear of the cable connected to the box, or due to repairs to the device and its incorrect connection. If the cable is worn out, then you just need to replace it, there is nothing complicated about it. The main thing is to connect the cable correctly so that its tip fits exactly into the groove on the tidy speedometer.
- Damage to the board itself. Such a malfunction occurs quite rarely, but, nevertheless, it should not be forgotten. If the structural board fails, the shield will have to be repaired, but if this does not help, then it will need to be replaced.
Messages 11
1 Topic by Andrey08 2009-12-16 13:01:12
Topic: Not Working: All Tidy, Wipers, Fern Guard on VAZ 21099
My friend has a VAZ 21099 injector.
And recently the following happened: all the instrumentation stopped working (speedometer, tachometer, etc.), the wipers and ferns do not work. the headlights seem to come on
Today I talked to him, they say in the morning everything worked fine, but in the afternoon it immediately turned off right on the go.
I advised him to pay attention to the fuse box (they say the frost has hit, condensation is forming or it’s just wet)
I would like to hear your opinion, what do you think about this? mb has this happened to anyone?
2 Reply from maik 2009-12-16 19:38:20
Re: Not working: All tidy, wipers, fern on VAZ 21099
My friend has a VAZ 21099 injector.
And recently the following happened: all the instrumentation stopped working (speedometer, tachometer, etc.), the wipers and ferns do not work. the headlights seem to come on
Today I talked to him, they say in the morning everything worked fine, but in the afternoon it immediately turned off right on the go.
I advised him to pay attention to the fuse box (they say the frost has hit, condensation is forming or it’s just wet)