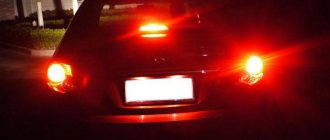
Often, car owners have a situation where the rear brake lights do not light up. An experienced motorist can guess what the reason might be. Therefore, it will not be difficult for him to determine the source of the malfunction and eliminate the problem. For beginners and inexperienced owners, it is advisable to contact specialists or study reliable information on car repairs.
This article outlines the main causes of this malfunction and provides recommendations for eliminating it. The owner of the car can make the repairs himself or contact a car service center.
Causes of malfunction
The main reasons for this malfunction are:
- defective or burnt out light bulb;
- break in electrical wiring or plug connections;
- fuse blown due to a short circuit or overload in the on-board network;
- limit switch malfunction;
- problems with electronic systems or units.
Such malfunctions can usually occur on high-mileage vehicles. However, there are exceptions.
Brake lights don't come on completely
If the brake lights on the car stop lighting completely, then you should look for a break in the wires, in the limit switch or a faulty fuse. The search for a breakdown should begin with the fuse box. On its cover there is usually a table showing which circuit is protected by which fuse link. If it is missing or the information in it is unreadable, you can use the owner's manual for the vehicle.
If the required fuse has blown, it cannot be replaced until the cause is determined. This usually happens when there is a short circuit or the insulation of the wires is damaged and they touch the housing. A similar effect is observed when water gets into electrical connections. In this case, it is necessary to dry the area where moisture has entered. To speed up the process, you can use a hair dryer (being careful not to melt the wire insulation or sheathing elements). Then you need to remove the fuse from the holder and test the circuit after it with a multimeter.
Often the wires fray at the point where they pass from the body to the trunk lid. Typically, the casing must be removed to detect cable damage. Therefore, in the absence of proper experience, it is better to entrust this work to a service center. If damage is found, the insulation coating must be restored. To do this, you can use ordinary insulating tape.
If the fuse is OK, you can assume the limit switch is faulty. It is located in the pedal assembly. It is necessary to inspect the condition of the switch and test it with a multimeter while the brake pedal is pressed. The multimeter should show a resistance of less than 1 ohm. If it is large or the switch has mechanical damage, it must be replaced. Due to the complexity of such an operation, it is better to entrust it to experienced car service workers.
If both the fuse and the limit switch are not damaged, this indicates a broken wire. To find such a fault, you will also need to open the casing. If you lack experience, it is better to entrust these actions to a car service.
If a wire break is detected, it is necessary to strip the insulating layer from the wire, make a connection and insulate the joint. A break in a section of wire is repaired by soldering. To insulate the connection, you can put on heat shrink tubing and heat it until it is fixed to the wire. If the terminal breaks, it is removed from the plastic case and replaced with a new one, crimping the stripped end of the wire into it, then inserted back.
Main reasons
Almost all problems related to automotive electrical systems can be solved in approximately the same way. You need to look for a potential or probable cause of malfunctions in the problematic object itself, or understand the system responsible for supplying power.
The situation is exactly the same with devices called brake lights. If they stop working, then you should look for the reason in one of the following points:
- There were problems with the fuse. It has oxidized or completely failed;
- There are faults in the lamps themselves or in one lamp, depending on how many stops are not working;
- The reason lies in the mechanism responsible for turning on the warning signal when the brake is applied;
- In the socket where the stop light is installed, the contacts have oxidized;
- More serious problems appeared related to damage to the wiring.
Based on the stated reasons why the feet may stop working, we can draw a completely objective conclusion. A truly serious malfunction concerns only wear or damage to the electrical wiring. Solving such a problem with your own hands is not always correct.
When the rear brake lights (left and right) or the additional central brake light repeater fail, do not rush to look for an auto electrician and offer him money to fix the problem.
There is a high probability that you will be able to do everything on your own. You will only need a standard set of tools for a motorist, as well as an understanding of how the lighting equipment in general works in your vehicle. Start with the most likely and fairly simple to solve possible malfunctions. Only if it turns out that the problem is bad or damaged electrical wiring, then it makes sense to visit a good car service center. It is better to entrust such tasks to experienced craftsmen. The main components for restoring the operation of brake lights on your own, you will need a spare working lamp, a control unit or a multimeter, as well as suitable tools.
It would be a good idea to study the owner's manual and understand how to get to the stops on your car.
Fuse
The first place to start is by searching for the mounting block in which the fuse responsible for the brake light is located.
Moreover, each machine has its own electrical circuit and specific location of fuses.
These can vary significantly depending on the vehicle, such as:
- VAZ 2110;
- VAZ 2107;
- Toyota Rav 4;
- Ford Fusion;
- VAZ 2114;
- VAZ 2115;
- Ford Focus;
- Chevrolet Lacetti;
- Lada Granta;
- Hyundai Accent;
- Renault Logan;
- Hyundai Solaris, etc.
A blown fuse quite often causes the failure of a number of equipment, including lighting devices. Check fuses visually and using a multimeter.
But there is a simple and effective way to check that takes a minimum of time. To do this, start the engine and hold down the horn button. This is not suitable for all car models, but on many vehicles the same fuse is often responsible for the sound signal and brake lights.
If this is not the case, we continue our search further.
Brake lamps and their sockets
Next, you should switch to the brake lights themselves. In most cars, to gain access to the feet, the luggage compartment is opened, the rear light bulb is removed, after which you can get to the feet themselves.
Separate brake light does not light up
If only one brake light does not light, then the most likely problem is the lamp or poor contact in the socket. In this case, you need to disassemble the trunk trim on the side of the car where the signal is not lit. If necessary, remove the lamp unit, remove them from the sockets or holders, carefully inspect the contacts in the socket and on the lamp base.
The presence of rust, traces of oxidation (white or greenish coating), soot, as well as dust or moisture confirms that the brake light does not light due to missing or poor contact in the circuit. Cleaning the indicated areas will help eliminate the problem. To remove rust and oxides, you will need a sharp object, such as a screwdriver. It is also necessary to check the serviceability of the lamp. To do this, you can use a multimeter or the on-board voltage supplied to the lamp via wires through a fuse. The burnt-out lamp is replaced with a similar new one.
Auto-assistance
The brake lights located in both rear lights of the Lada Kalina passenger car play an important role in ensuring traffic safety, since they warn drivers behind moving vehicles that you have pressed the brake pedal and the speed of your car will begin to decrease sharply . If the brake lights do not work, then the likelihood of being hit by the rear of your car by a car following you when driving in dense city traffic increases sharply. Therefore, before leaving, you must definitely check the operation of the lighting devices of your Lada Kalina.
If, when checking, you find that one of the brake lights does not work, then you can make the assumption that either the lamp in the rear light has burned out, or the contact of the lamp with the contact of the socket in which it is installed has disappeared. To eliminate this malfunction, you will have to use a 10mm socket wrench to unscrew the three nuts securing the rear light, remove it from the installation site and unscrew the brake light lamp socket. You will need to replace a burnt-out lamp, and if the lamp is intact, you will have to find out why the contacts of the lamp and socket are not in contact with each other.
It must be said that there are cases when both stop signals are not working at once. The probability of the lamps burning out at the same time is negligible, so you need to start looking for a fault by checking fuse F7 (10A). To do this, you don’t even need to open the cover of the mounting block, since this fuse also protects the electrical circuits of the liquid crystal indicator of the instrument cluster and the interior lighting. If they work, then the fuse is intact and undamaged.
The second device that may not turn on both brake lights at the same time when you press the brake pedal is the brake light switch located above the base of the brake pedal. To check the functionality of this switch, you need to remove the plug block from it and use a jumper to close its contacts. If the brake lights come on, this switch will have to be replaced because it has failed. And if the brake lights do not light up, then you will have to look for a break or loss of contacts in the wires running from the brake light switch to the rear lights. When replacing the brake light switch, be sure to adjust the timing of its activation.
Share this article with your friends:
The additional brake light does not light up
If the additional brake light does not light up, this indicates a break in its wires or an unreliable connection. It usually connects to one of the stock brake light sockets. It is necessary to ensure that the wires are securely fastened and that there are no signs of oxidation.
If they are present, it is necessary to cut off the damaged end of the wire, clean it again and connect it to the socket. If the cable is broken in another place, it is advisable to install a new one. In this case, it is better to use a thicker wire (to avoid recurrence of the malfunction).
Feet don't burn on viburnum
I drive: Kia Cee'd
| Rating: 3 194 |
| Reputation: +3 |
Thanked: 16 times Thanked: 31 times
Brake lights are constantly on when the lights are on
Post by LEvSHA » 09 Mar 2011, 14:06
Messages: 44 Registered: Feb 18, 2011, 00:00 From: 3rd Zarechny Experience: 1985 Car: RAV 4
| Rating: 44 |
| Reputation: 0 |
Post by kranchik72 » 09 Mar 2011, 14:20
I drive: Kia Cee'd
| Rating: 3 194 |
| Reputation: +3 |
Thanked: 16 times Thanked: 31 times
Post by LEvSHA » 09 Mar 2011, 14:30
Messages: 4239 Registered: 08 Feb 2008, 00:00 From: Tyumen Experience: 1999 Car: Renault Sandero :
Awards: 1
| Rating: 19 375 |
| Reputation: +29 |
Thanked: 39 times Thanked: 242 times
Post by AcnupuH72 » 09 Mar 2011, 14:48
Messages: 71 Registered: April 21, 2010, 00:00 From: Tyumen Experience: 1997 Car: Kia Sportage
| Rating: 101 |
| Reputation: 0 |
Thanked: 1 time
Post by Major » 09 Mar 2011, 14:51
Messages: 4239 Registered: 08 Feb 2008, 00:00 From: Tyumen Experience: 1999 Car: Renault Sandero :
Awards: 1
| Rating: 19 375 |
| Reputation: +29 |
Thanked: 39 times Thanked: 242 times
Post by AcnupuH72 » 09 Mar 2011, 14:51
I drive: Kia Cee'd
| Rating: 3 194 |
| Reputation: +3 |
Thanked: 16 times Thanked: 31 times
Post by LEvSHA » 09 Mar 2011, 14:56
Messages: 71 Registered: April 21, 2010, 00:00 From: Tyumen Experience: 1997 Car: Kia Sportage
| Rating: 101 |
| Reputation: 0 |
Thanked: 1 time
Post by Major » 09 Mar 2011, 15:00
I drive: Kia Cee'd
| Rating: 3 194 |
| Reputation: +3 |
Thanked: 16 times Thanked: 31 times
Post by LEvSHA » 09 Mar 2011, 15:09
Messages: 4239 Registered: 08 Feb 2008, 00:00 From: Tyumen Experience: 1999 Car: Renault Sandero :
Awards: 1
| Rating: 19 375 |
| Reputation: +29 |
Thanked: 39 times Thanked: 242 times
Post by AcnupuH72 » 09 Mar 2011, 15:30
Messages: 71 Registered: April 21, 2010, 00:00 From: Tyumen Experience: 1997 Car: Kia Sportage
| Rating: 101 |
| Reputation: 0 |
Thanked: 1 time
Post by Major » 09 Mar 2011, 15:38
I drive: Kia Cee'd
| Rating: 3 194 |
| Reputation: +3 |
Thanked: 16 times Thanked: 31 times
Post by LEvSHA » 09 Mar 2011, 15:53
Messages: 4239 Registered: 08 Feb 2008, 00:00 From: Tyumen Experience: 1999 Car: Renault Sandero :
Awards: 1
| Rating: 19 375 |
| Reputation: +29 |
Thanked: 39 times Thanked: 242 times
Post by AcnupuH72 » 09 Mar 2011, 15:59
I drive: Kia Cee'd
| Rating: 3 194 |
| Reputation: +3 |
Thanked: 16 times Thanked: 31 times
Post by LEvSHA » 09 Mar 2011, 16:05
Messages: 2923 Registered: Jan 12, 2009, 00:00 From: Tyumen Auto: Greetings from Vtorchermet! :
Awards: 3
| Rating: 9 366 |
| Reputation: +20 |
Thanked: 3 times Thanked: 48 times
Post by A_nikolaenko » 09 Mar 2011, 16:23
I drive: Kia Cee'd
| Rating: 3 194 |
| Reputation: +3 |
Thanked: 16 times Thanked: 31 times
Post by LEvSHA » 09 Mar 2011, 16:33
Messages: 333 Registered: Nov 03, 2010, 00:00 From: forest Experience: 2000 Car: Solaris new
| Rating: 614 |
| Reputation: 0 |
Thanked: 1 time
Post by sergunya915 » March 09, 2011, 20:20
I drive: Kia Cee'd
| Rating: 3 194 |
| Reputation: +3 |
Thanked: 16 times Thanked: 31 times
Post by LEvSHA » Mar 09, 2011, 10:31 pm
Malfunction of LED brake lights
If, after carrying out the measures described above, it is not possible to determine the reason why the brake lights do not light, you should clarify the type of lamps used. They can be made using LEDs. Their installation has a number of features. Typically, LED lamps have a certain polarity for connecting to the vehicle’s on-board network.
Manufacturers always take this into account when developing. Incorrect connection results in the lamp not lighting up. In some cases, such inclusion may lead to damage. If a connection polarity violation is detected, this indicates that the repair on the vehicle was carried out by an unqualified person.
Car alternator malfunction
LED lamps are very sensitive to voltage surges in the on-board network (along with this, the current through the LEDs increases, which leads to their destruction). The voltage may increase if the generator components (namely the stabilizer) are faulty. This is especially common on domestic cars due to the lower quality of component production compared to more well-known brands.
Therefore, if the brake light on a VAZ 2114 or another model does not light up (provided that LED lamps are used), you should also check the generator and replace the damaged element, then change the lamp.
Such a malfunction can occur periodically and is associated with wear and tear of the entire generator. If the brake lights on the VAZ 2115 do not light up and other breakdowns often occur, you should also think about replacing it with a more reliable car (in some cases, this is more profitable than constantly investing money in endless repairs).
How to replace light bulbs
If the work to determine the cause of the malfunction was carried out correctly and the cause was found in the lamps, they need to be replaced. The rear lights contain several lamps: brake lights, turn signals, side lights, reverse lights. If the VAZ rear brake lights do not light up , you can change the lamps.
The process of replacing brake light bulbs
In order to get to the lamps, you need to open the trunk and remove the plastic trim, which prevents free access to the latter. Each lantern has a plastic handle that unscrews. When this handle is completely unscrewed, the glass may fall.
So you need to keep it. After this, access to all lamps is open. To replace the desired lamp, you need to take it and twist it counterclockwise. You need to repeat the steps in reverse order and drive calmly. This instruction is suitable for VAZ. On other brands the process may be either easier or more labor intensive.
Malfunction of brake lights together with other indicators
Quite often, the brake indicator lamp is used together with the side lighting of the car. One cylinder contains two filaments, one end of which is connected to the base, and the other two are brought out to separate contacts. If the brake lights and parking lights do not light up, the most likely loss of contact is at the point of their connection to the body (“ground”) of the car or in the socket. This can happen due to a broken wire or oxidation. The broken end is connected to the terminal by soldering or crimping. Oxides are cleaned off with a sharp tool (knife or screwdriver); after repair, it is advisable to cover the joint with paint or grease to prevent re-oxidation.
It is quite rare to encounter a malfunction when not only the brake light, but also the other indicators on the car do not light up. This is usually observed in “drowned” cars that have somehow been in water (as a result of careless driving or an accident). Even after thorough drying, moisture still remains inside the interior trim and electronic components. Its presence leads to increased oxidation of conductive surfaces. In such a car, having eliminated the malfunction of one system, you cannot be sure that it will not appear again.
What to do if your car's rear brake light doesn't light up?
First of all, you need to find out why the rear brake lights do not light up. To do this, you need to check the condition of the lamps installed in the brake light. This can be done by opening the trunk and removing the taillights. On some machines this operation is not necessary; on other models it will be labor-intensive. In order to be one hundred percent sure that the problem is not in the lamps, you need to replace them with new ones or try lamps from other signals. If they work, the problem is solved. You just need to buy new light-emitting devices. On some cars, the brake lights are connected to each other. If one becomes unusable, the other will automatically not work. That's why you need to check both of them.
We recommend:
How to start a car with a manual transmission
Two rear brake lights
If replacing the lamps does not produce results, you can move on to testing another theory. Namely: checking the operation of cartridges. They must be non-oxidized and connected to the wiring. You can update this connection by disconnecting them, cleaning them with sandpaper, lubricating them with grease and putting them back. It is worth remembering that if replacing the lamps does not produce results, there is no need to replace them with old ones. The lamps could burn out at the same time as the cartridges that became faulty.
If the previous manipulations did not help resolve the problem, you need to check the fuses. They are very easy to check - just start the car and press the horn. If sound then follows, these elements are in order. If there is no sound, the fuse will need to be replaced. This verification method is not suitable for all car models. There are some varieties in which different systems are responsible for the brake light and horn.
You need to check that the signal switch is working properly. When the brake is pressed, a mechanism is activated that turns on the brake signals. If it fails, then, accordingly, the signals themselves will not work. It fails for two reasons. Either the formation of soot and corrosion, or oxidation of contacts. To fix this problem, you need to either replace this part or clean it.
To remove the signal switch, you need to remove the pedals and unscrew it. Then disconnect the wires and close them manually. If after the wires are closed the signal lights up, then the problem was in this particular part.
We recommend:
Replacing the fuel filter on Lada Kalina
Other causes of brake light failure
Sometimes the reason why the brake light on a car does not light up is a malfunction of the electronics. In this case, it is better to take the car to a service station.
There are also exceptions, for example, when a defective light bulb comes across. In addition, lamps may burn out due to normal wear and tear. In these cases, the problem is solved by simply replacing them.
Do not forget that you need to contact only trusted workshops. Often, the intervention of unskilled workers leads to additional malfunctions.
The brake light indication is one of the most important signals indicating driver actions. Therefore, it is impossible to postpone repairs if the brake lights are not on. If you notice a malfunction along the way and you are unable to eliminate the cause of the breakdown, turn on the hazard lights and drive at low speed to the nearest service station or a place suitable for DIY repairs.
Search principle
To find a fault in any vehicle on-board network system, you should use the method of sequential elimination of elements. The point is to consistently check electrical appliances and sections of the circuit, excluding elements from the list of reasons that could cause a breakdown. To do this, you need to clearly understand the design and operating principle of the system. When troubleshooting, you need to move from the components that require the least effort to check, to the most difficult to diagnose elements.
Electrical diagram
We immediately emphasize that the pinout of connectors and color markings of wires may differ not only between different models of the same automaker, but also among one model of different years of manufacture. Before you start searching for the cause of the breakdown, you need to find an electrical diagram specifically for your car model.
We will consider the principle of operation of brake lights and the troubleshooting algorithm using the example of the VAZ 2101-2102 circuit. The photo shows the general diagram of the vehicle's lighting and light signaling. We need to isolate the components involved in the operation of brake lights.
The speaker wheezed in the car: what are the reasons, how to fix it yourself
But the dismantling process may differ on different brands and models. Here, start from your car specifically; if necessary, look for hints in the operating manual. There are examples of cars where you can get to the brake light without removing the rear optics at all. You still have one main task ahead of you. It consists of gaining physical access to the faulty device, the lamp and the socket in which it is located. Not everyone can try to determine the problem by eye. Here it is better to take a different route.
The optimal solution would be to use new, similar lamps instead of potentially faulty ones. Therefore, you will have to buy a light bulb in advance and screw it in. If you can't find a lamp of a similar size, use a marker or turn signal repeater. Make sure these conditional controls work first.
When everything worked after installing the new lamps, you found the reason. You can confidently buy new matching stop lamps, replace old ones and reassemble the unit in reverse order.
It is extremely important to take into account one feature. Some modern cars have such a principle of operation of brake lights, in which when one car brake light fails for one reason or another, the second one automatically stops functioning. That is, sometimes checking one lamp does not give a result, since in fact the chances are 50/50 of replacing the burnt lamp, and not the one that simply turned off in tandem.
Fault localization
Understanding the operating principle allows you to determine exactly why the brake lights may not light up:
The fuse has blown. In the diagram, the fuses are marked with the letter F (from English - Fuse) and the serial number of the seat in the fuse block, for example, F3;- poor contact at connectors;
- the light bulbs have burned out, but since the lights are connected in parallel, the likelihood that 2 lamps will burn out at once is extremely low;
- poor contact on the negative terminal of the lights. In this case, problems may begin not only with the feet, but also with the lighting of the remaining lamps in the lanterns;
- Damage to the negative track in the lamp board. From the total mass directly to the brake light lamp, the minus goes along a special path on the board. The path may collapse from water or mechanical impact;
- malfunction of the brake light switch, the so-called frog;
- broken wiring, oxidation of contacts.
