Since the beginning of 2011, all Lada Granta models have been manufactured with audio preparation: factory radios and receivers. The quality of reception and sound is not always at the highest level due to its cheapness and simplicity. When purchasing a Lada Grant from the showroom, the owner receives audio preparation, acoustic wires, and installed electrical wiring.
The door panels have already prepared openings for installing speakers. True, few people use the standard seat, as they prefer the rear shelf to improve the sound.
Choosing the right radio size
We carry out installation either independently or by contacting specialists at the service center. In the second case, the service is paid.
By default, all VAZ and Lada models are equipped with a 1-DIN radio. The opening dimensions correspond to: 180 x 50 mm. This is an old standardization that has been in force since the times of the USSR. Modern audio modules can be purchased complete with a pre-installed LCD display. The size of the opening must comply with the standard: 180 x 100 mm, that is, doubled in height. Size marking: 2-DIN.
To install the radio in the Granta liftback, cut out the top pocket, remove the plastic, and install the assembled module. For a beginner, the process will seem somewhat complicated, so strictly follow the instructions.
Related link:
Soundproofing Lada Granta Liftback
What extensions can there be?
If you plan to connect a professional device via the ignition switch or directly to the network, then in order to do everything correctly, you need to take into account the extensions specific to the 220 radio. Thanks to this functionality, the device is equipped with additional functionality that makes using the radio more comfortable.
For example, these could be extensions:
- ANT. This extension will be useful if the car has a retractable antenna. That is, if you need to activate it, you can simply give a command to the device and the antenna will turn on automatically.
- REMOTE. Thanks to this function, you can connect an amplifier to the system and, accordingly, achieve better sound. If your car is basically small, then this function will not be particularly useful, since in any case you will not be able to achieve the desired sound background.
- ILLUMINATION. Using this extension, you can make sure that the brightness of the device is reduced while driving and does not distract the motorist. When the car stops, the system will automatically increase the brightness of the display.
- MUTE. This extension is enabled only when the car owner needs to talk on a mobile phone. When the phone rings, the system automatically turns on this extension and the speakers are turned off.
How to connect a Lada Granta head unit with a 1-DIN connector
- We carry out the work inside the car, having previously disconnected the terminals from the battery in order to prevent a short circuit in the circuit;
- We remove the plastic partition - pocket. It covers the hole, preventing objects from falling inside the torpedo. We use a flat-head screwdriver to unscrew the bolts;
- Two ISO plugs are visible behind the partition body. These types of wire terminals are manufactured in accordance with international automotive standards. More than 98% of all automakers use the standard when equipping technical equipment;
- We remove the metal frame - the block - from the body of the audio unit and place it in the cavity of the torpedo.
- We first connect the blocks with wires. Fitting into the connectors is accompanied by a characteristic click;
- We insert the module into the metal frame.
Note to the driver!!! Incorrect terminal connections result in a short circuit. To ensure the safety of the connection process, the connectors have guides that allow you to install the block in only one position.
Removing the device according to the instructions
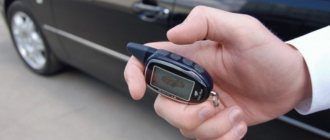
The algorithm for removing the radio if you have the keys is outrageously simple. It is worth considering in order to understand how to act if they are lost. The order is as follows:
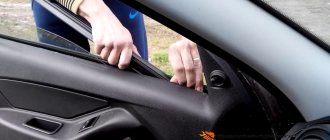
- Remove the front panel of the player and the decorative plastic frame, prying it up with a flathead screwdriver if necessary.
- Insert the first key into the gap between the housing and the mounting frame, located at the end. You should feel slight resistance as the tool bends the latch.
- Repeat the same action with the second key.
- Grasp the radio with your hands by the protruding parts on the sides of the case and carefully remove it from the niche.
To remove the radio, 2 keys are used
Special keys must be inserted into the side openings
When the radio is equipped with four latches, access to them is through 2 pairs of round holes. You need to insert 2 U-shaped keys into them and pull them out by the body, as described above.
The music center can be easily removed using keys
Common mistakes when installing a standard Granta liftback radio with your own hands
- when connecting additional terminals, manual twisting of wires is used instead of classical soldering;
- regular insulating tape is used on connections instead of heat-resistant sleeves;
- Incorrect connection of a large number of speakers on one branch leads to overload, heating, and short circuit.
Installing a sound amplifier
By liftback radio amplifier we mean:
- crossover installation;
- subwoofer installation.
The choice is up to the owner of the Lada Grant, as different goals are pursued: cleanliness, sound quality. Obviously, the cost of equipment will also increase. Crossovers are installed in the cavity of the glove box, since their dimensions do not exceed 100 x 150 mm and are rectangular in shape. Subwoofers are fixed in the luggage compartment. Equipment requires more space.
Connection of an external device is carried out strictly in accordance with the operating instructions:
- brown wire color: responsible for the operation of the system;
- black: power supply to equipment;
- yellow: audio module activation;
- red: settings and programming.
Related link:
Installing a trunk release button with your own hands on the Lada Granta Liftback
At the very end, do not forget to connect a red wire with a pre-installed fuse to the positive terminal of the battery. It directly connects the amplifier (subwoofer) to the current source.
Installing two speakers in the front doors
- dismantle the door card, handle, control unit;
- We compare the standard cutouts for the speakers with the actual dimensions. If necessary, expand with a file or fine sandpaper. It is strictly forbidden to use cutting objects, as there is a high risk of damage to the plastic of the door card;
- we check for the absence of roughness in the hole, install the speaker, fix it, connect the standard terminals with wiring;
- we check the operation of the speaker, install the door card, and fix the metal grille to protect the speaker from mechanical damage.
Connectors and their markings
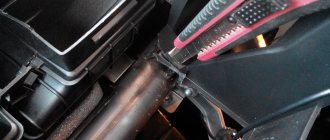
So, in order to correctly connect a car multimedia system to a car battery or ignition switch at home, you first need to understand the connectors. Currently, most car radios are usually equipped with two standard outputs, marked with ISO symbols. Each of them has eight contacts equipped with a special key.
One of them consumes linear current in amperes, that is, a power circuit should be connected to it, which is a brown connecting element, marked as A. The second is intended for connecting music speakers, usually black wires are connected to it, and it is marked with the letter B.
Connecting the radio plug in a car
It should be noted that in some cars, in order to properly connect the power to the network, it is necessary to use non-standard connectors. But such elements are usually labeled the same, so there are several options here. The first is to simply cut off the old connector and connect the wires to it, then wrap them with electrical tape, but this option is less practical. The optimal solution would be to purchase a special adapter, with which you can correctly connect the system directly to the battery or through the ignition switch. Currently, you can purchase such a device without any problems, especially since the domestic market offers customers a huge assortment.
Characteristics of the standard radio "Lada Grants Liftback"
The radio for the Lada Granta liftback is supplied as standard equipment. Product in 2-DIM format (100 x 180 mm).
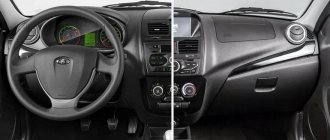
In addition to the classic radio, there is a built-in card reader, Bluetooth, and a USB output for connecting flash drives. The only disadvantage of the audio module is that it is a push-button type. Which is not to the liking of many car enthusiasts, which is why they install more modern modifications.
During the startup of the audio module, a greeting from Lada Kalina 2 is displayed. This is not an error, as many owners think. This type of audio was originally developed for the Lada Kalina 2. Obviously, the manufacturer did not change anything and started production for the Granta. Installation/disassembly of the module is somewhat complicated due to the tight fit, so be prepared for this.
It is based on the Windows operating system, which allows you to connect to the World Wide Web via a 3G modem. There is no such option out of the box; you first need to reflash the device, but more on that later.
Via Bluetooth, it is possible to connect to a phone, and the “hands-free” option is activated. Which is very convenient and practical when driving. The owners were also pleased with the stock radio. At first glance it looks simple, but it turns out not to be so. Available programming function for a specific channel on a given topic.
Related link:
Lada Granta Liftback Comfort: is it really comfortable?
For example, as soon as a news broadcast comes on, the radio automatically switches to the programmed channel. The audio module reads the following formats: MP3, WMA, WAV, WMV. Control of the standard radio of the Lada Granta liftback is accessible and intuitive, even for an inexperienced owner.
Decoding problems
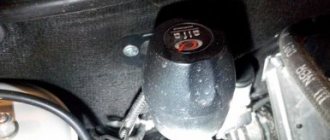
The main pitfall of the described procedure lies in the security code embedded in the memory of most radio tape recorders. The bottom line is this: disconnecting the music center from the external power supply for 10-15 minutes will lead to the fact that the next time you turn on the car radio, it will require you to enter a security code (usually a four-digit one), without which it will not function.
The device requests a code after connecting to the on-board network
If the card with the code is lost or missing, the issue can be resolved in several ways:
- when it comes to a standard device, for a certain fee they will help you find the code at a dealership that sells cars of your brand;
- there are companies and individual specialists dealing with these problems;
- the free way is to search for code using various programs.
Serial number location
Regardless of the method chosen, you will have to remove the radio from the socket to find out the serial number. It is printed along with a barcode on a tag glued to the side or top of the case. After taking out the device, rewrite these numbers, and then try to calculate the PIN code using them using various online calculators on the Internet.
The issue of removing a car radio from its socket is not very difficult and will not require much time. But the consequences can be unexpected for an unprepared motorist. Hence the last piece of advice: find the lost pin code before turning off and removing the player in order to save your time and nerves.
The standard multimedia system 2190 on the Lada Granta has many useful functions, but this does not mean that one day you will not need to connect additional equipment to it (rear view camera, etc.) or remove it altogether. For example, to replace with more powerful multimedia systems or, conversely, to install a double-din radio without a touch screen.
In any case, you may need to dismantle the MMC on Grant, which we will talk about now.
How to flash the firmware
- Buy an SD card, format it in FAT, exFAT format;
- We download the firmware for free on the manufacturer’s official website;
- We save the data in the root directory of the SD card;
- We insert the SD card into the slot on the radio, start it, wait for the update to finish;
- Turn on and off the module;
- We customize the new interface for ourselves.
If the firmware is installed incorrectly, additional screen calibration using the CAN bus will be required. It is impossible to do this yourself, only in a service station. After successful flashing, the following is available:
- graphic equalizer;
- viewing photos, pictures, videos;
- improved sound quality;
- possibility of installing a navigation system.
Disadvantages of a standard radio
- Outdated firmware from the “box”;
- Not all options are initially available;
- The need for periodic software updates;
- Push-button interface.
Criterias of choice
How to choose the right 2 DIN radio:
First of all, this is the cost, which is determined in accordance with the financial capabilities of the buyer. Based on the price, you will choose the best device from a certain price segment. You should pay attention to the functional features, because the more options there are, the more opportunities the driver will have in terms of control and operation. We wrote more about additional functions above. The ability to read information from different media CDs and DVDs is a thing of the past, so you cannot rely on the availability of only these drives. The device must be equipped with at least a USB output, as well as a slot for connecting an SD card. Dimensions in the center console of your car. If you choose a radio whose dimensions do not correspond to the dimensions of the hole in the dashboard, then you will additionally need to purchase a frame. If you value good sound quality, then also pay attention to the output power. The higher the power, the higher the playback quality will be. As practice shows, 50 W of power is enough for normal sound quality. Backlight
It is important that it has an adjustment function; if it does not, then the backlight should not be bright. Otherwise, it will distract the driver from the road, which directly affects the safety of driving. The ability to customize the equalizer allows you to adjust the sound quality to suit your preferences. Number of connected speakers
If, in addition to the standard four speakers, you want to install tweeters (tweeters), an amplifier and a subwoofer, be sure to make sure that the radio you buy supports this feature (the author of the video is the Parcels from China channel for CergeyNchina).
Reviews
| № | Positive |
| 1. | Victor, 39 years old: after buying the car, he did not change the radio, despite the push-button control option. The sound quality is good, the radio reception is excellent, that's enough for me. |
| 2. | Konstantin, 41 years old: bought the car second-hand, second owner. I didn’t change anything, I left the original radio. The functionality is good, the build quality is also good, it reads from a flash drive. |
| 3. | Vasily, 44 years old: I listen to the radio more, the reception in the city is good. True, it causes interference near metal structures, but this is natural. |
| 4. | Kirill, 36 years old: I work as a taxi driver, on wheels all day. The standard tape recorder saves the day, it works properly. My friends recommended replacing it with a touchscreen model from the new Granta, but so far the old one hasn’t failed. |
| Negative | |
| 1. | Victor, 38 years old: the standard audio module, although not bad, seemed to me not enough, so I replaced it with a foreign one and supplemented it with an amplifier. Now the volume is good, the quality is high. |
| 2. | Mikhail, 42 years old: I work as a courier, I drive for the entire shift. I expected more from the standard radio, so I had to replace it with a new one. The volume suits me, I plan to connect an amplifier - a crossover. |
| 3. | Ivan, 33 years old: I bought the car second-hand, immediately replaced the audio module, the reviews are not good. New and high-quality equipment from Trinity, no problems. |
| 4. | Vladlen, 40 years old: friends gave me a gift in the form of a radio with touch control for our anniversary. Before this there was a push-button one. Can't compare, quality, sound, control, functionality at a high level. |
Related link:
Tips for installing a towbar on a Lada Granta liftback with your own hands
Conclusion The opinions of motorists on the functionality and sound quality of the standard radio are divided, which is obvious. Everyone evaluates according to their own criteria. Some people care about sound, others about functionality, and others about control. Regardless of the type of radio: push-button or touch-sensitive, the workmanship is good. No massive breakdowns or defects were recorded. Maintenance is not expensive, parts and components are available both at official representative offices and on the Internet. Now it will not be difficult for the owner to remove the radio on the Granta liftback with his own hands without contacting a service station.
Instead of a total
- If we install a simple radio, the size should be no more than 178 * 50 mm. Installation requires plastic spatulas or a screwdriver. Adapters and slides are included.
- To install 2 din, you need a new overlay on the console, a decorative frame on the GU itself, wire cutters and a metal blade to adjust the installation location.
- Are we replacing the standard speakers with another of the same size? Still need a new decorative frame. Otherwise, gaps in the panel will be visible.
More articles about Granta here.
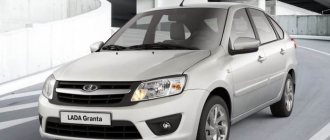
How to install a head unit on a car with basic equipment?
Since the Lada Granta base is not equipped with musical equipment, and only a push-button radio is installed on board, the question justifiably arises: how is the standard radio installed in the cabin? In reality, this is a simpler procedure than it might seem at first. The occurrence of problems during installation is excluded, since a seat is already provided for the standard device on the Lada Granta panel, regardless of the level of equipment.
You can purchase the device in a retail chain or on an Internet site, where you can actually find an improved version, equipped with a navigation system with a detailed map of the Russian Federation. Don't forget to buy an additional luxury panel. Although multimedia will fit into the standard panel without any problems, the appearance will not be so beautiful. The price for this device reaches 2.5 thousand rubles.
Description of general settings
General settings of the radio can be made after pressing the “Settings” menu button. They include setting the screen saver (only works in conjunction with the radio), the current date and time. All the necessary functional buttons are present on the screen during radio operation or music playback, which allows you to quickly switch to the required operating mode. Operating instructions for the radio are not supplied by official dealers, so you will have to figure out all the nested menus using a simple “poke” method.
https://youtube.com/watch?v=AM02w_hDBaA
https://youtube.com/watch?v=AM02w_hDBaA
The simplicity of the interface and all the inscriptions and names are in Russian save the situation. This greatly simplifies the familiarization process. A standard device for Granta with a liquid crystal display 2190 can be purchased by ordering it via the Internet or in a retail chain. The firmware on it will be standard, although the manufacturer claims that they are updated all the time. The functions of the radio can be supplemented with new firmware, then the device will have navigation and the ability to connect a rear view camera.
| Not everyone knows that depending on the configuration of the Lada Grant, the standard radio can be 1 din or 2 din. This option is rare for a Russian car, the new product arouses great interest, and therefore we decided to test the Granta luxury radio. |
The text is based on reviews from car enthusiasts who have a standard luxury radio (2 din) in their Lada Granta. So, the Itelm radio runs on WinCE 6.0.0.3. and it takes a couple of seconds to turn it on.
USB screen
SD cards. An 8GB memory card was tested, there were no problems with identifying or playing music. The manufacturer warns: The USB and SD connectors are designed to connect SD cards and USB flash drives. Connecting other devices may damage the radio or the connected device.
Hands free. The standard radio of the Lada Granta even has such a function as pairing with a phone via bluetooth. We managed to connect a couple of phones (android 2.1 and WM 6.5), but you have to wait to load the phone book. In addition, you can play audio via bluetooth. However, it’s difficult to call the work of the phone-radio combination stable, and remembering two phones on the list is a whole epic.
Video
Photo. There is support for viewing photos. Supported formats: JPEG, .JPG, .JPE, .BMP, GIF, .PNG. If a 1MB 800x1397px photo takes 1 second to open, a 1978x3456px 7MB photo will take as much as 9 seconds to load the radio.
Antenna Settings
- General settings (screen saver that only works with the radio, factory reset, language settings, date settings, clock settings).
- Phone settings
- Sound settings
- Display settings
- Photo viewing settings
- Video player settings
- Radio settings
luxury radio manuals
There is no option to connect a rear view camera.
The standard speakers are 13 cm, obviously weak for a luxury radio, so it is recommended to install speakers in the rear doors and replace the existing ones. Installing soundproofing will make the sound in the cabin even clearer.
In conclusion, we can say that you shouldn’t expect much from the Granta luxury radio; it is still far from a full-fledged multimedia system. The slow processor (even though it is declared Dual Core), the meager amount of RAM memory (128MB), the lack of AV output and navigation are upsetting. The positive aspects include a simple and intuitive interface, support for USB and SD memory cards and the ability to play video clips (albeit only in a strictly limited format, but the option itself is quite rare). The good news is that AvtoVAZ has work in this direction, and this means a lot.
«>