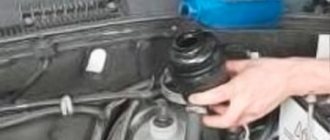
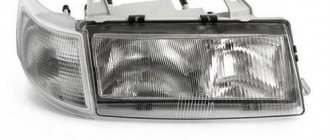
Very often, car enthusiasts are faced with the following question: how to remove the deflectors on a VAZ 2114? It occurs as a result of the fact that when they are handled carelessly (for example, when trying to clean them with force), they break or are pressed inward. How to correct this situation will be discussed in today’s article.
Deflectors VAZ 2114
What are deflectors and the reasons for their failure?
Before considering the main topic - how to remove the air ducts of a VAZ 2114 and their nozzles, you should first briefly talk about what they are.
The deflector (otherwise called an air duct nozzle or air deflector) is designed to reflect the flow of air moving from the stove through a special channel (air duct) and deflect it in the desired direction (in the direction that the driver or passenger wants - for this there is the possibility of deflecting the deflector guides ).
Due to the peculiarities of their design and location, side deflectors are often damaged as a result of mechanical stress (for example, when accidentally pressed). In addition, they can break if you try to clean them with a hard object (screwdriver or knife) using significant force.
Dismantling of air ducts
Sometimes, in addition to removing the deflectors, you also have to remove the air ducts themselves (this may be necessary if they are damaged or severely clogged).
Heater device with air ducts VAZ 2114
In order to dismantle them, you need:
- remove the deflectors (how to do this was described above);
- remove the dashboard by unscrewing the fastening screws;
- disconnect the side air ducts (left and right) by unscrewing two screws securing them to the central air duct;
- disconnect the central air duct by unscrewing three screws - one in the center and two at the edges.
After the air ducts have been cleaned or replaced with new ones, their installation and assembly is carried out according to the specified scheme, but in the reverse order.
FakeHeader
Comments 127
I already bought a car on these wheels, so you can say they are rare wheels, in our city no one has these, and in my life I have never seen anyone like them, only I saw one on a drive)
useful info, thanks)
There is a special rubber disk for an angle grinder - it’s soft. It rips everything off with a bang. Or a hairdryer and just a washing machine. But everyone works with what they can))))) Five for ingenuity!
thank you) I found something on the Internet that can be removed) and it gave me this crap from tubeless cameras)
How are you on such roads with such suspension)? I understand that in Moscow there is asphalt everywhere, but here...
We also have asphalt: D not everywhere it’s normal, there are potholes and bumps, but you can safely drive 200)) and I only drive low in the city, on the highway I have air conditioning about 5 cm higher)
Why did the windshields bother you?
rattled, and even without them I like the view better, I took the car they were already there
Hmmm, we wiped off the army’s ensign with gasoline))
I also cleaned it with gasoline)
I removed the double-sided tape without any problems... The brake cleaner takes it in seconds. and not any torment
Is there anything wrong with the paint?)
I removed any stains with a hair dryer, but carefully so as not to damage the paint and varnish, and tried it with a solvent, everything came off fine too
understandable) well, a hairdryer is not very good for paint)
Well, you set the temperature so as not to damage it, they filmed my buddy the same way, and everything was ok.
a good alternative to the Wurth rubber roller, papilla***
What is the best way to remove the tape from the moldings that are glued all over the side of the door without damaging the paintwork?
In YouTube, enter a lot of videos on how to do this) it is common to use a drill and a tubeless pipe tool)
Pipka=this is a nipple so to speak?
I liked the skirts on the edges of the front bumper. What did you make them from?
these are from the Priora luxury skis) on the Priora they are in the same place
At first I started cleaning with my finger - it wasn’t going badly until I rubbed a callus, then I took a piece of leather from an old bag and started to rub it with it) it works like a charm!
There is a special remover for double-sided tape, the price is 100 rubles.
Yes, how often it happens that you sit, have nothing to do, and realize that the deflector is in your way... it’s simple.
+1 that's exactly what happened
At first I started cleaning with my finger - it wasn’t going badly until I rubbed a callus, then I took a piece of leather from an old bag and started to rub it with it) it works like a charm!
I'll know for the future)
I cleaned it with carb cleaner. You water the tape, wait a minute, then direct a stream of cleaner at the joint and start peeling it off. And immediately wipe off the residue with soapy water using a brush or a good rag, and if necessary, again with carburetor cleaner and soapy water.
it’s clear) well, here I went faster with a drill and then removed the remains with a rag; they cleaned up normally) I only went 15 cm with a drill, then the lights were turned off, I had to clean up everything else manually)
In 15 minutes I removed all the double-sided tape around the entire perimeter of the door.
If the lights hadn’t been turned off, I would have removed them from all 4 doors in 15 minutes)
Well it was easier for me
How to remove double-sided tape - wet it with vodka. rub.
it turns out there’s a lot of ways to remove it) when I was looking for how to remove it, I couldn’t find anything helpful)
How to remove double-sided tape - wet it with vodka. rub.
like what? soggy double-sided tape
Ahhhh, I thought maybe the tongue...
You are strange people (no offense) you remove really useful things, and at the same time call them collective farms, and firmly believe that “drain” is labor, and leave the collective farm mirrors)
The stock ones are a bit under repair and these mirrors will also be gone soon)
There are also similar mirrors, there are abrasions from them on the door and the stock ones are smaller in size...
If I touch up anything, there is still a jamb left on one side of the windshield so it’s not visible, but if you come close and look closely, you can see a scratch)
You are strange people (no offense) you remove really useful things, and at the same time call them collective farms, and firmly believe that “drain” is labor, and leave the collective farm mirrors)
I agree about the mirrors, but windshields, especially on Russian cars, are +100 to wretchedness! They only suit some foreign cars, and only when they are original, expensive, well-made windshields.
I agree about the mirrors, but windshields, especially on Russian cars, are +100 to wretchedness! They only suit some foreign cars, and only when they are original, expensive, well-made windshields.
windshields are +1000 to practicality!) - it started to rain, the windows began to fog up - I opened it a little and the interior does not flood and the air circulates. - if you leave the car with the windows slightly open in the summer (so that the interior does not get hot), no one will even notice) - on the highway they reduce whirling noise in the door frame area
In general, to each his own, some enjoy comfort, some enjoy dubious aesthetics HD
You are strange people (no offense) you remove really useful things, and at the same time call them collective farms, and firmly believe that “drain” is labor, and leave the collective farm mirrors)
Great! I also did this, it’s a tedious task, but it’s worth it
What is a deflector - a wind deflector for a car
Deflector translated from English means cut-off device. This accessory is a plastic visor that is installed in the upper part of the side opening of the car, as well as on the hood.
The deflector cuts off air flows that bring dirt and dust into the car interior. It also protects the windshield from dirt from the front side, where dirt from outside often penetrates into the car.
By installing the deflector on the hood and windows, you can be sure:
- dead insects will not stick to the hood,
- debris flying towards the car (stones and gravel from roads) will change its trajectory and be diverted away from the hood and glass,
- When opening a window during rain, you don’t have to worry – water won’t get into the car’s interior.
This in turn leads to increased fuel costs. In this regard, each driver decides for himself whether he needs deflectors and whether he is ready for additional gasoline costs.
Choose deflectors from trusted manufacturers.
Deflectors for car windows and hood: installation and removal instructions
Deflectors on car windows and hoods are used everywhere. Most vehicles on the road are equipped with black or body-colored visors pasted over the sliding windows.
Some vehicles have a similar design in the front part of the hood. What are these devices used for? How to choose and install a deflector with your own hands?
Why are deflectors needed?
The structures under consideration have several functional purposes, which include:
- Protection of the hood from mechanical damage - a deflector mounted in the front part of the hood changes the direction of the air flow flowing around the car. Together with the upward flow, small stones and wheel spikes are diverted from the car, flying out from under the vehicle in front. In the absence of the so-called “fly swatters” all this ends up in the windshield of the car. In addition to the above, the deflector mechanically protects the edge of the hood from flying sand and dust.
- Protection of the windshield from insects - the direction of the oncoming flow changing under the influence of the device helps to remove mosquitoes and midges, which in warm weather literally stick to the windshields of cars that are not equipped with protective devices. Installing a fly swatter solves this problem.
- Improving the design of the car - visors and fly swatters significantly improve the appearance of most cars. Black elements look best when installed on light-colored cars.
- Protection from splashes in the cabin - a deflector on the car windows allows you to open them a little even in heavy rain. Of course, if the window is completely lowered, the device will not save you.
Criteria for choosing car deflectors
Installation of deflectors begins with their selection and purchase. It is necessary to select products based on several parameters. First of all, the visors must match the shape of the door or hood where they are planned to be mounted
It is important that the coincidence of all angles is accurate. Otherwise, the installed deflectors will not last long and will soon disappear
The second selection criterion is the method of attaching the products to the glass. There are plug-in and self-adhesive visors. Installing a hood deflector is always done in one way, so there is nothing to choose from.
The quality of a product is determined by its manufacturer. It is preferable to purchase goods from a monobrand manufacturer. However, devices of acceptable quality can also be sold by brands that develop several car models at once.
The most famous companies today are the following:
- Mono-brand (products for one brand of vehicle): climair, airpiex, heko.
- Multi-brand (products for several brands): autoclover, mobis.
- Little-known (not very common, usually Russian manufacturers): strelka, cobra, comfort.
Fly swatter installation procedure
Installing a fly swatter on the hood requires some knowledge. Violation of the installation technique leads to damage to the paintwork. The result is accelerated corrosion of the metal under the deflector.
Things to consider before installation
Before gluing the deflectors to the car, you should evaluate the condition of the hood edge.
Corroded areas should be cleaned, treated with a rust converter, puttied, primed and painted. The device should not be placed on rusty surfaces, as moisture almost always accumulates under the device. This will lead to the final destruction of the metal within several months.
The second factor to consider is the speed at which you plan to travel. On relatively low-speed vehicles, installation of deflectors can be carried out using adhesive tape or standard fasteners. For high-speed vehicles, additional fastenings should be made.
If installation is planned using glue or tape, the temperature in the room where the work is being carried out must be at least 10 °C. Otherwise, the fixing compounds will not stick to the paintwork and the deflector will fall off at the first shake. Installation using mechanical clips or bolts can be done at any temperature.
How to install plug-in deflectors
To attach plug-in deflectors to a car door under the door frame, follow these steps:
- Roll down the window.
- If you are installing a windshield on the front door, then bend it similar to the door shape. It is due to bending that the cutter is held firmly on the front doors, while on the rear doors it is held more firmly with the help of an adhesive element.
- Make sure that the part of the windshield that fits into the groove is strongly ground off. If this is not the case, then the glass will not be able to be closed completely; moreover, it will be scratched by the rain cover.
- Make sure that the glass rises/lowers without interference.
- Secure the windshield with adhesive tape or double-sided tape, depending on the method of fastening your particular part.
- If the fairing is equipped with special rivets, secure it using this fastener.
- Lower/raise the window several times, making sure that the installation of the windshield does not affect the operation of the lift in any way.
When Rework Is Needed
This situation often happens: when trying to reduce the temperature, hot air blows from the torpedo. But from the air ducts located on the sides, a cold flow of air flows onto the windshield. Necessary:
- 1. Remove the side cover of the torpedo on the gas pedal side. Here you will find the throttle cable. It is secured with a clamp. Loosen it and, pulling the cable down, fix the clamp again. Now you need to set the damper control levers. Left - to the right, and right - to the left. The crane control lever itself must be set all the way to the right. At this moment, warm air should come out of the side holes.
- 2. The second stage of tuning is to ensure that outside air passes through the heater. Since one engine is responsible for the operation of the damper and the tap, it is necessary to block its control of the damper. Remove the dashboard cover on the right side and disconnect the temperature control cable from the engine. There are two of them here. Disconnect and tighten the one on the right. At this moment the damper should be in its maximum position. Bend the tensioned cable at the attachment point and cut off the excess length.
How to disassemble the instrument panel on a VAZ 2114
Before embarking on this complex process, the driver must carefully familiarize himself with the design and arrangement of the instrument panel on his car. When disassembled down to the cogs, it looks like this:
The device of the VAZ 2114 dashboard
Instrument panel and its accessories:
1 - VAZ 2114 torpedo, or - instrument panel, that is, the main part of the entire structure to which the instrument unit, on-board computer, stove control levers, key blocks and other linings and latches are attached;
2 — overlay on the instrument panel, has a decorative function, it also contains air duct outlets for blowing the windshield;
5 — ashtray body;
6 and 11 - right and left crossbars;
7 and 10 - right and left console screens;
8 — instrument panel;
9 — central bracket.
If you carefully study this diagram, it becomes clear how to remove the panel on a VAZ 2114. Having determined the order for yourself, you can begin the process.
Using a Phillips screwdriver, you need to unscrew the three screws holding the left console screen. For convenience, when doing this work, it is better to use a screwdriver with a short handle and blade.
Left screen of the VAZ 2114 console
When removing the screen, carefully remove the lower edge of the trim from the body bracket. The right console screen is secured with five self-tapping screws. Using a Phillips screwdriver, carefully unscrew all the screws while holding the trim with your hand.
Right screen of the VAZ 2114 console
remove the screen without allowing it to get caught in the wiring harnesses that are hidden behind it.
Disconnect the ground from the battery by disconnecting the connectors. If your car has a radio, disconnect it from the main bundle of wires by pulling out the connecting connector. If there is no radio installed on the car, then simply pull the wires out of the panel; they should be closed with a plug. Be sure to turn off the cigarette lighter and remove the socket with the ashtray light bulb.
Remove the handles from the heater damper control levers. To make the process easier, pry them off with a flat-head screwdriver.
Removing handles and levers from the dashboard of a VAZ 2114
Despite the apparent simplicity of this item, removing the handles from the levers can take a lot of time. To do this, a clear example is given of how this should be done on a removed unit.
Removing the handle using a VAZ 2114 screwdriver
Remove the electric heater fan handle by simply pulling it towards you.
Removing the handle of the electric fan VAZ 2114
Unscrew the cross-head screws securing the instrument panel to the brackets on the right and left with a screwdriver.
Self-tapping screws on the dashboard brackets of VAZ 2114
in the window on the instrument panel where the instrument unit is located there are two screws on top and two on the bottom - under the window. It is necessary to turn them out, loosening the cover (2) and the shield (8).
Releasing the lining and shield of the VAZ 2114
pull out the plug and unscrew the screw located behind it.
Self-tapping screw under the plug VAZ 2114
- remove the two screws from the bottom holding the trim and remove it.
- Having marked the wires suitable for the switches, disconnect them.
Disconnecting wires from VAZ 2114 buttons
Unscrew the bolts from the steering wheel bracket.
Bolts on the VAZ 2114 steering bracket
Using the “8” key, unscrew the screws of the lower bracket fastening.
Lower mount on the VAZ 2114 bracket
- Unscrew the self-tapping screw and remove the light guide.
- remove the fasteners of the heating control unit and remove the cartridges from the back of the unit.
Cartridges from the reverse side of the VAZ 2114 block
- remove the decorative insert, removing all external parts.
- Unscrew the nuts with a key to “21”.
- remove the hydraulic corrector illumination.
- Unscrew the top and bottom fastenings of the panel, remove the fastening to the cross member on the left side.
Upper mount on the left side of the VAZ 2114 panel
Now you can remove the VAZ 2114 torpedo.
Removing the instrument panel of VAZ 2114
Installation is in the reverse order.
In order to clearly see the whole process in motion, you can watch a video on how to remove the dashboard on a VAZ 2114.
https://youtube.com/watch?v=F-FEZZiQ31Y
It would seem, why suddenly remove the air duct deflector. The need for this may arise for various reasons. For example, it may simply fail, in which case it should either be repaired or replaced. To improve the interior, some people purchase deflector grilles from other car models and install them. Our goal is to tell you how to remove the air duct deflector in order to carry out the desired operations. The process will be examined using the example of different VAZ models. Here you will also find instructions on how to remove the air deflector on foreign cars.
Malfunctions in the cooling system
The stove may blow cold air due to a malfunction in the cooling system. If the heater motor is working properly, we look for the reason for supplying cold air into the cabin instead of hot air in the following order:
- open the hood, check the coolant level in the expansion tank, if necessary, add antifreeze to the required level;
- Warm up the engine, pay attention to the readings of the temperature sensor on the instrument panel. If the temperature does not rise to the desired value, the valve in the thermostat may be faulty - it opens prematurely;
- The cooling system can also “air up”, often the cause of this phenomenon is a broken head gasket. A cylinder head burnout may be accompanied by the following symptoms:
- Antifreeze splashes out of the expansion tank.
- The gauge on the instrument panel shows a high temperature.
- The engine is tripping.
- Antifreeze gets into the oil, the engine oil becomes lighter.
If the cylinder head gasket breaks, cold air often blows into the cabin only at low speeds; when the engine is pressurized, the cooling system is “pierced” and hot air begins to flow into the cabin. Very often, replacing the PGBC solves the problem.
Types of deflectors
On store shelves there are windshields that differ in shape, manufacturer, characteristics, color palette and other parameters. The main criterion that the driver must follow is the method of attaching the fairings to the car doors.
- Plug-in windshields are attached very simply between the rubber seal and the glass, but they perform worse in practice. On some brands of cars it causes inconvenience when opening/closing the glass.
- Overhead windshields are fixed to the door frame, but installation is a little more difficult and takes longer. However, proper installation of such overlays will not cause any interference and will last much longer.
Often, reputable manufacturing companies produce high-quality deflectors and complete them with the necessary consumables for installation.
How to remove deflectors from a car yourself
Having decided on the method of attaching the mentioned accessory to the upper edge of the door, dismantling begins.
On double-sided tape
If the first method takes place - fastening with tape, then you should definitely take into account the following steps:
fix the door in the open position;
It is strongly recommended to carry out fixation from the inside of the cabin - between the trim and the threshold. Anything will do for this - a chair, a toolbox, even a log, but first wrap it in a blanket or jacket.
raise the glass completely;
If the glass is tinted and if there is no confidence in the quality of the film used, cover 10 cm from the top point of the glass with a rag or gauze.• heat the place where the deflector is attached to the door using a hairdryer.
At this stage, it is worth considering the age of the car’s paint job and its originality. Even for factory painting, the recommended distance of the hair dryer from the door and, accordingly, the plastic lining is 10 cm. Heating will take longer, but the possibility of swelling of the paintwork is completely eliminated.
- use a plastic spatula to pry off the edge of the cutter;
- insert the previously mentioned fishing line into the resulting opening;
- with smooth movements, in the direction opposite to the heated corner, try to cut the tape in the middle;
You should not try to tear off the adhesive backing right at the base of the door, since the fishing line is quite strong and has almost invisible cutting edges. Accordingly, it can cause chips or scratches that cannot be removed with regular polishing.
- as you pass halfway through the door, continue heating;
- remove the windshield;
remove remaining pieces of tape using improvised means;
A stationery knife or any other sharp object should be used as carefully as possible.
Moisten a rag with solvent and wipe off any remaining glue.
It is highly recommended to use mineral spirits, which is a proven degreaser in the automotive industry and will not attack varnish, paint or primer.
Try to remove hardened residues of the base moistened with solvent using a scraper or a plastic ruler.
The process of removing the shutters from all doors takes 30 minutes.
Major electrical failures of the heating system of the VAZ-2115
If no changes occur in the heating system at any position of the switch knob, then most likely the system motor is faulty (the brushes are worn out) or there is no voltage at the terminals. But also in this case there may be problems with the ignition switch or mounting block (fuse F4 has blown).
It is important for the proper operation of the car's heating system that there is no more than 3 ohms at the engine ground (installed under the hood). If the heater works normally at maximum engine speeds, and problems arise only at low speeds, then the cause of the malfunction most likely lies in the speed switch button or additional resistors
If the heater works normally at maximum engine speeds, and problems arise only at low speeds, then the cause of the malfunction most likely lies in the speed switch button or additional resistors.
If you turn on the interior heating system and hear a noise and the heater is not blowing properly, this also indicates an engine problem. Malfunctions may include jamming of the impeller or armature bearings. Malfunctions can be eliminated by replacing components or, if necessary, lubricating them. But, as a rule, these actions have a short-term effect and the problem returns.
Over time, any equipment breaks down and requires repair. Therefore, the heating system is no exception here, and the least that needs to be done for preventive purposes is to at least carry out periodic visual inspections and diagnostics. Don’t forget that over time the system ages and wears out, so the older the car, the more it needs to be prepared for the heating season.
Popular product types
You've probably noticed that they come in different shapes. Modern devices may have different tops:
- Flat
- Semicircle
- With lid
- With a gable gable roof
Semicircular cap
The first type is most often installed on houses made in the Art Nouveau style. For ordinary modern buildings, a semicircular cap is mainly used. The gable roof of the deflector does the best job of protecting the chimney from snow.
Chimneys are mainly made from galvanized iron, less often from copper. But today products coated with enamel or heat-resistant polymer are becoming fashionable. If the device is used on ventilation ducts where there is no direct contact with heated air, then a plastic cap can be used.
The designs of deflectors are also different.
In the domestic market the most popular are:
- TsAGI deflector, spherical with rotation, open “Astato”
- Grigorovich device
- "Smoke Tooth"
- Round chimney "Voller"
- Star "Shenard"
Various options for chimney caps
The TsAGI deflector has become the most popular in Russia. Its package includes:
- Branch pipe (inlet)
- Frame
- Diffuser
- Umbrella
- Brackets
You can buy a factory deflector and install it on the chimney, but some people prefer to make it themselves from scrap materials. To do this, you should follow a few simple rules.
This is a mechanism that has a rotating body and is connected to a bearing unit; specially curved parts are attached to it. The weather vane itself is located on top, it allows the entire device to constantly stay in the wind.
The ring with a bearing unit built into it is attached to the edge of the chimney using strong bolts. The air flow passing between the visors is accelerated, which leads to the creation of a rarefied zone. The thrust, accordingly, increases and the efficiency of removal of combustion products increases.
How to make a chimney deflector with your own hands
First you need to decide what material it will be created from. It can be galvanized iron or stainless steel. Copper is also suitable, although it is an expensive material. The use of these particular metals is due to the fact that the deflector must be as resistant to temperature changes and atmospheric influences as possible.
The device has its own specific parameters that must be adhered to. For example, the height of the chimney should be 1.6-1.7 parts of the internal diameter of the pipe, and the width should be 1.9.
The sequence of work on creating a deflector yourself is as follows:
- On cardboard we draw a diagram of the main parts.
- We transfer the patterns to metal and cut out individual parts.
- We connect all the elements to one another using fasteners or welding.
- We make the brackets from steel needed to mount the cap on the surface of the chimney.
- We assemble the cap.
A self-made deflector is first assembled and only then mounted on the pipe. The first to install is the cylinder, which is fixed with fasteners. Using clamps, a diffuser is attached to it, as well as a cap in the form of a reverse cone. This simple element allows the device to function in any wind.
Watch the video and do it yourself step by step:
To make your own cap you will need the following items and tools:
- Rubber or wooden mallet
- Hammer
- Bar
- Clamps
- Scissors for working with metal
- Steel corner.
To simplify the process of assembling the device, all parts have specially cut corners on both sides.
Installing a deflector is mandatory and is most effective if there is an indirect chimney.
When making the device yourself, you must strictly adhere to the proportions indicated above. If the deflector installed on the chimney does not meet these parameters, then it will not be able to perform its main function of creating good draft.
We make the cap ourselves, video review:
When making metal blanks yourself, it is best to do this using cardboard patterns cut to the required dimensions. Having attached them to a sheet of metal, it will be enough to trace the details along the contour and you can safely cut them out without fear of making a mistake.
If the pipe has a maximum permissible diameter, then installation will require the use of a stretcher made of wire.
Kia Rio
But with this model you will have to seriously tinker. Since the deflector is attached to screws that are hidden by the visor. It must first be removed.
The tools you will need are Phillips and slotted screwdrivers, a flashlight and a construction spatula.
The process involves some combination of activities. Watch in detail how this work is done in the video.
Video: removing the instrument panel visor on a Kia Rio
;
Only then can you remove the central deflector. It is attached to pistons and screws. Two screws at the top, two pistons at the top and one at the bottom. After the deflector is removed, you need to disconnect the plug.
Before dismantling the left deflector, remove the left panel and the panel under which the fuse box is located. The deflector is attached to the side with two self-tapping screws. Before dismantling the right panel, open the glove compartment and remove the right panel, unscrew the screws. Now, by prying with a screwdriver, you can remove the deflector.
Video: dismantling the central and side heating deflectors
This is how the air duct deflector is removed on different cars. Of course, within one article it is impossible to give complete instructions for all car models. From all of the above, we can conclude that the amount of work that needs to be done to remove the air duct deflector is not the same. In some cars, the deflector is removed simply by pulling it out (Renault Logan), in others you have to remove the dashboard or other large elements (Lada Vesta, Kia Rio).
Materials
The product has been used for a long time and has been modernized many times to this day. New models are developed from time to time. In the manufacture of exhaust ventilation deflectors, plastic or galvanized steel is used. Metal products can last much longer. It is better to give preference to these deflectors rather than plastic ones.
As mentioned earlier, these products are used not only to protect hoods, but also to protect chimneys. Each home owner has the opportunity to significantly increase draft and protect their fireplace or stove from overturning air flows by installing ventilation deflectors. In such cases, plain galvanized steel is not suitable. You need to use special boiler metal. This is a fairly durable and expensive material that can withstand much higher temperatures without burning out. If the flow cools down before leaving the chimney, you can safely install a ventilation deflector made of galvanized metal. Therefore, it is recommended to first make a calculation of the possible heating of the smoke coming out through the pipe.
Radiator tuning
Approximately 30% of uneven heating of the interior is a clogged VAZ 2114 heater radiator. To clean it, you need to perform the following steps:
- 1. Remove the radiator and rinse with strong water pressure. In this case, disconnect the pipes and connect hoses instead. Water must be supplied to the outlet. Then the dirt will be “squeezed out”;
- 2. Use any sewer pipe cleaner for flushing.
Pour it into the system and drain it after 20 minutes. After repeating this procedure three times, complete the rinsing with clean water.
- 3. Attach the pipes in place and fill in antifreeze or antifreeze;
- 4. When installing the radiator, seal it.
It is also important which heater radiator is installed on the VAZ 2114 - aluminum or copper. In the first case, it heats up quickly and also cools down instantly. But it has a larger number of fins and channel width, which gives better heat transfer at idle speed. Minus - cannot be repaired.
Copper heats up more slowly, but also cools down much longer. It has fewer ribs and narrower channels. At idle speed the air flow is cold. But if a leak occurs, it can be easily repaired.
A painted radiator is not suitable for tuning. It has little heat transfer and an unpleasant odor.
