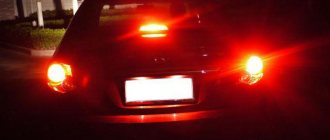
Often, car owners have a situation where the rear brake lights do not light up. An experienced motorist can guess what the reason might be. Therefore, it will not be difficult for him to determine the source of the malfunction and eliminate the problem. For beginners and inexperienced owners, it is advisable to contact specialists or study reliable information on car repairs.
This article outlines the main causes of this malfunction and provides recommendations for eliminating it. The owner of the car can make the repairs himself or contact a car service center.
Why the brake lights don't light up: how to quickly find and eliminate the cause
Good day everyone and good mood! Surely many drivers have encountered a situation where the brake lights are not on. It may seem to some that there is nothing serious or dangerous in this, and supposedly they can continue to operate a car with such a malfunction without any problems. It's a delusion.
The operation of all lighting equipment on a car plays a huge role. This applies not only to the headlights, but also to the signal lights. Not long ago we discussed the issue of adjusting the low beam. But now the issue is more serious, since it concerns the malfunction of lighting equipment.
In addition to the likelihood of causing an accident, faulty stops also entail the imposition of a monetary fine by traffic police officers. The main emphasis should be on personal safety.
It is recommended to solve the problem as soon as it is noticed. If, in the event of a failure of the sound signal, it is sometimes difficult to cope with the repair yourself, it is most often possible to do without the intervention of specialists and payment for services to car service employees.
Tail light tuning options
LED overlays, diode rings for lights, individual LEDs and powerful light bulbs in a darkening film - tinting are very popular. Each option for decorating optics deserves attention:
- LED overlays. Among VAZ car owners this is the most popular and inexpensive tuning for headlights. Nowadays you can find a huge number of overlays, but among motorists, diode overlays that were made by hand are more valued. Drivers adhere to this opinion due to the fact that ready-made options most often do not look original, and choosing a suitable option for 2114 is very difficult. LED overlays can be made from two main materials: epoxy glue and fiberglass.
Main reasons
Almost all problems related to automotive electrical systems can be solved in approximately the same way. You need to look for a potential or probable cause of malfunctions in the problematic object itself, or understand the system responsible for supplying power.
The situation is exactly the same with devices called brake lights. If they stop working, then you should look for the reason in one of the following points:
- There were problems with the fuse. It has oxidized or completely failed;
- There are faults in the lamps themselves or in one lamp, depending on how many stops are not working;
- The reason lies in the mechanism responsible for turning on the warning signal when the brake is applied;
- In the socket where the stop light is installed, the contacts have oxidized;
- More serious problems appeared related to damage to the wiring.
Based on the stated reasons why the feet may stop working, we can draw a completely objective conclusion. A truly serious malfunction concerns only wear or damage to the electrical wiring. Solving such a problem with your own hands is not always correct.
When the rear brake lights (left and right) or the additional central brake light repeater fail, do not rush to look for an auto electrician and offer him money to fix the problem.
There is a high probability that you will be able to do everything on your own. You will only need a standard set of tools for a motorist, as well as an understanding of how the lighting equipment in general works in your vehicle. Start with the most likely and fairly simple to solve possible malfunctions. Only if it turns out that the problem is bad or damaged electrical wiring, then it makes sense to visit a good car service center. It is better to entrust such tasks to experienced craftsmen. The main components for restoring the operation of brake lights on your own, you will need a spare working lamp, a control unit or a multimeter, as well as suitable tools.
It would be a good idea to study the owner's manual and understand how to get to the stops on your car.
Fuse
The first place to start is by searching for the mounting block in which the fuse responsible for the brake light is located.
Moreover, each machine has its own electrical circuit and specific location of fuses.
These can vary significantly depending on the vehicle, such as:
- VAZ 2110;
- VAZ 2107;
- Toyota Rav 4;
- Ford Fusion;
- VAZ 2114;
- VAZ 2115;
- Ford Focus;
- Chevrolet Lacetti;
- Lada Granta;
- Hyundai Accent;
- Renault Logan;
- Hyundai Solaris, etc.
A blown fuse quite often causes the failure of a number of equipment, including lighting devices. Check fuses visually and using a multimeter.
But there is a simple and effective way to check that takes a minimum of time. To do this, start the engine and hold down the horn button. This is not suitable for all car models, but on many vehicles the same fuse is often responsible for the sound signal and brake lights.
If this is not the case, we continue our search further.
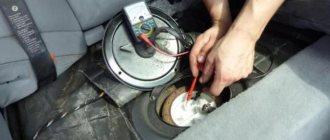
Brake lamps and their sockets
Next, you should switch to the brake lights themselves. In most cars, to gain access to the feet, the luggage compartment is opened, the rear light bulb is removed, after which you can get to the feet themselves.
But the dismantling process may differ on different brands and models. Here, start from your car specifically; if necessary, look for hints in the operating manual. There are examples of cars where you can get to the brake light without removing the rear optics at all. You still have one main task ahead of you. It consists of gaining physical access to the faulty device, the lamp and the socket in which it is located. Not everyone can try to determine the problem by eye. Here it is better to take a different route.
The optimal solution would be to use new, similar lamps instead of potentially faulty ones. Therefore, you will have to buy a light bulb in advance and screw it in. If you can't find a lamp of a similar size, use a marker or turn signal repeater. Make sure these conditional controls work first.
When everything worked after installing the new lamps, you found the reason. You can confidently buy new matching stop lamps, replace old ones and reassemble the unit in reverse order.
It is extremely important to take into account one feature. Some modern cars have such a principle of operation of brake lights, in which when one car brake light fails for one reason or another, the second one automatically stops functioning. That is, sometimes checking one lamp does not give a result, since in fact the chances are 50/50 of replacing the burnt lamp, and not the one that simply turned off in tandem.
If replacing the light bulbs did not give anything, check the sockets themselves. It happens that they oxidize, this breaks contact, and the device does not turn on, although power is supplied to it. Also make sure that the socket is connected to the vehicle wiring. If necessary, the contacts are disconnected, cleaned with fine-grained sandpaper, and then returned to their place. Even during this procedure, it is recommended to apply a special lubricant to the contacts after cleaning.
One more thing. When checking the sockets, it is also worth taking new light bulbs. It happens that due to oxidation of the cartridge, the lighting device itself fails. That is, in fact, 2 malfunctions occur simultaneously.
Problems with the switch
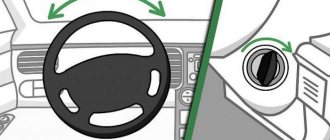
The brake light on a car lights up the moment the driver presses the brake pedal with his foot while sitting behind the wheel. When pressed in this way, the force is transferred to a special mechanism. It is popularly called a frog. It is also a limit switch and it is also a classic brake light switch.
There are 3 main reasons why a frog or limit switch may not work:
- contacts have oxidized;
- carbon deposits appeared;
- corrosion has formed.
Despite the slightly different processes, the essence of the problem is the same. It can be eliminated by stripping the frog, or by replacing the stop switch.
If none of the options are suitable, there is a high probability that the problem lies in damage to the vehicle's electrical wiring. Here it’s up to you to decide whether to try to resolve the issue on your own, or seek help from qualified specialists.
Considering the complexity of the electrical circuits of modern cars, a better solution would be to visit a trusted auto electrician. But the final choice is yours.
Thanks everyone for your attention! Be sure to subscribe, leave comments, ask questions and invite your friends to join us!
Installation, repair and replacement of front and rear dimensions of the VAZ 2110
Traffic regulations clearly state that you cannot drive in the dark or in poor visibility without the lights on, both in front and behind the car. Today we will look at how the dimensions on the VAZ 2110 are arranged, what the causes of breakdowns may be, and how to eliminate them.
VAZ 2110 with side lights and DRLs
Purpose
The front lights are called head lamps; they are located in the headlight unit in front of the car on both sides. They are the outermost ones in the lighting system, and owe their name to the fact that they show the width of the car to oncoming vehicles.
Various options for side lights and daytime running lights
The rear lights are intended for exactly the same mission—so that you can be seen by those driving behind you. This is especially true when overtaking; you don’t want someone to hit your “swallow” without seeing its real size.
Tuned tail lights
Hence the important advice: if it suddenly happens that you need to go at all costs and you discover that the light bulb in the left side light has burned out, replacing it with a new one is impossible due to the lack of one, don’t be lazy and move it from the right side. And we will tell you how to do this.
Device
The head lamps (front dimensions) are part of the headlight unit. Rear dimensions are part of the rear light of the VAZ 2110, being one of its sections. Nearby there is a rear fog lamp, a taillight, a turn signal, a reflector, a brake signal and a marker.
Fog lights will not only improve the appearance of your car, but will also improve safety. You can read about connecting fog lights here: https://vazweb.ru/desyatka/osveshchenie/kak-podklyuchit-protivotumanki.html
Causes of breakdowns
There can be many reasons for malfunctions. The most common problem is that the lamps burn out, which naturally makes it impossible to turn on the side lights. Lamps brought to us from the Middle Kingdom are especially unreliable in this regard.
Although they are attractive at a more than “democratic” price, and there are plenty of them at any retail outlet, you won’t be able to get away with them. Therefore, perhaps we should remember the saying that we are not such rich people as to buy cheap things twice.
Good branded light bulbs will last many times longer, and you won’t have to change them endlessly.
Lamp options for dimensions
Sometimes there is a “flashing” of the dimensions, or the blinking of the instrument panel lighting when the side lights are turned on. Many blame the size relay for this, but they cannot find it. In the carburetor VAZ 2110 there is no size relay, there is only a relay for high and low beam.
Mounting block and relays and fuses
Never, under any circumstances, should a blown fuse be replaced with a more powerful one, or even with a “bug”.
This material will help you choose an alternative low beam lamp: https://vazweb.ru/desyatka/osveshchenie/lampa-blizhnego-sveta.html
Repair
As already said, it is prohibited to drive a car in the evening or at night if the side lights are not on, so we will look for the cause and then eliminate it.
If you are sure that the paths through which electricity passes are in good condition, the first thing to do is check to see if the lamps have burned out. And if they need a replacement, do it.
For the head lamp, the replacement procedure is as follows:
- Open the hood;
- We disconnect the battery, or even better, remove it. After all, we are talking about electricity, which is unsafe;
- From the engine compartment, holding the lamp with your hand, disconnect the wires directly going to the light bulb from the block;
- Remove the rubber cover;
- We move the latch to the side, disengaging the spring from the hook;
- We take out the size bulb;
- We replace it with a new one and put everything back together.
When the replacement is made, we check whether the head lamps are on.
Light bulbs in the rear dimensions on a VAZ 2110 are installed as follows:
- We de-energize the car;
- From the trunk (open) side, remove the contact part of the rear light with lamps. To do this, you need to release the latches;
- Remove the headlight bulb and replace it with a new one.
The nuances of installing xenon in foglights are discussed here: https://vazweb.ru/desyatka/osveshchenie/ksenon-v-protivotumanki.html
Do not forget that you cannot touch the halogen lamp with your bare hands. Replacement must be done with gloves. The fact is that dark spots will appear where you touch the light bulb. In addition, it has been proven that such a light bulb burns out much faster.
- Benjamin
Search principle
To find a fault in any vehicle on-board network system, you should use the method of sequential elimination of elements. The point is to consistently check electrical appliances and sections of the circuit, excluding elements from the list of reasons that could cause a breakdown. To do this, you need to clearly understand the design and operating principle of the system. When troubleshooting, you need to move from the components that require the least effort to check, to the most difficult to diagnose elements.
Fault localization
Understanding the operating principle allows you to determine exactly why the brake lights may not light up:
The fuse has blown. In the diagram, the fuses are marked with the letter F (from English - Fuse) and the serial number of the seat in the fuse block, for example, F3;- poor contact at connectors;
- the light bulbs have burned out, but since the lights are connected in parallel, the likelihood that 2 lamps will burn out at once is extremely low;
- poor contact on the negative terminal of the lights. In this case, problems may begin not only with the feet, but also with the lighting of the remaining lamps in the lanterns;
- Damage to the negative track in the lamp board. From the total mass directly to the brake light lamp, the minus goes along a special path on the board. The path may collapse from water or mechanical impact;
- malfunction of the brake light switch, the so-called frog;
- broken wiring, oxidation of contacts.
Troubleshooting algorithm
To detect a fault in the electrical network, you will need a multimeter or a tester, which you can make yourself. Previously, we told you how to use a multimeter, so we won’t focus on that.
The sequence of searching for the cause of the breakdown:
- Check the fuse for the brake light circuit. The location diagram of the fuse links can be found in the repair and operating manual for your car; often the symbol of the protected circuits is located on the back of the cover covering the fuse mounting block. If the installed fuse of the required rating immediately blows, there is a short circuit (short circuit) in the circuit. Please note that the fuse can protect not only the feet, but also other circuits. Installing a fuse with an increased rating is fraught with the risk of a car fire;
- If oxidation is detected on the terminals, clean the contacts mechanically or use an aerosol contact cleaner.
- Having turned on the ignition first and holding the brake pedal depressed, check whether there is power on the positive wire that goes from the limit switch to the rear light connector. If there is power, there is a malfunction in the lights themselves;
- check whether the positive signal is coming from the mounting block to the limit switch. If + comes, but when you press the brake pedal it does not appear on the second terminal of the limit switch, then the problem is in the “frog”;
- If there is no + at the limit switch terminal, examine the circuit up to the mounting block. If the wire is intact and securely fastened in the connectors, then the problem is in the mounting block.
If, for example, there is a + on both terminals of the limit switch when you press the brake pedal, but it does not come to the headlamp connector, then you need to look for the location of the wiring break. You can check the existing “frog” with a multimeter. Simulate the state of the brake pedal being pressed, attach probes to the terminals, turning the multimeter into resistance measurement mode. If there is no resistance between the terminals, the limit switch is faulty. If you removed the brake pedal limit switch for diagnostics, adjust its position correctly during installation. The brake lights should light up at the slightest touch of the brake pedal.
The search principle we considered is suitable for most cars. But, for example, in some cars, a relay is also involved in the operation of the brake lights, due to which the brake lights may also not light up. That is why it is always necessary to start by reading the electrical diagram.
Auto-assistance
In the diagram we presented, the elements are depicted as close as possible to how they look in reality. Don’t be alarmed if you only find a schematic diagram for your car with symbolic images of the elements. Schematic diagram of external lighting for VAZ 2114, 2115:
- 3 – mounting block;
- 8 – lamps for side lights and brake lights;
- 11 – brake light limit switch;
- K4 – relay for monitoring the serviceability of brake light lamps and side lights.
Fault localization Understanding the operating principle allows you to determine exactly why the brake lights may not light up:
- The fuse has blown. In the diagram, the fuses are marked with the letter F (from the English.
Why do the feet on the VAZ 2115 not light up?
Everything related to electronics and where current flows: batteries, generators, relays, headlight adjustment, etc.
Messages: 138 Registered: Feb 24, 2009, 00:00 From: Tyumen Experience: 04/01/2008 Car: Priora :
Awards: 1
| Rating: 168 |
| Reputation: 0 |
Brake lights of VAZ 2115 do not light up
Post by Alex-K717TR » 13 Oct 2011, 20:11
Messages: 416 Registered: Jun 10, 2011, 00:00
| Rating: 492 |
| Reputation: 0 |
Thanked: 2 times Thanked: 1 time
Post by Rustam9801 » 13 Oct 2011, 20:23
Messages: 917 Registered: 06 Nov 2010, 00:00 From: Tyumen Experience: 2003
| Rating: 1 570 |
| Reputation: +1 |
Thanked: 4 times Thanked: 11 times
Post by project72 » 13 Oct 2011, 20:27
Messages: 4145 Registered: June 05, 2011, 00:00 From: Tyumen Experience: 08/03/2011 Car: Pajero II
| Rating: 6 495 |
| Reputation: +16 |
Thanked: 9 times Thanked: 15 times
Post by Waldopwnz » 13 Oct 2011, 20:40
| Rating: 27 761 |
| Reputation: +45 |
Thanked: 9 times Thanked: 314 times
Post by Berkut4044 » 13 Oct 2011, 20:44
Messages: 380 Registered: 02 Feb 2009, 00:00 From: on the other side of the Urals Experience: 1992 Auto: fifth-sixth :
Awards: 1
| Rating: 530 |
| Reputation: +1 |
Thanked: 1 time Thanked: 1 time
Post by ales » 13 Oct 2011, 20:58
Not everything that is beautiful is right, but everything that is right is beautiful.
If a girl who is not experienced in fishing decides to change her stockings right at her workplace, this will negatively affect the catches of the fishermen around her.
Messages: 138 Registered: Feb 24, 2009, 00:00 From: Tyumen Experience: 04/01/2008 Car: Priora :
Awards: 1
| Rating: 168 |
| Reputation: 0 |
Post by Alex-K717TR » 13 Oct 2011, 21:02
Messages: 380 Registered: 02 Feb 2009, 00:00 From: on the other side of the Urals Experience: 1992 Auto: fifth-sixth :
Awards: 1
| Rating: 530 |
| Reputation: +1 |
Thanked: 1 time Thanked: 1 time
Post by ales » 13 Oct 2011, 21:12
Alex-K717TR, - see if the voltage is coming to the boards themselves - if not, then check if the voltage is coming to the connectors into which the boards are connected
for this you need either a probe lamp or a very primitive tester
then you'll understand what's wrong
Added after 1 minute 40 seconds:
Yes, you also need an assistant who will press on the middle pedal
well, it’s trivial to tighten up the mass on the lampshades, but it’s unlikely that the rest of the lamps wouldn’t be damaged - I think it’s not the boards
Added after 1 minute 59 seconds:
You can check the frog at the pedal, that’s not difficult either
you can go to AvtoVAZ to meet the security officers for 200 rubles, they will definitely find a joint there
Not everything that is beautiful is right, but everything that is right is beautiful.
If a girl who is not experienced in fishing decides to change her stockings right at her workplace, this will negatively affect the catches of the fishermen around her.
Messages: 138 Registered: Feb 24, 2009, 00:00 From: Tyumen Experience: 04/01/2008 Car: Priora :
Awards: 1
| Rating: 168 |
| Reputation: 0 |
Post by Alex-K717TR » 13 Oct 2011, 21:24
| Rating: 672 |
| Reputation: +1 |
Thanked: 7 times Thanked: 1 time
Post by Vitos » 13 Oct 2011, 21:48
Messages: 138 Registered: Feb 24, 2009, 00:00 From: Tyumen Experience: 04/01/2008 Car: Priora :
Awards: 1
Fuse blocks under the hood
Fuse block
Photo of the block
Circuit example
general description
| 1 | (5A) Cooling fan motor(s) |
| 2 | (5A) Coolant pump relay |
| 3 | (15A) Air conditioning (5A) Crankcase ventilation resistor |
| 4 | (30A) Anti-lock Braking System (ABS) or Voltage Stabilizer, Stereo, Radio |
| 5 | (15A) Automatic transmission |
| 6 | (30A) Anti-lock braking system (ABS) |
| 7 | (5A) Cooling fan motor control unit 1 (7.5A) Washer pump |
| 8 | (15A) Motor control |
| 9 | (5A) Engine control, main ignition circuit relay |
| 10 | (5A) Engine control (15A) Pressure or exhaust gas valve |
| 11 | (5A) Power steering control unit (30A) Headlight switch and relay |
| 12 | (5A) Engine control (10A) Fuel pressure regulator |
| 13 | (10A) Engine control (10A) Xenon in the left headlight |
| 14 | (5A) Engine control or fuel pump relay |
| 15 | (10A) Reversing light switch |
| 16 | (5A) Engine control or brake light switch, air flow meter |
| 17 | (5A) Anti-lock braking system (ABS) |
| 18 | (5A) Power steering wheel |
| 19 | (5A) Brake light switch (brake pedal position sensor), clutch pedal position sensor |
| 20 | (5A) Motor control |
| 21 | (5A) Exhaust gas recirculation valve |
| 22 | (10A) Engine control (injectors) |
| 23 | (25A) Automatic transmission (10A) Xenon in the right headlight |
| 24 | (5A) Automatic transmission |
| 25 | (25A) Engine control, Ignition |
| 26 | (25A) Engine control (5A) Left headlight |
| 27 | (5A) Coolant pump relay |
| 28 | (15A) High tone signal |
| 29 | (10A) Vehicle speed sensor (5A) Right headlight |
| 30 | (15/20A) Auxiliary A/C/Heater Pump Relay, Fuel Pump, Fuel Pump Relay |
| 31 | (15A) Engine control (lambda probe) |
| 32 | (30A) Engine control (ignition) (5A) Fuel pump relay |
| 33 | (5A) Coolant pump relay, engine control, glow plug relay |
| 34 | (10A) Cooling fan motor control unit (5A) Botnet control unit |
| 35 | (10A) Engine control (15A) Fuel level regulator |
| 36 | (25A/30A) Starter relay (5A) Data bus interface |
High Power Fuse Box
It is located next to the mounting room and connected to the battery.
Decoding
| 1 | (175/225A) Generator |
| 2 | (125A) Battery power distribution, ignition auxiliary relay, driver door control module, passenger door control module, rear window defroster, terminal X relay, individual fuses |
| 3 | (50A/100A) Charging system (with additional battery), rear left door electrical control unit (some models), rear right door electrical control unit (some models), charging system divider relay (with additional battery) |
| 4 | (125A) Battery power distribution (70A) Positive connection in the engine compartment wiring harness |
| 5 | (50A) Battery power distribution (some models), separate fuses |
| 6 | (60A) Glow plug relay (50A) exhaust air pump motor |
| 7 | (70/80/100A) Cooling fan(s) motor |
| 8 | (40/50/100A) Cooling fan(s) motor, individual fuses |
| 9 | (100A) Battery power distribution, ignition switch |
| 10 | — |
Relay block
Also located next to the fuse mounting block.
Option 1
Purpose
| 1 | Electronic air conditioning control unit (manual temperature control) |
| 2 | Fuel pump relay 2 |
| 3 | Exhaust air pump relay |
| 4 | Main ignition circuit relay |
| 5 | Fuel pump relay 1 |
| 6 | A/C compressor magnetic clutch relay (automatic temperature control) |
| 7 | Automatic transmission control system relay |
| 8 | Power steering control unit |
| 9 | Coolant pump relay |
Option 2
Designation
| 1 | Electronic air conditioning control unit (manual temperature control) |
| 2 | Fuel pump relay 2 |
| 3 | Exhaust air pump relay |
| 4 | Main ignition circuit relay |
| 5 | Fuel pump relay 1 |
| 6 | A/C compressor magnetic clutch relay (automatic temperature control) |
| 7 | — |
| 8 | Coolant pump relay |
| 9 | Starter relay - if equipped |
The brake lights on the VAZ 2114 do not light up: reasons and methods for eliminating them
According to current traffic regulations, driving a car that does not have brake lights is prohibited, and this should be clearly remembered. True, this rule can be taken into account in practice only when leaving the garage. But what to do if the feet on the VAZ 2114 fail during the trip? Why not call a tow truck because of such a problem? In fact, this problem can be solved even on the road.
To do this, you only need to have a minimum set of tools:
- multimeter (even the simplest one will do);
- Screwdriver Set;
- sandpaper (for cleaning oxidized surfaces);
- set of wrenches.
In addition, it is good to have a fuse box diagram on hand.
Popular myths
Varieties
Some people deliberately get rid of the catalyst, others deliberately ignore the clogged unit. All this caused the spread of myths.
- By removing it, the engine gains power. A misconception that arose for unknown reasons.
- The engine cannot “breathe” normally due to the catalyst. Absurd. It functions quite well if the cat itself is in working order.
- A clogged element ensures a more environmentally friendly ride. Another myth, the origin of which can only be guessed at. Rather, on the contrary, a clogged device harms nature and your car even more.
Therefore, monitor the condition of the catalyst on the VAZ 2114, check its functional condition, and if necessary, replace it with a new one or replace it with a flame arrester. Both options have shown their effectiveness.
How to troubleshoot?
The most common reasons that the brake light on the VAZ 2114 does not work are the following factors:
- Fuse failure.
- Broken wires in one of the sections of the circuit.
- Limit switch faulty.
- Bulbs burn out.
- Oxidation of contacts in lamp sockets.
- Damage to the contact board.
The most common and at the same time the most easily removable of the above reasons is a blown fuse. To identify such a malfunction, you need to examine the fuse box. A 10-amp fuse F3 is responsible for the brake lights, which also protects the ignition switch, computer and interior lighting.
Malfunctions in the operation of the latter may also indicate a malfunction of the stop fuse (and in this case, troubleshooting should begin with the block). If it turns out that the fuse has blown, then you should replace it with a new, similar one.
A new fuse installed in place of a failed one must be designed for exactly the same maximum current. If it is less, the fuses will blow more often, and if it is more, the protected device itself may burn out.
The problem may also be in the fuse block itself - sometimes the tracks on its printed circuit boards burn out or the contact legs oxidize. In order to check its serviceability, it is enough to measure the voltage at the contacts of the newly installed fuse.
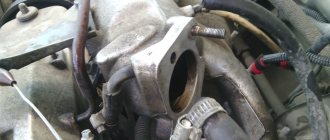
Another common reason why the brakes of the VAZ 2114 do not light up is a malfunction of the limit switch that turns on the signals. It is located on the brake pedal bracket and is always in working order, regardless of whether the car engine is turned on or not.
It works automatically when you press the pedal. In order to check its serviceability, it is enough to see whether the power supply is suitable for its contacts (on one of the contacts the presence of power must be constant). In addition, if you press the pedal and thus turn on the limit switch, you can measure the voltage at its connectors.
If there is no current at the switch contacts, you should check the wire going to the limit switch from the fuse box. If the test shows that the wire is faulty (there is a break), then it should be replaced with a new one and the test repeated.
Otherwise (if everything is in order with the wire), you should disconnect it (as well as the other wire suitable for the second connector) from the switch and connect directly. If after such an operation the brake light works, then the limit switch itself has failed and should be replaced.
You should purchase a new brake light limit switch that is exactly the same model as the failed one. Installing a different type of switch may result in incorrect signal operation.
What to pay attention to
The brake light in the bumper must perform its function as correctly as a regular VAZ-2114 brake light. This kind of tuning can attract attention with its unusual animation. Drivers and other road users may pay more attention to this animation than to the actions of the driver himself in terms of actual braking on the highway. Therefore, not everyone has time to immediately assess the situation and may confuse turning with braking. In this case, a traffic accident may occur.
When you press the brake pedal, all the brake light bulbs should light up at the same time in order to attract the attention of the driver behind as much as possible, and only then you can turn on the necessary animation for visual display. Basically, for drivers, the brake light performs a completely different function.
If the driver makes a turn, he must first slow down before turning in the direction he wants, after which the brake light comes on. For safety, it is recommended to turn on 2 animations at once for at least 2 seconds, so that other drivers understand that the car will first slow down and only then turn. Many people act differently: first they turn on the turn signal, then they brake, so it is not always clear that the driver will brake or turn, because the flashing turn signal is difficult to see on the LEDs, although it is on.
Running turn lights can look more impressive if the animation speeds up towards the end of its action. This gives great elegance to the spoiler, but also adds attention to other road users. With such turn signals, it is clear that the driver is already turning in the right direction and has already finished braking.
As a rule, all these subtleties decorate a car on the road, but many drivers believe that these “things” are a threat to traffic and can lead to a traffic accident.
Malfunction of the lights themselves
If during the check from the fuse box to the limit switch no problems are found, then you should move on. Now you should test the wiring from the second limit switch connector to the stop connectors with a tester. If it is working, then you need to check the board. The printed circuit board on which the taillights are mounted is not ideal, and is one of the biggest problems of all VAZ cars.
Its tracks often burn out or peel off, causing the lights to stop working. This problem can be solved in two ways - either re-solder the tracks (which can be done with a regular soldering iron, although not in road conditions) or replace the board with a new one (most motorists choose the second option).
Another reason why the VAZ 2114 brake lights do not work may be oxidation of the lamp sockets. In order to eliminate this problem, it is enough to clean all contacts from oxides that have appeared on them.
This is best done in one of the following ways:
- small grit sandpaper;
- WD-40 solution;
- kerosene;
- purified gasoline (“galosh”).
You should absolutely not use gasoline or other solvents to clean contacts.
The last option for faulty stops is the light bulbs themselves. It makes no sense to give any detailed advice here - you just need to replace the burnt out light bulbs with new ones.
By following all the tips listed above, the car enthusiast gets the opportunity to check the entire electrical circuit of the brake lights, starting from the fuse box and ending with the bulbs in the lamps. Thanks to this, the guarantee that the fault will be accurately detected and eliminated is 100%.
What options are there for decorating taillights?
Quite often, car owners choose so-called angel eyes to decorate the front optics, and LED elements for tuning the rear lights of the VAZ-2114, and other models. Independent tuning for rear optical devices is quite simple, but it is worth considering that this process will require the installation of diodes, so you need to decorate the lights taking into account the recommendations, step by step and slowly.
It is worth noting that LED lighting is not only used for car decoration, but also for practical use. Among the main advantages are the following:
- since LEDs illuminate the road much better than conventional incandescent lamps, driving safety increases several times;
- the driver will be able to travel more comfortably, both at night and in adverse weather;
- This type of tuning is permitted by law, so the driver will not be fined for such decoration.
Car owners can decorate car optics in the following ways:
- LED overlays;
- diode rings that are installed on the lights;
- additional LEDs or more powerful light bulbs that are pre-tinted.
Let's look at each tuning option in more detail:
- LED overlays. The most inexpensive and, of course, popular tuning option for the rear lights of the VAZ-2114 is the use of LED overlays. Car owners can buy ready-made linings in various designs or make them themselves. Most often, it is independent overlays that are used to decorate optics, since drivers are able to create the most original and best-suited decoration option for flashlights without any problems. And for this you only need two main components: fiberglass and special epoxy glue.
- Car owners began to use tuning with diode rings relatively recently. This method of decorating optics can be done independently by those who understand electronics. Its essence lies in the fact that you need to completely replace the rear lights, having first removed the old ones, and you will need to install those optical lighting devices that are modernized independently.
- Upgrading the rear lights with more powerful lamps, as previously mentioned, is necessary after preliminary tinting, so that the bright light does not blind the eyes of oncoming drivers. According to experts, this tuning option can be used for VAZ-2114 cars, but only as a last resort, since this option implies some disadvantages:
- the load on the generator increases;
- fuel consumption increases several times;
- Car wiring overheats.
And since the engine on the VAZ-2114 does not have enough power, as indicated by numerous reviews from car owners, the use of powerful lamps, one might say, is a rather dubious tuning option for this car model.
- Installation of additional individual LEDs. This tuning option is the most creative, because it is possible to turn your own design fantasies into reality, however, this option will require more time to create a design solution and the installation itself. To speed up the process, experts recommend purchasing ready-made individual LEDs and doing further installation yourself.
Additional Tips
Before each trip, especially over long distances, you should check the functionality of all lighting equipment, including brake lights. In order to reduce the likelihood of breakdowns along the way, you need to periodically check the condition of the sockets and bases of the rear light bulbs, and periodically clean them of oxides and dirt.
In case a breakdown does occur, you should always have an additional set of light bulbs and 10 amp fuses in your car, as well as a multimeter to check them.
The brake light does not light up: possible reasons, solution to the problem and recommendations
Often, car owners have a situation where the rear brake lights do not light up. An experienced motorist can guess what the reason might be. Therefore, it will not be difficult for him to determine the source of the malfunction and eliminate the problem. For beginners and inexperienced owners, it is advisable to contact specialists or study reliable information on car repairs.
This article outlines the main causes of this malfunction and provides recommendations for eliminating it. The owner of the car can make the repairs himself or contact a car service center.
Causes of malfunction
The main reasons for this malfunction are:
- defective or burnt out light bulb;
- break in electrical wiring or plug connections;
- fuse blown due to a short circuit or overload in the on-board network;
- limit switch malfunction;
- problems with electronic systems or units.
Such malfunctions can usually occur on high-mileage vehicles. However, there are exceptions.
Brake lights don't come on completely
If the brake lights on the car stop lighting completely, then you should look for a break in the wires, in the limit switch or a faulty fuse. The search for a breakdown should begin with the fuse box. On its cover there is usually a table showing which circuit is protected by which fuse link. If it is missing or the information in it is unreadable, you can use the owner's manual for the vehicle.
If the required fuse has blown, it cannot be replaced until the cause is determined. This usually happens when there is a short circuit or the insulation of the wires is damaged and they touch the housing. A similar effect is observed when water gets into electrical connections. In this case, it is necessary to dry the area where moisture has entered. To speed up the process, you can use a hair dryer (being careful not to melt the wire insulation or sheathing elements). Then you need to remove the fuse from the holder and test the circuit after it with a multimeter.
Often the wires fray at the point where they pass from the body to the trunk lid. Typically, the casing must be removed to detect cable damage. Therefore, in the absence of proper experience, it is better to entrust this work to a service center. If damage is found, the insulation coating must be restored. To do this, you can use ordinary insulating tape.
If the fuse is OK, you can assume the limit switch is faulty. It is located in the pedal assembly. It is necessary to inspect the condition of the switch and test it with a multimeter while the brake pedal is pressed. The multimeter should show a resistance of less than 1 ohm. If it is large or the switch has mechanical damage, it must be replaced. Due to the complexity of such an operation, it is better to entrust it to experienced car service workers.
If both the fuse and the limit switch are not damaged, this indicates a broken wire. To find such a fault, you will also need to open the casing. If you lack experience, it is better to entrust these actions to a car service.
If a wire break is detected, it is necessary to strip the insulating layer from the wire, make a connection and insulate the joint. A break in a section of wire is repaired by soldering. To insulate the connection, you can put on heat shrink tubing and heat it until it is fixed to the wire. If the terminal breaks, it is removed from the plastic case and replaced with a new one, crimping the stripped end of the wire into it, then inserted back.
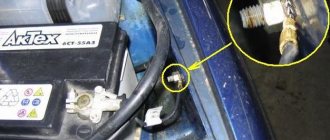
Checking the reverse sensor
It doesn't take too much effort to check your vehicle's reverse sensor (switch). In fact, this process can be completed in several steps.
Step 1: Locate the reverse sensor location. In almost all models it is located at the bottom of the gearbox housing. In fact, there are two sensors installed there: one to measure the speed of movement, and the second is a reverse sensor. To get to it, you will need to drive into the “pit”.
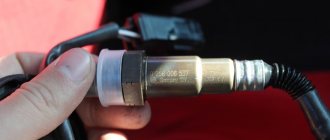
This is what the reverse sensor looks like
Step 2. Once you reach the sensor, disconnect the power wires from it.
Step 3. Connect the disconnected wires to each other (connect them).
Connect the wires together
Step 4. After this, you need to turn on the ignition and “stick” the reverse gear.
After checking the sensor, engage reverse gear again
What will it give? In fact, there may be different scenarios for the development of events after the wiring is closed.
If after this the lights are on. This indicates a faulty sensor condition that needs to be replaced.
If the lights still don't come on. This means that you need to look for the cause in the circuit, and the sensor itself most likely has nothing to do with it. Use a test light to measure the voltage coming from the sensor wire. If there is voltage, you need to check the contacts and boards.
Separate brake light does not light up
If only one brake light does not light, then the most likely problem is the lamp or poor contact in the socket. In this case, you need to disassemble the trunk trim on the side of the car where the signal is not lit. If necessary, remove the lamp unit, remove them from the sockets or holders, carefully inspect the contacts in the socket and on the lamp base.
The presence of rust, traces of oxidation (white or greenish coating), soot, as well as dust or moisture confirms that the brake light does not light due to missing or poor contact in the circuit. Cleaning the indicated areas will help eliminate the problem. To remove rust and oxides, you will need a sharp object, such as a screwdriver. It is also necessary to check the serviceability of the lamp. To do this, you can use a multimeter or the on-board voltage supplied to the lamp via wires through a fuse. The burnt-out lamp is replaced with a similar new one.
Modernization of rear lights VAZ 2108-2115, 2110-2112
And if owners of 2108-2114 and cars of the tenth family have an alternative in the form of domestic OSVAR rear optics, then for some reason the tags turned out to be completely deprived in this regard. I really don’t want to buy a Chinese product with problems during maintenance, and even without a guarantee for normal operation and cosmic appearance.
There are several treatment options available. I took the path of completely abandoning the conductive tape and using sockets for each lamp from the VAZ 2101. This option was described back in 2007 in the magazine “Behind the wheel”.
We take out the rear light board, use a screwdriver to pry up the plastic sockets and take out the tape.
on the board you can see where the contact was lost and because of this the lamps did not light up
The rear lights of tags use double lamps for the markers and stops, therefore, in stores you need to look for double sockets for markers and stops, and single sockets for the turn indicators. In VAZ 2108-2114 models all cartridges are single. The cost of such cartridges in the store is 15-30 rubles. In addition, you will need wires, lugs, connectors (you can also use computer connectors), and M3 bolts and nuts for attaching the cartridges.
Electrical diagram of the rear lights of the VAZ 2108-2115 from the book. Everything seems to be more than clear, the total weight and advantages for each cartridge.
This diagram for tags does not show the series connection of the side lights and brake lights. I quickly jotted down a cheat sheet for myself.
Now we need to arm ourselves with patience. We mark and drill holes for the cartridges in the same places where they were installed earlier. The metal part of the cartridge had to be slightly modified, namely, on the cartridges of clearance and brake lights, the terminals for the tips were moved 180 degrees with pliers, and on the cartridges of turn indicators, they were completely bitten out.
holes drilled and filed for cartridges
To attach the cartridges to the plastic base, I used small bolts with M3 nuts, it came out neatly. But all the work is quite painstaking and slow.
Since I couldn’t find single sockets for turn signals, I made a jumper in the center on the double one.
After all the cartridges are secured, the most pleasant and interesting part remains. Well, at least for me, electrical wiring.
First, I made the total mass by connecting all the cartridges in series, then the plus on the turn signal and connected the pluses in series on the terminals of the brake lights and dimensions.
I rang the resulting wiring and, making sure that I had not screwed up anywhere, extended the purchased connector block.
All that remains now in the car is to replace the stock pad with a newly purchased one.
Didn't find the information you are looking for? on our forum.
We recommend reading:
Replacement of IRR VAZ 2114 8 valves
Checking the functionality of the generator on VAZ cars
VAZ 21213 accelerates poorly
How to connect fog lights on a VAZ 2110
Wiring diagram VAZ 2110 injector 8 valves and with a carburetor engine
VAZ 2106 does not start, reasons, spark is gasoline too
How to disassemble a caliper on a VAZ 2107
Smells of gasoline in the interior of the VAZ 2107 injector reasons
The additional brake light does not light up
If the additional brake light does not light up, this indicates a break in its wires or an unreliable connection. It usually connects to one of the stock brake light sockets. It is necessary to ensure that the wires are securely fastened and that there are no signs of oxidation.
If they are present, it is necessary to cut off the damaged end of the wire, clean it again and connect it to the socket. If the cable is broken in another place, it is advisable to install a new one. In this case, it is better to use a thicker wire (to avoid recurrence of the malfunction).
Symptoms and malfunctions of the reverse sensor
You put the vehicle in reverse, but the rear lights do not work. There are three options here: the reverse light has expired, the power fuse has blown, or the sensor itself has failed. But how can you check the reverse sensor and make sure that it is the one that is faulty?
Take a few simple steps:
1. Remove the fuse and check its integrity. In the VAZ 2110 it has number 19 (rated current - 7.5 A). The mounting block itself is located under the instrument panel.
2. Make sure the lamp is intact. If there are also no complaints about it, then you can proceed directly to checking the sensor.
Malfunction of LED brake lights
If, after carrying out the measures described above, it is not possible to determine the reason why the brake lights do not light, you should clarify the type of lamps used. They can be made using LEDs. Their installation has a number of features. Typically, LED lamps have a certain polarity for connecting to the vehicle’s on-board network.
Manufacturers always take this into account when developing. Incorrect connection results in the lamp not lighting up. In some cases, such inclusion may lead to damage. If a connection polarity violation is detected, this indicates that the repair on the vehicle was carried out by an unqualified person.
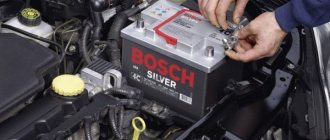
Car alternator malfunction
LED lamps are very sensitive to voltage surges in the on-board network (along with this, the current through the LEDs increases, which leads to their destruction). The voltage may increase if the generator components (namely the stabilizer) are faulty. This is especially common on domestic cars due to the lower quality of component production compared to more well-known brands.
Therefore, if the brake light on a VAZ 2114 or another model does not light up (provided that LED lamps are used), you should also check the generator and replace the damaged element, then change the lamp.
Such a malfunction can occur periodically and is associated with wear and tear of the entire generator. If the brake lights on the VAZ 2115 do not light up and other breakdowns often occur, you should also think about replacing it with a more reliable car (in some cases, this is more profitable than constantly investing money in endless repairs).
Features of this tuning
The brake light in the spoiler has a number of advantages:
- It's stylish, that's why they buy spoilers. Without a spoiler, the VAZ looks like a simple classic car, even a kind of retro, but with a spoiler it looks quite original.
- The spoiler best conveys the stop signal, and you can come up with any animation that attracts attention, but you need to be careful with this.
- The spoiler has a low price, and almost every driver can install it independently.
- The spoiler is installed once for many years, so it is beautiful and profitable.
- The brake light on the spoiler is more visible, so even from a road safety standpoint, the spoiler wins.
Malfunction of brake lights together with other indicators
Quite often, the brake indicator lamp is used together with the side lighting of the car. One cylinder contains two filaments, one end of which is connected to the base, and the other two are brought out to separate contacts. If the brake lights and parking lights do not light up, the most likely loss of contact is at the point of their connection to the body (“ground”) of the car or in the socket. This can happen due to a broken wire or oxidation. The broken end is connected to the terminal by soldering or crimping. Oxides are cleaned off with a sharp tool (knife or screwdriver); after repair, it is advisable to cover the joint with paint or grease to prevent re-oxidation.
It is quite rare to encounter a malfunction when not only the brake light, but also the other indicators on the car do not light up. This is usually observed in “drowned” cars that have somehow been in water (as a result of careless driving or an accident). Even after thorough drying, moisture still remains inside the interior trim and electronic components. Its presence leads to increased oxidation of conductive surfaces. In such a car, having eliminated the malfunction of one system, you cannot be sure that it will not appear again.
Replacement process
The rear lights are attached to the body of a VAZ 21099, 2108 or 2109 car using 4 nuts. To dismantle the lighting system you will need:
The operating algorithm is as follows:
- To access the nuts, remove the 21099 luggage rack at the appropriate location (if the rack is installed).
- Disconnect the power plug that is attached to the board.
- Unscrew the 4 nuts using a wrench.
- When removing the last nut, hold the taillight outside to prevent it from falling and breaking.
- After removing all 4 nuts, remove the light.
When installing a new headlight on the rear of model 21099, do not forget to connect the wiring to ground, which is attached to one of the studs.
In such cases, the ride becomes quiet, calm and relaxed, but how everything changes when at least one light bulb burns out. This causes inconvenience and emergency situations, and you can also get a fine from a road service employee.
The dimensions on the VAZ 2109 do not light up, then look for the reason in the wiring. Even experienced drivers recommend carefully checking the functionality of all devices and components before leaving. The nine is no exception, in which optics can often fail for various reasons, including:
The rear lights (headlights) of the VAZ 2108, VAZ 2109, VAZ 21099 have the following bulbs: 1) Brake lights. 2) Dimensions. 3) Reverse. 4) Turns. 5) Fog lamp.
Rear light board for VAZ 2108, VAZ 2109, VAZ 21099
A wiring harness goes from the mounting block to the rear lights. The purpose of each individual wire in the harness can be understood by its color: 1) Brake lights - red 2) Dimensions - yellow 3) Reverse - green. 4) Turns - blue. 5) Fog light - orange-black.
We remove the connector from the rear light board of VAZ 2108, VAZ 2109, VAZ 21099
Naturally, you need to understand that if the car VAZ 2108, VAZ 2109, VAZ 21099 is old and there are a lot of people doing the wiring, then the color match of the wire to its purpose may be violated. That is, the red wire can be converted not to brake lights, but, for example, to dimensions. But in general this is a very important point: the developers of the VAZ 2108, VAZ 2109, VAZ 21099 specifically marked the functional purpose of the wires with a certain color to make it easier to use.
Flashlight board VAZ 2108, VAZ 2109, VAZ 21099
If some light signal in the taillight of a VAZ 2108, VAZ 2109, VAZ 21099 does not work, then before climbing into the mounting block and opening the electrical circuit, we check the following: 1) The reliability of fastening the mass of the taillight to the body of the VAZ 2108, VAZ 2109, VAZ 21099.2)
We check the reliability of fastening the wire connector to the headlight. 3) Integrity of the light bulb 4) Quality of contact between the light bulb and the flashlight board. It often happens that everything is intact, the light bulb and the mass are good, and 12 Volts come to the light bulb, but it does not light. The reason is poor contact between the light bulb and the board. In this case, you need to clean both the light bulb base and the area on the lantern with fine sandpaper.
As one smart person said: “Electrics is the science of contacts.” To disassemble the rear light of a VAZ 2108, VAZ 2109, VAZ 21099, first remove the protective plastic cover. Then disconnect the black wire of the flashlight from ground. Then we remove the connector from the flashlight board and remove the board itself with the bulbs from the headlight housing. If it is necessary to replace the headlight itself, then unscrew the remaining bolts securing the headlight to the car frame and remove it.
Flashlight housing VAZ 2108, VAZ 2109, VAZ 21099
There is one important point that many owners of VAZ 2108, VAZ 2109, VAZ 21099 do not know. This is the rear fog light. It is turned on by a button between the hazard warning button and the heated rear window. The rear fog light will only work if: 1) The ignition is turned on. 2) Low beam headlights are on. 3) The flashlight power button is pressed. The fog lamp lamp for VAZ 2108, VAZ 2109, VAZ 21099 is the only one that has a reflector inside the headlight. Thanks to this reflector, the glow of the lantern becomes brighter.
The clearance of VAZ 2108, VAZ 2109, VAZ 21099 is included
Rear fog light on VAZ 2108, VAZ 2109, VAZ 21099
Power of rear light bulbs VAZ 2108, VAZ 2109, VAZ 21099: Dimensions 5 Watt Fog light 21 Watt Reverse 21 Watt Stop light 21 Watt Turn signal 21 Watt
Other causes of brake light failure
Sometimes the reason why the brake light on a car does not light up is a malfunction of the electronics. In this case, it is better to take the car to a service station.
There are also exceptions, for example, when a defective light bulb comes across. In addition, lamps may burn out due to normal wear and tear. In these cases, the problem is solved by simply replacing them.
Do not forget that you need to contact only trusted workshops. Often, the intervention of unskilled workers leads to additional malfunctions.
The brake pedal has too much travel
In this case, one might suspect that:
- air has entered the hydraulic drive;
- the rear cylinder piston thrust ring lost elasticity, as a result of which it shifted inward;
- Brake fluid has leaked from the system;
- There is too much clearance between the main cylinder piston and the vacuum booster adjusting bolt.
- in the first case, you will need to bleed the system;
- in the 2nd - you will need to completely change the cylinder;
- in the 3rd - eliminate the leak by replacing seals or hoses that have become unusable.