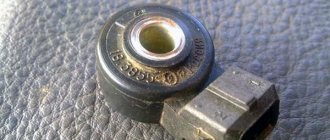
After the publication of my article on the topic of oil seals for the Niva, requests began pouring in to write the same regarding bearings and sensors for the 21214 engine, which is installed on Nivas, Niva-Ms, crocodiles and Shnivas. I’ll begin to slowly talk about “trouble-free” sensors, that is, those that you install and forget about for a very long time.
A few general words. Why did this question even arise? Let me give you an example: such garbage as a throttle position sensor (TPS). Since the electronics of our injector are taken entirely from their front-wheel drive counterparts, and their number is very large, a very large number of companies make spare parts for them, and there is no need to talk about the Chinese brothers at all. For some time I even saved up faulty TPS from different manufacturers in a box, after 7 I got lost and threw everything away)) While the factory supplies only two manufacturers.
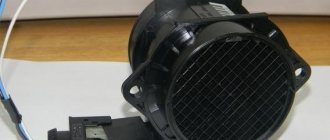
Another example is the speed sensor. When it’s burned out, it happens that when driving through a puddle, the “check engine” lights up, or the engine simply starts to stall when coasting and nothing lights up. And when you reach the service level, like a wartime exterminator, suddenly the defect disappears. This means that water got inside the case and then also leaked out. So all is well......until the next puddle. One of the most basic sensors is the mass air flow sensor (MAF) , so a separate detailed article is devoted to it.
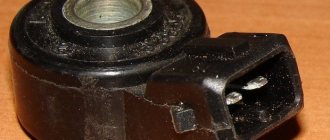
Crankshaft position sensor - DPKV
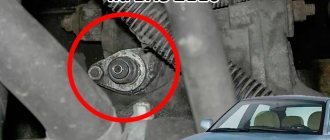
The task of this sensor is to read the revolutions of the engine crankshaft and whether it is spinning at all. Perhaps the only sensor that I recommend keeping in your car’s first aid kit (so as not to get lost) as a spare. This is the only sensor without which the injector will not start in principle. Without the rest, the engine will sneeze like a sick person, hiccup, fart, blink the check engine... but rattle. Which means it’s bad, but go. Without DC there will not even be signs of life. Therefore, we will consider it, in medical terms, as setting the heart rhythm. I’ll tell you a little secret, if you are leaving somewhere or leaving the car in a bad place, open the hood and slightly disconnect the DC connector. It is difficult to imagine a more effective anti-theft. The main thing is not to forget about it yourself))
Coolant temperature sensor
The DTOZH in Grant is located in the thermostat block and serves to read the coolant temperature. The sensor is also responsible for the operation of the engine cooling fan and for the presence of warm-up engine speed. When starting the engine, you will notice that if the DTO is in good working order, the speed is slightly higher than the working idle speed; as soon as the internal combustion engine warms up, the speed returns to normal.
Symptoms of malfunction:
- There are no increased speeds to warm up the internal combustion engine;
- The engine cooling fan does not work;
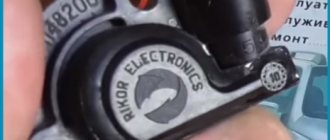
Throttle position sensor - TPS.
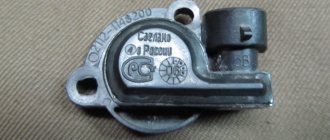
The function of this sensor is to provide information to the brain about the position of the gas pedal and the degree of throttle opening. The TPS contains electromechanical parts, that is, a potentiometer. This means that after some time it wears out and the sensor dies. In Russia there are about 10 companies producing this sensor. But I want to draw the reader’s attention to the so-called non-contact (inductive) TPS. It is made by one company, which used to be a “mailbox”. My experience has shown that the sensor in their “non-contact” design is virtually eternal. This is exactly what is shown in the photo.
About the consequences of a malfunction of the Priora DPRV
The phase sensor on the Priora affects the correct functioning of the engine. The malfunction of this element leads to a number of the following negative consequences:
- Reduced power and dynamic performance. This is due to the fact that when the ECU does not receive a signal from the DF, it goes into emergency mode. In this case, not phased fuel injection occurs, but pairwise parallel injection.
- Fuel consumption increases by approximately 10-20% (0.5-1 liter).
- The engine warm-up speed decreases, which leads to frequent turning on of the cooling fan.
- Problematic or prolonged engine starting (starts up 2-3 seconds after turning the key).
- Reduced service life of the catalytic converter, the cells of which receive unburned fuel and are burned.
That is why it is extremely important to pay attention to this element. The cost of the product is low, but in order to correctly determine that the above consequences arise due to a malfunction of the phase sensor, you need to pay attention to the characteristic signs.
This is interesting! The sealing ring for DPRV Priora has serial number 21110-3706042-00.
Speed sensor – DS.
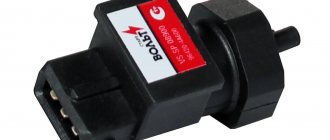
The brain uses the signal from the speed sensor to control the engine's idle speed. And support for “pickup” speed while the car is coasting. The actuator of this circuit is the idle air regulator, which controls the air supply bypassing the throttle valve. Enough theory, let's get closer to the people. In fakes based on this sensor, ahead of the original by an order of magnitude - the Chinese brothers. 8 out of 10 sensors that I held in my hands in stores and on the market were made in China. They work for three months, after which they announce their retirement as a “check engine.” What is the difference between the original and the pale one? In the photo, I indicated with arrows where the wires entering the connector are filled with varnish. The seam of the body, which consists of two parts, is also filled with varnish. Mao's heirs consider this unnecessary, and that is why the sensor dies after the onset of the first St. Petersburg slush.
DF on Priora: main types of faults
The resource of the DPRV is quite large, but sometimes already at 100 thousand (some earlier, some later) problems may arise with its functioning. The reasons for the failure of such a product are very different, so let’s look at the most common ones among car owners:
- Mechanical damage to the sensor. It usually manifests itself in the form of chipping of the working part of an element or fastener, and occurs due to contact with the pulley plate.
- The magnet falls out, which can also happen during the operation of the vehicle.
- The sensor power supply is faulty. Most often, the reason is hidden in damaged wiring. However, the possibility of contact oxidation cannot be excluded.
If there is a suspicion of a malfunction of the DPRV on the Priora, then it is necessary to look for the cause of the failure. First, let's find out where the phase sensor is located on the VAZ-2170.
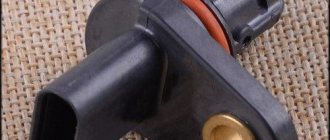
Phase sensor - DF
It's also a camshaft sensor. The VAZ phase sensor is designed to determine the angular position of the camshaft. The main function is that when the engine is running, the phase sensor provides a pulse signal to the controller synchronizing fuel injection with the opening of the intake valves. Failure of the phase sensor switches the fuel supply to pairwise-parallel mode, which leads to a slight (up to 10%) increase in fuel consumption. And I’ll also add this “miracle of nature” is a headache and a source of a lot of errors, for example the famous 0301, 0302.... In my humble opinion, this is the same disgusting and abomination as the old-style hydraulic compensators. But what has grown has grown. (How to get rid of it forever, lambda, roll sensor - will be written in the article about chiptuning). The only normal manufacturer of this sensor is Avtovazagregat. The logo is visible in the photo.
On any four-stroke engine, a complete cycle is completed in two revolutions of the crankshaft - once the piston approaches top dead center at the end of the compression stroke, and a second time at the end of the exhaust stroke. This allows injection engines to use only the counting moment from the crankshaft position sensor as a reference signal. In this case, the operation of injection and ignition is called non-phased. At the end of exhaust, a second (idle) spark occurs, and the injector opens twice, part of the fuel is supplied to the open intake valve, and part to the closed one.
Description of the procedure for replacing the timing belt VAZ 2110, (2112) 16 valves
Former flagship of the Russian automobile industry VAZ 2110 with a 1.5 16 valve engine. Scheduled replacement of the timing belt 30,000 km after the last replacement. The autopsy showed that if they had not changed it today, then tomorrow there would have been more work for our mechanic. In general, we recommend that all customers check the condition of the belt at least once every 5,000, or once a year. But knowing the quality of our spare parts, more often is better. On this engine, if the belt breaks, almost all the valves bend. The article is also relevant for VAZ 2112))
We look, remember and don’t let it get to that point.
The patient became five millimeters narrower and generally looked very bad. We send him to the honor board.
And here is the hero of the occasion himself.
We remove the absorber and power steering reservoir so that they do not interfere in the future.
We loosen the bolt by seventeen, the tension roller of the service belt and remove the last one. It will not be possible to remove it completely because the engine mount is in the way. If the belt requires replacement, you will have to unscrew the engine mount.
Remove the tension roller. We unscrew the bolts securing the upper protective cover; they are hexagonal.
Remove the right wheel, plastic mudguard and drain the antifreeze.
We see the crankshaft pulley. Using its bolt, clockwise, rotate the crankshaft until the marks on the camshaft pulleys and the timing belt protective cover match.
Markings on the left exhaust camshaft. The mark on the protective cover is highlighted in red.
Likewise for the intake camshaft. He's on the right. Its pulley has an inner ring for the phase sensor, so it is very difficult to mix up the pulleys.
Remove the crankshaft pulley. Let's lock the crankshaft with the help of a friend. We put him in the car and force him to turn on fifth gear and press the brake all the way. And at this time, with a slight movement of your hand, unscrew the crankshaft pulley bolt. Remove it and the lower protective cover.
We see that the mark on the sprockets and the slot on the ebb of the crankshaft cover coincide.
Loosen the seventeen bolts of the tension and idler pulleys and remove the timing belt. Then the videos themselves. We change them anyway.
We lock and unscrew the camshaft pulleys and remove them. Remember that the right camshaft has a pulley with an inner ring for the phase sensor. The picture should look like this.
We unscrew everything that holds the protective plastic cover and remove the latter. Unscrew the three bolts holding the pump. They are hexagonal.
The pump for a sixteen valve engine is slightly different from the usual for an eight valve engine. It has a small threaded ear for attaching the protective casing.
Lubricate the gasket with a thin layer of sealant and put the pump in place. Tighten the fastening bolts. We put the protective cover in place. We make sure that he sits in his place, otherwise he will rub the belt. If everything is in order, tighten everything that holds it and install the camshaft pulleys and new rollers.
We check that the marks on the camshafts and crankshaft match. We install a new timing belt. If there are no directional arrows, put it so that the inscription is read from left to right.
The right, or descending, branch of the belt should be tight. You can turn the right camshaft clockwise a few degrees, put on the belt and turn it back. In this way we will stretch the descending branch. The tension roller has two holes for a special key. You can find it in any auto store. The issue price is 60 rubles. To tension the timing belt, insert a special key and turn the roller counterclockwise. Since there is a lot of controversy about tensioning the timing belt, we will write this: a tensioned belt should not have a sag between the camshafts of more than 5 mm when pressed and 7 mm on the longest branch (specially experimented). Remember: an overtightened belt reduces the service life of the pump, and an undertightened belt can lead to cylinder head repair. (photo below)
We check all the marks. We turn the crankshaft two turns and check the marks again. If the pistons and valves do not meet and the marks coincide, then accept my congratulations. Then we put everything back in place in the reverse order of removal. Don't forget to tighten the bolts. We tighten the service belt roller with the same wrench as the timing belt tension roller. Fill with antifreeze and start the car. We wish the belt many years of service, but don’t forget to check it periodically; after all, it was made in Russia.
How does DPRV work?
The camshaft position sensor (abbreviated as CPR) provides one pulse per shaft revolution. Since the camshaft rotates twice as slow as the crankshaft, we get an exact mark that determines the intake stroke on one of the cylinders. In this case, the injection ECU can calculate the injection timing for the cylinders very simply.
Let's assume that the pulse from the DPRV comes after the reference mark for the first cylinder. Then, upon receiving a signal, the ECU supplies fuel to the first cylinder, after half a turn of the crankshaft - to the third, at the next passage of the reference mark - to the fourth, and after another half turn - to the second. In this case, the impulse from the DPRV is “reference”, since all injection moments are still rigidly tied to the teeth of the rim of the crankshaft position sensor.
Well, where is the camshaft sensor located? On the cylinder head or, less commonly, on the valve cover, directly at “its” camshaft.
Less commonly, the camshaft position sensor gives a series of pulses that determines the beginning of the desired stroke in a particular cylinder. On many Nissans, the sensor supplies one pulse for the first cylinder, two for the second, and so on.
But injection phasing is not the only thing the camshaft sensor is responsible for. Since the injection ECU can easily calculate the time delay between the moment the count starts from the DPCV and the moment the pulse is received from the DPCV, it becomes possible to determine the actual position of the camshaft relative to the crankshaft. If on engines without changing the valve timing this has a purely diagnostic value (checking the correct installation of the timing phases), then on engines with phase shifters the DPRV is an important feedback element that allows you to monitor the performance of the valve timing control system.
Structurally, the DPRV can be made on the basis of an inductive sensor or a Hall sensor. The first is simpler, since it is just a winding around a magnetic core. The second is less reliable and less accurate, but it supplies the injection ECU not with a sinusoid, the amplitude of which is proportional to the rotation speed (which makes signal processing difficult), but with an easily processed “ready” rectangular signal. Where there is no need to accurately determine the position of the camshaft, but the very fact of determining the required speed is important, a Hall sensor is most often used.
VAZ-2112 sensors 16 valves and their location: diagram, photo, video
Replacing the temperature sensor on a VAZ 2110 in 5 minutes!
The efficient operation of the injection engine is ensured by a set of sensors. They all connect to the ECU. Lada hatchbacks of the 2112 family were produced only with injection engines, and two varieties of these internal combustion engines are 16-valve. We will talk about them further. All VAZ-2112 sensors, their location and appearance will be shown in the photo. The excess oil pressure sensor, which is not connected to the ECU, is shown in the video.
Understanding the oxygen sensor
It is necessary to determine the sensor articles not by the engine model or even by Euro standards, but only by the ECU unit.
The number of oxygen sensors can be two or one - it all depends on environmental standards. AvtoVAZ also used two types of sensors - 0 258 005 133, 0 258 006 537 (BOSCH part numbers). The first of them are compatible with BOSCH M1.5.4, MP7.0 and January 5.1 controllers. Newer sensors were connected to the BOSCH M7.9.7 ECU (January 7.2). The two different types of sensors differ even in appearance.
The ECU unit in “Dozens of VAZs” is located under a plastic cover. It is located near the front passenger's foot.
The red arrow marks the first, that is, the main sensor. The top photo corresponds to engine 21124 (1.6 l).
VAZ-21120 engines (1.5 l) could meet the Euro-3 standard, and then an “extended” catalyst was welded behind the main sensor. The second sensor was located behind it, that is, behind the “can”. Let's clarify:
- The Euro-2 standard corresponds to a design with one sensor (main);
- During the transition to Euro-3 standards, a second sensor was added (blue arrow).
By the way, the 24th engine can meet Euro-4 standards.
Which VAZ engines have a phase sensor
Main set of sensors for 16-valve VAZ-2112 engines
The ECU must control many parameters at once
The most important information will be the position of the crankshaft. You can turn off all sensors except the DPKV, and this will not lead to the engine stopping. Let's list all the elements one by one:
Let's list all the elements one by one:
Let's take a look at how all the elements look in real life. Shown are pictures of VAZ-2112 sensors (16-valve internal combustion engine).
Everything said above is true for two engines at once - for units 21124 and 21120 (1.6 and 1.5 l).
You cannot unscrew the DTOZH sensor without draining the coolant. And to disconnect the sensor means to disconnect the connector, but not to dismantle the sensor itself.
Where is which sensor located - engine compartment diagram
Let's look at another picture.
It is important to understand where the following elements are located:
The location of the phase sensor is indicated in the previous chapter.
How to check Niva Chevrolet phase sensor
Never unscrew the speed sensor. It will be difficult to install it in a way that maintains a seal.
Articles
For oxygen sensors, the designation 21120-3850010 was first used. Then an article appeared with the numbers 1118 (see photo). It appears to be a new type of sensor. It will be easier to use BOSCH articles.
We list the article numbers of the remaining sensors:
- Mass air flow sensor (21124 or 21120): 21083-1130010-01, -10, -20;
- Mass air flow sensor (motor 21120 with ECU January 4.1): 2112-1130010, -01;
- DPDZ: 2112-1148200;
- РХХ: 2112-1148300-02;
- DPKV: 2112-3847010, -01, -03, -04;
- DTOZH: 2112-3851010, -01, -02, -05;
- Speed sensor: 2110-3843010-13, -18;
- DPRV: 2112-3706040, -02, -03;
- DD: 2112-3855020, -01, -02, -03;
- Oil pressure sensor: 2106-3829010, -01, -02;
- Antifreeze level sensor: 2110-3839310-10, -11, -12, -13, -14;
- Coolant temperature indicator sensor: 2101-3808600, -02, 2106-3828010.
The last three sensors are not connected to the ECU. However, a rough road sensor (2123-1413130) can be connected. It affects the operation of the engine, although it is attached to the body.
Engines with ECU January 4.1 do not have oxygen sensors.
In general, on VAZ-2112 hatchbacks, sensors may be different from those indicated in the list. But then we are talking about an 8-valve engine. And everything that we indicated applies to 16 valves, here is a diagram of this engine.
Checking the coolant temperature sensor VAZ 2110
Malfunctions of the camshaft position sensor
The main malfunction of the Hall effect camshaft sensor is its physical failure (the sensing element itself or the output circuit that generates rectangular pulses). With inductive sensors, microparticles of chips, which occur when the elements of the gas distribution mechanism are worn, adhere to the magnetic core, due to which the shape of the pulses is “smeared” and they can be processed incorrectly in the injection computer.
Main errors of the camshaft sensor according to the OBD-II standard:
- P0340 - Malfunction in the camshaft position sensor circuit
- P0341 - Incorrect indicator / camshaft position sensor not adjusted
- P0342 - Camshaft Position Sensor: Low Signal
- P0343 - Camshaft Position Sensor: Signal High
- P0344 - Camshaft Position Sensor Malfunction
Error code P0340 is interpreted as a sign of a purely electrical fault, but in fact it is the most common: it is caused by both oxidation of the contacts in the connector and stretching of the timing chain. On “chain” engines, in most cases, the camshaft sensor is not to blame for this; signs of a malfunction indicate that the marks are “moving away.” I have come across cars where this error occurred literally after a few minutes after the reset, the engine shook at idle, the ECU recorded multiple misfires, but at high speeds the car literally “teared out from under itself,” which clearly indicated a “lag” in the camshaft intake valves and, as a result, an increased overlap phase. Because of this, the filling of the cylinders at low speeds was insufficient for normal engine operation, but at high speeds the filling due to the inertia of the exhaust gases and the increased shutdown time, on the contrary, sucked even more air into the cylinders than was “supposed” for it.
When faced with a problem from such a “general” series, you should rely not on its designation according to the OBD-II standard, but on targeted diagnostic procedures for a specific vehicle, since different injection ECUs record such errors for different reasons.
Error P0341 indicates more serious problems when receiving a signal from the camshaft sensor relative to the camshaft sensor and can already be clearly identified as a sign of problems not related to the camshaft sensor and its wiring. We check the position of the marks; on “keyless” engines, we adjust the camshafts and crankshaft with special devices.
Knowing at what moment on a particular engine the signal from the DPRV should arrive relative to the reference moment according to the DPRV, we will see the phase deviation on a two-channel oscilloscope without disassembly.
Possible causes of malfunction
DPRV is a pulse generator that creates a very weak signal. There is a small chance that the current will gradually weaken the integrity of its winding. However, vibrations caused by magnetism travel through the gear teeth. When the camshaft is turned, the force changes just like the signal generated. These vibrations cause microscopic movements within the DRV, creating weak points in essential parts, especially the winding in the case of inductive type DRV.
With a Hall-type sensor it is a completely different story. This type of DPRV is a solid-state device, that is, its electronic component, such as a diode or transistor. Voltage can damage the sensitive parts of the DPVR. Short circuits and incorrect connections can also damage it. And remember that you need a polarity sensitive power supply.
How to check the camshaft sensor?
Without an oscilloscope at hand (the capabilities of the simplest Chinese “designer” DSO-138 are sufficient here), only a basic check is possible.
The condition of the contacts in the connector is monitored - connection tightness, absence of moisture and traces of oxidation. When the engine is running, you can use an LED probe: on Hall sensors, it alternately blinks red and white LEDs with a frequency proportional to the engine speed. If the signal in this form reaches the ECU connector, then we can say with reasonable confidence that the sensor and its wiring are working properly.
You will also be interested in:
It is worth checking the valve timing settings if errors from P0340, P0341 are recorded. The sensor itself must be removed and cleaned of adhering chips, if any.
On a number of engines, the crankshaft and camshaft position sensors are unified - you can swap them as a diagnostic measure. If the error remains on the camshaft, then we can definitely say that the sensor itself is absolutely working.
Video: Replacing the camshaft position sensor
Problems in the operation of the DPRV can seriously threaten the safety of the driver and passengers. Imagine the situation: you are driving in heavy traffic in a large city, and suddenly the engine suddenly loses power, which leads to a significant decrease in the speed of your car. Very often it ends in an accident, because the driver driving behind simply does not have time to react.
Another option is that while driving, the engine stalls and the power steering is turned off, which is why you cannot make a sharp turn. The situation is sad and this really happens. In other situations, you simply leave the house to go to work, and the engine does not start at all.
This article will discuss the main symptoms of a DPRV malfunction. You will also learn where the camshaft sensor is located and how to check it yourself. But first, let's try to figure out why it is needed at all.
Repair
Before checking the DPRV or before starting any independent actions, you need to familiarize yourself with the connection diagram for the VAZ 2110 camshaft sensor, as well as the features of its installation in the engine body.
The type of action performed depends on what signs of malfunction have been identified:
- if there is visible mechanical damage to the wiring or exposure of live parts, it must be replaced, but repairs in the form of re-insulation of the wires are also possible;
- If the sensor is mechanically damaged, it must be replaced. It is not recommended to repair or disassemble it;
- if the connector is dirty, it is necessary to reconnect with a visual inspection and cleaning of the electrical contacts;
- Wear of the connection connector requires its maintenance or replacement of the sensor. Maintenance consists of ensuring a tight fit of the connected parts;
- When checking the electrical wiring or sensor with a voltmeter and identifying deviations, it is necessary to replace the faulty element. When connecting the voltmeter probes to the electrical power contacts, the sensor resistance should not be lower than 550 Ohms or higher than 750 Ohms;
- If an internal malfunction of the sensor is detected during computer diagnostics, it must be replaced.
What is camshaft position sensor (camshaft position sensor)?
The cylinder head of the power unit contains 1-2 camshafts. They are equipped with special blades responsible for controlling the intake and exhaust valves. The block also contains a crankshaft, which drives the camshaft through gears, a timing belt, or a timing chain.
To determine the working cylinder, the engine ECU analyzes the rotating position of the camshaft in relation to the current position of the crankshaft. This is exactly the information that the DPRV reports. The control unit uses the received data to correct the operation of the fuel injectors and spark formation. This means that fuel economy, engine efficiency and the level of harmful emissions depend on the performance of the camshaft sensor.
Today, cars are equipped with two types of DPRVs - electromagnetic (inductive) and Hall sensors. Sensors are used to transmit a signal to the engine control unit.
The inductive sensor produces an AC signal and is easily identified by its two wires. But the Hall sensor needs additional power to create a signal, so another wire goes to it (three in total).
Meter design and location
The operating principle of the DPRV is based on the Hall effect - the sensor reacts to the approach of a metal mass by changing the voltage on the signal wire. The design of the device is similar to another element - the crankshaft position detector. Inside the plastic case there is a coil where the 12 V on-board voltage is constantly supplied.
The meter is installed on the engine cylinder head in close proximity to the camshaft. The latter is equipped with a special plate or gear, whose rotation affects the DPRV. The work algorithm looks like this:
- After turning on the ignition and starting the engine, a supply voltage of 12 V is supplied to the sensor. Through the third signal wire, the element supplies the controller with a voltage of 90–95% of the original one.
- When the protrusion on the rotating part of the camshaft passes next to the DPRV housing, the voltage at the signal contact drops to 0.2–0.4 volts, depending on the design of the device and the vehicle model.
- When the voltage drops, the electronic unit clearly “sees” the valve timing, promptly supplies the fuel mixture to the engine cylinders and directs the spark discharge to the desired spark plug.
Note. On cars with 16-valve engines, 2 sensors are installed - one for each camshaft.
When the meter is faulty, the electronics are unable to control the operation of the gas distribution mechanism. In such cases, the control unit goes into error and is guided by the signals of other meters. Spark generation and fuel supply are adjusted according to the programmed program, which affects the operation of the power unit.
Problems that a faulty camshaft sensor can create
Malfunctions of the DPRV can lead to various problems. It all depends on the specific car and the breakdown of the sensor itself. Most often, motorists mention the following symptoms of a malfunctioning camshaft sensor:
- Transmission locking at one speed. To remove the blockage, you have to turn off and start the engine again. The phenomenon can appear at certain intervals.
- Significant reduction in engine power. For example, it is often impossible to accelerate a car above 55-60 km/h.
- The engine may suddenly stall.
- If DPRV malfunctions begin while driving, the car may jerk, and engine power drops noticeably.
- Misfire, difficult starting or engine choke, poor dynamics.
- Sometimes a failed camshaft position sensor simply blocks the formation of a spark, so the car cannot be started at all.
Characteristic symptoms of the problem
Practice shows that a malfunction of the camshaft position sensor does not lead to engine failure and immobilization of the vehicle. The engine continues to operate with some deviations that interfere with the normal operation of the car. Symptoms of DPRV failure are quite vague and similar to problems with other measuring elements:
- Unstable engine operation at idle and while driving.
- Instead of dynamic acceleration, after pressing the gas pedal, there is a series of small jerks and a sluggish increase in speed.
- The power of the power unit decreases. The effect becomes noticeable when the load increases - on a hill, sharp acceleration, while towing a trailer.
- The Check Engine light on the dashboard does not always come on. But many drivers note that if the meter is faulty, the display flashes after the crankshaft speed increases to 3000 rpm or more.
- Fuel consumption is naturally increasing.
If the measuring element is faulty, the control unit prepares and supplies an enriched air-fuel mixture to the cylinders. This results in an increase in gasoline consumption and unstable idling. Jerks and drops in power are caused by untimely supply of a spark - the controller “does not see” the end of the compression stroke in the cylinder and cannot clearly determine the ignition timing.
On various car models, additional symptoms of a malfunctioning camshaft sensor are noted:
- the engine suddenly stalls while driving, but starts without problems;
- cold starting of the engine becomes difficult;
- on cars equipped with a robotic gearbox, difficulties arise with automatic gear shifting;
- the engine “troits” - skipping ignition cycles is heard, sometimes popping sounds are observed in the exhaust manifold;
- On some cars, the power plant fails due to lack of sparking.
Reference. The service life of the element is quite long. On domestically produced cars, the resource reaches 80–100 thousand km, on imported cars – 150 thousand km. When searching for the causes of a malfunction, you can focus on the specified periods.
Driving with a broken air pressure sensor is acceptable for a short period. Jerking, rich fuel mixture and electronic errors accelerate the wear of spark plugs and engine parts. After detecting the listed symptoms, you should send the car for diagnostics or find the source of the problem yourself.
What leads to malfunctions of the DPRV
Like any element of the car, the camshaft sensor at some point stops working. For example, this occurs as a result of wear on the internal part or wire. Depending on the type of sensor used, engine operating problems vary. As soon as the “brains” of the car detect a malfunction in the operation of the DPRV, the Check Engine icon will light up on the instrument panel, and a diagnostic fault code will be stored in the memory of the control unit. This will make it easier to find the problem in the future.
Mass air flow sensor Lada Granta
This element is located near the air filter; its main task is to estimate the amount of air entering the engine. Based on the information received from the mass air flow sensor, the ECU determines the fuel volume that is necessary to maintain the stoichiometric ratio between fuel and air for the engine to operate within the specified parameters.
The mass air flow sensor on the Lada Granta is located next to the air filter, right between it and the air falling sleeve. It should also be noted that this sensor is no longer installed on modern VAZ engines. The catalog number of the described element on Grants is 11180-1130010-00.
If the mass air flow sensor breaks down, the system stores the error code in its memory, after which the “Check Engine” lights up. Then the controller replaces the readings of the broken device with fixed temperature values. Signs of failure of this element are different, the most common include:
- increased fuel consumption;
- problems when starting the engine;
- disappearance of cravings;
- instability of speed.
Troubleshooting DPRV
If the Check Engine indicator on the panel has already come on (it may not be lit constantly, but may appear periodically), you just need to read the fault code using a diagnostic device. If you do not have such a device and it is impossible to buy it, you need to contact a specialist.
After receiving the exact fault code and decoding it, we recommend performing several simple tests. The presence of one of the above DPRV fault codes does not always indicate that the sensor must be replaced. Sometimes the source of the problem is damage to the wiring, connector, etc. It is quite possible to fix such problems on your own.
But to check the functionality of the camshaft position sensor itself, you need to perform several steps. Of course, it is difficult to check the signal without special equipment. But checking the camshaft sensor with a multimeter will provide basic information.
First, visually check the condition of the sensor connector and the wires that go to it. Make sure there is no dirt, oil or rust that could cause problems. Check the wires for damage. Sometimes problems are caused by broken wires, poor connections, or defects in the insulating layer caused by exposure to elevated temperatures. The DPRV wires should not come into contact with the high-voltage wires of the ignition system.
After that, we pick up a digital multimeter; it “knows how” to check the value of alternating and direct current (AC and DC, respectively). But you need to obtain information in advance about what these indicators should be for the sensor used on your car.
Some sensors have connectors designed so that you can connect additional wires to them to read data with a multimeter.
If this is not possible, try disconnecting the DPRV connector and connecting thin copper wires to each terminal of the connector. After this, install the connector in place so that two wires protrude from its body.
Another option is to pierce each of the wires with a needle or pin (do everything carefully so as not to short the wires!). After such a diagnosis, damaged areas of insulation should be well wrapped with electrical tape to prevent moisture from getting inside.
Checking the two-wire camshaft position sensor:
- If your car uses an electromagnetic DPRV, switch the multimeter to AC mode.
- Another person must turn the ignition on by turning the key in the lock without starting the engine.
- Voltage should appear in the circuit. Connect one of the multimeter probes to ground (any metal component of the engine), and connect the second one in turn to the camshaft sensor wires. The absence of current on all wires indicates a problem in the wiring that goes to the sensor.
- Ask the person in the car to start the engine.
- Touch one multimeter probe to one wire of the DPRV connector, and the other to the other. Values will appear on the device screen, which should be compared with the operating readings given in the car’s operating instructions. As a rule, the readings on the screen vary within 0.3-1 volts.
- The absence of a signal indicates a malfunction of the camshaft sensor.
Checking a three-wire DPRV:
- Identify the power, ground and signal wires (use the repair instructions), and then check the integrity of the wiring that goes to the sensor. The multimeter must be switched to DC mode.
- Another person must turn on the ignition without starting the engine.
- We connect the black probe of the multimeter to “ground” (any metal part of the engine), and the red probe to the power supply wire of the DPRV. The results obtained should be compared with the data in the operating instructions.
- An assistant must start the engine.
- Touch the red probe of the multimeter to the signal wire of the DPRV, and connect the black probe to the ground wire. If the sensor malfunctions, the voltage will be lower than stated in the repair manual. Sometimes the multimeter does not show anything at all, which also indicates a sensor failure.
- Remove the DPRV and check the element for mechanical damage or contamination.
Below is a video that clearly demonstrates how you can conduct such tests. In some cases, the electrical circuit is working properly, and the sensor also gives correct readings during tests. The question arises: why do errors and problems appear in engine operation? Sometimes the causes are related to other engine components. Errors may appear due to a loose timing belt or a faulty tensioner. Because of this, the DPRV will transmit the wrong signal.
Camshaft Position Sensor Testing
Testing a two-wire inductive sensor
There are a number of common signs of a faulty DPRV. If you have these problems, you may need to replace it. These same symptoms can be caused by problems with the ignition or fuel injection systems. Thus, before replacing the DPRV, it is worth conducting tests to determine the real source of the malfunction.
If the check light comes on, your ECU is recording a trouble code. You can check for errors using a special diagnostic tool. Codes between P0335 and P0338 correspond to DPR problems.
This is probably the easiest and most accurate way to test and determine the problem of the DPRV. Unfortunately, the DPRV, as a rule, fails much earlier than the corresponding indicator lights up. To be constantly aware of the car's problems, it is worth conducting other types of testing.
RPM is the next method for checking the DPRV, which also requires a diagnostic tool. One of the scanner settings allows you to read the engine speed in revolutions per minute (RPM). Set up the scan tool to read engine speed and start it. The scan tool should read between 100 and 500 rpm. A low value indicates that the DPRV is not working properly. “0” means that the DPRV is completely out of order.
Multimeter testing
Of course, not everyone has access to a scanner (although they can sometimes be rented from parts stores). A multimeter is a more common and very useful tool for diagnosing many of your vehicle's electronic components. The multimeter can measure voltage, current and resistance.
You can remove the DPRV and then check the resistance. Attach one end of the multimeter to each DPRV wire. A resistance of 0 means there is a short circuit. Infinite resistance means there is an open circuit. Any of these readings indicate that the DPRV is not working. For any other value, check the manufacturer's instructions. If the reading does not match the recommended resistance, you must replace the DPRV.
Cost and replacement of the camshaft sensor
If the test results finally convince you that the DPRV is faulty, it must be replaced. On many cars, changing the sensor is very simple. It all comes down to disconnecting the electrical connector, unscrewing just one mounting bolt, removing the old one and installing a new sensor. On other cars, you have to remove several engine components at the same time, otherwise you will not be able to gain access to the sensor. To assess the possibility of replacing the DPRV yourself, we advise you to study the corresponding paragraph in the repair manual for a specific car. The cost of a camshaft sensor usually ranges from $30-$100.
Replacing the device
Dismantling the part is not difficult. We find it behind the air filter. The phase sensor housing is secured with a bolt.
First, disconnect the terminals from the battery. In this case, the electronic unit will be de-energized. The control unit memory is reset to zero.
If you don't turn off the on-board network, you won't feel the difference. After replacement, the unit will maintain the same mode as with a faulty phase sensor. Process control returns to normal only after several engine starts.
Tools and materials for removing the sensor are available in the arsenal of every motorist. You need to prepare a key for ten, sealant, alcohol, rags. It is convenient to unscrew the fastening bolt using a socket wrench. Take the sealant from ZOLLEX. It is designed for temperatures up to 350°C.
Replacing the sensor will take 10 minutes. First of all, disconnect the wire block from the phase sensor. To do this, you need to bend the latch with one hand and pull out the wiring with the other. Next, unscrew the only bolt. It's on the back side. We take out the body of the spare part.
Do not apply great force when removing the DF.
Moreover, you should not use impact-type locksmith tools. The plastic housing may crack. Residues will fall inside.
Before installing a new device, you need to clean the seat. Apply a thin layer of sealant to the joining ring. Let stand for a few minutes. We put the camshaft sensor in place. We tighten the bolt.
Results
At the beginning of the article, we mentioned the unpleasant consequences that can result from a breakdown of the DPRV. If you find at least one of the signs of a malfunction of the camshaft position sensor, we advise you to diagnose the problem as quickly as possible. Otherwise, you might just end up standing in the middle of the road. Start by reading the fault codes stored in the ECU memory and, if necessary, check the sensor itself. Now you already know how to do this using a regular digital multimeter. Very often you can solve the problem yourself without spending extra money on diagnostics and replacement.
Verification methods
The DPRV of the VAZ-2115 car is located under the air filter, installed near the cylinder head. In order to check its functionality, it is necessary to remove the power socket and dismantle the part.
Visual inspection
The first way to check the performance of the DPRV is a routine external inspection. The causes of the malfunction are the following:
- Cracks and chips on the body can cause penetration. A complete replacement of the part is required.
- Oxidation or breakage of contacts in the connecting socket is the reason for the lack of connection between the DPRV and the ECU. Cleaning the contacts will fix the problem.
Checking with a multimeter
In order to check the phase sensor with a multimeter, you must:
- Dismantle the part.
- Connect the multimeter terminals to terminals 1 and 3 of the sensor.
- Place the device in the resistance determination position.
- Apply a metal screwdriver or knife to the tip of the DPRV.
The device should react to metal, and the multimeter should show the working resistance of the part. Lack of response indicates damage.
Checking with a voltmeter
- Dismantle the part without removing the current-carrying socket.
- Turn on the ignition.
- Connect the voltmeter terminals to terminals 1–3.
- Bring a metal object to the tip of the part.
A working part should react to metal and produce a voltage of 0.7 to 0.9 V. High readings or their complete absence indicate damage.
