Tail light repair
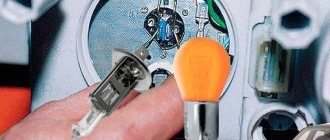
The most common reason for the failure of a VAZ 2114 rear light is the failure of a flexible printed circuit board or a connector made directly on it with conventional metallization.
You can, of course, just buy a new printed circuit board and replace the faulty one with it, but, firstly, for how long? And secondly, we are not looking for easy ways. So we will try to eliminate this malfunction on our own, at minimal cost and in such a way that it will last forever. Let's start with the connector for connecting the flashlight to the on-board network. It looks something like this:
The connector for connecting the rear light to the on-board network is part of a flexible circuit board and cannot be replaced separately
There are many reasons for this connector to fail. For example, we removed the power supply from the flashlight too often and simply partially erased the traces, which have a very small thickness of copper deposition on the plastic. Another reason is that the conductive paths next to the connector broke due to constant vibration. Well, the most banal thing is that the tracks burned out due to overload or short circuit.
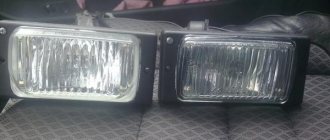
Due to burnout of the conductive tracks of the flexible board, the rear fog lights do not light up
The photo shows a flashlight connector of a different modification, but the meaning of the problem is the same. All these issues can be solved with the help of a soldering iron, mounting wire and a regular six-pin (or more) connector with a mating part.
For repairs you will need this block with a mating part
We clean the connector contacts on the board using a student eraser (not sandpaper - the foil is very thin!) and service them.
We solder the wires from the block onto the tracks, not forgetting to mark them, and fill the soldering area with sealant or a hot glue gun.
Mounting block soldered to the rear light board
We cut off the standard power harness block, and in its place we solder the mating part of the new one. We assemble the flashlight, connect it to the on-board network - and check it. If we haven't messed up the wiring of the pads, then everything will work right away with a bang.
What to do if the tracks are burned out or broken? You can get out of this situation as follows. Immediately after the fracture, we clean the protective varnish from the tracks, tin, and solder the block. It will look like this:
You can solder the header anywhere on the flexible board.
You can, of course, limit yourself to this (until next time), but if you spend a little more time and effort, you can make more serious repairs. Flashlights modified in this way will serve faithfully for many years. Such a repair will save you from the eternal problem of contacts of flimsy standard sockets - this is also a very common malfunction of VAZ 2114 headlights.
To implement this idea, in addition to the six-pin block with a mating part (see above), you will need five cartridges from the VAZ 2106 direction indicators and a dozen terminals for them.
You will need 5 such cartridges and 10 terminals for them
We remove the lamps, standard sockets and flexible printed circuit board from the panel. We place the purchased cartridges in the right places on the panel and mark their centers. Special precision is not required here, the main thing is that each lamp shines into its own “window”. We drill holes according to the diameter of the base parts of the cartridges.
Holes for future cartridges
We insert the cartridges into the holes, mark the mounting holes, drill them, and screw in the screws. Now the cartridges are firmly fixed in the panel.
We secure each cartridge with two self-tapping screws
Using a mounting wire with terminals pressed onto it (you can crimp it with ordinary pliers and solder it to be sure), we assemble a circuit that repeats the layout of a standard flexible printed circuit board. To be sure, the terminals can be insulated with heat-shrinkable tubing, but in principle this is not necessary - the panel on which the cartridges are mounted is plastic. We solder our block to the ends of the wires.
This block will connect the rear light to the on-board network
We solder the mating part of the block to the power supply harness of the lights, having first cut off the old one. We solder it, not twist it together. The twist will oxidize in a week, and problems will begin again - sometimes it burns, sometimes it doesn’t. We insulate the solder joint with heat shrink or cotton (black rag) tape. PVC electrical tape is an extremely bad option. It can unfold over time. This kind of isolation is no good.
Everything is ready, you can connect and check
We admire our work for a couple of minutes, insert the lamps, connect them, check them. Is everything working as expected? We assemble the lantern and connect it.
The flashlight is in place, all problems are solved permanently LED analog P21W
⇡#Brands and “China”
But it’s not for nothing that they say that the miser pays twice: it was precisely these Chinese light bulbs that, unfortunately, did not suffer from good quality, and failed (and continue to fail) even earlier than other energy-saving ones. They could go out in a month or six months. And there are a lot of problems - complete chaos in the quality of light, complete unpredictability of the color temperature of light even in one batch. You could easily have been sent “cold” instead of the “warm white” you ordered, and the headache over replacing the product would have lasted for weeks.
LED lamp on E27 base without bulb
Regarding brands, we repeat, in terms of reliability it is too early to talk, too little time has passed since the cost of such lamps became cheaper and mass-produced, too little practical information has been accumulated. Here, apparently, you will also have to check everything from your own experience. For example, my experience says that IKEA sold excellent CFL lamps (albeit with a slow starter) that last up to seven years (in fact: tested on myself), and it is quite possible that the Swedish concern orders LED lamps that are no worse. And, of course, the aforementioned OSRAM and Philips.
Russian manufacturers should not be neglected: recently, individual companies have ensured high stability of their products and thus demonstrate significant interest in increasing customer confidence. Over time, we will definitely return to this topic and try to study LED light bulbs from various domestic companies in more detail.
Russian LED lamps "Era"
To summarize, we can summarize the following. Of course, even now the transition to LED lamps is already economically profitable (unlike last year), their cost is already more or less acceptable, and the price/quality balance, as usual, is something everyone decides for themselves. However, final, more or less reliable statistics on the reliability of LED lamps from different manufacturers will have to wait.
Malfunctions and their elimination (rear and front dimensions)
Now we just have to figure out why such problems occur and how to solve them, for example, how to replace a side lamp on a VAZ 2114 in any part of the car. So, first of all, let’s figure out why the lights don’t light up and what reasons there could be for this:
- No voltage on headlights;
- The lamps are burnt out;
- The fuse has blown;
- The fuse box has failed;
- The button to turn on the lights is broken.
So, now we need to understand each specific option in more detail, for example, why the left rear light does not light up. The first and most logical reason is that the lamp simply expired and burned out, just as happens with ordinary household light bulbs. Now it needs to be replaced; this is done in the same way in all parts of the car:
- First you need to find where the headlight housing or collar housing is located from the inside and remove the protective cover; on the VAZ 2114 it is clearly written on it how this is done. Everything will come out together with the base;
- Now you need to find the size in the base and carefully pull it out;
- We take out the lamp, it is simply inserted here with a latch;
- We insert the new one so that it clicks and assemble everything in the reverse order.
As for the fuses, if the rear right indicator light does not light, then in order to do without special tools and diagnose the cause, you just need to replace the suspicious fuse with a new one and see if the situation improves. If the lamps light up, then it was the problem, but if not, then you will have to look for the cause further. The tail light is always off. A very weak point is a design flaw in the contact group in the headlight.
To understand why the rear lights on a VAZ 2114 don’t light up, you need to look at the car’s electrical circuit; power to the lights goes along with the headlights, and if they don’t light up only at the front or rear, then it’s the wiring. It will have to be checked, but without the special knowledge of an electrician, it is unlikely that you will be able to find an open circuit or some other reason on your own. But if the right indicator light on a VAZ 2114 or only the left one does not light up, then it’s all a matter of fuses, replacing them is simple - take out the old ones and insert new ones in the same place. Checking the button is also quite simple - you need to remove it from the panel and short-circuit the wires; if the lamps light up, then it’s the problem. You will need to find a new button that will fit there and install it.
Procedure for installing new light bulbs
- If there are faults in a particular lamp, the first step is to unscrew the non-working socket where it was located.
- Unscrew it counterclockwise, being careful.
- When the socket is in your hand, carefully remove the lamp so as not to break it.
- Next, we insert new lamps or LEDs in its place, strictly observing the polarity.
Please note that the shape of LED lamps is square, and since it differs from ordinary light bulbs, the excess simply needs to be sanded off.
- After all the new lamps are installed in place, we check their functionality by connecting the wire block to the instrument panel without first fixing it.
- When everything is checked and working, you can reassemble everything in reverse order, remembering to tighten each bolt securely.
Dashboard functionality
The instrument panel installed in the vehicle will allow the driver to see a lot of useful information, monitor the main systems of the vehicle, as well as timely diagnose and repair faults. For example, light bulbs in a VAZ-2114 may come on for the following reasons:
- lack of battery charging;
- lack of fuel in the tank;
- decrease in oil pressure;
- excessive amount of water in the filter;
- problems with the fuel system;
- The handbrake is stuck;
- problems with the motor system and so on.
From all this it is clear that the lamps on the panel allow you to identify problems with the car, and if they themselves do not work, then an important breakdown can easily be missed, which can not only reduce the service life of your VAZ-2114, but also cause an accident
It is for this reason that when malfunctions are detected, it is very important to change the lamps in a timely manner (they cannot be repaired)
Types of light bulbs
Today, lamps for the VAZ-2114 dashboard are offered in many different variations, from a classic and more affordable solution to improved versions that make the atmosphere in the car more expressive. At the same time, professionals recommend installing LED bulbs on the instrument panel, because they significantly decorate the appearance of the interior.
Among the currently most popular options available for the VAZ model 2114 are the following:
- LED SM-T5 (white, blue or red) and SM-T5-cap-super (white);
- SMD LED modules with increased brightness;
- halogen lamps from Philip or Osram.
The indicated light bulbs for the VAZ 2114 instrument panel are quite low in cost, and you can replace them yourself without a lot of time.
What and how can you change the standard lights?
The easiest way is to change the appearance of your car - replacing the light fixtures with more original ones. The range of flashlights for the VAZ 2114, of course, is not particularly wide, but there is plenty to choose from. And the simple way is because all tuning comes down to “removing the standard ones, installing the purchased ones.” Let's wander around the shops and see what we can find for our VAZ 2114.
Osvar flashlights are the most popular option among car enthusiasts. They are relatively inexpensive and finding them is not a problem. The only thing is that the manufacturer uses ordinary light bulbs in it, but if desired, you can replace them with LED ones yourself. Although for most car owners this is not relevant.
Tail light “Osvar” on VAZ 2114
Skyline style. Also a “lamp” option, but it looks completely different.
Tail light Skyline style for VAZ 2114
ProSport RS-02020. This is already an LED option. True, the light bulbs responsible for the different signals in them are clearly not in their places, which may not please other road users, and the traffic police inspector will definitely not understand you.
Tail light ProSport RS-02020
ProSport RS-02020-T. The same “ProSport” with mixed up signals, but with tinted windows. A real gift to the traffic police!
Tail light ProSport RS-02020 with tinted glass
ProSport RS-07490. Option with light bulbs. Same manufacturer, same misunderstanding - the turn signal is located between the marker and the brake light. You can't make it up on purpose.
Tail light ProSport RS-07490
"Zigzag" 0013L. This LED miracle is offered by manufacturers from Togliatti, the birthplace of the VAZ car. Here at least the signals are more or less in place.
Tail light "Zigzag" 0013L
We'll finish our shopping trip here, although there are still many miracles there. Just watch a short video about a flashlight with red turn signals and move on to the next point.
How to remove tail lights
It's time to figure out how to remove the stock lights to install new ones. To work, you will need an 8 socket wrench with an extension and a Phillips screwdriver. We open the trunk door, use a Phillips screwdriver to dismantle part of the upholstery so that, by bending it, you can gain access to the entire rear part of the lamp.
The upholstery is attached to the body using self-tapping screws
We find 4 nuts around the perimeter of the light fixture and unscrew them with a wrench
The lamp is secured with four nuts
Carefully remove the connector by pulling it towards the central axle of the car. We don’t swing it, we just pull it, trying not to twist it!
Removing the power supply
Pull the light from the outside of the car toward you and remove it.
Now the lamp can be removed
We install the new light fixture in the reverse order.
CIRCUIT BREAKERS
To protect against voltage surges and other influences on the electrical component, a side light fuse is also included in the circuit along with the light bulbs and the button. At the moment of overvoltage, it burns out, but due to this everything else in the circuit remains intact. It is usually located in the engine compartment, where in the VAZ 2114 there is a place for a whole fuse block for all electrical networks in the car.
Article on the topic: Replacing the engine mount on a VAZ 2109
Since all of them have markings, we can easily find the parts that we need: F10 is responsible for the safety of the lamps on the left side of the car, and F11 for the right. Thus, in the event of a failure of one half, for example, when the rear left indicator does not light up, the right side of the car will remain operational and will do its job. And if the size fuse blows, then replacing it is, in principle, quite simple - this is considered the simplest malfunction of this kind.
Diagram and location of fuses on the VAZ 2114 (also on 2113 and 2115)
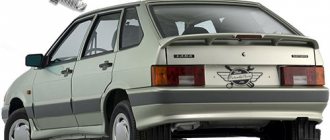
AvtoVAZ stopped producing Lada Samara
AvtoVAZ stopped producing Lada Samara
27 November, Wednesday,
Whatever you were, that's how you remain - this look is perfectly suited for the four-wheeled miracle of technology called Lada Samara from AvtoVAZ. The Russian automaker AvtoVAZ has finally announced the cessation of production of another outdated model of the car - Lada. “Fourteenth” will leave the assembly line in December. AvtoVAZ says nothing about the burial ceremony; may the old Lada Samara rest in peace.
“Instead of the Lada Samara hatchback, starting this year, the auto giant will begin producing the Lada Granta hatchback in Izhevsk,” the automaker’s press service reported about this event. Production of the Lada Samara will end with a five-door hatchback. Other versions of the car left the assembly line earlier.
Thus, production of the Lada Samara sedan (VAZ-2115) was discontinued at the end of the year. And production of the three-door hatchback Lada Samara (VAZ-2113) stopped in September of this year. Completion of the assembly of this model will be the next step towards a complete update of the model range of the domestic company. But on the roads in the regions, these iron “horses” will delight the eye of a passerby or a motorist passing by for a long time.
It should be noted that at the end of last year, sales of Lada Samara in Russia amounted to 67,971 cars. In October of this year, sales of the model fell by 15% compared to the same period last year, to 3,661 cars. In total, since the beginning of the year, Samara sales have decreased by 36%, to 35,143 cars, PRIME reports.
AvtoVAZ is one of the largest enterprises in the automotive industry in Eastern Europe. Production capacities allow the production of over 800 thousand cars per year. The automaker produced 718 thousand cars in a year. Lada sales decreased by 4.1% compared to the previous year - to 608.2 thousand units.
The updated Lada Priora should hit the market in the fall of this year. In September, budget versions of the new generation Lada Kalina went on sale. Next year, the Lada Granta is expected to appear in a hatchback body. Also, the Tolyatti Automobile Plant may release a crossover based on the Lada Kalina and a hybrid version of one of its models.
R93 – Auto portal of the Krasnodar region: Auto news
Main causes of malfunctions
Why might the tail light not work? There are quite a few reasons, but we will list them all:
- the light bulb burned out;
- fuse is blown;
- wiring fault;
- faulty connecting blocks;
- flashlight malfunction;
- malfunction of the control relay in the mounting block;
- Side light switch malfunction.
The most common malfunction of the above, of course, is the failure of the side light bulb. In this case, it is enough to replace it. How to do it?
How to change tail light bulbs
Replacing lamps in the rear light of a VAZ 2114 is extremely simple and does not require any tools. We open the trunk lid and opposite the lantern we find this pocket on the upholstery.
It's on Velcro. Just pull the edge and open it. In front of us is the back of the flashlight and the power supply.
Carefully remove the block by simply pulling it out.
Removed power supply
There are three latches on the lantern: on the top, bottom and side.
We press them out and take out the board.
Removing the lantern
Place the board face up. The side light bulb is the smallest, marked with an arrow in the photo below.
Slightly recess the lamp, turn it counterclockwise and pull it out of the socket. We install a new one in place of the burnt one, mount the board in place, connect the power supply, and close the pocket in the upholstery.
What to do if the lamps are constantly on?
Some car enthusiasts are faced with the problem of chaotic starting of lamps that turn on regardless of reverse gear or burn in constant mode. Auto mechanics note several reasons for this situation:
- the connection of the power sensor and the wires from the lamps led to a short circuit;
- frayed wire;
- The sensor is stuck in a closed state.
For cars operating on an automatic transmission system or CVT gearbox, breakdowns can be caused by a number of other reasons. Repairing the lighting here will be a little more difficult. This is due to the presence of a gear controller. Therefore, it is safer to contact a specialist workshop.
Electrical wiring faults
One of the reasons why LED lamps glow is the natural aging of electrical wiring and the appearance of leaks through the insulation. This can cause tension to appear in completely unexpected places. In most cases it is small, but enough for the LED device to glow faintly.
Old aluminum wiring, laid in a hidden way, after 30 years of operation.
The insulation condition can be checked with a megger (checking with a multimeter in most cases is a waste of time due to the low measuring voltage). For a 220 V network, the insulation resistance should not be less than 0.5 MOhm. But even if a deterioration in the condition of the insulation is detected, often nothing can be done - it is impossible to accurately determine the location of the damage. And since the electrical wiring in residential and public buildings is hidden, its complete replacement is carried out during a major renovation of the premises.
Effect of capacitive conductivity
It must be taken into account that the leak may be capacitive in nature. In this case, one plate of the capacitor is a wire, the other is a second wire, a grounded conductive element (fittings), a damp wall, etc. It is much more difficult to detect such a fault with a megger without experience. It must be borne in mind that this problem cannot be solved even by completely replacing the electrical wiring. The capacity will not go away from this, and moreover, it directly depends on the quality of the insulation.
The influence of parasitic capacitance between the neutral and phase wires.
Also, stray capacitance can cause unauthorized glow if there is voltage on the neutral wire relative to ground. Its source is voltage asymmetry in phases, characteristic of end-user networks (220 V). Through the interwire capacitance, this voltage creates a small current, at which the LED lamp lights dimly even when turned off.
And we should also note the influence of interference. There is a situation when another phase wire is laid parallel to a phase wire over a long distance and at a short distance. If a sufficiently powerful load is connected to it, the current flowing through such a conductor creates an electromagnetic field that induces voltage in the LED power wire. It may be enough to constantly or periodically light the LED.
How to check the functionality of the frog?
The contacts from the sensor are removed and clamped together, after which the ignition is turned on. If there is light, then you need to replace the sensor. And if not, then the problem is in the circuit, but the frog is fine.
When the reverse lamp does not light up, it is often necessary to replace the old sensor with a new one.
What should be done:
- place the car on the overpass;
- install the handbrake;
- remove protection;
- remove the contacts of the old sensor;
- place the container and remove the frog;
- Unscrew the faulty device and replace it with a new one.
Then let it sit for a while and check the oil in the gearbox. Fill it up to the required level and put the entire structure back together.
Attention, the price of a new sensor is within 250 rubles. The next option, if the reverse light does not light up on a VAZ 2114, then the problem is in the light bulb
To replace it, you need to disconnect the wire block, remove the plastic contact panel from the flashlight, while squeezing the side fixing elements
The next option is if the reverse light does not light up on a VAZ 2114, then the problem is in the light bulb. To replace it, you need to disconnect the wiring block, remove the plastic contact panel from the flashlight, while squeezing the side fixing elements.
We rotate the light bulb counterclockwise and, pressing slightly on the socket, remove it. Now we install a new one, check the contacts and put the entire unit back together.
We visually assess the condition of the wiring; if necessary, we strip the wires, check for breaks using the ringing method, and check the contacts on the headlight film.
Why aren't the reverse lights on yet?
A blown fuse is a common cause, which means you need to know exactly where they are located and how they change.
The products are located in the fuse box, which can be found under the steering wheel on the left side. It can be easily removed with just one touch of your hand. There is no need to unscrew anything.
When the reverse light does not light, you need to check the condition of the fuses. How to do this? You can visually look at the fuses and determine the breakdown - the integrity of the middle part.
But the burnt jumper is not always so clearly visible, so you need to turn on the dimensions and, without removing the fuses, check the voltage; if one end is on and the other is not, the device is faulty.
To replace the product, you don’t need tools, just take tweezers, remove the old unit and install a working one.
Key conclusions and recommendations from professionals
You can find out where the VAZ 2114 reverse sensor is located very simply by looking up at the gearbox, and if the driver cannot get under the car, then the hood opens and thus the condition of the frog is checked.
To completely verify that the brake gearbox is damaged, you need to turn the wheels to the left and look at the gearbox from the driver’s side. There is a protection with contacts inside on the side, remove it, close the contacts on the DZH and turn on the ignition. When everything is in order, a white light appears.
If not, then use a tester to measure the voltage on ground and on the orange wire that comes from the frog. If voltage is present, then we check the flashlight board itself and clean the contacts.
There is also a chance that the contact between the frog and the fuse block has “frozen”; you need to find it and check its condition.
This is why the reverse light on the VAZ 2114 does not light up, as you can see, there can be many reasons, and for the motorist it is important to carefully check the integrity of all frog mechanisms, identify the malfunction and repair the functionality of the lighting. Have a nice journey, good fellow travelers and a smooth road!
Have a nice journey, good fellow travelers and a smooth road!
Where does it short out most often?
I will try to make your task a little easier in finding the location of the short circuit, if, of course, this is appropriate in your case. But, if all the methods described above did not bring a positive result, then this is the only option left. The wires that go to the license plate lights, as well as to the trunk roof, most often fray and short out there. This wiring needs to be treated with electrical tape, and nothing else.
Another problem area is the wiring on the back of the fender under the carpet. There, too, you need to look at everything carefully, and, if necessary, wrap it with electrical tape. Yes, there are cases when both light bulbs burn out, but drivers refuse to believe it, checking everything but the lights themselves. Start with them. That's all, good luck!
Which modification is better?
H4 halogen lamps installed on the VAZ-2114 are divided into:
- Standard.
- Enhanced light beam.
- Improved visual overview.
- All-weather.
- Increased power.
They are two incandescent filaments for low and high beam lighting. Lamps with a power of 60/55W are considered optimal among them.
Standard H4 lamp
Such lamps are mounted on every car of this VAZ model.
Improved visual overview
Illuminated with white light familiar to the eye. Consuming the usual 55 W, they illuminate brighter, despite the bluish tint of the bulb.
They provide an excellent background light on snowy and dry roads. On a wet road it is better to use yellow fog lights. Doesn't blind oncoming cars. The service life of these does not differ from standard ones, despite the inflated price
. Manufacturers prefer lamps with a yellow or bluish tint.
All weather
All-weather yellow lamp
The lamps are specially coated with a yellowish tint, which allows the light to achieve the contrast of the area in bad weather, especially cloudy (foggy). Yellow light has less reflection.
Increased power
They are in demand among owners who do not particularly know the “subject of the dispute.”
High-power lamps lead to consequences such as blinding an oncoming car and causing an accident.
About lamps
The 2114 will accept several types of lamps, such as halogen, incandescent and even LED.
It is prohibited to install lamps that are not specified by the manufacturer. For example, when installing xenon in headlights that are designed for halogen lamps, the beam of light from the xenon lamp will not be limited and will thus blind oncoming cars.
Installation of lamps not installed by the manufacturer may entail administrative penalties in the form of a fine.
Rear lights on VAZ 2114 do not light up
When both side light bulbs on one side of a car, left or right, fail, the reason is always clear. The fact is that the safety block contains one fuse responsible for each side. It is necessary to replace the corresponding fuse and the problem will be eliminated. At the same time, there is a constant discussion on the Internet on forums about whether the front lights on a VAZ 2114 don’t light up or why the rear lights on a VAZ 2114 don’t light up. Quite a lot of opinions and different experiences are expressed. If we summarize all this, we can draw the following conclusions.
The side lights of the rear hemisphere are located in the rear light block, in which a generally recognized disease is constant oxidation and corrosion of the contact groups. For preventive purposes, it is necessary to constantly monitor this board.
The same is possible on the contacts of the front headlights. Nevertheless, from practice there are cases when, when checking the performance of light bulbs, it turned out that they burned out on both sides at the same time (maybe one by one, but the driver did not notice this in time). At the same time, the amateur master checks everything, just not the light bulbs, claiming that the probability of simultaneous failure of the lamps is absolutely minimal. But auto electricians first check the lamp and contact.
When driving a VAZ-2115 passenger car, regardless of the time of day, the side lights, as well as the headlights, must be turned on. This is a requirement of the Russian Traffic Rules that every driver must comply with. Therefore, the electrical circuits of side lights and brake lights operate through the K4 lamp control relay, the task of which is to warn the driver with a light and sound signal that at least one of the lamps of the above listed electrical circuits is not turned on. This will force the driver to get out of the car and determine which side light lamp is not on and begin to search for the problem.
On a VAZ-2115 car, the side light lamps in the rear lights often stop working. This is due to the occurrence of leaks in the lamps, as a result of which moisture gets inside, which leads to oxidation of the plug of the block or the track on the flexible circuit board, through which voltage is supplied to the lamp contacts.
There are cases when, after moving the exterior lighting switch to the first position, not a single side light lamp lights up. The search for such a malfunction will have to begin by checking the presence of voltage at terminal 1 of this switch. It should be +12 volts, even with the ignition off.
If this terminal is de-energized, then you will need to sequentially check the voltage at terminal 6 of connector X8, and then at terminal 6 of connector X1 of the mounting block. If there is voltage at these terminals, the culprit for the lack of power at terminal 1 of the outdoor lighting switch will be the pink wire connecting it to terminal 6 of connector X1 of the mounting block.
Well, if there is voltage at terminal 1 of the external lighting switch, the culprit for the side lamps not turning on may be the switch itself or the K4 lamp control relay. To make sure that the switch is out of order, you need to move it to the first on position and check for voltage at its terminal 2. If there is no voltage at this terminal, then the outdoor lighting switch will have to be replaced.
Lada Kalina fuel pump relay where is the photo
If fuse F10 (7.5 A) blows, the front and rear side lamps on the left side of the VAZ-2115 car will not light up, and if fuse F11 (7.5 A) fails, both side light bulbs on the right side of this vehicle will not light up. car. The blown fuse F10 can be determined instantly, without even looking into the mounting block, since the backlight lamps for switches, heater control levers, cigarette lighter, and ashtray immediately turn off, because it also protects these electrical circuits.
When driving at night or in fog, side lights are indispensable, especially if they are located at the rear. When moving or while parked, they show other motorists where your vehicle is. If the rear lights on a VAZ-2114 car do not light up, then it will not be difficult to do the repair yourself. To do this, just find out the reason and follow the instructions below, or watch the video.
Scheme for switching on headlights, side lights and turn signals for VAZ-2113, 2114 and 2115
Headlight switching diagram for VAZ-2113, 2114 and 2115
Scheme for switching on headlights and fog lights:
1 – headlights; 2 – mounting block; 3 – headlight switch; 4 – ignition switch; 5 – external lighting switch (fragment); 6 – fog lamps in the internal rear lights; 7 – fog light switch with control lamp; 8 – indicator lamp for high beam headlights in the instrument cluster; K8 – headlight high beam relay; K9 – relay for low beam headlights; A - the order of conditional numbering of plugs in the headlight block; B - to power supplies
Replacing side light bulbs on a VAZ 2114
Removing and replacing front marker lamps.
The replacement process involves sequentially performing the following steps:
- the hood opens;
- the marker lamp socket is removed;
- The lamp is being replaced;
- The socket with the new lamp is installed in its original place.
Replacing the side light bulb:
This lamp is replaced very simply, in order for you to be able to remove the old lamp, you will first need to open the hood and remove the same plastic cover that was discussed just above, in the section “Replacing the low and high beam lamp”, so first remove this completely roof and simply pulling the wires that fit the side light lamp, pull it out of the hole in which it is located and then, holding the lamp itself with your hand, simply remove it from the hole, thereby you will remove it from the chamber, as shown in the small photo slightly below:
Note! In some cars of the Samara family, the optics are slightly changed, so on some cars there are side light headlights that are held simply by tension, and there are those that are specifically fixed in the chamber, those that are held by tension do not need to be turned anywhere, you just need to pull it by force it will come out (This lamp is shown in the small photo above), but those that are specifically attached to the chamber must be turned counterclockwise and only then removed, so before pulling it, try turning it counterclockwise!
When should the side lights be turned on?
The driver is required to turn on the lights whenever there is poor visibility on the road, as well as when driving through a tunnel.
Conditions for poor visibility include:
- heavy rain/snow;
- fog;
- dusk/predawn.
It is very important to turn on your side lights when driving in fog. At the slightest sign of its appearance (especially in the dark), you need to turn on the dimensions, indicating the boundaries of your own vehicle
If you are forced to stop on the side of the road in conditions of insufficient visibility, you should definitely turn on the side lights, and in the dark, also turn on the emergency lights. Such actions will protect you and help other road users not to get into a situation where a car suddenly appears out of the fog/darkness in front of them.
PRICES OF COMPONENTS
There is also a separate section for prices for all the parts that may be needed when repairing this part of the car, because if the side lights on a VAZ 2114 or the fuses have blown, they will still have to be replaced with new ones. In any case, all the components are quite cheap, all we might need:
- Marker lamp;
- Fuse;
- Power button;
- A whole fuse block.
Today, an ordinary white light bulb costs up to 30 rubles; of course, the price depends on the individual pricing policy of a particular seller. Individual fuses can be selected for up to 50 rubles, unless, of course, you want to install a higher quality option. Button, if you look for exactly the same one as the original one, you will have to pay up to 300 rubles. In some situations, more serious problems may arise and you will have to change the entire unit, this is quite an expensive proposition, together with all the wires it will cost up to 1000 rubles.
TECHNICAL DEVICE
In some situations, it happens that the rear lights of a VAZ 2114 do not light up, in other cases only the front ones, but their structure and operating principle are identical. The side lights are located in the turn signal housing, while the front and rear lights find a place in the headlight housing in the same area. There is a special button for the side lights on the dashboard, which allows you to control them; next to it there are headlight switches and other lighting. When the driver touches this button and turns them on, at the same time the corresponding light on the dashboard lights up, which will not allow the driver to forget about the action taken.
How to troubleshoot?
The most common reasons that the brake light on the VAZ 2114 does not work are the following factors:
- Fuse failure.
- Broken wires in one of the sections of the circuit.
- Limit switch faulty.
- Bulbs burn out.
- Oxidation of contacts in lamp sockets.
- Damage to the contact board.
The most common and at the same time the most easily removable of the above reasons is a blown fuse. To identify such a malfunction, you need to examine the fuse box. A 10-amp fuse F3 is responsible for the brake lights, which also protects the ignition switch, computer and interior lighting.
Malfunctions in the operation of the latter may also indicate a malfunction of the stop fuse (and in this case, troubleshooting should begin with the block). If it turns out that the fuse has blown, then you should replace it with a new, similar one.
The problem may also be in the fuse block itself - sometimes the tracks on its printed circuit boards burn out or the contact legs oxidize. In order to check its serviceability, it is enough to measure the voltage at the contacts of the newly installed fuse.
Another common reason why the brakes of the VAZ 2114 do not light up is a malfunction of the limit switch that turns on the signals. It is located on the brake pedal bracket and is always in working order, regardless of whether the car engine is turned on or not.
It works automatically when you press the pedal. In order to check its serviceability, it is enough to see whether the power supply is suitable for its contacts (on one of the contacts the presence of power must be constant). In addition, if you press the pedal and thus turn on the limit switch, you can measure the voltage at its connectors.
If there is no current at the switch contacts, you should check the wire going to the limit switch from the fuse box. If the test shows that the wire is faulty (there is a break), then it should be replaced with a new one and the test repeated.
Otherwise (if everything is in order with the wire), you should disconnect it (as well as the other wire suitable for the second connector) from the switch and connect directly. If after such an operation the brake light works, then the limit switch itself has failed and should be replaced.
Reasons for failure of dashboard lights
There may be several reasons why the instrument panel lamps are out of order:
- The incandescent lamps burned out , or in the case of LED analogues, the tracks stopped working.
- A malfunction has occurred in the circuit (a break has occurred or the contacts have oxidized - approx.).
- The fuse box has failed.
- on the instrument panel contact board.
- There is a short circuit to ground .
In order to understand this problem more closely, it is necessary to dismantle the instrument panel.
Removing the dashboard apron
To get to the instrument panel, you need to carry out some preparatory work, which will allow you to easily access the main device:
- First, remove the negative terminal from the battery.
- Then, unscrew all the screws securing the torpedo trim on the right leg on the driver's side, and then do exactly the same procedure with the trim on the passenger side.
- Next, for ease of dismantling, release the gearshift lever housing from its fixation point.
- Unscrew one screw on each side of the tunnel, and then another one, which is located directly under the ashtray for the rear passengers.
- Now that the tunnel is not holding anything, we move it back a little.
- The next step is to dismantle the “apron” of the torpedo, and to do this, unscrew the 4 bolts that secure it at the steering column and the remaining ones that hold it at the edges of the center console, do not forget to remove the plug on the panel and unscrew the fixing bolt.
- Disconnect the block with the wires of the cigarette lighter, radio, on-board computer (if equipped - approx.) and buttons.
- When nothing else is in the way, dismantle the “apron” and put it aside.
Why don't the lights light up?
Malfunctions that occur in the operation of side lights worry every motorist because it makes it difficult to use the car at night. After all, the traffic rules clearly state the requirements when stopping the car and turning off the ignition at night to indicate the car with illuminated side lights. Failures in the side light circuit can manifest themselves in different ways.
One of the side light bulbs does not light up. The most likely cause is a burned out light bulb. Less common problems with poor contact are oxidation or poor connection. And very rarely - a breakdown in the wiring to the contact group of this light bulb. Although rare, this also happens. If the light bulb burns out, it needs to be replaced. To do this you need:
a) when replacing the marker lamp in the front headlight:
- turn off all exterior lights and open the hood
— unscrew the screws securing the plastic casing on the headlight with inoperative headlights
— having pulled out the socket with the burnt-out light bulb, remove it and replace it with a working one, without needing to disconnect the block with wires
- install the cartridge and casing in place
Front side lights
b) when replacing the side light bulb in the rear light unit:
- turn off the lights and open the trunk
— remove the decorative upholstery and pull out the block with wires from the contact group
- squeeze the side clamps and pull out the contact panel for the rear light with the non-working bulb
- remove the burnt out lamp by pressing it and turning it counterclockwise
- install a new lighting fixture and install the panel in the reverse order
Rear marker lights of VAZ 2114
- The side lights button does not turn on (the indicator lamp on the button does not light up). The reason is mainly due to oxidized contacts, which must be cleaned and washed with alcohol by removing the key block from the socket. Fuse F10 may fail, but then the sidebar lamps on the left side should not light up. On a VAZ 2114, an oversized fuse does not blow out very often, especially since wide plastic fuses with good contacts are currently installed in the mounting block.
- Blinking when the lights are on or dim lights. The main reason for such manifestations is the oxidation of contacts in the chain. First of all, you need to check and clean the contact group in the mounting block in the fuse circuit. The same is possible in contact groups of specific side light lamps. Do not forget that the machine is operated in conditions of high humidity and oxidation is a normal physical phenomenon that must be taken into account.
- The headlight fuse is constantly on. The reason must be sought in the mounting block. Possibly bad contacts in the fuse contact group.
Types of lamps used in the 2115 car
| Name | Designation according to GOST | EEC designation | Lamp power. W | Number in photo |
| Headlight high and low beam side light turn signal | AKG12-60+55-1 A12-4-1 A12-21-3 | H4 T4W P21W | 60/55 4 21 | 1 6 3 |
| Rear exterior lamp, side light and brake lights | A12-21-3 A12-21+S | P21W P21/5W | 21 21/5 | 3 4 |
| Rear interior reversing light fog light | А12-21-3 А12-21-3 | P21W P21W | 21 21 | 3 3 |
| Side turn signal | A12-5-2 | W5W | 5 | 7 |
| Anti-fog headlight | AKP2-55-1 | HI | 55 | 2 |
| License plate light | AC 12-5-1 | C5W | 5 | 5 |
| Lower glove box lighting | AC 12*5*1 | C5W | 5 | 5 |
| Central interior lamp | AS 12-5-1 | C5W | 5 | 5 |
| Front interior lamp | A12-4-1 | T4W | 4 | 6 |
| Ashtray light | A12-1.2 | W2x4.6d | 1.2 | 8 |
| Illuminated symbols of key switches and their indicators | ASMN12-0.55 | _ | 0.55 | 9 |
| Instrument cluster and on-board control system unit | A12-1.2 | W2x4.6d | 1,2 | 8 |
| Trunk light | AS 12-5-1 | C5W | 5 | 5 |
| Cigarette lighter socket | A12-4-1 | T4W | 4 | 6 |
You might be interested in reading:
- Opel Astra h low beam lamps: Selection and replacement of low beam lamps H7 on an Opel Astra H Replacing a low beam lamp in an Opel Astra H Hatchback Every car driver knows how much driving comfort should be traced, that...
- Overlays for arches on a VAZ 2115 - how to choose, price, replacement I decided to share my experience of installing overlays on wing arches. When I decided to do this, I found almost nothing useful on the Internet...
- What is better than the VAZ 2115 or the VAZ 2112? What is the difference between the VAZ 2115 and the VAZ 2112? There are few differences between these two cars. The first and most noticeable thing is the body shape and...
- What improvements can be made to the VAZ 2115 Engine modification You won’t be able to defeat a prehistoric engine with a little blood. This requires an integrated and thoughtful approach. It doesn’t matter at all whether the injector is installed on...
- The oil pressure light came on: what should I do - call a tow truck or add oil (which one)? The “first moves” in such a game are known - we turn off the road anywhere to the side. Then we climb under the hood and take out...
Tips for motorists
According to these Rules of the Road, on any moving vehicle, including the VAZ-2114, the headlights must be turned on, along with which the side lights must also be turned on. In addition, they must be turned on when the car is stopped or parked on the road in the dark and in conditions of insufficient visibility. Therefore, they must always be in good working order.
The electrical circuit of the side lights of the VAZ-2114 is not so complicated and, if desired, any self-respecting driver will be able to find a malfunction associated with the failure of its operation. To do this, you need to know that terminal No. 1 of the side light switch is always supplied with positive voltage from the battery, bypassing the ignition switch. If the side light switch key is in the on position, then electric current flows to two fuses F10 (7.5A) and F11 (7.5A), which respectively protect the electrical circuits of the left (F10) and right (F11) side lights. The further path of the current lies to relay K4 (lamp health monitoring relay), and then to the front and rear side lamps.
When only one of the side light bulbs does not light, then we check whether it has burnt out. If it burns out, then we replace it with a new one of similar power, but if it is intact, then we will have to look at the condition of the contacts of the cartridge in which it is inserted. In the rear lights, due to moisture getting into them, oxidation is possible, both of the tracks and the pads through which voltage is transmitted to the terminals of the side light lamp.
Another reason why the headlight lamp does not light up may be the lack of voltage at the corresponding terminals of the rear light blocks or headlight blocks. Then, using a tester, you will have to ring the corresponding wires:
- The right front marker does not light up (check the yellow wire from terminal No. 4 of the headlight to terminal No. 8, block X6 of the mounting block);
- The right rear light does not light up (check the yellow wire from the right rear light block to terminal No. 9, block X9 of the mounting block);
- the left front marker does not light up (check the yellow-black wire from terminal No. 4 of the headlight to terminal No. 10, block X6 of the mounting block);
- the left rear light does not light up (check the yellow-black wire from the right rear light block to terminal No. 17, block X9 of the mounting block);
If both lamps on the right or left side of the car stop working, then troubleshooting should begin by checking the corresponding fuses located in the mounting block under the hood of the VAZ-2114 car, since the simultaneous burnout of two dimensional lamps at once is unlikely. The blowing of fuse F10 is very easy to determine, since it will lead to the cessation of combustion of the backlight lamps of the instrument switches. Also, the reason for turning off the side lamps may be the failure of relay K4.
3 comments
When you press the brake pedal, the rear turn signals turn on. When you turn on the turn signals, the rear lights begin to switch and shine like garlands?
When connecting to the board in the chip (connector), the wires were not connected correctly. And the chip itself is apparently not original, but was attached by someone illiterately, despite the diagrams. You have the wire that is responsible for the turns - in place of the dimensions. It is easy to treat. You need to transfer the wires from the wiring to the chip. You need to find the ground on the rear stopper board (there is a green stripe on the board that runs under each light bulb socket); see which wire is connected through the chip and connect to the black wire from the rear wiring. Then we take the wire on the chip below and connect it in the following sequence: 1 wire in the chip with black (ground), 2 - blue (turn signal), 3 - red (stopak), 4 - yellow (marker)
On the right side, the dimensions do not light up, the fuses are intact, and the light bulbs are intact. Could it be K4?
Guys, tell me, the lights on the left side do not light up! The fuse is intact!
Lada 2114 2010, 81 l. With. - breakdown
Comments 11
Participate in the discussion can only registered users.
If the problem is in the relay and it needs to be replaced, will the diodes work or will they flash again in a month? is there any info?
Sorry. There is not. I didn't install them again... I installed orange from the repeater
Same problem, I installed the diodes, after a month the right one started blinking, I thought the diode had gone bad, I bought a new one and installed it, now the left one is blinking.
Yesterday the left front marker went out (the lamp is intact), but I need to go to the maintenance urgently! I connected the wires from the right block - now both do not light, I removed the wires that I connected, still both do not light. The fronts are intact, the lamps too. I measured it with a multimeter - there is no voltage on the socket and there is no voltage on the block either. The middle one is on, the rear lights are on. I feel the same sadness, I’ll try to change this relay on Monday.
Yes, relyushka is a common problem.
Yes, she was