Dear customers, in order to avoid errors when sending connector 1118-6512010РХ for connecting the VAZ-1118 electrical package control unit with wires, in the “Comment” line indicate which equipment is Standard, Norm, Luxury, your car model, year of manufacture.
On cars of the VAZ 2110-12 family with a Europanel, Lada Kalina, 2 types of non-interchangeable (by wiring) glass unit control controller 1118-6512010 and 11180-3763040 can be installed.
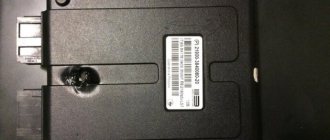
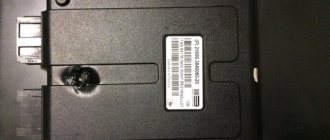
The electrical package control unit (comfort unit) VAZ-1118 “NORMA” ITELMA 11180-6512010-00 has one 25-pin connection connector, 1118-3763040 (1118-3763040-10) has two connectors.
The electrical package control unit 1118-6512010 has one 25-pin connection connector, suitable only for the Lada Kalina “Norma” and VAZ 2110-11-12 with a Europanel.
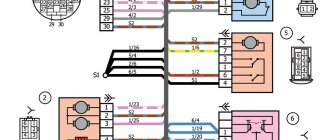
Contact carrier 1118-6512010РХ with 25 contacts assembled with wires for connecting the electrical package control unit (comfort unit) ITELMA 11180-6512010-00 in cars of the tenth family, Lada Kalina / VAZ-1118 in the “NORMA” configuration, VAZ 2110-11-12 with europanel and their modifications. Can be used to make your own cable. The contacts are already crimped onto the wires (wire length 100 mm) and inserted into the connector according to the pinout, so they can be installed on the car.
Click to open
Connector 1118-6512010РХ for 25 terminals, assembled with wires, suitable for Electrical package control unit (comfort unit) ITELMA 11180-6512010-00 in Lada Kalina /VAZ-1118 in the “NORMA” configuration, VAZ 2110-11-12 with Europanel and their modifications.
The electrical package control unit 1118-6512010 is designed to perform the following functions:
— remote locking/unlocking of door locks with simultaneous activation/deactivation of the vehicle security mode;
— locking all doors by turning the key in the driver's door lock;
— locking/unlocking all doors using a button from inside the car;
— activation of the alarm system in case of violation of vehicle security zones;
— turn off the alarm remotely or after turning on the ignition with your key.
Ambient temperature from minus 40 to plus 45 °C;
Relative humidity of ambient air at a temperature of 27 °C 90%;
Atmospheric pressure from 84 to 106.7 kPa (from 630 to 800 mmHg);
The operating supply voltage range is from 9 to 15 V.
Replacement of connector 1118-6512010РХ assembled with wires for connecting the electrical package control unit (comfort unit) ITELMA 11180-6512010-00, in cars Lada Kalina / VAZ-1118 “NORMA” equipment, VAZ 2110-11-12 with Europanel and their modifications, can be done independently, without contacting specialized maintenance services.
Other article numbers of the product and its analogues in catalogues: 1118-6512010РХ.
VAZ 2110-11-12 (Europanel), VAZ 1117, VAZ 1118, VAZ 1118 “NORM” equipment.
Any breakdown is not the end of the world, but a completely solvable problem!
How to independently replace the connector for connecting the comfort unit in a car of the tenth VAZ family with a Europanel, Lada Kalina “Norma”.
With the online store Discounter AvtoAzbuka, repair costs will be minimal.
Just COMPARE and BE SURE.
Don't forget to share the information you find with your friends and acquaintances, because they may also need it - just click one of the social networking buttons located above.
A story about how I repaired the Norma electrical package control unit. It all started with the fact that the driver's door electric lock stopped closing, I've already encountered this more than once, the teeth in the drive itself were cut off. I drove like this for two weeks, closing the driver's door with the key. But at one point, all the locks stopped closing, either from the alarm or from manually pressing the button in the driver's door. I replaced the drive with a new one, but that didn't help. 1. I tried to retrain the key fob again, it has not responded to pressing the buttons on the key fob for a long time. The training was successful, the key fob began to respond to button presses, and the car was set to normal security. But the door locks did not respond to closing. 2. I got to block 1118-6512010 “Norma”, I saw an unpleasant thing, the alarm installers assembled everything by twisting, without soldering. The wires for opening and closing the doors, from the alarm system, are connected to the second and seventh contacts of the block; they were soldered directly to the board, but quite efficiently; two holes for the wires were broken out in the case. Contacts from the ISO connector are suitable for this connector for connecting music in the car.
3. I cut off wires No. 2 and No. 7 from the “Nor”, nothing has changed, the drives are silent, inside the “Norma” you can hear the relays clicking. 4. No voltage is supplied to pin 14, 17, 18. 5. I disassembled the “Norma”, removed all the relays from the board, checked them, they all turned out to be working. 6. When you press the door lock button, ground appears along the blue wire (Contact No. 4). 7. I applied power directly from the battery to contacts 14 and 17 - all the doors except the driver's door closed, I also applied to 14 and 18, the driver's door closed, i.e. Drive wiring is correct. All the manipulations performed showed that some SMD components on the board had failed, I examined the board under a magnifying glass and did not find anything burnt out. 8. I went shopping for the “Norma” block, found it only at the car market, the stores in our small town of Sepversk didn’t have it, one store offered to deliver it to order in two weeks. It cost me quite a budget - 2000 rubles. In the store I came across two types of “Norma” 1118-6512010 and 1118-6512010-01, I took the one I had without the “-01” at the end, does anyone know what the difference is between them? 9. I left the store, immediately picked up the block, closed the door with the key, all the locks worked as expected, first they all opened, then they all closed. That is, the block is working and my wiring, as I said, is also all working. 10. I tried to close it using my own key fob, but there was no reaction. I retrained the key, now this manipulation took place at the level of automation, although at first I forgot to unhook the end on the diagnostic connector leading to BC STATE Matrix (this is very important as they write on the Internet). After training, the key fob worked as normal, opening and closing the doors.
11. I pulled out two contacts from the ISO connector (for connecting musical equipment), inserted them into contacts 2 and 7, and soldered the “green-white” and “blue-white” alarms to them. As I understand it, the impulse to “Norma” is supplied with negative polarity, so the “blue-red” and “green-red” wires are screwed to ground. I closed the doors with the signal, everything worked as expected.
While I was fiddling with “Norma” I re-read a bunch of all sorts of material, I realized that it is not so difficult to replace the key in the immobilizer bypass with a simple chip, otherwise you have to carry a red (training) key there. To retrain the key, I had to remove the dashboard and climb into the immobilizer bypass.
Double-glazed window control unit “Norma” 1118 – 6512010 for VAZ 11183 “Kalina”
©Aktuator On cars of the Kalina family, 2 types of non-interchangeable (by wiring) glass control controller 1118 - 6512010 and 11180 - 3763040 can be installed. 1118 – 6512010 has one 25-pin connection connector, 1118 – 3763040 (1118 – 3763040 – 10) – two connectors.
Remote control system for double-glazed windows “norm” on a VAZ 11183, Kalina. Controls power windows and central door locking. When the connector is removed, the engine does not start; the device performs some of the anti-theft functions.
Connection
* A regular shock sensor from any alarm system (Alligator, Saturn, Clifford, APS) is suitable.
+ 12 V connect to pin 12; body – on the 6th; We connect the signal wire (a ground appears on it at the moment of activity) to the 1st contact.
During normal arming, Kalina now reacts to an impact on the body (it sounds a horn and blinks turn signals). Similarly, instead of a shock sensor, you can connect a volume sensor (for example, single-level MMS‑1).
You can also connect a pager: + 12 V of the pager transmitter on pin 12, minus on pin 21.
Double-glazed window control unit 1118 – 3763040 (- 10 ) for VAZ 11183 “Kalina”
| Appearance | Controller board | Reverse side |
Double-glazed window control unit 2170 – 3763040 for VAZ 2170 “Priora”
1 . 1 Malfunction in the VZ communication coil circuit
1 . 2 Malfunction in the circuit from the block to the communication coil to the APS ECU
1 . 3 Transponder missing in OK
1 . 4 The transponder in OK is faulty (detected during pre-production preparation)
1 . 5 The transponder in the Republic of Kazakhstan is faulty (detected during pre-production preparation)
1 . 6 Malfunction of the input transponder circuit in the APS ECU
1 . 8 The communication coil came off from the VZ pad on the inside
2. 2 Malfunction of W‑Line circuits in the APS or ICS units
2. 3 Lack of supply voltage on the APS or KSUD unit
2. 4 The “Normal” electrical package is faulty (the control driver has burned out)
2. 5 KSUD does not contact
Abbreviations: IS – status indicator; VZ – ignition switch; OK – training key; RK – working key; RC – remote control; KSUD – engine control system controller; ECU - electronic control unit
The Kalina electrical package control unit is used to automatically raise and lower windows and control doors. Additionally, it makes it possible to control alarm activation and trunk opening.
If we are talking about the luxury configuration of Kalina 2, then the electrical package control unit is responsible for blocking the ignition switch. That is why any malfunctions in its operation negatively affect the driving performance of the vehicle.
Advertisements on NN.RU - Auto
Lengthen Gas 331043, 331063 Valdai-farmer for installation of a body 5.1/6.5 m. The chassis is lengthened by increasing the wheel size.
A specialized company for the conversion of trucks produces extensions for man man, iveco and iveco truck tractors.
Conversion of a cargo-passenger gazelle, an all-metal gazelle, an autoline into a cargo gasel 3302 gas 33023 gazelle-farmer includes c.
We sell KAMAZ injection pump (All types) BOSCH injection pump for KAMAZ 1 year warranty Bosch Euro-3 injection pump 1 0402698817 (electr.) EURO-3 - 134,200 rub. 2. Price: 131,000 rub.
The weather this weekend will not be very pleasant: summer warmth has not yet returned to our region. But neither are cold temperatures with heavy rains.
Imagine, you wake up in the morning, open the curtains, bright sunlight bursts into your apartment, and outside the window is a stunningly beautiful landscape.
An accident occurred in the Moskovsky district of Nizhny Novgorod: a girl was swinging her friend, but the swing suddenly fell. As a result.
Today, Nizhny Novgorod fast food lovers have a real holiday: a new worldwide outlet has opened on the renovated Nizhne-Volzhskaya embankment.
Personalize existing features
The manufacturer has provided for the timing of regular technical inspections, which are mandatory. For non-compliance, the company reserves the opportunity to deprive the car owner of the right to free service.
The most vulnerable is the comfort block, which includes many logical circuits. Its purpose boils down to the following functions:
- activation of interior lighting;
- adjusting the operation of car alarms;
- turning on the heated rear window;
- automatic mirror adjustment;
- control of electric windows;
- remote control of locks.
The manufacturer has provided the ability to personalize each element. To do this, the electrical package control unit must be recoded at an authorized automotive center. Using official software, the wizard will add or remove certain features. If everything is done correctly, 20 minutes after requesting the appropriate service, you can safely use the “iron horse”.
According to reviews from car enthusiasts, the Lada Kalina car is distinguished by electronic filling with increased sensitivity to operating conditions. Aggressive driving style and minor damage lead to malfunctions.
As a result, you need to visit a service station to replace the device. To do this, remove the control unit, which must be done as follows:
- turn off the battery;
- unscrew the screws from the driver's seat;
- Use a ratchet wrench to remove the nut;
- the plastic plug is squeezed out completely;
- carefully pull out the seat;
- remove the seat by dismantling the terminals;
- remove the cover plate.
The replacement procedure on the Kalina 2 model is completed by folding the carpet and installing a new block. After this, all procedures are carried out in reverse order.
How to disable the immobilizer on Kalina?
The immobilizer is disabled if problems arise in the operation or use of the alarm system with remote start. In the second case, a more competent solution would be to install a bypass device.
If the owner intends to block the immobilizer on Kalina, then he needs to know the type of ECU (engine control controller) that is installed on his car.
When using crawlers, two schemes are possible:
- using a device with a key or chip inside;
- use of a keyless crawler equipped with a chip signal emulator.
What will you need?
Depending on the type of ECU you will need:
- K-Line adapter;
- a laptop with pre-installed software, for example, ChipLoader 1.97.7 or analogues;
- soldering iron or soldering station;
- additional wires and elements (in accordance with the diagram);
- additional 12 V power supply;
- Firmware may be required for a unit with the immobilizer function disabled.
DIY shutdown instructions
The work is carried out with the removal of parts from the car, so the owner must have the skills to disassemble and assemble components. Otherwise, it is better to contact a car service.
Bosch M 7-4 controller
Sequence of steps to deactivate Bosch M 7.4:
- Turn off the on-board power supply. The unit is equipped with two plugs; for further work you need to remove the large one, the small one can be left in place.
- Install the wires required to supply additional positive voltage into pins A4 and B2 on the wiring harness. The conductors are connected to the battery through a switch.
- Carefully place the block in place and fasten the fasteners.
- Install the adapter into the diagnostic connector and connect to the computer. For correct operation, a data exchange rate of no higher than 38400 bps is recommended.
- Run the software and then turn on the power on the auxiliary wiring.
- Turn on the ignition, after which communication with the unit will be established.
- Read EEPROM data and save it.
- Load new firmware into memory with the immobilizer disabled.
- After the firmware is completed, close the software and then turn off the ignition.
- Remove the plug and disconnect any additional wiring.
- Check the ability to start the engine with a key without a chip. At the same time, the immobilizer indicator on the instrument cluster will turn on and off.
Location of pins in the plug
Bosch 7-9-7 controller
The modification of the Bosch 7.9.7 block consists of removing one resistance. Since the dimensions of the parts are small, it is recommended to carry out the work in a specialized service center. Without soldering skills and without additional equipment, the unit can be damaged.
Controller January 7-2
In order to disable the immobilizer on Kalina with ECU January 7.2 yourself, you must:
- Turn off the on-board power supply and remove the unit from the vehicle.
- Connect the controller connector in accordance with the diagram.
- Install the adapter on your computer.
- Apply voltage using the switch, simulating the operation of the ignition.
- Launch the software on the computer and establish communication with the programmable unit.
- Read the firmware and save it on your hard drive.
- Read the EEPROM data and delete it programmatically (using the “delete IMMO” button). If the deletion is successful, a corresponding message will be displayed.
- Turn off the program, “turn off” the ignition switch.
- Gain access to the immobilizer unit installed on the vehicle and remove the harness from the connector. It is necessary to connect pins 9 and 18 in the plug, which will ensure the normal functioning of the car’s electronics.
The photo below shows some steps to remove immo January from memory.
Source
Possible breakdowns of body electronics and their elimination
CBKE allows you to free the driver from routine work and focus his attention on driving and managing the traffic situation. Despite this undeniable advantage, persistent failures of some nodes often occur. One of the most common malfunctions is the failure of turn signals and hazard warning lights. This most often manifests itself in the fact that the lamps simply burn continuously on the left side of the car. Before you begin repairing the TsBKE, you need to make sure that the lights are not burnt out, their contacts are not oxidized, the emergency stop button is working, and the wires are not charred.
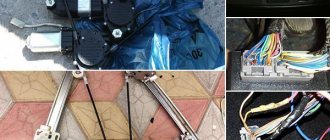
The reason for the failure of the power windows may be a breakdown of the electronic control unit. There are other options: problems with the window regulator built into the driver's door, poor wire contact, incorrect installation of limiters.
You can repair the electronic unit yourself. To do this, you need to remove it from its regular place, open the cover and carefully inspect the circuit for the presence of soot or melted parts of the controllers. If you find obvious defects in the controllers, you should replace them and reinstall the software through a special connector on the electronic unit. In order to correctly replace burnt-out components, you need to have a “pinout” - information about connectors, wiring, input and output ports, various adapters and plugs.
Description of CBKE
Unlike the first Kalin models, the second versions and Luxury equipment use an electrical package control unit instead of traditional relays to control the electronics. This device combines many functions, we suggest you familiarize yourself with them in more detail.
Connection diagram of elements and outputs of the CBEK
Functions
The electrical package control unit is designed to perform the following functions:
- Alarm. If the car's anti-theft system detects a break-in attempt, thanks to the CBKE, it will transmit information about this to the car owner's control panel.
- Windshield wiper system control. Moreover, we are talking about both manual and automatic control (if the car is equipped with an electrical package control unit marked 21900-3840080-20).
- The device performs the function of controlling the windshield and rear window heating systems. This unit also controls the heating elements of the side rear-view mirrors.
- The electrical control unit also monitors the performance of the optics, both in manual and automatic control modes. In particular, we are talking about low-beam headlamps, side lights, and DRLs.
- Separately, we should highlight the function of ensuring the functionality of the high-range lighting.
- Turning lights, as well as light signaling.
- Vehicle interior lighting.
- The device monitors the performance and energy saving of devices belonging to the category of internal lighting of the car.
- Monitoring the state of the central lock, as well as performing the functions of locking and unlocking the locks themselves from the key, from buttons installed in the car interior, as well as in the doors.
- Another option is to open the luggage compartment lid using a button installed in the cabin.
- An equally important function is the control of electric drives, in particular, we are talking about power windows, as well as side rear-view mirrors.
- Heating system for driver and passenger seats.
- Luggage compartment lighting unit (video author - Vladimir Kostyuchenkov).
Typical faults
If the electrical package control unit fails for some reason, this can lead to the following problems:
- Failure to operate power windows. Of course, before disassembling the control module, you should make sure that the window regulators do not work precisely because of it. It would be logical to first check the safety element, as well as the lift control unit, which is built into the driver's door. In practice, it often happens that the cause of power window failure is poor wiring contact on the unit itself.
- The optics stopped working - low beam, turn signals, etc. In this case, the safety elements, light sources and steering switch are first checked. There is a possibility that the reason lies in a broken contact directly on the switch; if this is the case, then they should be re-soldered. If the reason is that the unit is not working, it will need to be dismantled and disassembled in order to find the burnt-out element and re-solder it. If soldering does not help solve the problem, the device will have to be replaced.
- Some of the equipment has stopped working, while the devices, as at first glance may seem, are in no way connected with each other. The fact is that the module itself includes many elements and controllers, each of them is responsible for performing certain functions. If two or more controllers fail at once, it can cause serious damage. For example, the optics, heated rear and front windows, the trunk door and the window regulator will immediately refuse to work. It is necessary to locate the failed controller and replace it by re-soldering.
- A fairly common problem that can occur is a break in the wiring of the unit. It is installed in a virtually inaccessible place, but if electrical work is being done, for example, installing an anti-theft system, then most likely the car owner will encounter a TsBKE. And if the wiring is damaged during the work, of course, this will affect the functioning of the device and, accordingly, the performance of certain functions.
- Oxidation of contacts on module connectors. If you encounter such a problem, we recommend paying attention to the humidity in the cabin. Often, oxidation at the outlets occurs precisely as a result of high humidity. The contacts can be cleaned, this is not a problem, but the problem of humidity must be addressed, since otherwise it can lead to failure of the microcircuit as a whole.
- Board failure. The most terrible problem for the car owner, because because of this the device simply will not be able to work normally. Accordingly, it will need to be replaced, and this, in turn, costs a lot of money (author - Alexander Fisher).
Read also: Solex 73 carburetor diagram
Non-specific types of services
Even if the rules for safe operation of the vehicle are observed, the heater control unit may require servicing or replacement. This happens as a result of sudden switching of the heating knob of the Lada Kalina car. The operating instructions indicate that you must wait until the system warms up to a minimum, otherwise expensive repairs will be required.
From a financial point of view, the stove control unit will not be cheap, so its careful operation will save the family budget.
The heater control unit cannot be replaced independently due to the need to use special equipment. Much less often problems arise at the level of the engine control system.
The need to visit a service station will be caused by driving on a gravel road, an accident, or the result of unprofessional maintenance. The engine management system is responsible for fuel injection, so any deviations in its operation immediately put the car on hold. How long it will take to replace the engine control unit will be decided by the technician after an inspection.
It is cheaper, but repairs take much longer when the body electronics unit comes under attack. The problem can only be diagnosed in a service center. The duration is due to the fact that if the engine control unit can be replaced as a single whole, then part of the wiring must be changed along with the electronics.
Voltage surges or a simple short circuit can damage a certain sector. The light control unit will be the first to tell you about this.
Incorrectly working turn signals or emergency lights are the first sign indicating a failure in the electronic component of the car. There is no point in delaying a visit to the service center. Otherwise, the ESP unit responsible for dynamic stabilization will come under attack. Even with minor problems, the driver will notice a decrease in the lateral dynamics of the vehicle.
Lada Kalina requires regular maintenance as prescribed by the manufacturer. If the specified deadlines are met, each element of the system will work properly.
Door pinout for first generation Kalina
In all versions of the first generation Lada Kalina, the cable routing is the same.
Driver's door
- Output to the rear harness.
- A bundle of wires for connecting the speaker.
- Locking device.
- Driver's door control switch pinout element.
- Voltage to switch harnesses.
- Connection of the harness line to the mounting unit.
- Same as 5.
- Same as 6.
- Window regulator.
For front passenger
- Exit to the stern beam.
- Output to the appropriate speaker.
- Door lock drive.
- Electric window lift key.
- Power window control unit terminal harness.
- To the switch key of the corresponding node.
- Gearbox of the above device.
Rear doors
On the rear doors, the terminals are similar for both sides. Only two terminals are used here, where the first serves to connect to the rear electrical harness. The second is designed to supply an impulse and power to lock the doors.
Typical Lada Kalina pinout intended for the rear wiring harness
- Output to the rear door harness behind the driver.
- Voltage and indication of the rear left optical element.
- Same as 1 for the opposite side.
- Terminal for handbrake output.
- Kalina instrument pinout line.
- Output to the driver's door.
- Same as 5.
- Car interior lighting lamps.
- To the left turn signal.
- Connecting the fuel pump.
- Reverse transmission lock switch.
- Continuation of the highway from the front passenger door.
- Line articulation to the rear right speaker.
- Illumination lamp for the interior of the cargo compartment.
- Auxiliary stop.
- Alarm control unit.
- Same as 13 for the opposite side.
- Rear right turn.
- Output to rear optics located on the left side of the car.
- Output to cargo compartment wiring elements.
- Heated rear windshield.
Instrument panel pinout Kalina first generation
The decoupling is considered the most complex element of a car's electrical circuit. Here there are outputs from all important elements and assemblies of the machine:
- 1-5 – outputs responsible for connecting the front beam indication;
- 2.8 – similar for the stern;
- 6,7,9,10 – continuation of lines to the mounting unit and fuse-links;
- 11 – control lines for side, head and interior lights;
- 12 – combination instrument panel;
- 13 – keys for adjusting the heater cooler positions;
- 14 – for powering the air supply box;
- 15 – factory anti-theft element – ignition unit;
- 16 – immobilizer switch;
- 17 – part of the Kalina instrument panel pinout, responsible for indicating and supplying current to the ECM;
- 18 – onboard cigarette lighter;
- 19 – emergency warning button;
- 20 – brake light button located on the pedal;
- 21 – indicator on the windshield wiper system;
- 22 – rear window heating switch;
- 23 – power supply unit for turn signals and low/far modes of head optics;
- 24 – wiper control lever;
- 25 – horn button;
- 26 – supply voltage to the light bulb in the glove compartment;
- 27 – similarly, for the on/off key;
- 28-29 – pinout for Kalina radio – standard position:
- 30 – voltage to the heater cooler motor;
- 31 – resistor network of the above element;
- 32 – main pinout of Kalina EUR;
- 33 – lighting of the ventilation channel and stove.
Front wiring harness pinout
- 1 – left head optics cable;
- 2-5 – connection chips to the dashboard;
- 6 – reverse gear activation locking element solenoid;
- 7 – key for activating the reverse gear lamp;
- 8 – voltage for starter;
- 9 – connector for connecting the line to the battery and starter;
- 10 – battery;
- 11 – electricity generator;
- 12 – the same as 1;
- 13 – relevant for hatchback, front window washer;
- 14 – washer motor;
- 15 – sensor for measuring temperature outside;
- 16 – powering the horn.
Part of the air supply unit wiring pinout diagram
- The line is a continuation of the line from the dashboard.
- Wiper motor.
- Hood closing indicator.
- Line leading to the brake reservoir sensor.
Small aft lighting harness
- Continuation of the highway to the main loop.
- Closing the cargo compartment lid.
- Cargo compartment light power switch.
- Terminal of the state license plate illumination line.
- Answer for the previous “mother”.
- Left backlight.
- Same for the right side.
Part of the wiring, ECM connection EURO-3 class
The car is available in two versions. However, the Euro 3 version is in great demand. Pinout of the control unit Kalina model BOSCH M7.9.7, M 73 with 81 contacts:
- 1 – for the 16 valve version – ignition coil 2 combustion chambers, in the 8 valve version. not used;
- 2 – for 8 valves is responsible for 2-3 clamping coils. In 16th grade. only for 3 boilers;
- 3 – grounding to the body from a short circuit;
- 4 – not applicable for 8 valves (empty). On a more powerful version, it is responsible for cylinder 4;
- 5 – for 16 kl, supplies power to 1 kat. Clamp For anlaog, he is responsible for blocks 1 and 4;
- 6-7 – Injector driver No. 2, 3;
- 8 – electronic signal for indicating engine speed;
- 9 – not used;
- 10 – gasoline consumption indicator;
- 11 – empty;
- 12-13 – from the battery to the ignition;
- 14 – main relay – current supply;
- 15 – DPKV input response;
- 16 – reception from the TPS sensor;
- 17 – similar element – grounding on the car body;
- 18 – response from DK 1;
- 19 – knock sensor input;
- 20 – land DD No. 2;
- 21-26 – not used;
- 27 – drive of the first nozzle;
- 28 – heater DK2;
- 29 – power output of the control unit for coolant fan No. 2;
- 30 – free;
- 31 – lamp performance – check the engine;
- 32 – TPS controller;
- 33 – power supply to the mass air flow sensor;
- 34 – receiving an impulse from the DPKV;
- 35, 36 – ground of the corresponding sensors;
- 37 – impulse transmission channel from the mass air flow sensor;
- 38 – empty;
- 39 – power output of antifreeze temperature sensor;
- 40 – DTVV – signal reception;
- 41-43 – not used;
- 42 – receiving an impulse from the DNRD;
- 44 – per main module;
- 45 – for phase distribution sensors;
- 46 – adsorber valve, control part;
- 47 – voltage for injector No. 4;
- 48 – heater circuit DK1;
- 49, 52, 54, 56, 58, 60, 62 – empty;
- 50 – extra Starter relay;
- 51, 53 – taps to the ground;
- 55 – pulse receiving line from DC2;
- 57 – calibration of short circuit to ground;
- 59 – speed sensor sensor;
- 61 – on the body;
- 63 – from the main control relay;
- 64-67 – XX calibrators;
- 68 – control of cooling system fan No. 1;
- 69-70 – power lines for the fuel pump and air conditioning relays, respectively;
- 71 – K-Line;
- 72-74 – not used;
- 75 – request on. Air conditioning systems inside the cabin;
- 76 – impulse to activate the power steering unit;
- 77-78 – empty;
- 79 – input from DF;
- 80 – body weight;
- 81 – empty.
CBKE schemes
_x000D_
_x000D_
Electrical connection diagram for TsBKE on LADA VESTA: 2 – rechargeable battery; 3 – starter; 4 – rear left outer lamp; 5 – left headlight; 7 – rear window heating relay (K3); 8 – right headlight; 10 – rear outer right lamp; 13 – trunk light; 15 – fuse 60 A (F70); 16 – additional relay (K8); 17 – ignition switch; 26 – alarm switch; 30 – fuse 5 A (F20); 32 – left steering column switch (light alarm switch); 34 – fuse 60 A (F75); 35 – rear window heater; 44 – windshield heating relay 1 (K21); 46 – windshield heater; 47 – lampshade lighting of the glove box; 48 – switch for the glove compartment lamp; 51 – TsBKE (VSM controller); 58 – fuse 30 A (F61); 59 – left threshold lamp (installed on luxury equipment); 60 – right threshold lighting lamp (installed on the “luxury” configuration); 61 – relay of additional consumers (K2); 63 – fuse 10 A (F32); 84 – fuse 3 A (F43); 87 – left outside mirror; 88 – right outside mirror; 120 – additional starter relay (K23); 134 – brake signal switch; 138 – fuse 5 A (F15); 164 – air conditioner control panel (connection diagram for the “comfort” package); 185 – interior lighting unit with ERA-GLONASS interface module; 196 – fuse 5 A (F24); 200 – fuse 15 A (F11); 201 – fuse 15 A (F12); 202 – fuse 10 A (F13); 203 – fuse 10 A (F14); 204 – fuse 5 A (F17); 205 – fuse 5 A (F16); 229 – fuse 3 A (F49); 230 – clutch pedal position signal switch; 231 – windshield heating relay 2 (K22); 233 – fuse 5 A (F80)
_x000D_
- _x000D_
- location of fuses F1-F59 and relays K1-K20 in the interior mounting block;
_x000D_
location of fuses F60-F80 and relays K21-K28 in the motor mounting block
_x000D_
_x000D_
_x000D_
Electrical connection diagram of the TsBKE on LADA VESTA (Comfort package): 2 – rechargeable battery; 3 – starter; 9 – rear inner left lamp; 15 – fuse 60 A (F70); 16 – additional relay (K8); 17 – ignition switch; 20 – fuse 15 A (F1); 23 – rear inner right lamp; 28 – fuse 5 A (F74); 31 – reverse light switch; 33 – right steering column switch (windshield wiper switch); 51 – TsBKE (VSM controller); 63 – fuse 10 A (F32); 79 – electric motor for windshield wiper; 80 – washer motor; 120 – additional starter relay (K23); 198 – fuse 25 A (F40);
_x000D_
- _x000D_
- location of fuses F1-F59 and relays K1-K20 in the interior mounting block;
_x000D_
location of fuses F60-F80 and relays K21-K28 in the motor mounting block
_x000D_
_x000D_
After replacing the TsBKE, it is necessary to perform the training procedure (entering parameters) and automatic configuration of the TsBKE using the Grade-X diagnostic device. You can also view error (fault) codes using this device. You can get acquainted with the functionality of the CBKE in more detail, as well as its diagnostics, using the TI (device, fault diagnosis of the CBKE).
_x000D_
On the one hand, this functional device allows you to more finely tune the operation of the electronics. On the other hand, the unit has a complex structure, which makes independent repairs more problematic. If the TsBKE fails, you will have to contact the dealer, because It is unlikely that the necessary equipment for programming or diagnostics will be at hand.
_x000D_
Attention! It is impossible to retrain a CBKE taken from another vehicle. _x000D_
_x000D_
Which implementation do you like best? The presence of a simple circuit, where there are turn relays, ESP, etc., or the presence of a central electronics control unit? Find other materials on repair, maintenance, modifications and tuning of these cars in the contents (XRAY crossover, Lada Vesta sedan).
Categories of products that may be of interest to you based on the article “Central unit of body electronics Lada Vesta and XRAY (description, reviews)”:
Basket
Double-glazed window control unit “Norma” 1118 – 6512010 for VAZ 11183 “Kalina”
©Aktuator On cars of the Kalina family, 2 types of non-interchangeable (by wiring) glass control controller 1118 - 6512010 and 11180 - 3763040 can be installed. 1118 – 6512010 has one 25-pin connection connector, 1118 – 3763040 (1118 – 3763040 – 10) – two connectors.
Read also: Mutlu battery production date
Remote control system for double-glazed windows “norm” on a VAZ 11183, Kalina. Controls power windows and central door locking. When the connector is removed, the engine does not start; the device performs some of the anti-theft functions.
Connection
| № | Wire color | Purpose, addressing |
| 1 |
* A regular shock sensor from any alarm system (Alligator, Saturn, Clifford, APS) is suitable.
+ 12 V connect to pin 12; body – on the 6th; We connect the signal wire (a ground appears on it at the moment of activity) to the 1st contact.
During normal arming, Kalina now reacts to an impact on the body (it sounds a horn and blinks turn signals). Similarly, instead of a shock sensor, you can connect a volume sensor (for example, single-level MMS‑1).
You can also connect a pager: + 12 V of the pager transmitter on pin 12, minus on pin 21.
Double-glazed window control unit 1118 – 3763040 (- 10 ) for VAZ 11183 “Kalina”
Most often, the electrical part of the solenoids control fails, and the locks themselves are considered relatively reliable.
The central locking of a Chevy Niva car works on the following principle: the signal for opening or closing the doors is transmitted by pressing a button on the key or turning the cylinder in the driver's door, while the signal passes through the central locking control unit and the on-board computer.
This scheme has its weaknesses, and the main reasons for failure are the following factors:
- short circuit in the circuit and fuse failure;
- chafing of wiring in flexible corrugation, loss of contact at joints due to vibrations and moisture ingress;
- central locking relay malfunction;
- error in the central locking control unit;
- lock motor failure.
Advice! If the car has an alarm system, the central locking may not open due to a malfunction of the alarm system. Perhaps the reason lies in the dead battery of the alarm control panel.
Purpose and characteristics of TsBKE
The central unit of body electronics Kalina 2 controls:
- alarm system;
- windshield wipers;
- heated windshield and rear windows;
- heated side mirrors;
- lighting system;
- direction indicators;
- central locking;
- trunk opening drive;
- electric windows;
- heated front seats;
- electric side mirrors.
When the alarm is turned on, an automatic check occurs, accompanied by a short flashing of the direction indicators. In security mode, the immobilizer light on the instrument cluster blinks. The security mode is disarmed by pressing the remote control button.
The central electronic unit automatically turns on the windshield wipers if:
- a signal was received from the rain sensor;
- sensitivity regulator in position from 1 to 4;
- The wiper switch is in the intermittent position.
When the voltage drops to 9.6 V, the central unit limits the operation of the rear window and side mirror heaters. This prevents the engine from going into emergency mode. When the voltage is restored to a level of 10.8 Volts, the heaters turn on automatically.
The driver is also assisted by body electronics when working with the lighting system. When the engine starts, the daytime running lights turn on, and when the engine stops, they turn off automatically. The low beam headlights and side lights turn on when a signal is received from the light and rain sensor. At the same time, the daytime running lights turn off. If during automatic diagnostics a malfunction is detected, the absence of a signal from the light sensor, then the TsBKE turns on the low beam and dimensions.
Pinout of the ignition switch VAZ 2101 VAZ 2107
The system in these versions is located to the left of the steering wheel. To protect against dust and burglary, it is closed with a special plastic cover.
1. "". The absence of a mark indicates that all systems are currently turned off and not working. These devices do not include brake lights, lighting, cigarette lighters and, in some models, radios.
2. "I". This position indicates a working battery, as well as the inclusion of a number of automotive equipment, such as windshield washers, headlights and some alarm functions.
3. "II". A position indicating the start of the motor system. It does not have a key lock, as there is likely to be an increased load on the starter.
4. "III". Parking mark. When the key is pulled out, it locks. To remove the block, you need to insert a key.
1. 50. Red or purple wire. Supplies voltage to the starter.
2. 15. Two-core wire with blue insulation and black stripes. Supplies current to the cigarette lighter, washer, and brake light.
3. 30 and 30/1. Pink or brown positive contact.
4. INT. Two-core black wire responsible for headlights and light signaling.
The ignition switch connection diagram gives an idea of the work plan and will allow you to independently diagnose and identify problems in the system. The VAZ ignition switch is convenient and easy to disassemble.
The ignition switch pinout may be erased. If such a defect is allowed, you can match the lock with the picture.
Replacement features
Briefly about the procedure for replacing the control module on Kalina 2:
- First, the instruments are dismantled from the center console; there is nothing difficult about it.
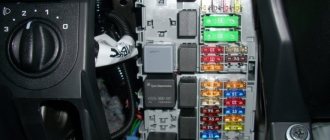
- Then the lower part of the center console trim is unscrewed, the trim is removed, and you gain access to the fuse and relay box.
- The mounting block with safety devices can be unscrewed, but it cannot be removed because it is connected by wires. You can rotate it a little so that it takes a horizontal position.
- You can stick your hand into the gap formed as a result of turning. Having done this, you will be able to feel the shelf on which the TsBKE is installed. A little to the left there is a bolt with which this module is fixed - you need to unscrew it.
- After this, through the top, through the instrument panel, you will need to disconnect the two connected connectors. After completing these steps, you can carefully dismantle the CBKE and remove it by slightly moving the fuse box. Please note that you should not pull the device too hard, since there are two more connectors on the other side that will need to be disconnected. When the wires are disconnected, the CBKE can be completely dismantled and repaired or replaced.
Operating principle and central locking diagram
Central locking has been installed on the VAZ 2123 since 2004. Since then, the Chevy Niva central locking scheme has not changed fundamentally and is installed on cars starting with the “Norma” configuration. To control the remote door opening, a remote control (remote control with a flip key) is used. It combines the functions of an immobilizer, ignition key, and door key. The signal from the remote control is received by the electrical package control unit (1118-6512010), which is responsible for opening the doors.
Car alarm connection points for Lada Priora 2011
Ignition switch: + 12V - brown Starter - red IGN - blue/black
Tidy: Tacho signal - brown/red Handbrake - brown/blue (For more details, see Diagram 1)
Connector X3 (See Fig. 1) BCM: Driver's door switch - blue/black Right front door switch - brown Rear door switches - gray/red Trunk switch - yellow/red Opening the trunk (low-current input, possible without a relay, additional channel directly to alarm) - blue/red
Connector X1 (See Figure 1) BCM: Turns - blue, blue/black
Ts.Z. - brown; The wire is located inside the driver's door, in the harness from the button block. (See Diagram 3 for details)
Hood tip - white/black; Connector X2-17 (If an engine temperature sensor is used, then according to scheme 2)
The block is located behind the panel, near the gas pedal. To remove the block, remove the left and right panels, unscrew the two 10mm nuts, left and right, securing the block.
Connection to central locking
When connecting the central locking (see diagram 3), if you connect only to the brown wire in the driver's door, then all doors will close and only the driver's door will open. To open the remaining doors, you need to use a wire in the alarm for two-step opening of the central locking system, and connect according to the diagram below.
The remaining doors are opened by the second impulse, relay K1. Relays K2 and K3 are also activated; they are needed to block the right power windows. If this is not done, then when you open the remaining doors, the right windows will open slightly for 0.8 seconds, i.e. from the impulse to open the central locking, the second step. It is necessary to block the power windows due to the peculiarities of the electrical circuit of the Priora doors.
If the configuration does not include power windows on the rear doors, then relay K3 does not need to be installed, and accordingly, cell X1-11 in connector X1 is not used. (The color of wire X1-11 is not known.) If the configuration does not include power windows at all, then there is no need to use relay K2.
Key programming instructions for Lada Kalina, Priora, Granta, etc.
- Close all doors. Turn on the ignition with the training key and wait in the on state for at least 6 seconds.
- Turn off the ignition. The indicator light in the warning lamp unit should flash quickly (at a frequency of 5 times per second) while the learning procedure is being carried out correctly. If the lamp stops flashing quickly, it indicates an incorrect operation, an out-of-time interval, or a malfunction. Remove the training key from the ignition switch.
- While the warning lamp is flashing (about 6 seconds), insert the remote control and turn on the ignition. The immobilizer buzzer should emit three beeps. If the buzzer does not sound and the indicator has stopped flashing, this means: - the time interval of 6 seconds has been exceeded and it is necessary to repeat the learning procedure, starting from step 1; -immobilizer is faulty
- Wait 6 seconds for the buzzer to emit two more beeps and turn off the ignition.
- If it is necessary to train the second remote control, then you should perform steps 3...4 again, using the second learning remote control to turn on the ignition. If not, continue from step 6.
- After turning off the ignition for no more than 6 seconds, while the indicator is flashing, remove the remote control, insert the learning key and turn on the ignition. The buzzer should beep three times. Wait 6 seconds until the buzzer beeps two more times.
- Turn off the ignition without removing the training key, wait 6 seconds until the buzzer sounds a single sound signal. The indicator should flash twice as fast. If the sound signal does not sound and the flashing indicator stops, you should return to step 1 and repeat the learning procedure. If a repeated failure occurs when performing step 7, this means that the ECM was previously trained with a different key, in which case the controller should be replaced.
- After the buzzer gives a single sound signal, no later than 3 seconds, turn on the ignition for 2...3 seconds and then turn it off (after turning on the ignition, the buzzer will sound three times and the indicator will stop flashing). The hazard warning lights should flash and the car horn should beep.
- Remove the learning key. Wait with the ignition off for at least 10 seconds. Insert the working key and turn on the ignition. Wait 6 seconds, if the indicator does not flash, test start the engine, the engine should start. If the indicator flashes, turn off the ignition and wait at least 10 seconds. Turn on the ignition. The warning light should not flash and the engine should start. If, after turning on the ignition, after 6 seconds the indicator lights up with a constant light, then the learning procedure must be repeated, starting from step 1.
Ways to solve problems with central locking Niva Chevrolet
Before starting work, it is recommended to evaluate your repair skills and experience with electrical wiring in a car. Special equipment may be required, and at a minimum, a tester is required to diagnose electrical circuits. Troubleshooting always starts from simple to complex.
Fuse failure
The fuse is the first thing every car owner should check if the central locking stops working. The symptom will be the failure of all doors to close with the button at the same time. It's easy to check - just open the mounting block and replace it with a serviceable one of the same rating.
Most often, the cause of its burnout is a short circuit or overload in the circuit. In the mounting block of cars manufactured before 2009, it is designated F6; on cars after 2010, it is located under the number F10.
Where is the remote control unit for the security alarm on Kalina
This part is located under the rear seat, more precisely under the left half. In order to get to it, you must first raise the seat by pulling the cord:
And under the floor covering there is a part that interests us; in the photo below the approximate location is shown by an arrow:
Now below we will analyze in more detail the entire procedure, starting from removing the casing and ending with dismantling the module itself.
Diagnostics
You can diagnose problems without a special lift, but this requires hanging the suspected wheel. The use of high-quality bearings allows the car to have no play in the hub, or it can be insignificant (with certain wear, but not yet in critical condition).
After hanging the wheel, you need to forcefully try to shake it in different directions. A serviceable bearing will not give any play or it will be almost unnoticeable. A faulty one can have strong rolling, even without the use of force.
In this case, only replacing the wheel bearing in the field will help. Adjustment and any types of straightening will no longer be effective.
Also interesting: How to find out the color of a car
Chevrolet Niva hub - replacement
To replace the wheel bearing in the field, you need to pull out the hub. This is carried out according to the following plan.
1. Dismounting the conical bushing.
2. Unlocking the nuts. The problem may lie in the fact that they often lick off or turn sour. In this case, you can use a chisel and a light hammer.
3. Use the nineteenth socket or wrench to remove the lever clamps. They are located both front and back.
4. The locking plates are removed. These are metal perforated strips that are often overlooked.
5. The seventeenth and tenth keys require removing the circuit pipes.
6. A stop is installed under the lever. Using two twelfths keys, unscrew the nut fixed on the upper arm retainer bolt.
7. The lower block is also unscrewed in the same way.
8. When there are no fasteners left, it is possible to pull out the entire system at once.
9. By fixing the steering knuckle with a clamp, you can knock out the hub.
10. After this, the screws securing the knuckle to the lever mechanism are removed.
Knowing the structure of the front wheel hub of Niva 21213, you can carry out repairs yourself, without contacting a service center.
1. The steering knuckle is rigidly fixed in a vice or clamp.
2. Carefully pull out the inner ring and separator.
3. The insides of the wheel bearings are pulled out in the same way.
4. The outer ring is removed with a punch.
This is where the extraction ends. The design of the Niva 21213 front wheel hub is simple and therefore after replacement it is enough to assemble the structure in the reverse order. Adjusting the Niva wheel bearings also does not require much skill.
You will need a clock type indicator. When installing, its leg should rest against the adjustment nut. A lever made from a hairpin smoothly rotates the mechanism around its axis. If the gap is more than 0.15 millimeters, the nut requires replacement.
Replacing the ignition switch on a VAZ car
· The plastic casing is dismantled;
· Remove the screws securing the bracket;
· The key is placed in position “0”;
· An awl or needle is inserted into the groove and the latch is snapped off.
The ignition switch circuit of the VAZ 2107 may differ slightly if non-original components were previously installed.
