| The key code is not readable |
1 . 1 Malfunction in the VZ communication coil circuit
1 . 2 Malfunction in the circuit from the block to the communication coil to the APS ECU
1 . 3 Transponder missing in OK
1 . 4 The transponder in OK is faulty (detected during pre-production preparation)
1 . 5 The transponder in the Republic of Kazakhstan is faulty (detected during pre-production preparation)
1 . 6 Malfunction of the input transponder circuit in the APS ECU
1 . 8 The communication coil came off from the VZ pad on the inside
2. 2 Malfunction of W‑Line circuits in the APS or ICS units
2. 3 Lack of supply voltage on the APS or KSUD unit
2. 4 The “Normal” electrical package is faulty (the control driver has burned out)
Central unit of body electronics Kalina 2 and Lux and its “diseases”
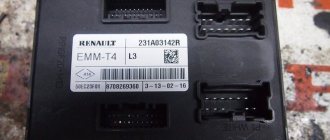
Auto manufacturers are now using a huge number of technological solutions to ensure the most convenient driving experience. One of such gadgets is CBKE. What is the central unit of body electronics Kalina 2 needed for, what functions does it perform and what malfunctions are typical for it - read in this article.
Video “Independent repair of the control module”
How to properly dismantle the CBKE and how to subsequently repair it - detailed instructions describing all the nuances are presented in the video below (author - MultiAlexander9).
After restyling, instead of fuses and numerous relays, the Lada Kalina is equipped with a central body electronics control unit (CBEC). The device is available in “Lux” and “Norma” trim levels.
Description of CBKE
Unlike the first Kalin models, in the second versions and the Luxury equipment, instead of conventional relays, an electrical package control unit is used to control the electronics. This device combines a huge number of functions, we suggest you familiarize yourself with them in more detail.
Connection diagram of parts and outputs of the CBEK
Functions
The electrical package control unit is designed to perform the following functions:
- Alarm. If the car's anti-theft system detects a break-in attempt, thanks to the CBKE, it will transmit information about this to the car owner's control panel.
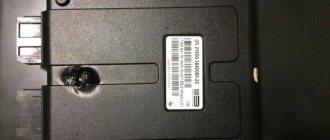
- Windshield wiper system control. In this case, we are talking about both manual and automatic control (if the vehicle is equipped with an electrical package control unit marked 21900-3840080-20).
- The device functions to control the heated windshield and rear window systems. This unit also controls the heating elements of the side rear-view mirrors.
- The electrical control unit also monitors the performance of the optics, both in manual and automatic control modes. Namely, we are talking about low-beam headlights, side lights, and also DRLs.
- Separately, the function of ensuring the functionality of distant lighting should be highlighted.
- Turning lights, also light signaling.
- Vehicle interior lighting.
- The device monitors the performance and energy saving of gadgets belonging to the group of internal lighting of the machine.
- Monitoring the state of the central locking system, as well as performing the functions of locking and unlocking the locks themselves from the key, from keys installed in the car interior, and also in the doors.
- Another function is to open the luggage compartment lid using a button installed in the cabin.
- An equally important function is the control of electric drives, namely, power windows and side rear-view mirrors.
- Heating system for driver and passenger seats.
- Luggage compartment lighting unit (video creator - Vladimir Kostyuchenkov).
Related faults
If the electrical package control unit fails for some reason, this can lead to the following dilemmas:
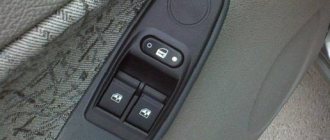
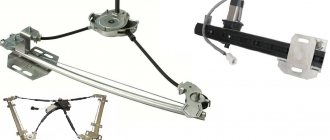
- Failure to operate the electric windows. Obviously, before disassembling the control module, you should literally make sure that the window regulators do not work specifically because of it. It would be wise to first check the safety element, also the lift control unit, which is built into the driver's door. In practice, it often happens that the reason for the failure of power windows is poor wiring contact on the unit itself.
- The optics did not work - low beam, turn signals, etc. In this case, the safety elements, lighting sources and control switch are first checked. There is a possibility that the reason lies in a broken contact specifically on the switch; if this is the case, then they should be re-soldered. In this case, if the reason is the unit’s inoperability, it will need to be dismantled and disassembled in order to find the burnt-out element and re-solder it. In this case, if soldering does not help solve the problem, the device will have to be changed.
- Some of the equipment did not work; however, the devices, as it might seem at first glance, are not connected to each other in any way. The fact is that the module itself contains a huge number of parts and controllers, any of them is responsible for performing certain functions. If two or more controllers fail at once, this can lead to serious damage. For example, the optics, heated rear and front windows, the trunk door and the window regulator will immediately refuse to work. You need to find the failed controller and replace it by re-soldering.
- A fairly common problem that can occur is a break in the wiring of the unit. It is installed in a virtually inaccessible place, but if electrical work is being done, for example, installing an anti-theft system, then most likely the car owner will encounter a TsBKE. And if the wiring is damaged during the work, this will obviously affect the functioning of the device and, accordingly, the performance of certain functions.
- Oxidation of contacts on module connectors. If you encounter such a problem, we advise you to pay attention to the humidity in the cabin. Often, oxidation at the outputs occurs specifically as a result of high humidity. The contacts can be cleaned, this is not a problem, but the problem of humidity needs to be solved, since otherwise it can lead to failure of the microcircuit as a whole.
- Board failure. The most terrible problem for the car owner, as because of this the device simply will not be able to work normally. Accordingly, it will need to be replaced, and this, in turn, costs a lot of money (creator - Alexander Fisher).
Personalize existing features
The manufacturer has provided for the timing of regular technical inspections, which are mandatory. For non-compliance, the company reserves the opportunity to deprive the car owner of the right to free service.
The most vulnerable is the comfort block, which includes many logical circuits. Its purpose boils down to the following functions:
- activation of interior lighting;
- adjusting the operation of car alarms;
- turning on the heated rear window;
- automatic mirror adjustment;
- control of electric windows;
- remote control of locks.
The manufacturer has provided the ability to personalize each element. To do this, the electrical package control unit must be recoded at an authorized automotive center. Using official software, the wizard will add or remove certain features. If everything is done correctly, 20 minutes after requesting the appropriate service, you can safely use the “iron horse”.
Substitution personality
Briefly about the procedure for replacing the control module on Kalina 2:
- First, the devices are dismantled from the center console; there is nothing complicated about it.
- Then the lower part of the center console trim is turned out, the trim is removed, and you gain access to the fuse and relay box.
- The mounting block with safety devices is turned out, but it cannot be removed, since it is connected by wires. You can rotate it slightly so that it takes a horizontal position.
- You can stick your hand into the gap formed as a result of turning. Having done this, you can feel the shelf on which the CBKE is installed. A little to the left there is a bolt with which this module is fixed - you need to unscrew it.
- After this, through the top, through the device panel, you will need to disconnect the two connected connectors. Having completed these steps, you can carefully dismantle the CBKE and remove it by slightly moving the fuse box. With all this, keep in mind that you should not pull the device very hard, since on the other side there are two more connectors that will need to be disconnected. When the wires are disconnected, the TsBKE can be completely dismantled and repaired or replaced.
Photo gallery “Assistance in replacing CBKE”
Cost of the question
The cost of CBKE will vary depending on the modification. On average, such accessories cost from 4,500 to 6,000 rubles.
Electronic circuits LADA KALINA luxury.
The album presented here is an addition to the technological documentation of LADA cars. 14 color diagrams of electronic connections of wiring harnesses for LADA 11174, LADA 11184, LADA 11194. Electronic connection diagrams for cars of the Lada Kalina family in the “LUX” configuration. Album of electrical circuits / Kulikov A.B., Hristov P.N., Zimin V.A., Shmeleva V.A. -Tolyatti, 2008· 26 p. The album presents electronic connection diagrams for LADA KALINA 11174, 11184 and 11194 EURO-3 cars in the “Lux” configuration, which includes a four-channel safety airbag system, an air conditioning system, an anti-lock brake system and a “Lux” electrical package control system. Electronic circuits were developed in accordance with the design documentation for the LADA KALINA car as of September 1, 2008. The album is intended for electrical equipment professionals and engineering workers of companies involved in the maintenance and repair of LADA cars, allows for high-quality work performance, can be used for staff training. The presented collection includes diagrams:
- panel of devices of cars LADA KALINA 11174, 11184, 11194
- ignition system for cars LADA KALINA 11174, 11184, 11194
- front wiring harness for LADA KALINA 11184
- rear wiring harness of car LADA KALINA 11184
- additional rear right wiring harness (right front door wiring harness) for LADA KALINA 11174, 11184, 11194 cars
- additional rear left wiring harness (left front door wiring harness) for LADA KALINA 11174, 11184, 11194 cars
- additional rear right wiring harness (rear doors) for LADA KALINA 11174, 11184, 11194 cars
- rear additional wiring harness (trunk lid wiring harness) and wiring harness for license plate lights of LADA KALINA 11184
- air supply boxes for cars LADA KALINA 11174, 11184, 11194
- additional rear (tailgate door wiring harness) and wiring harness for license plate lights for LADA KALINA 11174
- rear wiring harness of car LADA KALINA 11174
- front wiring harness for LADA KALINA 11174, 11194 cars
- rear wiring harness of car LADA KALINA 11194
- rear additional wiring harness (tailgate wiring harness) and wiring harness for license plate lights of LADA KALINA 11194
- electrical package diagram - luxury
Album in RAR archive 13.6 Mb
We look at the property according to the picture presented on the page
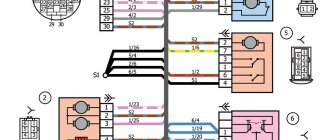
Wiring diagrams of Lada Kalina Lux, fragment for example
A selection of spare parts for Lada on Ali from the Chinese (continuously updated)
Central unit of body electronics Kalina 2 and Lux and its “diseases”
Auto manufacturers are now using a huge number of technological solutions to ensure the most convenient driving experience. One of such gadgets is CBKE. What is the central unit of body electronics Kalina 2 needed for, what functions does it perform and what malfunctions are typical for it - read in this article.
Description of CBKE
Unlike the first Kalin models, in the second versions and the Luxury equipment, instead of conventional relays, an electrical package control unit is used to control the electronics. This device combines a huge number of functions, we suggest you familiarize yourself with them in more detail.
Connection diagram of parts and outputs of the CBEK
Functions
The electrical package control unit is designed to perform the following functions:
- Alarm. If the car's anti-theft system detects a break-in attempt, thanks to the CBKE, it will transmit information about this to the car owner's control panel.
- Windshield wiper system control. In this case, we are talking about both manual and automatic control (if the vehicle is equipped with an electrical package control unit marked 21900-3840080-20).
- The device functions to control the heated windshield and rear window systems. This unit also controls the heating elements of the side rear-view mirrors.
- The electrical control unit also monitors the performance of the optics, both in manual and automatic control modes. Namely, we are talking about low-beam headlights, side lights, and also DRLs.
- Separately, the function of ensuring the functionality of distant lighting should be highlighted.
- Turning lights, also light signaling.
- Vehicle interior lighting.
- The device monitors the performance and energy saving of gadgets belonging to the group of internal lighting of the machine.
- Monitoring the state of the central locking system, as well as performing the functions of locking and unlocking the locks themselves from the key, from keys installed in the car interior, and also in the doors.
- Another function is to open the luggage compartment lid using a button installed in the cabin.
- An equally important function is the control of electric drives, namely, power windows and side rear-view mirrors.
- Heating system for driver and passenger seats.
- Luggage compartment lighting unit (video creator - Vladimir Kostyuchenkov).
Related faults
If the electrical package control unit fails for some reason, this can lead to the following dilemmas:
- Failure to operate the electric windows. Obviously, before disassembling the control module, you should literally make sure that the window regulators do not work specifically because of it. It would be wise to first check the safety element, also the lift control unit, which is built into the driver's door. In practice, it often happens that the reason for the failure of power windows is poor wiring contact on the unit itself.
- The optics did not work - low beam, turn signals, etc. In this case, the safety elements, lighting sources and control switch are first checked. There is a possibility that the reason lies in a broken contact specifically on the switch; if this is the case, then they should be re-soldered. In this case, if the reason is the unit’s inoperability, it will need to be dismantled and disassembled in order to find the burnt-out element and re-solder it. In this case, if soldering does not help solve the problem, the device will have to be changed.
- Some of the equipment did not work; however, the devices, as it might seem at first glance, are not connected to each other in any way. The fact is that the module itself contains a huge number of parts and controllers, any of them is responsible for performing certain functions. If two or more controllers fail at once, this can lead to serious damage. For example, the optics, heated rear and front windows, the trunk door and the window regulator will immediately refuse to work. You need to find the failed controller and replace it by re-soldering.
- A fairly common problem that can occur is a break in the wiring of the unit. It is installed in a virtually inaccessible place, but if electrical work is being done, for example, installing an anti-theft system, then most likely the car owner will encounter a TsBKE. And if the wiring is damaged during the work, this will obviously affect the functioning of the device and, accordingly, the performance of certain functions.
- Oxidation of contacts on module connectors. If you encounter such a problem, we advise you to pay attention to the humidity in the cabin. Often, oxidation at the outputs occurs specifically as a result of high humidity. The contacts can be cleaned, this is not a problem, but the problem of humidity needs to be solved, since otherwise it can lead to failure of the microcircuit as a whole.
- Board failure. The most terrible problem for the car owner, as because of this the device simply will not be able to work normally. Accordingly, it will need to be replaced, and this, in turn, costs a lot of money (creator - Alexander Fisher).
Non-specific types of services
Even if the rules for safe operation of the vehicle are observed, the heater control unit may require servicing or replacement. This happens as a result of sudden switching of the heating knob of the Lada Kalina car. The operating instructions indicate that you must wait until the system warms up to a minimum, otherwise expensive repairs will be required.
From a financial point of view, the stove control unit will not be cheap, so its careful operation will save the family budget.
The heater control unit cannot be replaced independently due to the need to use special equipment. Much less often problems arise at the level of the engine control system.
The need to visit a service station will be caused by driving on a gravel road, an accident, or the result of unprofessional maintenance. The engine management system is responsible for fuel injection, so any deviations in its operation immediately put the car on hold. How long it will take to replace the engine control unit will be decided by the technician after an inspection.
It is cheaper, but repairs take much longer when the body electronics unit comes under attack. The problem can only be diagnosed in a service center. The duration is due to the fact that if the engine control unit can be replaced as a single whole, then part of the wiring must be changed along with the electronics.
Voltage surges or a simple short circuit can damage a certain sector. The light control unit will be the first to tell you about this.
Incorrectly working turn signals or emergency lights are the first sign indicating a failure in the electronic component of the car. There is no point in delaying a visit to the service center. Otherwise, the ESP unit responsible for dynamic stabilization will come under attack. Even with minor problems, the driver will notice a decrease in the lateral dynamics of the vehicle.
Lada Kalina requires regular maintenance as prescribed by the manufacturer. If the specified deadlines are met, each element of the system will work properly.
Substitution personality
Briefly about the procedure for replacing the control module on Kalina 2:
- First, the devices are dismantled from the center console; there is nothing complicated about it.
- Then the lower part of the center console trim is turned out, the trim is removed, and you gain access to the fuse and relay box.
- The mounting block with safety devices is turned out, but it cannot be removed, since it is connected by wires. You can rotate it slightly so that it takes a horizontal position.
- You can stick your hand into the gap formed as a result of turning. Having done this, you can feel the shelf on which the CBKE is installed. A little to the left there is a bolt with which this module is fixed - you need to unscrew it.
- After this, through the top, through the device panel, you will need to disconnect the two connected connectors. Having completed these steps, you can carefully dismantle the CBKE and remove it by slightly moving the fuse box. With all this, keep in mind that you should not pull the device very hard, since on the other side there are two more connectors that will need to be disconnected. When the wires are disconnected, the TsBKE can be completely dismantled and repaired or replaced.
Photo gallery “Assistance in replacing CBKE”
Cost of the question
The cost of CBKE will vary depending on the modification. On average, such accessories cost from 4,500 to 6,000 rubles.
Album of electrical circuits LADA KALINA Lux
control unit for external lighting, contacts of the mounting block block; 11- lighting control module; 12 – composition switch; heater electric motor devices; 14 – connectors for the harness of the device wiring panel to the air supply wiring harness; emergency alarm switch; 20- rear heating switch; 21 – stop signal flowed down; ECU fret block; 2 – viburnum of the ECU wiring harness to the main panel; 3 – devices fuse block; 4 – speed sensor; 5 – uneven road sensor; 6 – oil drop pressure warning light sensor; 7 – position sensor, throttle sensor; 8 – cooling water temperature dampers; 9 – temperature sensor of the cooling water indicator; 10 – mass air flow sensor; 11 – idle speed regulator; 12 – relay fuse; 13 – electric fuel pump, fuel pump 15A; 14 – ignition relay; 15 – ignition fuse, relay 15; 16 – power supply fuse for ECU 7, 5A; 17 – crankshaft position sensor; 18 – control sensor; sensor; 19 – oxygen phase; 20 – knock sensor; 21 – electromagnetic purge valve of the adsorber; 22 – diagnostic oxygen sensor; 23 – ignition coil; 24 – spark plugs; 25 – nozzles; 26 – block of ignition harness coils to the ECU; 27 – ECM wiring harness block to the ignition coil wiring harness; 28 – ECM wiring harness block to wiring harness block; 29 – injectors, injector wiring harness to point harness; Ignition system harness grounding ECM; C1 – grounding point of the wiring harness of the ignition coils, front and starter wiring harness; 12- right headlight; 13-engine-electric washers; panel device wiring harness connectors to the front wiring harness; 2, 6 2.6 – wiring blocks of the device panel harness to the rear harness with illumination; 7, 8, 9, device wires and headlight beam direction controller; 1, 2, 3, 4 - blocks of the front wiring harness to the wiring harness of the device panel; 5 – left headlight; 6 – blocking reverse gear solenoid; 7 – reverse lamp light switch; 8-starter; 9 – battery generator; 10-battery; Battery wiring harness connectors Connection. batteries and installation of car alarm StarLine B9, 1118-Lux-10 – 3763040, module BP-02 double-glazed window control unit 3763040-1118. Connection and installation of the StarLine B9 car alarm, block BP-02 of the double-glazed window control module 1118-6512010 – Controls. The standard for diagnostics and repair of control systems under the engine of EURO-2 and EURO-3 toxicity standards. rear harness block to the device panel; 2 – block to the wiring harness of the left front door; 3 – to the rear door wiring harness; 4 – right lamp; 5 – to the rear door wiring harness; 6 – to the wiring harness of the panel door; 7 – to the back of the devices; 8 – lampshade; 9 – left side turn indicator; 10 – fuel level indicator sensor; 11 – reverse lock switch; 12 – to the right front sensor; 13 – parking brake doors; 14 – trunk light; 15 – double-glazed window control unit; 16 – right direction indicator; 17 – left lamp VAZ 1117, VAZ 1119; 18 – to the rear door, VAZ 1118.
Source: myauto.jofo.me
Basket
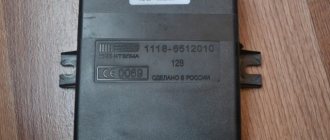
Double-glazed window control unit “Norma” 1118 – 6512010 for VAZ 11183 “Kalina”
©Aktuator On cars of the Kalina family, 2 types of non-interchangeable (by wiring) glass control controller 1118 - 6512010 and 11180 - 3763040 can be installed. 1118 – 6512010 has one 25-pin connection connector, 1118 – 3763040 (1118 – 3763040 – 10) – two connectors.
Read also: Opel Insignia paint code
Remote control system for double-glazed windows “norm” on a VAZ 11183, Kalina. Controls power windows and central door locking. When the connector is removed, the engine does not start; the device performs some of the anti-theft functions.
Connection
| № | Wire color | Purpose, addressing |
| 1 |
* A regular shock sensor from any alarm system (Alligator, Saturn, Clifford, APS) is suitable.
+ 12 V connect to pin 12; body – on the 6th; We connect the signal wire (a ground appears on it at the moment of activity) to the 1st contact.
During normal arming, Kalina now reacts to an impact on the body (it sounds a horn and blinks turn signals). Similarly, instead of a shock sensor, you can connect a volume sensor (for example, single-level MMS‑1).
You can also connect a pager: + 12 V of the pager transmitter on pin 12, minus on pin 21.
Double-glazed window control unit 1118 – 3763040 (- 10 ) for VAZ 11183 “Kalina”
