The VAZ 2110 fuel level sensor is a measuring device that is very necessary when operating a car. After all, if you don’t know how much fuel is in the gas tank, it’s impossible to calculate the distance the car will travel before it stops, and it’s not always clear whether you need to refuel or can still drive. And if you decide to stop for refueling, then how much to fill? Therefore, when it is discovered that the fuel level sensor on a VAZ 2110 does not work, or it is simply “lying,” any car owner tries to fix this malfunction as quickly as possible.
What is a fuel sensor
The fuel level sensor (FLS) is a control and measuring device that transmits information about the amount of fuel to the dashboard to the fuel level indicator (FLI), located on the dashboard next to the speedometer.
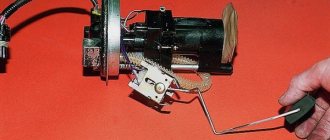
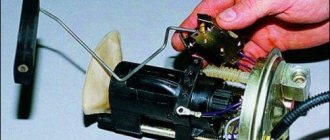
The operating principle of the FLS is simple: the fuel sensor is built into the gas tank system, consisting of a check valve, filter and fuel pump. A similar fuel supply and control system is used in injection engines. It is built into the gas tank cap and screws in with it.
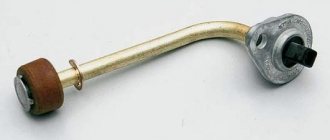
This device is typical for diesel engines and is installed on the side as a separate unit. In this case, a float with a lever for tubular devices is placed inside the tank, and the movement of the latter determines the level of fuel in the tank.
FLS device
In modern cars, LENs are installed mainly of lever and tubular types. In general, their operating principle has a lot in common, although upon closer examination some differences can be found between them. The VAZ 2110 is equipped with proven lever sensors. They are reliable, give a small error, but periodically fail. Sometimes their service life can be extended with simple manipulations, but sooner or later it becomes necessary to completely replace the VAZ 2110 fuel level sensor.
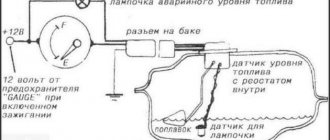
The figure shows a diagram of the VAZ 2110 fuel level sensor.
Replacement
You don't have to be a professional auto mechanic to replace a fuel sensor. It is enough to study the operating manual and understand the nuances of disassembling and assembling the unit.
Alas, this cannot be done without related work. In order to get to the sensor, you will first have to remove the fuel pump .
Before starting work, drain the fuel so that as little fuel remains in the tank as possible. Tools you will find useful:
- Spanners;
- Screwdrivers;
- Hammer, etc.
So, let's start removing the fuel pump:
- Remove the floor covering you have in the trunk;
- Remove the fastenings of the rectangular cover, which is made in black;
- Disconnect the negative terminal from the battery;
- Make marks on the gas pipeline tubes so that you can later figure out which one is intended for supply and which one is intended for return;
- The fitting is unscrewed with a 17mm wrench, after which the supply pipe is removed;
- The outlet pipe is removed in a similar way;
- Use a 7 mm socket wrench to unscrew the nuts securing the pressure rim;
- A hammer may be required here, since the hardware is often firmly attached. Place a flathead screwdriver on the ridged part of the nut and give the handle a light hammer blow;
- With the rim free, lift the assembly and remove the float from the fuel tank;
- Now you can remove the pump and, accordingly, the sensor.
Dismantling the sensor
This work is performed in the following sequence.
- Using a curved screwdriver, remove the two screws that hold the sensor to the pump.
- The fixing elements are unbent with a screwdriver and the guides are released from the pump body;
- The sensor is held on by bolts and nuts, so be sure to hold the back of the stud while unscrewing the fasteners;
- Carefully remove the pointer, after which you can replace it with new ones;
- Before reassembling, carefully examine the condition of all components and elements;
- It is important to pay attention to the wear of seals, pipes, and bushings. If the wear is severe, be sure to replace them with new ones. They are cheap, so you will not experience serious financial losses;
- When reassembling the bushings, treat them with the almighty WD40. And regardless of whether they are old or new.
The procedure really seems simple and easy to do with your own hands. This is partially true because you are dealing with gasoline, a highly flammable substance. Therefore, when replacing the fuel sensor yourself, be sure to follow all safety rules. Plus, you should definitely have a fire extinguisher . It is strictly forbidden to start work without it. Any violation of safety rules entails rather dire consequences.
The principle of operation of the fuel level sensor on the VAZ-2110
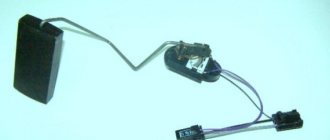
So, a lever fuel level sensor is installed on the VAZ 2110. It belongs to the float type. The sensor consists of the following elements:
- potentiometer;
- a slider made in the form of a moving contact;
- lever element;
- float;
- gas intake.
These devices are also called potentiometric. The float is connected through a lever to a resistor, inside of which there is a slider, or dynamic contact. As the float lowers in the gas tank, the slider moves along the resistive track towards another, static contact, forming electrical resistance between them. Thanks to the conversion of alternating current, which is transmitted to the dashboard, the driver knows the amount of fuel in his gas tank. Therefore, when the contacts are oxidized, or the electrical conductivity of the elements is otherwise disrupted, the sensor readings become confused and become incorrect.
Repair VAZ 2108 2109 21099
Tuesday, September 22nd, 2015
The most important thing you need to know about the temperature sensor of the VAZ 2110 is that there is not one. VAZ 2110 has two temperature sensors: - Coolant indicator temperature sensor
This is a sensor designed to display information about engine temperature on the instrument panel. It doesn’t affect anything else, it’s not connected anywhere - it only affects the temperature indicator on the panel. — Coolant temperature sensor connected to the ECU. This sensor radically affects the operation of the car engine. It is from this that the control program knows the engine temperature and sets the injection duration to the injectors. It is precisely this sensor that is used by the ECU to turn on the fan of the VAZ 2110 engine cooling system. Therefore, with high fuel consumption, a boiling engine, or a non-working fan, it is this sensor that needs to be checked.
Temperature sensor VAZ 2110
The temperature sensor is a thermal resistance, that is, a resistance that changes depending on the engine temperature. The sensor is installed in the exhaust pipe of the cylinder head near the thermostat. It twists inside the pipe and its sensitive part interacts directly with the coolant. The sensor connected to the injector has two contacts, and the temperature indicator has only one contact.
Location of temperature sensors VAZ 2110
As a rule, checking the VAZ 2110 temperature sensor comes down to measuring its resistance at different temperatures. The sensor has two contacts - the resistance between them must be measured with a multimeter. Checking the temperature sensor of the VAZ 2110: 1) When the engine is cold, remove the connector from the sensor and check whether it is oxidized. Then use a multimeter to measure the resistance. We put the connector in place. 2) Start the engine and warm it up. If the temperature indicator works correctly from its temperature sensor, then it will show us the correct temperature. 3) Turn off the engine, remove the connector again and measure the resistance of the temperature sensor. It should become less than it was on a cold engine. On a cold engine at a temperature of about 0 degrees, the sensor resistance should be about 10 kOhm. At a temperature of 90 degrees, the sensor resistance will be 240 Ohms. 4) When the resistance of the temperature sensor is less than 240 Ohms, the ECU should start the cooling system fan. To check this, you need to take a 100 Ohm resistor and connect it to the contacts of the temperature sensor connector. When the resistance of the connector contacts closes, the fan will begin to rotate; when it opens, it will turn off. 5) If the resistance of the sensor does not change depending on the engine temperature, then the sensor is faulty and needs to be replaced. 6) If the cooling system fan does not turn on even on a hot car and closing the contacts of the sensor connector with a resistance of 100 Ohms, the fan also does not start, then you need to check the fuse, the fan relay on the block to the left of the passenger seat under the glove compartment. Where the ECU is installed. 7) Anyone interested can drain the antifreeze, unscrew the sensor and take it home. Place it in boiling water and measure the resistance - it should be 100-200 Ohms. Although the same thing can be done on a car. The coolant temperature indicator sensor does not spoil life much, but it should still be in working order. Checking it is similar to the method described above - measuring the resistance at different temperatures of the VAZ 2110 coolant.
Temperature indicator VAZ 2110
Replacing the temperature sensor of a VAZ 2110: 1) We replace the temperature sensor on a cold engine. Unscrew the cap of the expansion tank and drain the antifreeze to the level of the temperature sensor. 2) Unscrew the sensor with a 19 mm wrench. Screw in a working sensor in its place. 3) Add antifreeze to the previous level, put the connector on the sensor, and close the expansion tank with a lid. 4) Start the engine and see if antifreeze is leaking through the temperature sensor
What to pay attention to: There is no need to confuse the temperature sensors of the VAZ 2110 with each other. The sensor that is connected to the ECU is installed higher, on the exhaust pipe
The temperature gauge sensor is below, screwed into the engine housing in the area of the cylinder head. To check the temperature indicator, you can use resistors of various values. By connecting it to the sensor contacts, the arrow on the panel should show different temperatures. 10 kOhm - 0 degrees, 240 Ohm - 90 degrees, 100 Ohm - 130 degrees.
Signs of sensor malfunction: rules for self-diagnosis
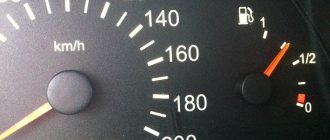
The first and most obvious sign of a fuel sensor failure is a discrepancy between the readings of the fuel level indicator (fuel level indicator and the condition of the gas tank). True, another reason cannot be discounted: after all, the contact between the FLS and the control unit may well be broken or problems may arise in the dashboard. But this happens less frequently and is easily diagnosed.
The VAZ2110 fuel level sensor does not work correctly if the float is connected incorrectly or the float is installed incorrectly. If you correct the errors, the device will begin to give correct readings. But errors make themselves known immediately after an incorrect installation of the FLS, and if the device functioned correctly for a long time, and one day began to lie, it means that there are problems in its operation.
First, a visual inspection of the parts located outside is carried out. The presence of oxidation on connectors and terminals is detected immediately. If they are not significant, then the contacts are cleaned. The potentiometer can also be opened by prying off the cover with a thin screwdriver and inspecting the condition of the slider and resistive tracks.
Where is it installed?
There are two options for installing an RTD: on the fuel rail and in the fuel tank.
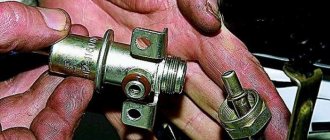
The regulator was installed on the fuel rail on cars with a 1.5 liter injection engine. On such engines, two fuel lines come from the fuel tank: direct and return.
The regulator was installed in the fuel tank on cars with a 1.6 liter engine. In such engines, the return line was abandoned. Now the regulator directly relieves pressure in the car tank.
Main causes of failure
Although the fuel sensor is not a consumable item, it also does not last forever. This device has a certain service life, which depends on:
- from the manufacturer;
- fuel quality;
- operating conditions and maintenance of the vehicle.
The reasons for sensor failure include the following:
- oxidation of contacts on the slider, lever element;
- wear of resistive tracks. Then the slider can be moved;
- sometimes, in order to correct the instrument panel readings, it is enough to bend the slider;
- resistor failure;
- broken wires. In this case, it may happen that the main two wires are connected securely, and the one that goes to ground may come off and, as a rule, is not visible.
On a note! If the wires are disconnected at the connection point, this is easily detected. If a break occurs on the wire connecting the FLS to the indicator on the dashboard, then such a breakdown will not immediately make itself known. In this case, its condition is checked with a multimeter.
It is worth remembering that repairing the fuel level sensor in a VAZ 2110 is not always able to extend the life of the device. Often it will have to be replaced anyway.
How to check the operation of the fuel pump?
First, you should check the fuse. To do this, check the instructions for its location. Next, you should check the voltage at the pump. Before doing this, be sure to check if everything is in order with the battery. The voltage at the fuel pump terminal must be checked using a multimeter or tester. The instruction manual always indicates the required voltage.
Using a tester, check the voltage supply to the fuse. Often this is where the electrical circuit breaks.
If the search does not yield results, then the voltage should be checked on the contacts themselves. All contacts must be in place and connected to ground. A broken contact or its oxidation leads to failure of the fuel pump system. If no broken contacts are detected, but the voltage drops by more than 1 volt, then the problem is in the wiring or oxidation of the contacts. There should be no short circuit in the wiring.
If, after checking the voltage, contacts and fuse, you do not find any problems, then the problem lies in the fuel pump itself. In this case, the fuel pump will most likely require replacement. In practice, it most often turns out that replacement is a last resort. First, you should try to restore and test the fuel pump again.
Before you check the fuel pump, you need to remember that, as mentioned above, pressure is the most important characteristic of the fuel pump, so it is worth measuring its level.
How to check the pressure in the fuel rail?
You will need a pressure gauge that measures pressure in the range from 7 to 10 atmospheres. If you choose a pressure gauge with a large margin, you risk getting less accurate measurement results. Specialized stores sell a kit for measuring pressure, but you can also design your own device.
If you want to assemble the device yourself, you will also need a hose with an internal diameter of 9 millimeters. You will also need plumbing tow, with which you can seal the connection between the pressure gauge and the tube. All parts are connected and tightened using a clamp. You will also need a car spool. Next you need to perform a series of actions:
- Place the car on a level surface that is prevented from rolling, turn off the ignition and open the hood.
- Check that the injection nozzles have access to the fuel rail.
- Find the fuel pressure plug and remove it. Then you should unscrew the nipple using the spool.
- Prepare an empty container (a regular bucket will do) and a clean rag. This is necessary to collect residual fuel, which under pressure can splash out in different directions. Therefore, take care of the safety of your skin (especially your face and eyes).
- Connect the device to the fitting and begin checking the mechanism.
Checking the pressure in the fuel rail should occur in four operating modes of the power unit:
- when the ignition is on;
- at idle engine speed;
- code the fuel pressure regulator tube is reset;
- when the drain tube is compressed.
Fuel rail pressure measurement results
The results may vary slightly for different car models, but in general they should be as follows:
- when the ignition is turned on, the pressure must be at least 3 atmospheres,
- at idle engine speed - at least 2.5 atmospheres,
- when the pressure regulator tube is reset - at least 3.3 atmospheres,
- when squeezing the drain tube - at least 7 atmospheres.
Fuel rail pressure fluctuates slightly during preparation. When you press the pedal, it suddenly takes on a value of 3 atmospheres; when you release the pedal, it drops to 2.5 atmospheres. When fuel enters the fuel system, turn off the ignition and begin observing the pressure gauge. The pressure in this case should drop to 0.7 bar and remain unchanged.
If the pressure drops to zero, there may be a problem with the fuel pressure regulator. In this case, the regulator must be replaced immediately. The cause could also be the fuel pump check valve.
It is necessary to observe the behavior of the pressure gauge even at 3,000 engine speeds. A drop in pressure will indicate a faulty fuel pump. Sometimes the fuel pump cannot reach the required pressure for a long time. In this case, the problem lies in a clogged fuel filter, which needs to be replaced, or in a dirty fuel pump mesh (read more about where the fuel filter is located).
If the above methods do not reveal a malfunction of the fuel pump, you will have to diagnose other units (DPZD, IAC, mass air flow sensor, compression in the engine and some other indicators and parts).
When is it necessary to change the sensor?
The fuel sensor must be replaced if at least one of the following reasons occurs:
- contacts are so destroyed that there is nothing left to protect;
- resistive tracks are worn to the limit;
- there is damage to the float. This is rare, but it happens. Ruptures lead to the fact that the latter fills with gasoline and sinks, showing an empty or half-empty tank,
- even when it is full;
- The slider itself is damaged.
In case of the above-mentioned defects, the FLS must be replaced.
Possible malfunctions and ways to eliminate them
Sensor readings jump
Tip: The most common malfunction of the gasoline level controller is associated with operational wear of the contact parts of its rheostat. You can verify this by measuring its resistance with an ohmmeter, smoothly moving the lever with the float on it from the left extreme position to the right (or vice versa). A faulty controller must be replaced
The cause of this problem lies in the erased tracks on the sensor rheostat board. They wear out under the influence of the runner. Sometimes bending the runner helps for a while; it becomes slightly higher than the worn parts of the tracks. If the abrasions are too great, then replacement is recommended.
Malfunctions in vehicle operation with a faulty FLS
If a faulty VAZ 2110 fuel level sensor is not repaired or replaced in a timely manner, this can damage the submersible fuel pump, for which hydrocarbons serve as a cooling medium. When the level of gasoline in the tank is below a critical level, this leads to the pump running dry, overheating and may fail. At the same time, the latter is not so bad. Overheating can cause a fire, and, accordingly, even greater damage to the car.
In addition, the filter meshes become clogged with dirt from the bottom of the gas tank, which also harms the gas pump.
Selecting a new sensor
Replacing a fuel level sensor on a VAZ 2112 is not such a difficult process, however, it is more difficult to choose the right controller to replace the old one. So:
- If you have no idea which gasoline level sensor to choose, then select it according to the following parameters.
- We create a resistance instead of the sensor itself, and then measure it with a tester and find out the value of the resistance.
- To do this, we need a special variable resistor rated at 1 kOhm; we connect it instead of the FLS.
- With a full tank, the resistance is approximately 6-7 ohms.
- We adjust the pointer to the “empty tank” position, then measure the resistance.
- Based on the data received, we are looking for a new sensor with the appropriate resistance. The main thing when searching is that the nominal resistance of the new controller corresponds to the indicator readings.
- In addition, you can use the instructions in the service manual.
- Before buying a fuel sensor for a VAZ2112, you need to determine its markings.
- There are many varieties of such sensors (controllers) (more than 8), and they practically do not differ in appearance.
- The difference between them is the resistance, which is different for each type.
- We strongly recommend purchasing a sensor with similar markings, otherwise you risk receiving false readings from the fuel controller, even if the system is fully operational.
- For your information, the older your sensor, the more difficult it is to find it on sale (the oldest models are DUT-1).
Interchangeability of gasoline level controllers
For VAZ 2112 cars, there are two most common types of fuel level controllers:
- For the so-called Vladimir combination of units (devices) and for Kursk (from JSC Schetmash).
- For VDO.
Experts say that only the first digits are the most significant in the controller’s markings, and the numbers following them are insignificant modifications by the plant. Therefore, DUT-1-01 and DUT-1-02 are interchangeable, as well as DUT-2-01 and DUT-2-02, etc. If for any reason you remove the fuel pump, immediately replace its strainer at the same time.
Typical faults
Alas, despite the importance of a fuel level meter, its quality is far from perfect, which is why car owners often have to deal with sensor malfunctions.
Typical breakdowns
Definition of marking
- The fuel level indicator suddenly changes its values. Most likely, the contact track has worn out due to the slider. If the wear is not severe, it is enough to simply bend the fasteners of the slider so that it is slightly above the problem area. But when wear is severe, the contact track changes completely.
- The indicator arrow is at a level that is not true. For example, it shows an empty tank even though you just filled up. This will require some adjustment. Disconnect the sensor from the gasoline tank and adjust the indicator. It is enough to move the arrow from the value at which it is stuck to zero. Most often, this measure helps.
- The arrow barely moves and cannot reach the desired position. In such a situation, the tongue bends slightly, which allows you to increase the range of the pointer arrow. It is possible that the contacts on the pointers have broken or come loose. To do this, look under the dashboard and check the condition of the wiring.
- It is possible that the fasteners securing the wires have become loose. They need to be tightened up. If the instrument panel is in good condition, examine the entire wiring path. A short circuit often occurs, causing the measuring device to stop working.
If all the measures taken have not yielded any result, the sensor continues to show complete inoperability, you will have to replace it.
Messages 9
1 Topic by drummer04 2015-04-14 10:42:54
Topic: How to choose the right fuel level sensor for a VAZ 2110?
Hello everyone, the gasoline needle has started to lie, and I want to replace the FLS, but I heard that there are already 8 varieties, and I don’t know which one to buy. They say that you can buy it by the number of the device, I have a device, Automatic Device (AP) with one window Article: 2110-3801010-04, has anyone come across this?
2 Reply from Daniil.Smit 2015-04-14 10:49:18
Take off yours and see what air you have on it and buy the same one, profit
Added: 2015-04-14 11:48:42
It should be written there
Added: 2015-04-14 11:48:59
Added: 2015-04-14 11:49:18
019395.jpg 45.6 kb, 18 downloads since 2015-04-14
3 Reply from drummer04 2015-04-14 10:52:01
Take off yours and see what air you have on it and buy the same one, profit
Added: 2015-04-14 11:48:42
It should be written there
I thought about it too, but it never changed. and maybe everything there is erased.
Added: 2015-04-14 10:51:02
what is written, where is it written. the picture is only of the FLS
Added: 2015-04-14 10:52:01
aaaaaaaaaaaaaaaa got it all. I didn't notice at first))))
4 Reply from Daniil.Smit 2015-04-14 11:24:40
Yes, I think it is held on by two bolts, you take out the pump and look at the FLS like this
5 Reply from drummer04 2015-04-14 11:29:13
yes everything is simple)
6 Reply from Andrey.Lazarev 2016-12-15 23:45:06
drummer04, hi, please tell me what kind of blower you installed, I also have a tidy 2110-3801010-04, the arrow jumps either down or up, it’s tortured.
Added: 2016-12-15 23:45:06
I've searched all over Google and there is not a single clear piece of advice on what to install for this or that device.
7 Reply from Dmitriy.Isaev 2016-12-18 15:15:58
It depends on the type of tidy, if the tidy is from 10 then DUT 1-01, DUT 1-02, DUT 1-03 will do. If the tidy is from Samar (2114,2115) then FLS 2-01.
8 Reply from Andrey.Lazarev 2016-12-19 15:47:56
Dmitriy.Isaev, thank you
