As an additional equipment, LADA vehicles can be equipped with a towing device (trailer hitch or towbar). The towing device is designed for articulated coupling of a vehicle with a towed trailer. The design of LADA vehicles provides for the possibility of installing a trailer hitch without additional mechanical influences (drilling holes, welding) on the vehicle body. The following are instructions for installing and connecting a standard towbar on cars of the Lada Priora family.
For each LADA car model, several trailer hitch options are offered for installation, differing in design, but identical in the method of attachment to the car body.
The trailer hitch, regardless of the model and design of the device itself, is attached to the rear power elements (side members) of the car body.
Tightening torques for threaded connections
:
- M6 – 9.8 Nm (0.98 kgf/m);
- M8 – 24.0 Nm (2.4 kgf/m);
- M10 – 47.0 Nm (4.7 kgf/m);
- M12 – 81.0 Nm (8.1 kgf/m).
Tow bar for Lada Priora
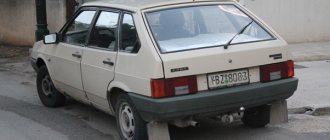
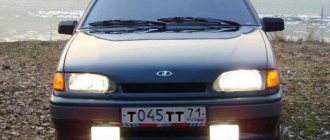
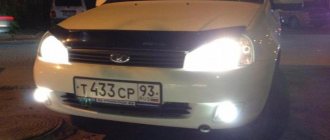
Lada Priora is almost the most common car on the road today. They make it here, quite efficiently, fully maintaining the entire technological regime, and the machine is quite capable of satisfying the average resident of our country, who only needs a car to go to work and back, and sometimes to go on vacation to the nearest forest. The car is available in three body styles: sedan, hatchback and station wagon. So everyone can choose a Priora according to their taste and needs: for some, a large and voluminous trunk is important, while others strive for compactness and maneuverability on the road.
But today we are not interested in this, but in how to install a towbar on a Priora with our own hands, and at the same time not break anything in the car.
What is the device
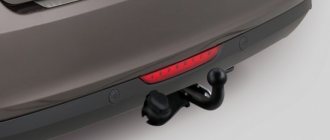
A towbar is a towing device (TCU) that is installed at the rear of a car’s subframe and is used to couple with a trailer or tow rope. It consists of the following elements:
- beams;
- two mounting brackets;
- An L-shaped pipe with a ball at the end, which acts as a hinge around which the coupling mechanism wraps;
- socket box for installing the trailer plug connector.
From behind the car you can only see a piece of pipe with a ball onto which the trailer drawbar is placed. You can make such simple equipment for your car yourself or buy a ready-made one. For Lada Priora cars, purchased coupling devices of the following brands are most often used:
- Bosal produced by Bozal-Autoflex LLC;
- 2170C from ;
- VAZ-05, produced by , is especially popular among Priora station wagon owners.
The trailer hitch is attached to the subframe of the vehicle with bolts or a welded connection.
Model selection
First we need to decide how we will look for a tow bar for ourselves. It’s not difficult to find any on a Priora, and it makes no difference whether it’s a hatchback or a sedan. We will need a towbar based on a tow ball, standard for our country and all neighboring countries. It is very simple, but fully capable of satisfying those who want to drive their car with a trailer. Externally, in the back of the car we can only see a pipe and a ball sticking out on it. In the part of the car that is invisible to us, there also remains a frame with brackets that secure this entire structure to the car’s subframe.
When a towbar is made, the mounting frame is first made, and therefore, depending on the depth of the subframe, the ball itself and the pipe on which it is attached are brought to the visible part. Everything is done simply on the Priora – it’s a standard car. The ball in this entire structure plays the role of a fixed hinge around which the trailer drawbar moves. Due to the perfectly smooth shape of the trailer, it turned out that the trailer can move both horizontally and vertically without causing any inconvenience to the driver.
There are also the following types of trailed equipment:
- Based on a trailer bracket.
- With tow hook.
Towbar Lada Priora
By the way, the towbar usually created a lot of inconvenience when driving. Usually, when making a sharp turn, the trailer could suddenly jerk the car to the side due to the fact that it is not firmly fixed. It often happened that the hook was torn off by the trailer. This happened because after long use the hook slowly wore out and the weld simply came off.
Types of devices and their features
Owners of a Lada Priora often purchase the following towbars for their vehicle.
How to attach the device
- Unknown manufacturer. Such designs are not marked; there are no manufacturer’s details in the passport or on the packaging. The big disadvantage of this product is the corner that protrudes 5 cm under the floor of the spare wheel.
- From . Model “2170-C”, equipped with a removable ball. The advantage of such a product is the presence of packaging and a passport with details, a seal and other features of the purchase process. It is necessary to take into account that the cross beam has a square cross-section and a large volume.
- . Welded structure VAZ 2110-2112-03. The optimal solution for the Lada Priora sedan is to purchase a towbar model VAZ-05. This product is equipped with a removable ball and 2 longitudinal mounting bolts. The original appearance is another advantage of this design. Please note that the removable ball of this model requires periodic removal and installation. In this case, the threads of the bolts are stretched under a certain load, gradually deforming. This towbar is sold without spacers. Without them, when tightening the bolts, the side members bend. The installation of such a unit involves the close location of the reinforcing corner of the left paw to the muffler pipe.
- From . Welded model "V-10". In terms of design and configuration, it is in greatest demand among Lada Priora sedan car owners.
Types, pinouts and connection diagrams for towbar sockets
p, blockquote 6,0,0,0,0 —>
Several types of connectors are used to connect trailers:
p, blockquote 7,0,0,0,0 —>
- seven-pin (7 pin) European-type connectors;
- American-type seven-pin (7 pin) connectors;
- thirteen-pin connectors (13 pin);
- special connectors.
The most widely used 7-pin European style connector is found on most passenger car cargo trailers. Its diagram and appearance are shown in the figure:
p, blockquote 8,0,0,0,0 —>
p, blockquote 9,0,0,0,0 —>
A special feature of the connector is that the receiving part and its mating parts have sockets of both types (“male” and “female”).
p, blockquote 10,0,0,0,0 —>
This is done for reasons of safe connection of the circular connector in zero visibility conditions. It is almost impossible to install incorrectly or short-circuit the sockets with this arrangement.
Basis of classification
The towbar for the Lada Priora sedan is classified according to a number of criteria.
Sign
1 manufacturer 2 price 3 components 4 technical characteristics
You can buy a tow bar for your car from an unknown manufacturer. Such a device is not marked. The disadvantage of the design is the presence of a corner protruding 5 cm under the floor of the spare wheel. You can choose similar products. This model has a removable ball and a cross beam with a square cross-section.
It is allowed to install a tow bar on a Priora from . If the Lada sedan is tuned with a device of the VAZ-05 model, then the removable ball will need to be periodically removed and mounted. This towbar is equipped with 2 bolts, the threads of which are stretched and deformed under a certain load.
The device in question is sold without spacer bushings, which has a negative effect on the side members (they bend). Installation of this model on a sedan involves the close location of the reinforcing corner of the left paw to the muffler pipe. To make your own towbar, you will need the following materials:
- ball mechanism with lugs;
- pipe 1 m long;
- corner;
- nuts, bolts with a diameter of 14 mm, washers.
If you plan to make a removable towing device, then you will need additional angles, nuts and a tailgate. The latter elements are designed for convenient transportation of loads of considerable length. Installation work is carried out using a rectangular pipe and a sheet of metal.
Installation
Now let’s move on to the nuances of installing a tow bar on Priora cars. There are several main steps here.
So it looks something like this:
- you choose a suitable tow bar;
- buy a trailer hitch that matches the Priora design;
- install the metal part;
- install electrical wiring;
- reassemble the car in reverse order;
- carry out a road test;
- hitch the trailer;
- check it in action with an empty and full trailer;
- testing the operation of lighting equipment;
- you are happy with the result.
But the installation itself includes the installation of metal structures and work with the electrical part.
Each stage is quite important, so I’ll tell you about them in more detail separately. The attached photos are not for instructions, but rather for reference.
Mechanical installation
If you bought a good towbar, it will be equipped with stiffening plates, a lining for the trailer hitch pad, and rubber inserts for shock absorption.
Although experts recommend installation at professional service stations, not everyone adheres to this recommendation. Therefore, if you want to do everything yourself, prepare a specific set consisting of:
- drills;
- drills 12.5 mm;
- sandpaper of different fractions;
- wrenches to match the size of the bolts on your car;
- anti-corrosion composition for metal;
- rags;
- degreaser;
- water with rags to remove dirt;
- good lighting;
- inspection hole or, in extreme cases, a reliable jack.
First, you need to note in which places you will have to drill holes for the subsequent installation of the trailer hitch. Make sure there is no wiring running through there, otherwise there will be even more problems.
Holes are drilled, sanded and the exposed metal is coated with anti-corrosion compounds.
All that remains is to carefully fasten the tow bar with the fasteners included in the kit, not forgetting about the stiffening plates, inserts and shock-absorbing pads. Tighten all the fasteners and make sure that the tow bar fits properly on the Priora. If everything is ready, you can move on to the next stage.
Some craftsmen take ready-made drawings and weld towbars with their own hands. This is a stupid idea because the results can be seriously disappointing. As a result, you will still have to buy a factory trailer hitch and install it.
Electrics
This stage is more difficult to implement, because not every car owner without the proper experience is ready to do such work with their own hands.
This is a completely reasonable fear that you should not be ashamed of.
It’s better not to take risks, but to entrust the connection to professionals. After all, you risk the integrity of the entire electrical wiring, and if connected incorrectly, there is a risk of fire.
The connection goes something like this:
- access to the wiring harnesses from the Priora rear lights is provided;
- The trunk is first emptied and the mats are removed;
- the dimensions are turned on so that the tester can be used to find the required wiring on the left lamp;
- a piece of wire about 60 cm long is attached to it and marked;
- Dimensions are turned off;
- right turn is activated;
- similar markings are made;
- Next on the list is the left turn signal;
- the brake light is now detected and marked;
- all wiring is connected into a single harness;
- it is discharged through the technological opening;
- the wiring is pulled to the trailer hitch socket;
- further, according to the diagram, the marked wires are connected to the towbar electrics;
- trailer plug is connected;
- functionality is checked.
Do not forget about the mandatory need to insulate all wires. Here you need to be extremely careful not to leave exposed wire. Otherwise, the risk of burning out all electrical components, short circuits, and vehicle fire immediately increases.
These words may seem scary, but I am not at all discouraging you from doing everything yourself. It's just important to understand what potential risks you may face. That's why you need to think twice. I would give preference to an auto repairman if he lacks proper experience in working with electrical equipment.
That's all for me. I hope I was able to help you a little.
Mechanical part of tow bar installation
First of all, you need to take into account that the ball of the device must be in the center of the rear bumper. It is necessary to achieve maximum accuracy, because otherwise there is a risk of trailer sway. This means that the mounting bolts on the subframe must be installed according to the previously marked marks.
Before installing the towbar, prepare the following:
- Electric drill;
- Metal spacer plates to strengthen the fastening;
- Set of keys, screwdrivers;
- Anticorrosive
Please note that the station wagon received a reinforced rear suspension, so the mounting points will be different.
Pay attention to the mounting points, mark the normal extension of the device beyond the edge of the bumper so as not to scratch it each time you install the trailer. Carry out the work according to the algorithm:
- Remove the rear bumper. To do this, unscrew the mudguard mounting bolt using Torx-20. Use a Phillips screwdriver on both sides to unscrew the screws that secure the bumper to other parts of the body.
- Then unscrew the bolts securing it to the body from below. Having opened the trunk lid, unscrew the remaining bolts with the “10” key.
- Pull the bumper slightly towards you. Disconnect the wires from the parking sensors. Remove the bumper and place it on a soft cloth.
- Mark the mounting locations. Drill holes with a radius of 6-7 mm, make the same holes in the plates to make the device more stable.
- Treat everything with anticorrosive. Place the brackets, securing them with bolts.
- Install the towbar. But don't overdo it to keep the spar intact.
- Connecting electrical wiring to the Lada Priora trailer hitch socket and light alarm.
A Question of Choice
If you go to auto parts stores, your eyes will literally start to run wild from the huge assortment. Frankly, if earlier the main problem was scarcity, now it is wide variety.
There are many brands that produce trailer hitches. But not all of them are ready to offer a design that is suitable for Priora. That’s why experienced motorists distinguish 3 main manufacturers.
- Trailer. You can get acquainted with the products of this company by following the link. Decent quality, reasonable prices, simple but convenient design. It completely justifies itself in all respects. There are models specifically for Priora;
- Leader Plus. Another good domestic manufacturer. The advantages are the same, but no significant disadvantages have been identified in relation to Russian cars. That is why there is an increased demand for their trailer hitch;
- Avtos. Although the name is in a foreign language, in fact the manufacturer is ours. There is also good quality, very reasonable prices and no installation problems.
I don’t argue that there are other companies that produce equally high-quality towing devices. But it’s not a fact that they have a solution specifically for the Priora design. Plus, famous foreign towbars are more expensive. And price is not always an indicator of high quality, as experience shows.
Do not forget to clarify the question of the hitch ball used. They are different, which makes the final choice somewhat more complicated. From personal experience, I can confidently recommend removable tow bars.
It's up to you to decide what exactly to put on your domestic car. The main thing is that the quality is at a good level. Otherwise, problems cannot be avoided in the future. Don't waste your time and money on cheap towbars. I gave similar advice regarding the selection and installation of trailer hitches on Lada Largus cars and the no less popular Lada Vesta in Russia.
To connect to the electrical network, follow these steps:
- Disconnect the negative terminal from the battery;
- Remove the bar that is located inside the trunk, closer to the edge. Find the wires that go to the rear signals;
- Lead the wires to the towbar socket - you need to solder the bends to the standard wiring. Insulate connections;
- Route the wires to the outlet. Connect it, carefully closing the connections;
- Only after this can the tow bar be installed inside the device;
- Reinstall the trunk trim and then the bumper.
How to install a tow bar on a Priora
It must be installed so that the hook with the ball is located exactly in the middle of the rear bumper.
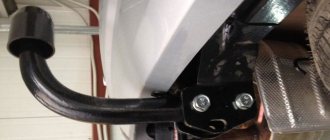
Installation of the tow bar on the Priora is carried out after checking the reliability of fastening
This is necessary for the safe transportation of the trailer, which should not move relative to the axis of the vehicle. Therefore, you need to determine the location for its installation on the subframe. In this case, it may happen that in order to attach the mounting bracket, you will need to do tuning of the exhaust pipe.
To install the trailer hitch you will need the following tools and accessories:
- an electric drill or welding machine if you bought or built a hitch with a welded joint;
- set of screwdrivers and keys;
- reinforcing plates;
- anti-corrosion coating, for example, Anticorrosive paste.
If you are the owner of a Priora station wagon, you should look under the car and see if the holes already in the subframe are suitable for installing a trailer hitch. To install a towbar on a Priora sedan or hatchback, you don’t have to look for such holes, and in any case, you will need either welding or drilling holes in the right place.
The procedure for installing a towbar on a Lada Priora is as follows:
- Remove the rear bumper of the car. Even if it doesn’t interfere much, working without a bumper will be easier and faster.
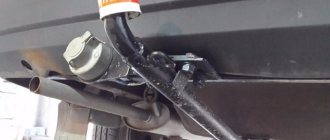
The towbar is secured to the reinforcement plate using a bolt and nut
- Mark locations for installing brackets and drilling holes.
- Drill holes with a diameter of 13 mm and weld reinforcing plates in this place.
- Treat the holes with anti-corrosion paste to avoid the appearance of a corrosion center at the drilling site.
- Install the right and left brackets, and attach the beam with the ball to them. When tightening the bolts on the brackets, do not use excessive force to prevent the spar from moving.
- After connecting the towbar to the vehicle's on-board network, reinstall the rear bumper.
Each car owner can install a towbar on a Priora independently, without contacting a service center, but at the same time he will have to register changes in the design of the car with the traffic police. You don't have to do this if:
- The car manufacturer provides the possibility of installing a trailer hitch;
- the installed towbar has a certificate;
- installation was carried out in a certified service center.
Holes for installing a trailer hitch are available only in Priora station wagons, which means that owners of sedans and hatchbacks can safely undertake installation of the device with their own hands, since they need to register it with the traffic police in any case.
Traffic police requirements for towbars in 2021
From February 1, 2022, improved standards for regulating changes in the design of cars and other vehicles came into force. These standards began to be applied from July 1, 2022 (clause 1 of the Decision of the Board of the Eurasian Economic Commission dated December 25, 2022 No. 219). Please note that the changes concern the installation of home-made, non-certified trailer hitches , or trailer hitches of a type not provided by the automaker. The identified device must either be dismantled or obtained approval from a specialized laboratory at your own expense. The process of installing a non-standard tow bar requires dismantling the bumper and modifying the design of the luggage compartment of the body. Such manipulations are considered modification of the car (tuning), therefore registration of the vehicle with the traffic police is mandatory.
If the identified changes are not eliminated within 10 days, the registration of the vehicle is terminated.
Penalty for violations when installing a tow bar
There is no special regulatory act directly related to TSU. The Code of Administrative Offenses of the Russian Federation (Article 12.5) stipulates the moments when a fine will be issued:
- Unregistered device.
- The design covers the state license plate.
If violations are detected, the owner of the Priora will face a fine of 500 rubles.
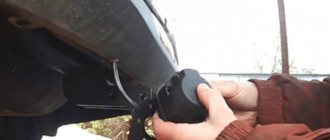
Connecting a towbar to a Lada Priora car
Installing a tow bar on a Priora is not limited to just installing the mechanical part of the device. It must be connected to the car's electrical network by attaching a connector to the socket for connecting the lighting devices of a trailer or trailer. For this purpose, the serially produced trailer hitch kit contains wires of various colors and a socket of the appropriate design, with a closing lid.
To connect the tow bar on any Lada Priora model, you must:
- Remove the strip in the corner of the trunk and part of its decorative trim. This is where the wires go to the rear signal lights and taillights of the car.
- In the wiring harness going to the taillight, you need to find the turn signal, side light, brake light, and ground wires.
- Connect the taps to the required wires to the tow bar socket. To do this, strip the corresponding cables and solder taps to them. After this, it is necessary to insulate the connection points.
- Route the connected wiring harness under the bumper, leading the ends to the trailer hitch socket.
- Connect the socket by soldering the wires according to the attached diagram. Secure the connector to the socket box.
- Reinstall the trim and trim in the trunk, as well as the car bumper.
All sockets for the towbar have identically numbered contacts and the corresponding colored wires for connecting them, namely:
- The pink color of the conductors corresponds to pins 5 and 7 on the connector, which go to the side lights of trailers;
- green and blue wires are, respectively, the left and right turn signals on Lada Priora cars, and they are connected to pins 1 and 4 of the towbar socket;
- the brake light corresponds to the sixth pin of the connector and the red or orange color of the wire;
- the black wire is ground, or the negative terminal of the battery, and it needs to be soldered to pin 3;
- The last contact of socket No. 2 is connected to the wire from +12 Volts.
Having attached the trailer and connected its plug to the connector on the trailer hitch, you need to check the operation of the signal lights. Having connected the towbar, you can consider the installation work completed.
Installation and connection of the connector for trailer light signaling
This is the most delicate and crucial moment in installing a towbar on a car, because not only the correct operation of the lights, but also the fire safety of the entire car depends on the correct connection of the disconnect plug.
This is due to the fact that there is no single standard for pinout of this connector, and it is quite possible to connect the wire for turning on the parking lights to the ground of the trailer. And this will lead, at best, to a blown fuse, and at worst, to a short circuit in the wiring.
So, the connection operation. To do this, you need to open access to the wiring harnesses of the Priora rear lights. That is, free up space in the trunk, remove the mat and everything that is there. Turn on the side lights. On the left lamp harness, use a test lamp to test the desired wire. Attach a piece 55-60 centimeters long to it and attach a piece of paper with the designation to it. Turn off the side lights. Enable right turn. Mark similarly. Then left, call on the other lamp. Make the wire longer there. In the same way, find the brake light on the right. If the trailer has a reversing light, mark and route its wire. Collect all the resulting contacts into one bundle. At the bottom of the Priora there are technological holes closed with rubber plugs. You need to bring this harness out through them and stretch it to the towbar connector.
Installation diagram
If the towbar on the Priora is chosen correctly, then there will be no problems with installation. And the standard installation sequence includes the following steps:
- Dismantling of some auto parts.
- Installation of the metal structure of the coupling device.
- Installation of electrical wiring.
- Reassemble the car in reverse order.
- Carrying out a road test in conjunction with a trailer. Including testing of lighting equipment.
Due to the importance of the installation stage of metal structures and electrical equipment, we will analyze these stages in more detail.
Basic faults
Exceeding the permissible load can affect the condition of the trailer hitch. Because of this, it becomes deformed, but may even break off on its own. If it has a removable ball, it may come off. The question is when the malfunction will appear - while the car is standing or while it is driving.
The second problem is the lights going out due to insufficiently strong wire connections. In order to avoid getting into an unpleasant situation, pay attention to the fastening of the bolts, the connection of wires, and their insulation. The main thing is not to exceed the maximum permissible load of the device, even if the trailer is capable of carrying more weight.
The permissible trailer weight for the Priora is 800 kg - don’t take anyone in tow?
When choosing a future car, I chose the VAZ Priora. In the technical specifications of this car it is written: the permissible total weight of a towed trailer with brakes is 800 kg - this means sending all your friends and relatives to hell if they break down somewhere, but the OCU will probably handle it? Explain to the fool that in reality something will happen to the car if, for example, you take a six in tow, it weighs a ton without passengers. Logan's maximum permitted weight of a towed trailer with a brake system is 1100 kg.
The question is: should we send relatives of those stuck?
The question is what will happen to the car after towing a vehicle weighing more than the permissible weight.
Installation work
More often, the towbar is equipped at the factory with a pad for the platform, stiffening plates and rubber shock-absorbing inserts. Although professionals advise installation at service stations, more often drivers are interested in how to install a tow bar on a car with their own hands. In answering this question, we will list the necessary equipment and tools. It will include:
- Drill with drills.
- Multi-grade sandpapers.
- Water with a cloth to remove dirt.
- Degreaser.
- Rags.
- Anti-corrosion composition.
- Jack or inspection hole.
- High quality lighting.
Video about installing a tow bar
The mechanical installation sequence is simple. To begin with, the driver drills holes in the appropriate places, but not in contact with the electrical wiring. We clean them with sandpaper and treat them against corrosion. Afterwards it is necessary to apply a sealant for waterproofing.
Next, we attach the towbar using the fasteners included in the delivery kit, using, among other things, inserts, shock-absorbing pads, and stiffening plates. The main thing is to carry out a high-quality tightening of all elements at the last step.
Required
- Towing device (without electrical wiring), article number 99999217007216, price about 4100 rubles.
- Electrical wiring kit for connecting the towbar socket, article number 99999000017182, price about 740 rubles.
Electrical wiring installation
It is better to entrust the connection to professionals to prevent electrical wiring damage. When installing electrics yourself, the steps are as follows:
- Emptying the luggage compartment, including carpets.
- Opening access to the electrical wiring harnesses of the vehicle's rear optics.
- Turn on the dimensions to search for the corresponding wire on the left lamp using a tester.
- Fasten and mark a 0.6 meter piece of wire in this place.
- Turning off the side lights.
- And turning on the right turn signal for subsequent similar markings.
- Further, the rear lights with brake lights are also determined.
- And then the electrical wiring is connected into one bundle, which is removed through the technological hole.
- Pulling wires to the towbar socket. For information on how to connect a towbar socket, read this article.
- Connecting the marked wires with the coupling electrics according to the diagram.
- Connecting the trailer plug.
- Functionality check.
At the stage of connecting the electrics, it is important to pay special attention to the insulation of the wiring, because if the standards of this stage are not followed, there is a possibility of a car fire.
Thus, choosing a towbar for a Priora is similar to the process for other cars. However, it is worth being familiar with the classification of towing devices, having information about manufacturers that produce devices specifically for this car, and also knowing how to install a towbar on a passenger car with your own hands.
Connection
Socket connection diagram
:
- Left turn
- PTF
- Weight
- Right turn
- Reverse
- Stop signal
- Dimensions
By the way, do you know how you can install a handle on the trunk floor of a sedan to make operating the car more comfortable?
Key words: trunk of Lada Priora
Share on social networks:
Found an error? Select it and press Ctrl+Enter..
Source