DSC_9678 (Copy)
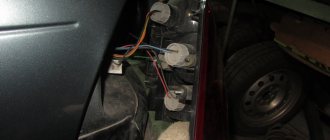
The turn signal lamp is located higher than the brake and side light lamps.
Shown with trunk trim retracted. The turn signal lamp is located higher than the brake and side light lamps. Shown with trunk trim retracted.
If you need to replace one of the lamps, just open the valve in the upholstery, secured with a Velcro fastener.
High beam
- Korean MTF Light Magnesium H1 / 100W. Time to failure over 550 hours, light white color, two-layer coating. Luminous flux 1700 lm. (hereinafter referred to as the joint venture);
- MTF Light Palladium H1/55W. Manufacturer: Korea, bluish tint, brightness decreases after 400 hours of operation. SP 1700 lm.;
- Osram H1 Cool Blue 4000K: xenon color, German quality, operating time over 500 hours. SP 1700 lm.;
- Osram H1 Night Breaker: the light cone is 35 - 40 meters longer than its analogues. The light is bright white, operating time over 500 hours. SP 1700 lm.;
- Philips H1 Crystal Vision: temperature 4300 K, xenon color. SP 1700 lm.;
- Philips H1 Night Guide Double Life: new for 2022, uses tri-color lighting technology, bright white, cool, warm colors. Preventing glare from oncoming traffic. SP 1700 lm.
Related link:
Choosing brake pads for a Lada Vesta car.
DSC_9672 (Copy)
To replace the brake signal lamp and side light, stick your hand in, feel for the larger socket and, turning it counterclockwise, remove it from the hole in the upholstery.
To replace the brake signal lamp and side light, stick your hand in, feel for the larger socket and, turning it counterclockwise, remove it from the hole in the upholstery.
Further, for clarity, replacing lamps is shown with the trunk upholstery removed.
Low beam lamp
- Osram H7 12V 55W PX26D: halogen lamp, excellent workmanship, German manufacturer. Time to failure over 500 hours. SP 1500 lm;
Osram H7 12V 55W
- Philips H7 12V 55W PX26D Longe Life Ecovision: operating time over 100,000 km. Quartz glass, resistant to temperature changes. SP 1500 lm;
Philips H7 12V 55W PX26D Longe Life Ecovision
- Philips Vision H7: The lamp light is brighter than daylight. Material - quartz, budget price, protected spiral, special coating from ultraviolet rays. SP 1500 lm;
Philips Vision H7
- Bosch H7 12V 55W PX26D ECO: German manufacturer of lamps with an enhanced light beam. The operating time before replacement is over 70,000 km, after which the beam sharply dims. SP 1500 lm;
Bosch H7 12V 55W PX26D ECO
- MTF Iridium H7: budget option, average performance, zoned space. SP 1500 lm.
The cost of low beam lamps for Lada Vesta: the price is individual, the formation depends on many factors. Range of Philips X-treme Vision, Bosch Xenon Blue, Bosch Pure light from 350 to 1800 rubles, depending on the modification.
Conclusion
The final decision on choosing a lamp rests with the car owner. You need to start from the conditions in which the machine will be operated.
For the average driver, stock lamps are more than enough. Fans of tuning and upgrading require greater lighting capabilities.
Before purchasing and installing a lighting element, always think about how you will not dazzle oncoming traffic.
DSC_9706 (Copy)
Pressing the lamp, turn it all the way counterclockwise and remove the lamp from the socket.
Pressing the lamp, turn it all the way counterclockwise and remove the lamp from the socket.
We install the new P21/5W lamp in the reverse order. In this case, two protrusions, located asymmetrically relative to the axis of the lamp, must fit into the corresponding grooves of the socket.
Reviews
| № | Positive |
| 1. | Vasily, 32 years old, Moscow: the car is a year and a half old, has not made any capital investments, with the exception of scheduled technical inspections. The car is good, but it needs systematic care and careful handling. |
| 2. | Gennady , 28 years old, St. Petersburg: I had no problems with optics, the devices work as normal. |
| 3. | Ivan , 39 years old, Samara: during the year of active operation of the Lada Vesta, I changed the fuses once under warranty. There were no other breakdowns, and I hope there won’t be any. |
| 4. | Dmitry , 42 years old, Sverdlovsk: my positive review of the car, the assembly is good, I always fix minor defects myself, I don’t contact service. |
| 5. | Valery , 37 years old, Krasnodar: instead of standard high-beam lamps, he installed Chinese halogen ones. The quality of lighting is better, the cone range is 20 - 25 meters, the price is affordable. |
| 6. | Negative |
| 7. | Valentin , 43 years old, Taganrog: the standard lighting system on the Lada Vesta is weak, ground clearance is limited. On the recommendation of my friends, I replaced it with Philips H7 12V 55W PX26D Longe Life Ecovision. 20% more expensive, but the quality is incomparable. |
| 8. | Vitaly , 38 years old, Omsk: after purchasing the Lada Vesta, I replaced the standard lighting, installed Osram H1 Cool Blue 4000K for high beam and Bosch H7 12V 55W PX26D ECO for low beam. I was pleased with the re-equipment, the lighting is better, brighter, the cone is longer. |
| 9. | Victor , 41 years old, Sevastopol: the low beam light on a Lada Vesta often burned out, contacted the service station, it turned out that the reason was a faulty relay. They replaced it under warranty and the problem went away. |
Shields
Shields are usually called bumpers made of plastic materials. Today they are increasingly used to protect the car, which explains their name. In addition, they significantly improve the aerodynamic characteristics of the body.
Shield repair
Repairs to fiberglass-reinforced resin shields can be made using resin-coated fiberglass cloth. (This technology will be discussed in more detail below). At the same time, other composite materials from which shields are made, such as polycarbonates, are completely unsuitable for repair. Shields are usually attached to the body with two central and two side bolts. If fog lights or direction indicators are built into the shields, then when removing the shield it is necessary to disconnect the electrical wires.
Rear lighting layout
External lights are those located on the fenders of the car, internal ones are those located on the trunk lid. You can see in more detail in the diagram below, all the component numbers in the table.
| № | detail number | the name of detail |
| 1 | 8450006963 | rear left lamp |
| 2 | 8450006965 | rear inner left lamp |
| 3 | 8450006962 | rear right lamp |
| 4 | 8450006964 | rear inner right lamp |
| 5 | 21910375701001 | rear fog lamp |
| 6 | 7703077469 | clamp |
| 7 | 7703033168 | hex nut with flange m5x0.8 |
| 8 | 7703077469 | clamp |
| 9 | 7703033168 | hex nut with flange m5x0.8 |
| 10 | 7703017138 | Large pan head screw |
We install PTF ourselves
Let's look at the installation process. From the list of factory items you should purchase: fog lights, a power button, inserts for attaching the lights to the bumper, a 4-pin relay, a 16-amp fuse, a wire, a plastic corrugation (at least 5 m long). First you need to dismantle the bumper and cut through the plugs where the headlights are installed. The cuts are made either with a 76-diameter crown or with a knife. We attach the fog lamp bracket with self-tapping screws. In the lower left part under the steering wheel of the Lada Vesta (near the button that opens the trunk) we install a button for turning on the fog lights. It can also be placed directly on the instrument panel. You must first cut out a receiving hole for the button.
The wires leading to the right headlight should be hidden in a metal box. From the engine compartment to the passenger compartment we lay the wire through a special hole in the pedal assembly. In this case, a simplified scheme similar to the Lada Kalina, Priora, Grant is used.
Power to the relay is supplied from the battery (necessarily through a fuse). The positive contact for controlling the button is supplied from the mounting block. Take the plus coming from the dimensions or the cigarette lighter. The device for closing the circuit can be located both inside the cabin and under the hood. We connect all the elements of the circuit according to this diagram and check the operation of the PTF using the button.
As you can see, a set of fog lights installed independently is much cheaper.
How to install fog lights on Vesta with your own hands
Replacement or initial installation of PTF on Vesta should be carried out in specialized workshops, but if it is not possible to go there, then you can do the work yourself:
- Remove the button cover on the central panel above the climate control and dismantle the board.
- Replace the board with a four-button one and install all the buttons in place, including the new one for controlling the fog lights
- Remove the bumper by unscrewing 2 screws on the fender liners, 4 screws near the wings and the same number in front of the protection below.
- Next, unscrew the 2 screws numbered and 5 under the hood, but leave one to hold the bumper.
- By removing the clips under the headlights and disconnecting the ambient temperature sensor, you can unscrew the last screw of the bumper and remove it completely.
- In place of the plugs, install the cladding assembly.
- Attach the brackets to the press washers, and the headlights themselves to the screws, but the bottom one should be shorter so as not to damage the frame.
- First install the bumper and, using a set of radio components and electrics, connect the wiring according to the formula.
- Install a square-shaped relay, pulse if desired, into the fuse block, making a tap from fuse f10.
- Finally install the bumper.
When performing these operations, inexperienced car enthusiasts may encounter a number of problems.
Hood switch
What is a hood switch? This is still the same rod switch, except that the rod is longer than in the doors or trunk. Since the hood end is located on the front frame, the distance to the hood is quite large, which is why it is necessary to use a long rod.
This is the most rarely installed standard limit switch. On cars without a standard alarm system, it can be used by the factory only for the engine compartment lamp, which is offhand only remembered from the VAZ “eighth” family. Therefore, these alarm switches have to be connected independently, and therefore at least one limit switch is always included in the security systems.
But it also happens the other way around: for example, on Renault Megane 3 and Fluence for the Russian market it is standard in all trim levels except the minimum one, and is even built into the hood latch. And there are even wires going to it... but it’s impossible to find them in the cabin, because they remain under the hood, not connected anywhere. When installing an alarm, of course, you don’t have to install your limit switch, but you still have to run the wires under the hood.
This alarm switch will be the most problematic: water and dirt will get under the edge of the hood, causing corrosion, or failure of the switch, or false alarms. Therefore, you need to carefully select the location, if possible installing the limit switch in the cleanest available location.
Transmission
The main purpose of the transmission is to transfer torque from the engine crankshaft to the wheels. The elements of which it consists have the following names:
A clutch, which is two friction discs pressed against each other, which connect the engine crankshaft to the gearbox shaft. This connection of the shafts of the two mechanisms is made detachable so that, by pressing the disks, it is possible to break the connection between the engine and the gearbox, to change gears and change the speed of rotation of the wheels.
This is a power transmission that connects the engine with the driving wheels of the car.
- Gearbox (or gearbox). This unit is used to change the speed and direction of movement of the car.
- A cardan transmission, which is a shaft with articulated joints at the ends, serves to transmit torque to the rear drive wheels. It is used only in rear-wheel drive and all-wheel drive vehicles.
- The main gear located on the drive axle of the vehicle. It transmits torque from the driveshaft to the axle shafts, changing the direction of rotation by 90°.
- A differential is a mechanism that serves to provide different rotation speeds of the right and left drive wheels when the car turns.
- Drive shafts or axle shafts are elements that transmit rotation to the wheels.
Why don't you have fog lights?
On modern domestic cars, such additional equipment is installed exclusively in luxury configurations or as an additional option. If our Vesta did not have foglights when we purchased it, then we will need to do the installation ourselves.
It is important to remember one immutable truth - even installing such a small thing as a pair of headlights automatically leads to loss of warranty. There can only be one way out, try to perform the so-called re-equipment to a configuration an order of magnitude higher than the existing one
You will need a standard kit from AvtoVAZ, which includes:
There can only be one way out, try to perform the so-called re-equipment to a configuration an order of magnitude higher than the existing one. You will need a standard kit from AvtoVAZ, which includes:
- Two headlights (261500097R);
- Front wiring kit in harness (8450006983);
- Left fastening element (8450006277);
- Right fastening element (8450006276);
- Switch kit (8450006924);
- Body electronics unit (231A08052R);
- Instrument panel wiring harness kit (8450030715).
PTF installation cost
It would be good to first think about how much such a procedure would cost, because on Vesta an installation of this kind is a rather complicated and time-consuming task.
The cost of pleasure, at the time of writing, is approximately 50,000 rubles. If you have somewhere to add 15-20 thousand, then you can safely go to the dealer and install it on site. If something happens, you can always fix any damage under warranty. Has the desire to save money taken over? We do everything with our own hands.
Bumpers
Damaged bumpers can in some cases be repaired. Since the metal of the bumper is quite thick, strong heating of the straightening area is necessary, which leads to the destruction of the chrome coating. Parts made of corrosion-resistant steel with minor damage can be repaired and polished once their shape is restored. However, these repair operations are rarely profitable, since the cost of straightening quickly reaches the cost of a new part, so replacement is preferable. In addition, the quality of editing of profiled bumpers is not always satisfactory. When repairing composite bumpers, only damaged parts are replaced, resulting in lower repair costs.
Here it is, a scattering of LED replacements for light bulbs in the rear lights.
Car taillights are not just lighting equipment, but also an important design element. It is enough to stand in an evening traffic jam to appreciate the wealth of imagination of their developers. Most lanterns still use the good old incandescent bulbs, but here, unlike headlights, there is a fair amount of variety: single- and double-filament, base and baseless, 21 and 5 W, with clear or colored glass. But the bulbs themselves, as a rule, are not visible from the outside: the light from their spirals scatters into thousands of lights thanks to the design of the reflector, which resembles crumpled foil. There are other solutions, such as a corrugated diffuser. But the trend of recent years is still transparent smooth glass and a faceted reflector.
Front body design
- Front fender aprons (mud flaps) are internal panels that fit around the wheel and protect from dirt. They are partially welded to the side members. Mud flaps also add structural rigidity to the body.
- The upper mudguard reinforcement is a structural element of the front part of the body. The front fenders are screwed onto it.
- Body cups are reinforced body parts that support the top of the suspension struts. They are formed as part of the body mud flaps.
- The radiator frame (radiator support, engine compartment frame) is a structural element located in the front part of the body and holds the cooling system radiator, hood latch and other adjacent elements of the car. The radiator frame is attached to the side members and mudguards. It stiffens the front part of the body as a transverse structural element.
- The engine compartment shield (or front bulkhead) is a panel dividing the front section of the body and the central section of the cabin. The engine compartment shield helps protect the driver and passengers in the event of a fire in the engine compartment. Behind the shield is a power structure that protects the driver and passengers at the time of an accident.
- The front fenders are located next to the front doors and extend to the front bumper. They cover the front suspension and the front mudguards. On modern cars, the fenders are usually bolted to the body.
- The bumper reinforcement is screwed to the front of the side members and is designed to absorb the impact in an accident.
