More than forty years ago, the first VAZ 2106, known as the Six, rolled off the assembly line of the Togliatti automobile plant. Reliable, and at that time quite economical, it quickly became a dream for millions of Soviet citizens who were not spoiled by the domestic automotive industry.
Ease of maintenance and repairs that do not require high qualifications made it possible to service the car independently, without the help of service station specialists.
Some time ago, the six became a training tool for a novice driver - using the example of its repair, you can accumulate good experience in carrying out auto repair work.
Body, chassis, electrical, do-it-yourself VAZ engine repair has become a huge field of activity for people who are interested in cars.
Increased oil consumption
Normal oil consumption is considered to be an average of one hundred grams per thousand kilometers; if you go beyond these limits, you need to look for the causes of malfunctions such as:
- valve seal malfunctions
- increased valve liner clearance
- piston ring wear
- ellipse of the cylinder block.
Replacing oil scraper and compression rings is more labor-intensive work and requires certain skills from the car enthusiast.The first two faults require repair of the cylinder head, and with a small amount of tools, they are quite accessible for repair with your own hands, if milling work is not required to restore the plane of the cylinder head.
As a rule, with high mileage, such work will not give the expected results, since replacing the piston rings is carried out in conjunction with boring the cylinder block.
This allows you to remove ellipse in the cylinder block, which in turn will give good compression and significantly reduce oil consumption.
VAZ 2109 - engine assembly
After the engine has been disassembled and all the necessary repair work related to replacing failed system elements or the cylinder block has been completely replaced, you can begin assembling the VAZ 2109 engine. For assembly, we also prepare a standard set of tools and begin the process, the order of which looks like in the following way:
First of all, we install the crankshaft in its place. Before installing it, we need to thoroughly clean the grooves and seats of the main bearing shells from carbon deposits, using a thin awl, a rag and gasoline for this. After the seats are cleaned, install the liners according to the marks made during disassembly
When installing, make sure that the antennae of the liners fit into the special grooves in their places. Then lubricate the surfaces with engine oil.
Now you can install the crankshaft in its place and then install the half rings
By the way, please note that there are chamfers on the half rings; these chamfers should be directed towards the crankshaft cheeks when installed
- The steel-aluminum ring, which is white, is installed on the drive side of the camshaft, that is, from the front, and the bronze ring (yellow) is installed on the opposite side, respectively.
- After the half rings are installed, we align them so that their ends are flush with the plane of the ends of the bed.
- Now, in accordance with the marks, we install the liners in the main bearing caps. The tendril on the liner should fit into the groove on the lid.
- We put on the covers according to the marks made and fasten them. By the way, if for some reason you did not make marks, then carefully look at their surface, on which factory marks should be made in accordance with the numbers of the cylinders on which they are installed. The cylinder count is carried out from the camshaft drive side. Tighten the fastening bolts crosswise - one bolt of the first cover, then diagonally the second bolt of the next cover and so on. After the bolts are tightened, rotate the crankshaft; it should rotate freely without noticeable jamming or effort.
- Next, install the oil pump, having first replaced its sealing gasket. To prevent the gasket from slipping during installation, place it on grease.
- We install the rear oil seal holder, also replacing the gasket.
- Assemble the pistons - see Assembling pistons for the VAZ 2109.
- Wipe the connecting rod journals and crankpins with a clean rag.
- Install a ring tightening device on the piston and, pressing it tightly to the cylinder block, push the piston with connecting rod along the cylinder, while the crankshaft should be positioned so that the installed piston is at bottom dead center, and the arrow on the piston bottom should be directed towards drive side of the camshaft.
- After the piston is seated in its place, we put the connecting rod on the crankshaft journal and put on the connecting rod cover, after inserting the liner into it. Inserts and covers must also be put on according to the marks made. The tendril on the liner should fit into the groove in the lid. Don't forget to lubricate the surface with motor oil.
- We install the remaining parts in place - oil level sensor, oil separator, pan.
Loss of power and unstable operation
The cause of such a malfunction can be several factors:
- faulty spark plugs
- burnt out cylinder head valve
- cylinder piston burnout
A faulty spark plug can be easily identified by unscrewing it from its normal location. Black soot, traces of unburnt fuel with a characteristic odor, a clear sign of its malfunction.
A burnt-out valve or piston will require much more effort and material investment. It is important to be careful when diagnosing an engine malfunction.
All other things being equal, these two malfunctions have similar symptoms, such as blue smoke from the exhaust system and increased carbon deposits on the spark plugs.
Installation of oil seals and oil pump
The 21083 engine lubrication system consists of an oil pump, oil receiver, filter and channels. After disassembling the engine, all channels must be washed with solvent and blown with compressed air. The oil pump should be installed together with the crankshaft seals, and the oil receiver should be installed after installing the ShPG and flywheel.
Installation procedure for seals and pump.
Using a thick copper or brass spacer and a hammer, drive the rear oil seal into the holder all the way. Using lithol or other grease, glue the gasket to the other side of the holder. Lubricate the inner edge of the rear oil seal and the crankshaft flange with engine oil. We put the oil seal assembly with the holder on the flange; to do this, carefully tuck the inner edge of the oil seal onto the flange using a sharp and soft wooden stick.
Replacing the oil pump seal
- After this, we slowly move the holder along the flange all the way to the cylinder block, secure it with bolts and align it so that its edge completely coincides with the edge of the block. Only after this do we tighten all the bolts completely.
- Just like the rear one, we hammer the front crankshaft oil seal into the oil pump hole.
- Lubricate the inner edge of the oil seal and pump gears with oil. To ensure uniform lubrication, turn the gears with your finger.
- Use lithol or any other consistency to glue the gasket to the oil pump.
- We rotate the drive gear so that the protrusions on it coincide with the cuts on the front of the crankshaft.
- We put the oil pump on the shaft, use a sharp soft wooden stick to tuck the lip of the oil seal onto the crankshaft journal.
- Just like the holder, we move the oil pump all the way to the block, secure it with bolts, align the edges and tighten the bolts completely.
Power system repair
The most common malfunctions of the fuel system of a VAZ 2106 car, which can be repaired with your own hands, are:
- The engine does not start.
- Unstable operation or lack of idling.
- The motor does not develop full power.
- Increased fuel consumption.
If the engine does not start, then it is worth checking the presence of fuel in the carburetor. The reason for its absence may be dirt or water in the fuel lines and filters.
In addition, you need to check the condition of the solenoid valve responsible for supplying gasoline to the carburetor and possible broken wires.
During unstable operation, a common malfunction is clogging of the jets, as well as possible air leaks through various connections.
Repairing a carburetor, like an injector, with your own hands is a rather complicated process, but quite accessible with minimal skills.
Noticeable loss of power, a fairly common malfunction. Possible causes of this are often failure of the accelerator pump, incorrect adjustment of the throttle valve, as well as a low fuel level in the float chamber.
Increased consumption is a headache for many owners of carburetor cars. A properly adjusted carburetor is the key to long and economical operation of the car.
Today, the Internet contains a large number of videos of DIY repair and adjustment of such a complex unit as the VAZ 2106 carburetor.
VAZ engine diagnostics
When carrying out computer diagnostics, disassembling the motor is not required. The unit is connected to a specialized computer and, using a scanner, malfunctions in the functioning of all engine components are detected. However, conventional scanners do not always detect all problems. To ensure high-quality and comprehensive diagnostics, our specialists use licensed software and special scanners from AvtoVAZ. Such diagnostics of a VAZ engine allows you to obtain the following information:
- Throttle valve opening value in percentage;
- Engine speed;
- Engine temperature;
- Voltage of on-board electrical network;
- The temperature of the air supplied to the engine;
- Ignition timing;
- Data from the air flow sensor;
- Fuel injection time by injectors;
- Motor load level;
- Oxygen sensor data.
Before starting diagnostics, our service technicians “listen to the engine.” Then they scan with computer equipment, and only after identifying faults, our specialists can determine the required amount of work to eliminate them.
Photo of DIY vase repair
VAZ 2106 | Engine disassembly procedure
Engine disassembly procedure
The easiest way to disassemble the engine is on a portable mounting stand. Such a stand can usually be rented inexpensively at a car service workshop or a special rental point. Before installing the engine on the stand, it is necessary to remove the flywheel/drive disk.
If it is not possible to use a stand, you can disassemble the engine after installing it on wooden blocks directly on the floor of the working area
Be extremely careful not to tip the engine onto the floor during this type of disassembly.
If you decide to purchase and install a remanufactured engine, the first step is to remove all attachments and auxiliary equipment from the old one - they should then be transferred to the new unit - as if you were about to begin a major overhaul of the old engine. This includes:
- Generator with brackets
- Components of exhaust emission control systems
- Distributor, spark plug wires and spark plugs
- Thermostat and housing cover
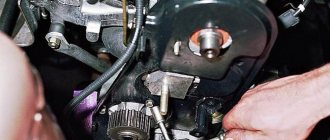
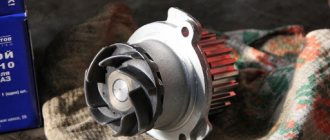
- Water pump
- Fuel injection system components
- Intake manifold and exhaust manifold(s)
- Oil filter
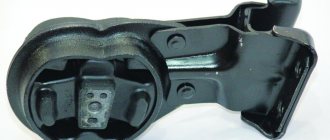
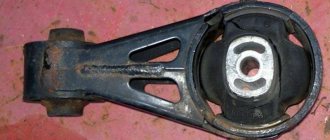
- Engine mounts
- Clutch Assembly and Flywheel/Drive Disc
When removing attachments and external components from the engine, pay close attention to their installation details, which may be useful and important when transferring them to a new/remanufactured unit. Remember the installation position of gaskets, seals, spacers, pins, brackets, washers, bolts and other small parts
If you are going to install a reduced block set (see Section Engine Restoration Options), then the cylinder head(s), oil pan and oil pump must be removed from the old engine.
If a complete overhaul is planned, the engine must be disassembled and all internal components removed. Follow this procedure for removing internal engine components:
- Cylinder head cover(s)
- Intake manifold and exhaust manifold(s)
- Rocker arms and pushrods
- Hydraulic valve lifters
- Cylinder head(s)
- Timing drive cover (chain)
- Distribution chain with sprockets
- Camshaft
- Oil pan
- Oil pump
- Connecting rod and piston groups
- Crankshaft and main bearings
Before disassembling the engine and performing its overhaul procedures, make sure that the following components are present (see also the lists of tools given in the Section Procedure for assembling the engine after completing its overhaul):
- Standard set of locksmith tools
- A set of small cardboard or plastic boxes for storing components
- Spacer scraper
- Countersink for removing step wear on the top of the cylinders
- Vibration Damper Puller
- Micrometers
- Telescopic bore gauges
- Plunger type dial meter
- Valve Spring Compression Tool
- Hone for processing cylinder mirrors
- Piston ring groove cleaning tool
- Electric drill
- Set of guides and taps
- Wire brushes
- Brushes (scrubbers) for cleaning oil galleries
- Solvent
VAZ engine diagnostics
When carrying out computer diagnostics, disassembling the motor is not required. The unit is connected to a specialized computer and, using a scanner, malfunctions in the functioning of all engine components are detected. However, conventional scanners do not always detect all problems. To ensure high-quality and comprehensive diagnostics, our specialists use licensed software and special scanners from AvtoVAZ. Such diagnostics of a VAZ engine allows you to obtain the following information:
- Throttle valve opening value in percentage;
- Engine speed;
- Engine temperature;
- Voltage of on-board electrical network;
- The temperature of the air supplied to the engine;
- Ignition timing;
- Data from the air flow sensor;
- Fuel injection time by injectors;
- Motor load level;
- Oxygen sensor data.
Before starting diagnostics, our service technicians “listen to the engine.” Then they scan with computer equipment, and only after identifying faults, our specialists can determine the required amount of work to eliminate them.
VAZ 2114 fuses
The simplest thing that can affect the operation of car components is fuses. Therefore, if any of the nodes stops working, we check its fuses.
Instrument fuse VAZ 2114 - The instrument panel does not light up, what should I do?
If your dashboard goes out, but all the other lights in the cabin are working normally, most likely
Cigarette lighter fuse VAZ 2114
If your phone stops charging through the cigarette lighter, you should first check the cigarette lighter adapter. If everything is fine with him and
Where are the fuses on the VAZ 2114
Location of fuses on the VAZ 2114. The simplest fuses are located in the engine compartment. In order to get to them, open the hood.
VAZ 2114 fuse box relay
Hello. On this page you will find a description of each relay in the fuse box. If you need complete information about the blocks themselves
VAZ 2114 fuse box
Has the fuse blown? You need to look for the VAZ 2114 fuse box. We will tell you where it is located on the VAZ 2114. This page shows a diagram
Heater fuse VAZ 2114
Rainy autumn will begin soon and without a heater in the car, all the windows will fog up. It will also just be cold, so it is necessary
Engine maintenance after a major overhaul and running in the repaired engine
It is worth noting that after a professional overhaul and if a number of conditions are met, the engine can go through the same amount, and sometimes even more, than it did after leaving the factory. This is especially true of high-tech turbo engines that run on low-quality domestic fuel.
The widespread use of nicosil, alusil and similar alloys for casting BCs, according to experts, is the reason that new internal combustion engines on reputable foreign cars can fail in the CIS after 70-80 thousand km. mileage To solve this problem, today the method of lining the cylinder block is used, which allows the unit to operate normally and theoretically surpass the original design in terms of the service life of the block and the engine itself in such conditions.
Also, one of the most important criteria is the correct running-in of the engine after a major overhaul. The requirements for such a run-in are similar to those put forward for running in the engine of a new car from the passenger compartment:
- short-term warm-up before the trip;
- gentle operation without sudden accelerations and stops;
- speed restrictions, prohibition on driving “tightly” in high gear;
- Engine braking is not allowed;
- prolonged movement at a constant speed at the same speed is prohibited;
- It is not permitted to tow a trailer or transport goods, etc.
The minimum period for running the engine after a major overhaul is around 1 thousand km, while practice shows that it is optimal to run the unit up to 10 thousand km, after which the load should be increased gradually. It is believed that complete grinding in of all elements in the internal combustion engine ends after a mileage of about 30 thousand km.
It is also necessary to remember that during running-in of the engine after repair, the oil and oil filter must be changed more often to remove chips and other wear products from the engine that appear as a result of grinding in new parts. The first lubricant change occurs after 1 thousand km, the next one occurs after 5 thousand km, another oil change occurs after 7-8 thousand. Then you can switch to the usual recommended service interval for changing oil and filters.
Self tightening
As mentioned earlier, tightening the cylinder head bolts is not that difficult.
However, so that this process does not turn out to be difficult for drivers, it is necessary to take into account the importance of this procedure and carry it out strictly according to the scheme, which can be found on the Internet resource
To get started, you will need to prepare only one, but very important tool (a torque wrench), without which it will simply not be possible to tighten the bolts. Of course, such a tool cannot be in the arsenal of every car owner, so you will have to buy it or rent it at a service station. The bolts are tightened in the following sequence:
First of all, you need to inspect the external condition of the fasteners. If their condition does not satisfy the car owner, then experts do not recommend tightening them, but using a new set of pins, which can be purchased both on the automotive market and in a specialized store
You need to choose bolts from a reliable manufacturer; when purchasing, be sure to pay attention to the quality of the thread. Before starting the procedure, the threads of the pins are lubricated with automotive lubricant, regardless of which element will be used: new or used
The tensioning process itself for the VAZ-2106 is similar to other VAZ models, but if you are considering a Niva, then experts recommend carrying out such work in two stages, after first familiarizing yourself with the diagram, which can be downloaded on the Internet
The diagram shows the exact sequence of tightening the bolts; all pins have their own individual number, so that car owners independently and strictly in order tighten the required elements. Using a torque wrench, you need to tighten all the bolts strictly according to the diagram. When performing this action, you should monitor the pulling torque, the indicator of which can vary from 3.4 to 4.0 kgf*m:
- The first to be tightened are the two elements located in the center of the head;
- then tighten the two upper bolts and two lower ones, which are located on the side of the middle clamp;
- The left outer bolts are tightened, and then the two right ones. You should not tighten only the element that is marked No. 11.
- After the first stage of tightening, according to the diagram, is completed, experts recommend repeating the entire operation again in exactly the same sequence. Making sure that when tightening the bolts, the tightening torque does not exceed 11.5 kgf*m.
- At the end of the tensioning process, you need to tighten the pin at No. 11, using the same torque wrench, making sure that the tension of this element does not exceed 4.0 kgf*m.
