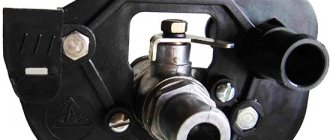
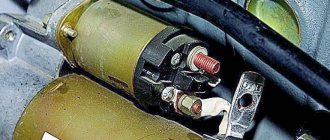
It's no secret that the starter for the VAZ 2114 is one of the most important parts, because it is it that allows you to start the car from the passenger compartment by turning the key. Without it, it is simply impossible to start the engine (except “from the pusher”). In today's article we will talk about the design of the starter, the principle of its operation, as well as how to replace it with your own hands.
Starter VAZ 2114
What causes the starter to fail?
Understanding the reasons for the failure of a part, we can say that there are not so many of them:
- Manufacturing defects. Due to the design features of the body, the manufacturer had to reduce the size of the mechanism, so it has insufficient power and often fails;
- Operation of the device with unacceptable overloads. If you have to turn the engine for a long time, the element can overheat;
- Violation of operating rules. For example, a car enthusiast has run out of gas, and in order to move the car to the side of the road, he puts the car in gear and turns the starter, which allows him to move the car. The mechanism is not designed for such a load;
- Natural wear and tear of parts.
The mechanism is a defect of the manufacturer and is considered a “sore” of the VAZ 2114 car, as it often fails.
Catalog number and cost of analogues
Finding a branded VAZ 2114 starter is not always easy. At the same time, the quality of the original components is very poor, which is further complemented by a high level of defects among the products sold. Therefore, experienced car owners recommend purchasing analogues from third-party manufacturers. The best alternative options for the original VAZ 2114 starter are presented in the table below.
Table - Good analogues of the original VAZ 2114 starter
| Manufacturer | vendor code | Approximate cost, ruble |
| As-pl | S9008 | 1750-2300 |
| HC Parts | CS332 | 2650-3500 |
| Startvolt | LST0115 | 3400-3800 |
| Bosch | 986014950 | 7300-8900 |
| WPS | 30714N | 2880-3500 |
Symptoms of a VAZ 2114 starter malfunction
Understanding the symptoms of a malfunction, we can highlight several points:
- When turning the ignition key, the mechanism does not move;
- Having started the engine, the bendix does not disengage from the flywheel;
- When you turn the ignition key, only electrical clicks are heard;
- The starter smokes when trying to start the engine;
- The mechanism hums, but does not engage the flywheel.
Useful : Where is the fuse and starter relay on the VAZ 2114?
All the reasons are similar in one thing: the engine does not start rotating during a startup attempt. To determine exactly what the problem is, you will need to remove the mechanism and carry out diagnostics. There are several main reasons for failure:
- It doesn’t turn at all: when the winding is shorted, or the armature shaft on the solenoid relay is stuck;
- Insufficient speed: the armature or stator winding has broken or shorted, or the brushes have worn out;
- Does not transmit speed to the crankshaft: the bendix is faulty;
- Does not turn off even after starting: the spring on the clutch is broken or the traction relay is stuck.
DESIGN FEATURES AND OPERATING PRINCIPLE
The starter on the VAZ 2114 (5712.3708) has an operation cycle, which can be divided into four main stages:
- After turning the ignition key, the fourteenth battery in the contact chain begins to supply power to the starter and traction relay;
- The Bendix gear drive (overrunning clutch) is connected to the flywheel;
- At the moment the gear drive is connected, power begins to be supplied to the electric motor of the unit;
- The electric motor begins to spin the drive, the revolutions of which are transmitted to the crankshaft of the car, as a result of which the engine starts. When the engine speed begins to exceed the starter speed, the drive and the crankshaft are disconnected.
Now let's look at the design features of the fourteenth starter. In the diagram below you can see the main elements of the device.
Starter device
- Housing - made in the form of a cast steel cylinder at the ends, closed with lids, inside which the cores and the exciting winding (stator) are located;
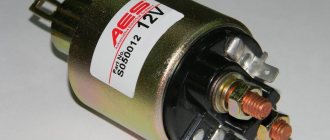
- Solenoid relay - consists of a movable jumper and power contacts. The purpose of the solenoid relay is to close the contacts when the ignition is turned on, as a result of which power begins to be supplied to the electric motor. Upon completion of the operating cycle, the solenoid relay disconnects the power and the device turns off;
- Bendix of the VAZ 2114 starter (aka overrunning clutch) - at the beginning of the operation of the device, the bendix is connected to the crankshaft and transmits the electric drive speed to it through the engagement gear; at the end of the cycle it is disconnected. The serviceability of the entire device depends on the normal functioning of the bendix, since if disconnection does not occur at the moment when the engine speed exceeds the speed of the electric drive, the unit will be damaged;
- Anchor - is a cast axle made of alloy steel, onto which collector plates and a core are pressed;
- Brushes and brush holders are structural elements that are necessary to supply power to the armature. Properly functioning brushes increase the power of the device's electric drive;
- The starter bushing - there are three in total: the rear and front - are pressed into the body, the third is located at the junction of the armature and the bendix. The bushings are responsible for fixing the drive shaft.
The cost of a new device varies between 3.5-5 thousand rubles, depending on the manufacturer. Owners of fourteen speak positively about devices manufactured by Eldix, KATEK and PRAMO. If you buy Bendix separately, it will cost you 300-500 rubles.
Which starter should you choose?
When choosing a new spare part, most car owners give preference to the geared version. Its advantages are that it is smaller in size, turns the engine faster even with a dead battery, and works better in winter.
Of the gearbox options, everyone prefers the following companies:
- KZATE – 3600 rubles
- Eldix – 4500 rubles
- PRAMO – 4400 rubles
Try not to save money when buying a new part. As mentioned earlier, the item from the factory is considered the weak link of the car. If you buy a cheap Chinese analogue, you can return to removing the starter on a VAZ 2114 at the most inopportune moment. Read the reviews in stores in your region, this will help you identify quality brands and not fall for a fake, which will also save time and money.
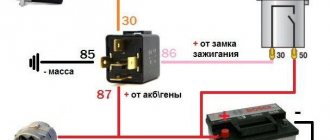
Useful : VAZ 2114 starter connection diagram
Reasons for removing the starter
It is worth noting the main malfunctions of the starter, which will require its removal.
The main problems with the starter that will require its removal are:
- When you try to turn on the starter, the traction relay does not work, and accordingly the armature does not rotate.
- When you try to turn on the starter, the traction relay is activated, but the starter does not turn or turns only slowly.
- When you try to turn on the starter, the traction relay is activated and switched off several times.
- When the starter is turned on, the armature rotates, but the engine flywheel does not.
- When the armature rotates, the starter makes extraneous noise.
It is also worth noting, and will save your energy and nerves, that before removing the starter, make sure that the problem does not lie in a dead battery, oxidized terminals, broken electrical circuit, oxidized contacts, etc. To do this, familiarize yourself with the problems that affect the operation of the starter:
Replacing the starter on a VAZ 2114
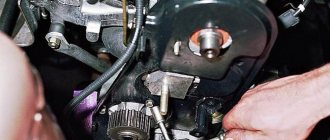
Before removing the starter, you need to clear the engine compartment by removing the air filter housing. This will give us more access to the element's location. How to remove the starter on a VAZ 2114 without a pit? Access to the bolts is also open through the engine compartment; the only thing you have to do is tinker a little with the bottom bolt. Afterwards you can start repairing:
- Remove the positive terminal from the battery. This must be done so as not to short-circuit the wiring and remove the voltage from it.
- Then disconnect the plug of the red wire that pulls in the relay.
- We take the key for 13 and disconnect the second wire from the body.
- Now you can start removing the part itself. We unscrew the three 13mm bolts that secure the part to the box.
The starter no longer holds anything and you can remove it from its seat and pull it out.
When installing a new part, try to tighten the bolts firmly, but do not overdo it so as not to bend the threads or studs.
How to properly remove the starter?
- We put the car in the pit and remove the engine protection by unscrewing the four fasteners.
- Open the hood and remove the negative terminal from the battery.
- Disconnect the wire block from the starter.
- Remove the crankcase protection as shown in the figure.
- Unscrew the fastening nut and remove the wire from the contact bolt of the starter traction relay.
- We climb under the car and unscrew the 2 starter fasteners from below as shown in the figure.
- We go up to the top and unscrew the last, third fastening of the starter.
- Then we climb back into the hole and remove the starter.
Replacing the solenoid relay
It is not always necessary to replace the starter; sometimes simply servicing it is enough.
You can replace the solenoid relay without removing it, but then you will have to work a little, as this is quite inconvenient.
You can learn how to replace the relay correctly from the video:
Following the instructions from the article, replacing the starter on a VAZ 2114 with an 8-valve engine will not be so difficult. The starter is one of the most complex mechanisms in a car because it consists of many parts that wear out and fail over time. Although the system is only concerned with starting the car, there are many processes going on inside the case that must work in time and pass enough current to start the engine. It is impossible to monitor the condition of the internal parts, the only thing is that if you notice that the starter turns weakly and sometimes does not work, it is better to immediately remove it and take it for repairs or fix it yourself. This will save money on the subsequent purchase of a completely new element.
Required Tools
In order to carry out repairs yourself and replace a faulty starter, you need the tools that are listed in the table below. Table - Tools required to replace the front strut
| Name | Note |
| open-end wrench | "at 8", "at 13" |
| Spanner | "at 13", "at 14", "at 15" |
| Ratchet | With extension |
| Head | "at 13", "at 14", "at 15" |
| Pliers | Can be replaced with pliers |
| Penetrating lubricant | For example, WD-40 |
| Screwdriver | With flat cross blade |
| Wire brush and rags | For cleaning contaminated surfaces |
Checking work
Sometimes, despite more than obvious signs of breakage or wear of the retractor, in reality everything turns out to be wrong. The car may behave similarly with some other malfunctions.
Therefore, in order to figure out whether the relay works or not, and also who is the real culprit for the violation of the functionality of the system, we will conduct several checks.
- Check the starter. Turn the ignition key. The starter should begin to turn, and the relay should make a characteristic click. If the starter is not doing its job, replace it. Relyukha has nothing to do with it in this case.
- Check the solenoid relay. To do this, there are two copper bolts on the back cover. Two contacts are attached to them. If the starter starts turning, then your relay has definitely failed and needs to be replaced. In this case, you should not remove the starter, which will allow you to get more accurate test results.
- If you have removed the starter, the check is performed slightly differently : Connect the contact wire of the retractor relay to the positive terminal of the battery;
- The second contact connects the starter ground and the battery charger;
- When the contacts are placed on the relay terminals, the relay should turn on with a characteristic click;
- If the operation is too slow, uncharacteristic, check the condition of the contacts. They often burn out or oxidize.
Differences between starter and relay failure
In order not to confuse what exactly has failed - the starter or the solenoid relay, there is an excellent method for recognizing the “culprit”.
- Remove the starter, connect the negative terminal of the battery to ground;
- The design of the device has copper bolts and a tongue-shaped element;
- The positive wire from the battery is connected to this “tongue”;
- If there is contact, the solenoid relay clicks and starts working;
- If not, then you will have to go to the store for a new relay.
But there is one more very important point. Even if all the facts indicate that the starter or retractor relay is not working, another unit - the ignition switch - may still be the cause of ignition problems. Take the time to check its serviceability before buying new parts.
Repair
In some cases (namely, when a collapsible type relay is installed on the starter), you can try to repair it. To do this, you need to remove the starter and dismantle the relay in the same way as mentioned above. After this, carefully halve the device by unscrewing the end mounting nuts.
The old core (which most often causes the relay to jam) will need to be removed, replacing it with a new one, after which all that remains is to assemble the relay and mount it on the starter.
The cost of such a repair (with replacement of the core alone) will be much less than replacing the entire relay. True, when separating one half from the other, as well as assembling the relay back, you should be very careful, since if you act carelessly, either the core or its return spring may fly out and get lost.
Design features
If we talk about the design, the starter is an electric motor with direct current. Its elements are:
- Stator (a stationary element that consists of windings);
- Anchor (aka a shaft with a commutator and a winding in its grooves);
- Overrunning clutch (gear with a mechanical device);
- Solenoid relay (located on the side of the starter).
Do-it-yourself disassembly and repair
When you remove the starter, you need to disassemble it, otherwise you cannot repair it. To do this you need to follow this algorithm:
- Using a key set to “13”, unscrew the nut and release the solenoid relay from the wire.
- Using a Phillips or flathead screwdriver, unscrew the bolts that secure the relay.
- Use a screwdriver to unscrew the bolts from the back cover.
- Using a flathead screwdriver, remove the retaining ring. It is located on the rotor, on its back.
- Unscrew the two nuts from the studs with a “10” wrench.
- Unscrew the bolts that secure the wires coming from the windings to the brush holder.
- Remove the entire starter brush assembly of VAZ 2112, 2114, etc.
- Using a drift, remove the pin that secures the Bendix fork.
- Remove the rotor, now it and the stator are separate.
- There is a retaining ring on the rotor; after removing it, you can replace the bendix.
Signs of a generator malfunction
Generator faults are not always easy to identify. Some of them (the so-called “floating” faults) are determined only on a special stand.
But if you notice that the headlights have become dimmer while the engine is running, and that extraneous noise interferes with the normal sound of the running engine or that the battery is quickly discharged, then it’s time to contact the experts. Because it is better to prevent a malfunction by repairing the generator in a timely manner than to ruin your day one day with an unexpected breakdown.
Recently, it has become very convenient to contact specialized companies whose specialization is the repair, maintenance and sale of starters and generators. Modern equipment, combined with qualified personnel and a large selection of spare parts, will allow you to eliminate any malfunction in just a few hours. And diagnostics with disassembly and analysis of the degree of wear of parts will help to quickly determine the degree of performance and carry out restoration work.
However, you can try to diagnose and eliminate some of the causes of generator malfunctions yourself.
If the battery in the car is not charging, then first of all you need to check the tension of the alternator belt - the belt should be tensioned without sagging. This, of course, can be done by eye, but it is better to use a dynamometer: if you pull the longest branch of the alternator belt with a force of 10 kgf, then it should bend no more than 10-15 mm.
On most machines, the tension of the alternator belt can be adjusted by loosening the nut securing the alternator housing to the adjusting bar and using a pry bar to move it away from the engine. After setting the required belt tension, tighten the generator mounting nut back.
If the tension of the generator belt is normal, then most likely the voltage regulator relay needs to be replaced. On older cars it is a plastic box screwed to the front fender mudguard, but in modern cars the regulator is built directly into the generator itself.
To replace the relay-regulator in the generator, you must first unscrew the two mounting screws, disconnect the contacts, and then remove the regulator along with the brush assembly from the generator housing.
Check the slip rings: burnt ones should be cleaned with fine-grained sandpaper and wiped with a cloth soaked in solvent.
For the first time after installing a new regulator, the voltage may be slightly different from the nominal one. When the new generator brushes get used, everything will return to normal.
