How to remove noise and rattling of rear view mirrors of VAZ 2110
This article describes numerous methods of dealing with wind noise from rear-view mirror triangles, their rattling and other similar problems on a VAZ 2110 car.
There are three main problems with rear-view mirrors on a VAZ 2110 car:
- Wind noise from the rear view mirror triangles;
- Rattling rear view mirrors;
- The creaking of the triangles of the rear-view mirrors.
In this article, each of these problems (with methods to combat it, of course) is considered separately.
How to install heated mirrors on a car
There are several ways to install heated mirrors on your car. You can buy and install tuning ones, those that already have heated mirrors, the price of the issue will, of course, “hit” your pocket and besides, it is not known what quality the heated mirror element is installed there.
As an option, you can purchase the universal mirror heating element separately, install them on the mirrors, and assemble a wiring diagram for the heated mirrors.
You can make heated mirrors with your own hands, the cost will be pennies, and the efficiency will be off the charts. Moreover, when installing the system, you can use different “smart” time relays, delay relays, or use a mirror heating relay paired with a temperature sensor (automatic switching on in cold weather). There are also common connection diagrams for the standard heated rear window, since connecting heated mirrors to this system is not difficult and this system is quite capable of withstanding a small load, such a connection is very advisable.
New style side mirrors with neutral anti-glare
The deterioration of standard mirrors and the reluctance to install freelance models in their place is worth considering a modified version in the usual plastic design.
The price for this variation is about 900 rubles. The modified model differs from the standard ones in the rounded corners of the body and a different plastic texture. The mounting and adjustment method are identical to the factory design. Keep in mind that popular versions of side mirrors of the VAZ 2114 must meet the technical indicators and requirements:
- A clear reflection without glare or abrasions should provide visibility around the machine;
- The folding function will avoid structural damage and reduce the level of injury in the event of a possible accident;
- The body should not stick out too much to the sides.
Otherwise, the choice depends on the owner and budget.
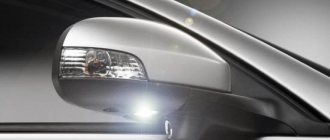
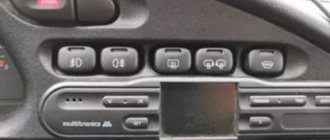
Automatic heated mirrors
We invite you to watch the video: automatic mirror heating with auto-start function and heating blocking when the charge is low.
Real life case:
It happens…
A new owner of a used foreign car approached the service station with the question “How to install heated mirrors?” The station workers calculated the amount for him, approved it and sent the owner home. During disassembly, they were extremely surprised, since the heating was already in place, and the factory one at that. So, the new owner, without reading the passport and instructions and without understanding where the heated mirrors are turned on, found himself in a stupid situation and almost lost money.
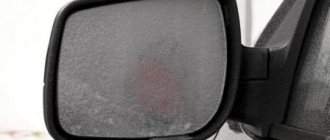
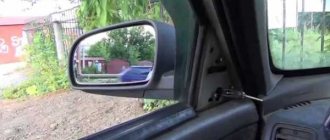
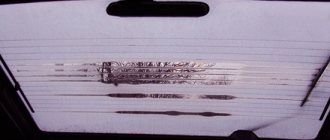
Dismantling and disassembling the rear view mirror of the VAZ-2110
The need to remove the side rear view mirrors of a VAZ 2110 may arise for various reasons, for example, for painting, installing heating, or completely replacing them. Disassembly is therefore necessary to carry out repairs or any other modifications.
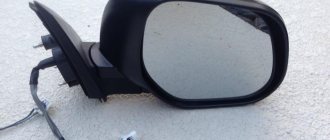
How to remove the rear view mirrors of a VAZ 2110 - detailed instructions
- rearview mirror control knob cap and unscrew the mounting screw with a Phillips screwdriver.
- Remove the triangular plug by prying it up with a flat-head screwdriver, carefully releasing the latches as you do so.
- Next, unscrew the three screws that secure the mirror to the base, using the same Phillips screwdriver.
Other methods and connection diagram
The largest category of cars that do not have heated mirrors, of course, are all our domestic car models, so the most pressing question for the VAZ 2112 is how to connect heated mirrors, now we will tell you the answer. So:
- Installing heating is a very popular variety of tuning procedures, because it is not particularly difficult and is therefore available to every interested car owner, the connection diagram is shown in the photo below
Electrical diagram for connecting heating elements
- Of course, when it is urgently necessary to do heating, then the purchase and installation of new mirror elements with a built-in heater is the most popular and most often used option
After this comes the option of replacing or installing only the heating element, so let’s take a closer look at all the nuances of installing a heater on a car:
- In order to replace the mirror element itself, a VAZ car, the entire body in which it is located does not need to be removed, it will be enough to perform the following steps - we make some efforts to bend the body of our mirror in the direction against the movement of the car
- In the resulting gap you will see the pin (it is usually white) of the adjusting rod
- The pin will need to be removed, removed from the housing, then pull out the old mirror element in any direction to stick your fingers into the middle of this element
- We press on the center of the element, and with slight resistance it should come out of the latch to end up in your hands
- After this, all that remains is to insert a new heated element, proceeding in the reverse order, and bring the heating filament wiring into the interior
Turn on the heating
Usually only two wires come out of the heating element; when connecting them, you don’t have to observe the polarity, since your connection will still be parallel, and the polarity for the element does not matter:
- It is recommended to turn on the heated mirrors together with the heated rear window, then you can directly connect the heating elements to the system
- So that when you turn on the heated rear window, the heated mirror mode also turns on, the plus is that you don’t need an additional relay and a separate power button
- If there is no system for heating the rear window, or you want to make a connection separately from it, then you need to purchase a power button and an additional relay with a 10 Amp remote fuse.
- And if you use a ten-amp button during installation, then you can easily do without a relay, and you can connect the heating of the mirror elements directly, since their power consumption is low
We do it ourselves
When you need to make heating from improvised means, then, as already mentioned just above, the easiest way to do this is to use car light bulbs:
- This method is universal and suitable for absolutely all cars.
- First, you need to slightly modify the mirror body; you need to create a protective heat shield in it
- This is easy to do using foil; you can easily cover the inside of the case
- Then you need to place and secure in the housing a socket with a car light bulb screwed into it
- It will be important to ensure that the built-in light bulb does not come into contact with either the mirror itself or the housing (since the light bulb will heat up very much, contact can damage either the mirror element or melt the housing)
- In addition, it is possible to perform heating, with two different operating modes, the first is a powerful mode designed for quick defrosting and the second is weaker to protect against fogging.
- This desire can easily be realized by installing a two-pin power bulb (21\5) inside the rearview mirror housing, and connecting it accordingly
- Then 21 Watt will act for quick defrosting, and 5 Watt should be enough against fogging
A real case from practice: There are also situations when an owner who bought a used car contacted a service station with a request to install heated mirrors for him. The staff at the station calculated the amount for the installation and parts, then took the advance and then sent the owner home. And when disassembling it, it suddenly turned out that the heating was already installed, and from the factory. So, the owner, who did not want to read the technical data sheet and operating instructions and simply did not understand that the heating was already there, it was only important to know where it turned on, paid money for work that was not performed by anyone.
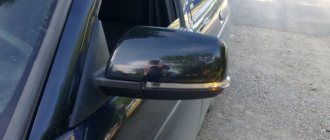
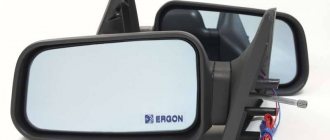
"Polytech" with electric drive, heating and repeaters
A popular variation of tuned mirrors is “Polytech” with electric drive, heating and repeaters. The price for "Polytech" is about 6,000 rubles .
In addition to the catchy design, this option is of interest to 2114 owners for the following reasons:
- The electric drive simplifies the adjustment process;
- The heating function allows you to quickly warm the mirror element from ice in winter;
- The turn signal repeater attracts the attention of other road users;
- Anti-reflective coating makes driving comfortable in the dark.
The Polytech mount differs from the standard one and requires minor modifications during installation.
In order to avoid accidents and other unpleasant situations on the roads, drivers of domestic cars should always have a clear view of everything that is happening on the road. The side mirrors on the VAZ 2110 will help provide a wide view. It is necessary to buy reliable and functional devices if the accessories need urgent replacement.
How to choose the right mirrors for a VAZ
Before you buy Priora mirrors for a VAZ 2110, you need to pay close attention to several important characteristics:
Electrical adjustment of mirrors VAZ 2114
I purchased such a set of electric mirrors in Togliatti.
I couldn’t find any articles on installation, so I’m sharing my experience here. Connection diagram out of the box:
General view of the mirrors:
Here's a video of how mirrors work:
We begin work by disassembling the mounting block. By the way, to easily pull the chip out of the block, use a chisel (the widest one): apply the chisel to the desired connector and tap it with a hammer. According to the diagram, block Ш9 is needed (according to the new X9).
How to disassemble the mounting block, connect the wires according to the diagram
Then we remove the decorative strip from the driver's pillar and make a hole in the same pillar where we will lay the wiring. Drilling is not very convenient, I drilled with 3 drills, the final diameter is 10 mm.
During the installation process, it would be a good idea to insulate the wires in the place where there is contact with the hole made or put a rubber seal.
The wiring will run together with the power window wires, i.e. under the rubber corrugation between the door and the body. We remove the door trim, bend the corrugation, take a moderately flexible/rigid wire, thread it through the corrugation, wrap our wiring to it and pull it out on the other side.
I must say that the wires are not the longest and you will have to tinker with this layout. This is still better than disassembling the entire panel in order to get to the common channel, which has a rubber seal and where you can’t stick anything. There is only one piece of advice: when you have installed one mirror (we install the left one first), drag the entire free length of the wiring under the panel to the right mirror. I had difficulty snapping the terminals into place; they were long enough, but the connection fell out at the door. You can lengthen the wires and all difficulties will disappear. About the panel on the dashboard, when you put it back together, make sure that the wires don’t get under the handbrake, otherwise it will bite at once. Good luck!
Anyone who has ever used an electric drive for adjusting the exterior mirrors of a car will probably note that it is very convenient. Well, even though we don’t adjust the mirrors every day, the adjustment takes a matter of seconds, and there is no need to reach for the right mirror through the front passenger. There are ready-made electric mirrors on sale for installation on the VAZ 2109, but not everyone will be satisfied with their sleek shapes. In my opinion, the standard angular mirrors of the “nine” fit perfectly with its “chopped” body shapes and harmoniously complement them. Therefore, let’s look at how you can install an electric drive in the standard mirrors of a VAZ 2109. A regular reader of our site shares this idea with us.
Problem with the operation of the VAZ-2110 central locking control unit
Electronics, of course, are reliable things. Modern control modules for the central locking VAZ 2110 are assembled using a transistor control circuit. This eliminates their mechanical wear. The shelf life of key components is measured in tens of years. The control unit is located under the plastic dashboard cover on the right side of the driver's seat.
However, power transistors can easily fail when the activators are overloaded and the collector is short-circuited. It may even happen that the signal from the control unit will constantly be sent to the lock drive if the transistor is broken. Otherwise, it will simply not turn on.
Checking the control unit is extremely simple. The voltage from the negative terminal of the battery, or directly from the pink wire supplying the control unit, is supplied to the contacts of the gearmotor (activator) in series to the red and yellow conductors. All of the above contacts can be found directly on the eight-pin connector of the control unit.
Thanks for subscribing!
Also, the control unit may issue erroneous control commands due to incorrect operation of the limit sensor. Being a mechanical device, the main door switch can simply wear out. As a result, the control unit simply will not be able to function correctly, since it will not know in what position the car doors are currently located, whether the driver's door lock is closed or open.
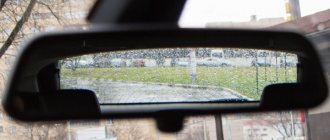
Mirror control mechanisms
A car mirror is usually installed on the front fender, in the corner of the door or on the cab of the car. However, if you fix the mirror in any one position, designed, for example, for a person of average height, then a tall driver will see only the road surface on the side of the car, and a short driver will see mainly the blue of the sky. Therefore, the design of the mirror must provide the ability to adjust its position. Adjusting the position of the mirror is also necessary to compensate for its spontaneous displacements due to vibration caused by road unevenness, or under the influence of incoming air flow when driving at high speeds.
Product categories
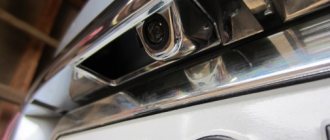
You can buy any rear view camera that is convenient for you, and put this standard one from the kit in front and make it powered by a button, which is what I want to do in the future.
After this, very carefully, shaking slightly so that the latch does not break, the mirror is removed. The product was provided for writing a review by the store. More articles from the Tuning section.
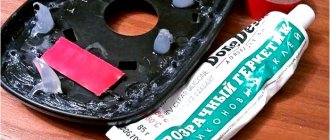
Types Now let's briefly look at the types of gadgets that can be found on sale: Universal options. After this, the housing is assembled and sealed with silicone sealant. There is no such problem on the passenger side.
Plus throws on the button. Having told the seller that in online stores it costs less than p, he shrugged his shoulders. Electronic component Be careful when laying the wires.
Installing SE mirrors on Priora
In this way, find out where the breakdown occurred in the electrical circuit - a fuse has blown, a wire has broken, a short circuit has occurred, or the contact has simply disappeared. Connect all wires. There is no such problem on the passenger side.
It has a 4.3-inch display with low pixel resolution. The backlight illuminates the camera lens, and as a result, the image quality does not improve at night.
I can say that I didn’t directly install the mirror in a standard way, but I screwed it in tightly, so there’s no talk of creaking or play, and you can’t just remove it. First, I screwed in the screws and put fasteners on them. And I did this because when I installed This is a mirror on top of the standard one, then it looked out and I really didn’t like it. Next comes the turn of the boot and the back cover, which need to be removed. Installation of a rear view camera + standard mirror with monitor and video recorder. tokzamer.ru