Removing the front seat
Move the seat back all the way and use a 10mm head to unscrew the two screws for the front fastening of the seat slide.
Having moved the seat all the way forward, use a 10mm head to unscrew the two rear mounting screws for the seat slide
We remove the front seat through the car door opening
Removing the front seat slide
We move the seat slide so that the bolts securing the slide to the seat frame are visible through the technological holes in the slide.
Using a 8mm socket, unscrew the bolts securing the slide to the seat frame.
Each of the slides is attached to the frame with three bolts.
Remove the slide assembly with the longitudinal movement mechanism lever
We remove the end of the lever shaft of the longitudinal movement mechanism from the hole in the inner slide and from the hole in the outer slide
A spring is installed between the lever and the outer herrings. Similarly, we remove and disassemble the front passenger seat.
We assemble and install the front seat in the reverse order.
Before installing the lever shaft into the hole of the outer slide, first put a spring on the shaft and place the short mustache of 1 spring on the latch, then, squeezing the long mustache of 2 springs (can be tied with wire), insert the shaft into the hole of the slide so that this mustache goes under the slide .
Which seats are suitable for Lada Kalina or Granta from a foreign car?
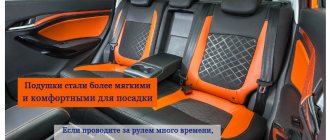
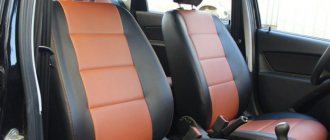
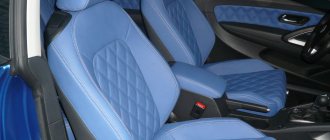
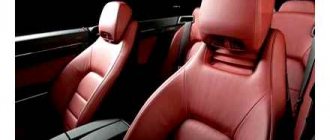
The standard seats of Lada cars may not be entirely comfortable. Some people lack more developed lateral support, others want height adjustment or adjustable lumbar support. All the shortcomings can be solved in one way - installing alternative seats, for example, from a foreign car.
The front seats themselves are different for Granta and Kalina (first or second generation), but the fastenings are similar. Distance between skid mounting bolts:
- width - 450 mm;
- length - 340 mm;
- diagonally 560 mm.
Luxury trim levels have similar seat mountings, which now have height adjustment. Seats from Lada Granta Sport, Kalina Sport or Kalina Cross are also perfect. The seats of sports versions of cars are more rigid (the seating position will be higher) and have little lateral support.
If you decide to choose seats from a foreign car, then pay attention to two things:
- Overall dimensions of the seats. They should not only fit in the cabin, but also be adjustable in all positions;
- The width of the slide (the distance between the fastening bolts). If the width of the seat slides of a foreign car is 45 cm, then it becomes possible to install them on a Grant or Kalina without alterations (with minimal modifications).
We analyzed reviews from owners on the Internet and compiled a list of “which seats are suitable for Granta or Kalina without modifications” (where the seat mounts for foreign cars have a similar width of the slide). The table is updated as new information becomes available:
| Automobile model | Note |
| Mazda 6 (2008 onwards) | Width 450 mm. Lumbar support, seat lift up/down, larger pillow under the knees ( source ). |
| Kia Rio | The slides are not symmetrical; the seats move inside the cabin by 1-2 cm. |
| Hyundai Solaris | The slides are not symmetrical; the seats move inside the cabin by 1-2 cm. |
| Skoda Fabia | Width 450 mm |
| Chevrolet Lacetti | Width 450 mm |
| Hyundai Tucson | Width 450 mm |
| Honda CRV | Width 450 mm |
| Opel Vectra C | Width 450 mm |
| Renault Megane | Width 450 mm |
| Nissan Qashqai | Width 450 mm |
| Mazda CX-5 | Width 450 mm |
| Volvo V40 | No fastening measurements were taken |
| Skoda Octavia | No fastening measurements were taken |
| Peugeot 308 | No fastening measurements were taken |
| Toyota Camry | No fastening measurements were taken |
| Opel Astra H | The width at the edges of the slide is 455 mm, in order to tighten the bolts you will have to cut off the edges of the slide |
In what cases is it necessary to remove the casing?
As a rule, it becomes necessary to remove the rear or front trim to gain access to cavities located inside the vehicle, namely to window lifting systems.
Despite this, there are other cases when such a need arises, namely:
- when installing acoustics in the inside of the door;
- when troubleshooting problems with the automatic window lifting buttons;
- when removing double-glazed windows for work on their replacement or tinting;
- when lubricating or repairing mechanisms that raise and lower door windows;
- when replacing door trim, which has lost its presentable appearance over the years of use;
- when performing work on the car body, namely when welding damaged parts, painting or carrying out measures to treat the vehicle against corrosion;
- when carrying out work on installing additional vibration or noise insulation.
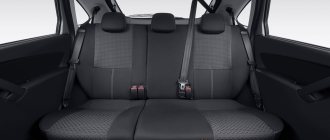
Removing the rear seat
The work is shown on the example of the left side of the seat.
The cushion and backrest of the right side of the seat are removed in the same way.
1
. Lifting the rear seat cushion by the strap,
Using a 10mm socket, unscrew one nut securing each hinge to the floor.
2. Remove the pillow
3
. Using a 13mm socket, unscrew the two nuts securing the backrest brackets to the floor on the left and right sides. 4. Having folded the seat back, use the same tool to unscrew the two bolts securing the backrest brackets on the left and right sides.
5. Remove the seat back.
Install the backrest and cushion on the left side of the seat in the reverse order.
All articles on repair and maintenance of Lada Kalina - “Repair Lada Kalina”
Good day to all.
While the car is waiting for a salary to replace the heater core, I decided to wash the seat upholstery (my family). No sooner said than done. I’ll make a reservation right away - I only removed the passenger seat and the back seat without a backrest (I’ll explain why a little later).
And so let's go: for removal we will need a 10 socket, as well as an 8 socket (or an asterisk, I don’t remember which one). I had exactly 8 in stock. The rear sofa has 4 nuts for 10, and the front one has 4 bolts for an asterisk (the head for 8 is ideal).
And so we unscrew the seats and take them home (someone removes the upholstery on the spot, but I think it’s more convenient and easier to bring it home. Moreover, the seats can be easily removed).
Let's move on. Disassembly. For disassembly you will need a Phillips screwdriver (to remove decorative plastic) and a flat screwdriver (to remove the upholstery itself. Some use pliers, but in my opinion a screwdriver is more convenient).
After removing the elastic, you need to either bend or cut the wire holding the upholstery with the foam. The fastening of the upholstery on the back of the front seat is slightly different. On the sides and bottom there is a groove in the groove, when disassembling it is clear without explanation
You also need to remove the headrest guides and the Kalina emblem. The latter is attached through paralon to a plastic crap (I don’t know what to call it) and to fabric with staples.
The upholstery is removed and you can start washing.
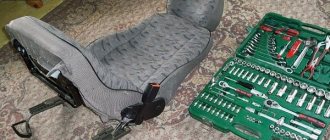
The springs on the front seat were sagging, so it was decided to turn them over. On the back, I left the top 2 as they were (curved back, but turned the rest over. Like lumbar support)
I don’t remember where, but I read that to prevent the seat from sagging, they tighten the springs with clamps
While I was doing all this, my wife soaked the upholstery
After a night in the bathroom, they went to the car. Strangely enough, they dried in the bathroom in about 4 hours. I didn't wait and started reassembling it.
It was decided to replace the wire with clamps
The rest is in reverse order.
Now that you’ve read everything and some are already scrolling further, so as not to burden people’s brains at the very beginning, I’ll explain why I didn’t remove the back of the rear seat - the back of the upholstery is attached to pistons, which I was frankly too lazy to go after))).
This is where I will end the story... I hope I helped someone.
Thank you all for your attention and good luck in your endeavors. See you in the open spaces of the drive
PS I will be grateful for reposts and likes. That's all for sure now.
Price tag: 0 ₽ Mileage 36070 km
how to remove the rear seats on a Kalina/Grant/Prior!
Now let’s figure out how to remove the cushion at the back seat on which people sit, and it’s not that difficult to remove, to do this, just find one latch on both sides of it (One of the latches is shown in the photo below) and press these latches with your hand, In this regard, the rear seat cushion will be freed from its fastening and it can be easily removed as shown in the small figure. If you have not yet removed it, if the airbag has been removed, then place the armrest on the car body), then find the place where the armrest is attached to the body with two nuts, so after finding these nuts, unscrew them completely as shown in the small photo and finally Finally, completely remove the armrest from the car. If you need to remove the central partition, then to remove it you will need to first remove the armrest, which is located in the middle, so when the armrest is removed, unscrew all the screws that secure the partition and then completely remove it from the car, as shown in the main one photo above!
Front seat slides: features of removal and installation
Today I decided to write a short article about replacing the front seat slides, since I found practically no information about this on the Internet, and I think that the material will be useful for many beginners and others. I’ll immediately write about the devices that will be needed for the most convenient dismantling and installation of these mechanisms.
- Large wrench, E10 torx head, extension - this is for removing the seats themselves.
- Head for 8
How to remove the skids on Kalina
- First of all, we will need to completely remove the front seat of our Kalina, which requires intervention and replacement of the runners. Read about this in this section.
- Next, turn the chair over to a comfortable position and perform the following steps, which are described below.
- The removal procedure will be shown using the example of one slide, which is located next to the adjustment lever, since this is where certain difficulties may arise. By pressing the lever, we set the position of the runners so that the fastening bolts are in sight and can be freely unscrewed. From one edge:
And on the other hand, where there are two more fastening bolts, so that they become visible, it is necessary, with the adjustment lever pressed, to move the skids in the desired direction so that the bolts are visible through the holes, as shown in the photo below:
How to fold the rear seats on a Kalina sedan
The work is shown on the example of the left side of the seat. The cushion and backrest of the right side of the seat are removed in the same way. Lift the rear seat cushion by the strap.
. Using a 10mm head, unscrew one nut securing each hinge to the floor.
. and remove the pillow.
Using a 13mm socket, unscrew the two nuts securing the backrest brackets to the floor on the left and right sides. Fold down the seat back.
. Using the same tool, unscrew the two bolts securing the backrest brackets on the left and right sides.
Remove the seat back. Install the backrest and cushion on the left side of the seat in the reverse order.
I don’t know what about the Kalina sedan, but in a station wagon you can make quite a decent platform for transporting cargo. Although the trunk itself is quite large, by folding out the rear seats you can get almost three times more space.
The seats fold out quite simply, but owners who just bought Kalina may not know this. I myself had a similar story with a VAZ 2112; after half a year of operation, I only later found out that the seats can be folded down to create a flat platform, and load fairly large cargo.
The first step is to fold the bottom row; to do this, just pull the laces, which are located right next to the seat belt buckles. And to recline the back, you need to pull the levers at the end on each side, and also pulling them towards you, lower them all the way down. The pictures below show everything clearly, but the levers themselves on the backs are not visible because of the covers, but I think everyone understands where they are.
Tool:
- Driver for socket attachment
- Knob attachment 10 mm
- Knob attachment 13 mm
Note:
The work is shown on the example of the left side of the seat. The cushion and backrest of the right side of the seat are removed in the same way.
1. Lifting the rear seat cushion by the strap, use a 10 mm socket to unscrew one nut securing each hinge to the floor.
Removing the rear seat of Lada Kalina
The work is shown on the example of the left side of the seat.
The cushion and backrest of the right side of the seat are removed in the same way.
Lift the rear seat cushion by the strap.
. Using a 10mm head, unscrew one nut securing each hinge to the floor.
. and remove the pillow.
Using a 13mm socket, unscrew the two nuts securing the backrest brackets to the floor on the left and right sides. Fold down the seat back.
. Using the same tool, unscrew the two bolts securing the backrest brackets on the left and right sides.
Remove the seat back. Install the backrest and cushion on the left side of the seat in the reverse order.
Algorithm for dismantling the rear trim
On the rear doors, the trim is fixed using ten plastic clips and two screws for attaching the handle. The technology for performing dismantling work consists of the following stages:
- Removing the handle used to lift the glass. To do this, you need to use an awl to remove the half ring that holds the axial lever.
- Removing the plugs on the door and unscrewing the mounting screws. After this, the element itself can be easily removed.
- Click the piston using a flathead screwdriver. This is easily done by pulling back the bottom corner in the decorative panel.
- Release the remaining clips by removing the door card.
As a rule, the procedure for removing the trim on the back door of Kalina does not take more than 10 minutes. Although dismantling itself is not difficult, it is better not to rush, since due to inexperience you can break all the clips.
By the way, the Kalina car is a very acceptable option, which is distinguished by its price-quality ratio.
The advantages of Kalina, according to car owners, are as follows:
- cheap and cheerful - the main qualities of Kalina;
- high-quality chassis;
- the first repair occurs after approximately 10 thousand km;
- It’s quite quiet inside the cabin;
- comfortable seats;
- high-quality upholstery;
- climate control;
- high cross-country ability;
- reliable engine;
- affordable service.
Considering the above advantages of the Kalina car, it is worth considering this vehicle option if you have a relatively modest budget.
How to fold out the back seat on a Kalina sedan
Tool:
- Driver for socket attachment
- Knob attachment 10 mm
- Knob attachment 13 mm
Note:
The work is shown on the example of the left side of the seat. The cushion and backrest of the right side of the seat are removed in the same way.
1. Lifting the rear seat cushion by the strap, use a 10 mm socket to unscrew one nut securing each hinge to the floor.
2. Remove the pillow.
3. Using a 13 mm socket, unscrew the two nuts securing the backrest brackets to the floor on the left and right sides.
4. Having folded the seat back, use the same tool to unscrew the two bolts securing the backrest brackets on the left and right sides.
5. Remove the seat back.
6. Install the backrest and cushion on the left side of the seat in the reverse order.
The article is missing:
- Photo of the instrument
- High-quality photos of repairs
Lada K alina 2 . BACKSEAT
The rear seat is equipped with head restraints that can be locked in only two positions: fully raised or fully lowered. To raise, pull the headrest up until it locks (you will hear a click).
To lower the head restraint, press the left latch as you did for the front head restraint (see “Adjusting the front seats,” page 27) and lower the head restraint.
All three rear seat head restraints can be removed in the same way as they were for the front seat head restraint (see “Adjusting the position of the front seats,” page 27).
To increase the luggage compartment area, the rear seat can be folded. The backrest and rear seat cushion can be folded completely, 2/3 or 1/3.
Fold the rear seat in the following order.
4. Unfasten the micro-lock of the middle passenger's seat belt strap by inserting the ignition key into the slot shown by the arrow in the photo and, pressing the latch, move the belt to the side.
I don’t know what about the Kalina sedan, but in a station wagon you can make quite a decent platform for transporting cargo. Although the trunk itself is quite large, by folding out the rear seats you can get almost three times more space.
The seats fold out quite simply, but owners who just bought Kalina may not know this. I myself had a similar story with a VAZ 2112; after half a year of operation, I only later found out that the seats can be folded down to create a flat platform, and load fairly large cargo.
The first step is to fold the bottom row; to do this, just pull the laces, which are located right next to the seat belt buckles. And to recline the back, you need to pull the levers at the end on each side, and also pulling them towards you, lower them all the way down. The pictures below show everything clearly, but the levers themselves on the backs are not visible because of the covers, but I think everyone understands where they are.
How to remove the front and rear seats of Kalina 2: manufacturer's recommendations
The manufacturer provides each car owner with instructions that discuss exactly how to operate certain systems. The manual relating to the operation of the Lada Kalina-2 does not cover the procedure for installing and removing seats. However, AvtoVAZ has a certain set of requirements on this issue. They are published in the repair manual. These requirements are listed in this text.
Removing the front seats
To perform dismantling you will need a TORX E10 wrench. The horizontal position of the seats is adjusted as follows: the bracket “4” shown in the photo is pressed up, then the seat is moved forward or backward. To gain access to the fastenings, you need to move the chair back all the way. Check the picture:
How to remove the front seat in Kalina-2
If the indicated action is completed, remove the two “3” screws using a TORX wrench. Then the seat is moved all the way forward. On the back of the slide there will be two similar screws, which are also unscrewed with a TORX key.
When the fastening screws are missing, the seat is dismantled along with the slide. Before installation, it is recommended to apply Fiol-1 lubricant to the rubbing parts (10 grams per seat).
Removing the rear sofa
First, let's look at how to dismantle the cushions, that is, the seats.
How to remove the back seat in Kalina-2
Loop “3” must be pulled towards you to tilt one of the pillows forward. Then the brackets “1” are removed from the stops “2”. Nothing more is required.
When there are no pillows, you can remove the backrest. By pressing the handle “3”, the backrest is tilted forward (see photo).
How to remove the back of a sofa in Kalina-2
The backrest is secured from below with two nuts “1”. Each nut is unscrewed with a 13 mm spanner.
The back of the sofa is held in place by nuts
Note that, if desired, you can remove the brackets themselves, which are a fastening element. To do this, unscrew the screws “2”, using the same key 13.
Let's list the whole sequence again:
- By pulling loop “3” towards you, remove the pillows;
- By pressing the fastening handle, the backrest is tilted forward;
- The fastening nuts are unscrewed with a spanner.
As you can see, nothing complicated. There is no need to apply lubricant to the fastening parts here.
please, when copying information from the website kalina-2.ru, set a back link
A barrel in the garden on a Kalina hatchback.
To increase the luggage compartment area, the rear seat can be folded down, and each part of the seat can be folded out separately if necessary. Fold the rear seat in the following order. Fold the rear seat in the reverse order of removal.
The rear seats on the Lada Priora hatchback car fold down, thereby forming a huge space in the trunk. But for some, even this space is not enough to transfer a certain load, so sometimes you have to completely remove them and take them out of the cabin. True, this method of increasing free space is very rarely resorted to. Also, seats have to be removed for the banal reason of replacing them with new ones or for dry cleaning purposes.
And the trunk of this model is the most spacious, and if you fold down a smaller part of the rear seat, it will fit, for example, skis. To accommodate the same skis, you will have to fold down most of the rear seat. However, carrying long vehicles doesn’t happen every day, and a roof rack completely eliminates this problem. Its dynamics and spacious trunk will appeal to fans of active recreation. The cabin can accommodate five people comfortably, and the trunk is quite enough for not too bulky luggage.
Firstly, we will walk you through the basic everyday things that a person should know about car seats, namely, we will show you clearly how to remove the headrests from the seats, and we will also show you how to correctly fold out the rear seat of a car to transport large items. cargo and some more useful information will be given about the seats. Applies only to the driver), because when adjusting the seat, for example in length, you may lose control of the car because if you do not properly fix the seat on the car, then there is a possibility that it will suddenly move backwards and thus you may lose control of the car , so be careful! Scientifically, longitudinally), you will need to pull up the locking lever with your hand as shown below in the photo, and only after that, with body movements, adjust the front seat as you need, but after you release the lever, move your body either forward or backward and This way you will fix the seat and it will stand clearly in one place.
The interior is cramped in the back, the trunk has a modest volume and a large loading height, and the rear seat only folds down entirely. A COMFORTABLE, DYNAMIC, STILL MODERN CAR IS ESPECIALLY APPRECIATED BY TUNING FANS. High smoothness, low fuel consumption, good selection of additional equipment. Low ceiling above the rear seat. THE MOST MODERN VASE MODEL, ORIENTED PRIMARILY AT CITY RESIDENTS.
If for some reason you need to remove the rear seats on the Lada Kalina, then for this you will need a small 10 socket and a slightly larger 13 socket. After you have unscrewed both nuts on the right and left sides, you can remove it and proceed to the backrest. After this, we carry out the same procedure with the second half of the seat and the backrest, and remove them.
Lada Kalina Cross. SEATS
Front seats. To adjust the front seats longitudinally, pull locking lever 1 (Fig. 9) up. Once the seat is in a comfortable position, lower the lever and move the seat back and forth slightly until it is securely seated.
Front seat height adjustment
In a variant in
The car has a front seat height adjustment function. To change the angle
tilt and position of the seat cushion, raise or lower the lever (see Fig. 9a) located on the outside of the cushion. To lower the seat cushion, push the lever down several times. To raise the seat cushion, pull the lever up several times. The tilt of the seat back is infinitely adjustable by rotating the round knob on the side opposite the seat adjustment lever.
It is prohibited to adjust the position of the driver's seat
days while the vehicle is moving. The seat may move suddenly, causing you to lose control of the vehicle.
The tilt of the seat back is infinitely adjustable by rotating handle 2.
In a variant version
The front seats are equipped with electric heaters, which are turned on with switches 1 when the engine is running (Fig. 10).
The height adjustment of the headrest (Fig. 11a) occurs by direct action
on the headrest. The headrest is raised by pulling it to the required height. To lower the head restraint, press the stopper lever 1 (on the right side of the head restraint) and push the head restraint down. To remove the head restraint from the seat back, lift it to its full height, simultaneously press both locking levers 1 and 2 (on the right and left sides of the head restraint) and pull the head restraint up.
The optimal position of the headrest is when its upper edge is at the same level as the top of the head (Fig. 11 b). If this is not possible, for very tall people the head restraint should be raised to its highest position, and for very short people it should be lowered to its lowest position.
Only drive with a correctly adjusted head restraint.
Rear seats
. The head restraints of the rear seats are adjusted and removed in the same way as the head restraints of the front seats (Fig. 11 c). To increase the luggage compartment area, the rear seat can be folded down.
In a variant version
Each of both parts of the seat can be folded out separately if necessary. When any part of the rear seat is folded down to carry cargo, the remaining part can accommodate only one passenger. The rear seat head restraints are adjusted and removed in the same way as the front seat head restraints.
Before folding the rear seat (or part of it), it is necessary to pass the tapes of 2 rear side belts (Fig. 11 d) through the holders of 1 tapes (in the variant), remove the tongue of the middle seat belt from the mini-lock (see Fig. 156) and install all the locks rear seat belts into the buckle holders located in the lower part of the backrest. Removing the middle seat belt tongue is done by pressing the button on the side of the mini-lock with a sharp object, such as an ignition key.
When returning the backrest to its working position, make sure that the shoulder branches of the side belts do not fall behind the backrest.
After returning the seat to its working position, the seat belt buckles must be removed
from the holders, and insert the tongue of the middle seat belt into the mini-lock, aligning the index arrows.
Do not allow the belts to be behind the backrest when returning it to the working position to ensure that they can then be used for their intended purpose and to avoid damage to the belts by the backrest lock.
Lay out the rear seat in the following sequence:
— remove the head restraints from the seat back (in the optional version),
— pull loop 4 (Fig. 12) and place pillow 1 in a vertical position. If necessary, move the front seats forward;
— pull the handle 3 of the lock drive and place the backrest 2 in a horizontal position;
Reinstall the rear seat in its normal position in reverse order.
Video on the topic “Lada Kalina Cross. SEATS"
Source
Removing the rear seat of Lada Kalina
The work is shown on the example of the left side of the seat.
The cushion and backrest of the right side of the seat are removed in the same way.
Lift the rear seat cushion by the strap.
. Using a 10mm head, unscrew one nut securing each hinge to the floor.
. and remove the pillow.
Using a 13mm socket, unscrew the two nuts securing the backrest brackets to the floor on the left and right sides. Fold down the seat back.
. Using the same tool, unscrew the two bolts securing the backrest brackets on the left and right sides.
Remove the seat back. Install the backrest and cushion on the left side of the seat in the reverse order.
Video on the topic “Lada Kalina. Removing the rear seat"
Source
Disassembling the panel
To dismantle the instrument panel in Kalina, you should arm yourself with a set of high-quality screwdrivers and patience. To work you will need:
- crosshead screwdriver;
- slotted screwdriver;
- 10mm wrench with round head;
- marker or tape to indicate disconnected wires.
Disassembly begins from the sides. How to remove a torpedo? The sequence is:
- The first step is to disconnect the rubber seal that prevents the panel from being removed. Using a flat-head screwdriver, bend it to make room for dismantling.
- Next you need to remove the plastic casing with three clips. It is located on the front pillar of the cover. Again, a flat-head screwdriver will come in handy, which can be used to pry off the socket.
- The next step is to detach the trims in front of the glass. You can unscrew them using a Phillips screwdriver by unscrewing the fasteners on both sides.
- After this you will be able to remove the black trim under the glass. It is secured with iron clips and screws, so there is no need to rush. Slowly pull towards you until it comes loose. It may happen that the clips get stuck under the panel or some of them will be missing altogether.
- We unscrew all the screws that are nearby and remove the covers from the side air ducts.
New Lada: About daytime running lights of Lada cars
After removing all the side and side elements, you can begin to dismantle the central part.
How to install fog lights on Lada Kalina
What you need to install fog lights
Having chosen a PTF kit, car owners purchase an installation kit for connection. What does it consist of:
- relay;
- button to turn on and off;
- wires and terminals;
- screws;
- electrical connectors;
- installation manual for brand new car owners.
Attention! The kit for installing fog optics in standard places is marked with the digital value 1119.
First you need to prepare the following set of tools:
- open-end wrenches for 8 and 10;
- flat-head and Phillips-head screwdrivers;
- 6-sided key for light adjustment;
- electrical tape, pliers;
- screeds.
Installing PTF on Kalina
A car owner who is often faced with disassembling a car or its individual parts will not have any difficulties with installation. If you have doubts about the correctness of the steps taken in installing the PTF, then it is better to contact a car repair shop.
- Disconnect the terminals on the battery.
- Remove the bumper after first unscrewing the fasteners. To do this, you need to unscrew the screws on the grille and under the arches.
- Remove the plugs with a flat-head screwdriver.
- Attach the fog lights using 3 self-tapping screws. Strengthen them securely so that the structure is not flimsy.
- Start laying the wires. Remove the mat near the driver's seat.
- Locate the wiring harness and plug near the clutch pedal. Sell the last one.
- Tie the harness to the wire and pull it under the hood.
- Attach the new wires to the old ones with plastic clamps.
- Place them on the left side of the bumper near the connection point for the front fog lights.
- Attach the wires firmly to the machine body so that they do not dangle.
- Under the radiator grille, route the wiring to the headlight on the right.
- Screw the negative terminals to the screws on the car body.
The simplest options - almost without modifications
There are legends on the Internet that many seat models fit the VAZ 2110 without any modifications at all. But in fact, without any special modifications, you can only install Recaro from old Opel. All other options will have to be redone and digested. There are also arguments that this is not a safe process at all and could lead to disaster. Let's draw a definite line under all that has been said and give specific recommendations so that nothing bad happens:
- you will still have to weld the slides on the seats, but you don’t have to do it yourself, it’s better to order this work from a good welder, maybe not even a car mechanic;
- after welding, no further alterations are needed if you have chosen the seats correctly, that is, you have not bought too wide or high seat options because of beauty and cheapness;
- it is more difficult to change the rear sofa due to its rather specific size, but there are model options on the market with identical widths; you just need to look for offers at a disassembly site;
- you can keep all the functions of the seats from the foreign car - height adjustment, lumbar support adjustment, electrical adjustments (but they will have to be connected separately from the wiring);
- The conversion is not only possible, it is really worth it, since AvtoVAZ does not install the best seats, with the only exceptions being Vesta and X-RAY.
These are the conclusions that can be drawn from installing foreign-made seats on a VAZ 2110 car. This is a good idea that should result in positive emotions during the trip. In almost any foreign car, the seats are much more comfortable than in domestic cars. It makes no sense to install seats from Kalina or Priora in the Ten, you won’t feel a significant difference, and you’ll still have to struggle with modifications. So it’s better to find a good foreign car.
We invite you to watch a video of remaking seats for a VAZ 2110:
Removing the front seat
1. Move the seat back all the way and use a 10mm head to unscrew the two screws for the front fastening of the seat slide.
2.
Having moved the seat all the way forward, use a 10mm head to unscrew the two rear mounting screws for the seat slide.
3.
We take out the front seat through the car door opening.
Removing the front seat slide
We move the seat slide so that the bolts securing the slide to the seat frame are visible through the technological holes in the slide.
1. Using a 8mm socket, unscrew the bolts securing the slide to the seat frame. Each of the slides is attached to the frame with three bolts.
2.
Remove the slide assembly with the longitudinal movement mechanism lever.
3.
We remove the end of the lever shaft of the longitudinal movement mechanism from the hole in the inner slide and from the hole in the outer slide.
A spring is installed between the lever and the outer herrings. Similarly, we remove and disassemble the front passenger seat.
We assemble and install the front seat in the reverse order.
Before installing the lever shaft into the hole of the outer slide, first put a spring on the shaft and place the short mustache of 1 spring on the latch, then, squeezing the long mustache of 2 springs (can be tied with wire), insert the shaft into the hole of the slide so that this mustache goes under the slide .
How to remove and install Lada Kalina car seats
Page 1 of 3
Seats are usually removed to clean the interior and the seats themselves, as well as to better access the components and parts of the instrument panel and vehicle controls.
Removing the front seat and slide
1. Move the seat back all the way and use a screwdriver to disconnect the torsion bars from the pillow base post.
2. We remove the torsion bars from the grooves of the brackets
6. Recline the seat back
7. ...and using a 8mm head we unscrew the two bolts of the front fastening of the slide.
8. The travel stop is secured with a bolt from the outer slide.
Move the seat all the way forward.
9. Using a 8mm socket, unscrew the first bolt of the rear fastening of the internal slide.
10. Unscrew the second bolts of the rear fastening of the internal slide.
Unscrew the rear mounting bolt of the outer slide.
11. Remove the chair and take it out through the front door opening.
Unscrew the seat belt buckle.
12. Disconnect the spring.
Sound insulation of the trunk Kalina 2 (VAZ 2192, 2194)
At the moment, the new Kalina is available in two versions: hatchback and station wagon. These body types are very practical, but they also have a drawback - noise, because the trunk is essentially located in the car's interior. To improve sound insulation, it is proposed to make sound insulation for the trunk of Kalina 2 with your own hands.
Car soundproofing technology is the same for all brands and types of cars, however, specific cases have their own characteristics. In the case of the Lada Kalina 2, the whole process begins with removing the trunk trim and tailgate trim, which does not cause difficulties. Next, the entire surface should be cleaned and degreased with White Spirit.
The first layer of trunk sound insulation is vibration isolation material. It is recommended to start installing sound insulation from the rear arches; it is through them that the main noise from the road is transmitted. To soundproof arches, it is recommended to use material with the highest vibration absorption coefficient, for example, 'Bimast Bomb'. We cut sheets of a suitable size (the larger the pieces, the better), and heat the bitumen side with a hairdryer. We apply the material to the cleaned metal of the body and roll it out with a hard (plastic/iron) roller. Glue the next sheet of vibration isolator overlapping or at the joint
After this, we move on to soundproofing the horizontal surface of the trunk, paying special attention to the part where the muffler resonator passes (for Lada Kalina 2 this is the left side)
The second layer is sound-absorbing material. Most often, due to its availability and low price, SPLEN (a largely thermal insulating material) is used, but we recommend that you use an accent. Both materials have a self-adhesive base, so their installation will require significantly less time. We glue 100% of the surface, joint to joint. The only exceptions are technological openings (openings for interior ventilation).
The trunk lid of Kalina 2 must also be soundproofed. Unlike the trunk, you should use a lighter material for vibration isolation, for example, StP Aero. We glue the material between the stiffeners. We set the accent on top in the same way.
Fighting squeaks and crickets
It is worth paying special attention to the sound insulation of the rear shelf. To prevent it from making squeaks, you should stick an anti-squeak (modelin) on all rubbing surfaces, for example, places where the trunk shelf is attached, the fifth door trim, etc.
The soundproofing of the trunk of the Kalina 2 hatchback is completed, we carry out the assembly in the reverse order. The station wagon trunk is treated in a similar way.
It will take one working day to soundproof the trunk, as well as:
- On the trunk shvi there are 8 sheets of 'Bimast Bomb' (0.53*0.75m) and 2 accent sheets (1.0x0.75m)
- On the trunk lid there are 2 sheets of Vibroplast and 1 sheet of accent.
The effect of sound insulation is significant; firstly, the exhaust pipe becomes less audible. Secondly, it became almost inaudible how the rear suspension worked. And also, if you have tuned the trunk of Kalina and installed a subwoofer there, then soundproofing the trunk is required!
Remember that the best sound insulation is when a set of works has been carried out aimed not only at insulating from external noise (noise from wheels, wind, etc.), but also eliminating creaks and crickets inside the car.
Knock in the front suspension of Lada Kalina
Many motorists dread the day when strange knocking noises appear in the suspension, especially the front suspension, which increases with increasing speed. Of course, there is reason to worry, but at the same time, a car’s suspension is a strong and reliable unit that will clearly withstand a few more kilometers to a service station or garage, where it can be diagnosed.
There are four main reasons for the occurrence of knocks and squeaks in the front suspension of the Lada Kalina. Of the three possible causes of knocking, two of them can be eliminated independently.
So, the first reason why a knocking sound may occur in the suspension is the quality of the road surface. Yes, suspensions, even the most ideal and new ones, can squeak and knock on a bad road, even if this has not been observed before. To test this theory, you should drive onto a well-paved road and drive a few hundred meters; if there is no knocking, everything is fine with the suspension; if not, look at the second reason.
The second reason for the knocking sound, if it is accompanied by vibration in the steering wheel, is a malfunction of the steering, or rather the steering rack, or thinning of the brake discs. If the discs can be replaced independently, then in the case of steering, if you are not a level 80 mechanic, it is better not to flirt with it right away bring the car to the service station.
The third reason is the springs that have lost their tone, as a result of which the car body practically hits the suspension. You should not deal with this problem on your own - it is better to immediately take the car to a service station or service center, since self-repair may seriously damage the front suspension strut.
The fourth reason is a worn-out silent block, which is designed to dampen vibrations and knocks when driving. You can replace the silent block yourself; see the step-by-step replacement of the silent block in the Lada Kalina mono in the next paragraph.
Replacing front suspension silent blocks
Replacing the silent blocks of the Lada Kalina front suspension is necessary after 15-17,000 km, otherwise noises and knocks may be observed when driving. In most cases, the loss of its functions is observed after 15-17,000 km; knocking noises that appeared during this period of kilometers are a problem of faulty silent blocks.
Silent block
The silent block replacement diagram looks like this:
- The machine is placed above a hole or ditch in order to be able to comfortably see the entire suspension. The movers are fixed by the wheels, we put the car itself on the handbrake, then it’s worth checking again that the car is stationary.
- Use a jack to lift the car and remove the front wheel.
- After this, you should fix the bolts of the ball joint with your hands, after which its fastenings are removed.;
- The SPU nut is unscrewed, before this the ball-type support is knocked out into the lower part, after these manipulations the bolts are removed.
- After removing the bolts, the sleeve blocking the lever is pulled out. After pulling out the bushing, the lever is pulled out.
- There are marks on the lever that indicate the direction of installation of new silent blocks; this should be taken into account when installing new blocks.
- The silent blocks must be lubricated at the point of contact with the lever. Using a vice or pliers, apply pressure to the blocks until they fall off.
The diagram is approximate and is for informational purposes to understand how many manipulations need to be made to replace silent blocks.