Often we have to talk about replacing the seat belt if it does not pull out of the seat. But first you need to understand the basis of its functioning. If the belt jams, we can safely say that the locking mechanism has broken. This happens as a result of road accidents, so after such events you need to carefully check every part in the car, even the belts.
Is it necessary to use a seat belt?
Yes, by law. Otherwise, you face a fine of 1000 rubles.
How many drivers actually use seat belts?
Despite what was said earlier, according to statistics, slightly less than half. But it is not recommended to risk your health and have the possibility of getting a fine.
What is the price for repair or restoration?
Small. Rarely more than a few hundred, at most thousands of rubles.
What does a jammed belt mean?
If the seat belt does not pull out of the installation socket, it is most likely jammed. To understand what this means, you first need to understand how it works. When the belt does not extend, this indicates a failure of the locking mechanism or that the belts were jammed as a result of an accident. But first, let's look at the principle of operation.
Vehicle seat belt
Inside the blocking device there is a sensitive element responsible directly for blocking, which is made in the form of a ball. This ball, moving through a system of levers, clings to the body of the coil gear. If the belt is retracted too quickly, the spool disc puts more force on the screw surface, thus blocking the ball.
If the lock is jammed and cannot be turned off, this means that over time the security mechanism has begun to function incorrectly.
In such cases, the strap does not retract and cannot be turned off in any way. In such cases, even an attempt to slowly latch the element may not help - it simply jams and no longer retracts, does not work.
We recommend: How to properly bleed the brakes of a car with ABS?
Operating rules
The procedure for proper operation of the protective accessory in question is regulated by the following rules:
- The shoulder part of the tape must go over the chest and shoulder; it is forbidden to thread it through other parts of the body, even if it causes inconvenience.
- When the seat back is positioned vertically, maximum protection is achieved when using a seat belt. Leaning the seat back increases the risk of a person slipping under the belt. Under these circumstances, a head-on collision will result in the passenger striking the instrument panel.
- One seat belt is designed for one passenger; two people are not allowed to wear it together.
- It is forbidden to drive with a child in your arms with a seat belt fastened. In this case, the accessory not only does not protect the adult passenger, but can also cause injury to the child in the event of an accident. The child must have a separate seat belt or child seat.
- It is prohibited to add or change the design of the device in question in order to weaken the tension or block the tightening of the belt.
- Make sure that the tape fits against your body and does not twist.
- If the child's height allows him to be fastened correctly, the use of a belt is mandatory. If the child is too small, a child car seat should be used.
- The waist part of the tape should be adjacent to the area above the hips.
- Adjust the mechanism to ensure a snug fit of the tape to your body.
Coil repair
For the reasons mentioned above, sometimes the seat belt does not extend. What to do? Advice from experienced auto mechanics will help. First of all, you will have to disassemble the casing and remove the coil. In some models, you will have to dismantle the seats in the place where the breakdown occurred.
To do this, you need to prepare screwdrivers (flat and Phillips), as well as spanners. Their diameter should be different. You should also purchase a multi-purpose lubricant. The seats must be protected from accidental contact with oil. You will also need napkins and wire.
Repairs can be simple or more complex. In some cases, you have to completely change the coil. For some machine models, you will need to prepare special tools. But repairing a seat belt yourself will help save quite a lot of money in the family budget.
Do-it-yourself seat belt repairs are most often performed in the reel area. To get to it, you need to remove the side panel trim. It can be fixed with clips or bolts.
To comply with safety regulations, it is necessary to remove the terminal for the negative conductor from the battery. The contacts that lead to the airbags are also disconnected (if possible). The colors of the corresponding wires are specified in the operating instructions.
These simple steps will prevent the squib from accidentally firing. Otherwise, you may be injured during the repair process.
The coil housing needs to be opened. Most likely, the spring of the tape return mechanism has failed. This element can be replaced. It will be easier to get it out than to install it in its original place.
In some cases, do-it-yourself seat belt repair requires completely replacing the reel. If after these steps the tape still does not come out of the reel, this action most likely cannot be avoided.
Design and operating principle
The design of the protective device in question is represented by a retractor reel, a lock and a tape. High-strength material is used to make the tape; this element is fixed to the body in several zones as follows:
- in the area of special traction with a lock;
- on the counter;
- in the threshold area.
The main purpose of the lock, in turn, is to lock the belt. This element is located near the seat. A movable tongue made of durable metal simplifies the operation of the belt; it is located directly on the belt. You can find a retractor coil on the car body pillar. Its purpose is to forcefully wind and unwind the tape. The design of the retractor reel provides for the presence of an inertial locking mechanism, due to which, in the event of a sudden stop, the movement of the belt is stopped and the person remains in a fixed position, not being able to go into free flight through the windshield.
The principle of operation is nothing complicated: the action of a coil with a blocker is based on a gear mechanism that rotates it. The closing of this mechanism occurs through a pendulum; it can have a ball or spheroid support with a lever system.
Repairing a seat belt
DIY repairs
Self-repair can be done without much difficulty, and if necessary, you can contact a service station.
It is recommended to disconnect the battery and airbags before starting work. This must be done to avoid triggering the squib. The coil is covered with plastic with the inscription “Do not open”, but for repairs it will have to be opened.
A plastic container with a spool is usually secured with bolts.
- If the belt retracts, the return spring may be damaged.
- Another problem could be the steel strip wearing out or the steel angle breaking. Because of it, the shaft spins in vain, without pulling the tape over itself. If the corner is not severely broken, its position can be corrected with pliers.
- In some vehicles, the belt mechanism may jam due to frosty weather. A common cause is freezing of the lubricant, in which case it should be replaced with a frost-resistant one.
Replacing the coil
If the above steps seem too complicated for you, you may prefer replacing the internal coil to simply repairing the belt. The main thing to remember when purchasing is that it must fit exactly your car model, otherwise there will be no benefit.
You can install a new belt yourself, but it is better to entrust this task to professionals. It is possible that in the future he will protect his family and friends.
The seat belt can withstand a load of 3 tons and is designed taking into account all the nuances of the human body.
Seat belt replacement and repair
If you need to change the strap on your car, there are several options to solve the problem. You can go to a specialized service station, where technicians will quickly and inexpensively replace the element. This way you can save your energy, time and nerves, especially since the cost of replacement today is not so high. But you can also change the device on your car yourself. Having completed this procedure once, you will always know how the replacement is carried out, and in the future you will be able to do it yourself (the author of the video is a Real White Guard).
Rear seat belts in a station wagon, replacement
First of all, in order to get to the side belt mechanisms, you need to remove the rear pillar upholstery, for which you unscrew the self-tapping screw “3”, and then remove the plastic clips that hold the part in place from the fastening.
Preliminary stage before dismantling the belt
The main step will be to remove the inertial coil. It is attached to the body with one screw “2”, which is unscrewed.
Side belts, dismantling
At the last stage, remove the cover covering the middle belt reel. As you can see, it is held in place by a single screw “2”. It needs to be unscrewed.
Middle belt, removal
Assembly is carried out in reverse order.
The force when tightening the screws should not exceed 31 N*m. The minimum value, moreover, is 18 N*m.
Part numbers in the catalog
If you open the spare parts catalog, on page number M9 you can find the following drawing:
Parts and components of Kalina-2 in a hatchback body
In the figure the numbers indicate:
As you can see, the two front belts differ in design, as they have different catalog numbers.
For a station wagon, rear belts 21940-8217210-00 (side) and 21940-8217310-00 (middle) are suitable.
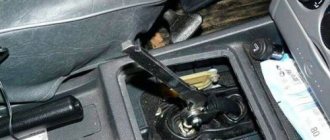
How to remove front seat belts
First, unscrew the two bolts located at the bottom of the plastic box.
Then use a flat screwdriver to pry up and remove the plug. Underneath there is a bolt that needs to be unscrewed.
There is one more bolt left on top of the plastic box, which also needs to be unscrewed. Next, unscrew the top fastening.
Now you need to open the plastic window on the box and pull out the textile element along with the coil.
To remove belts on a foreign car, for example a BMW, you first need to remove the plastic covers. They are attached using four clips, two of which are attached at the bottom. The other two are fixed on top.
The fastening elements are unscrewed using a TORX key.
Then you need to unscrew the bolts of the fixing metal part. In this case, only one bolt can be unscrewed.
The plastic cover is removed using a special tool. You can also pry out the plastic with a regular screwdriver. There will be quite a lot of dust inside.
Now all that remains is to unscrew the bottom bolt.
After unscrewing the bolt, the belt should come out easily.
To wash the belt, the removed mechanism must be disassembled. Next, installation is performed in reverse order.
Useful videos on the topic:
How to remove the front seat belts on a Volkswagen Polo
How to remove the front seat belts on a Toyota Camry
How to remove the seat belt on a VAZ 2110, 2111, 2112
We will tell you step by step how to remove the belt on VAZ models.
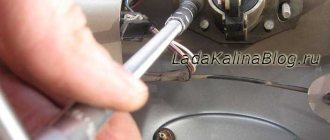
First you need to use a screwdriver to pry and remove the decorative trims of the lower and upper seat belt fastenings.
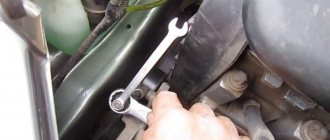
There will be bolts under the covers that need to be unscrewed with a 17mm wrench.
The procedure for dismantling the front belts on Kalina:
- The first step is to remove the plastic decorative trims on the car sills. The front trim is secured with five bolts. Four from the bottom:
- And the last bolt is located at the top, near the hood release lever, on the bend of this trim:
- Immediately after this, with a simple movement of the hand, remove this casing and take it out so that it does not interfere with the work process:
- Immediately after this, you can remove the same part on the rear threshold; there you also need to unscrew the 4 fastening bolts:
- Then, using a 17mm wrench, unscrew the lower bolt of the front seat belt, having first pryed off the plastic plug:
- Then you can remove the central casing, under which there is a box with a mechanism for returning and locking the belt. This casing needs to be lifted up a little and removed from the latches.
- Then unscrew the two bracket bolts with a Phillips screwdriver, as shown in the photo below:
- Next, the lower bolt of the belt mechanism, which is also secured using a 17mm wrench bolt:
- And all that remains is to remove the same one from above, first using a flat screwdriver to pry the cover off the latches:
After completing all the above procedures, you can safely remove the seat belts from your Kalina without any effort and, if replacement is necessary, install them in the reverse order of removal.
When is it time to change?
On Lada Kalina cars, the manufacturer does not regulate the replacement of this part. However, its failure is a common problem. In particular, we are talking about Lada Kalina cars. This applies to both 16-cl and 8-cl engines.
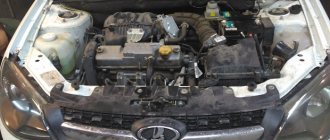
This is what a deformed element of a Kalina generator with an 8-cyl internal combustion engine looks like
Therefore, let’s look at the signs that indicate that the belt may fail in the near future:
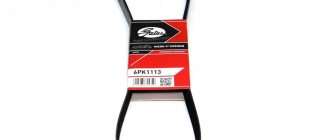
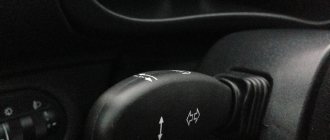
- Whistle when moving. As a rule, this whistle appears when the electrical appliances of the vehicle begin to load. For example, if you start the car, and when you press the gas, a loud whistle is heard from the engine compartment, this indicates that the belt is loose. In this case, it must be tightened using a tensioner or replaced.
- Cracks on the strap. If you open the hood, look at the belt and see cracks on it, then you know that it’s time to change the element. Neither tensioning nor adjusting the rollers will help here. The component can be tightened, but this will not be enough for a long time. The only option left is replacement.
- Deformation. As in the previous case, neither tightening the tensioner nor adjusting the rollers will give much effect. You just need to change the element.
- Noise when the engine is running. If the element has already served its service life, this can be understood by the noise that appears when the motor is running. For example, some Lad Kalin car owners report loud knocking and even impacts when the engine is running.
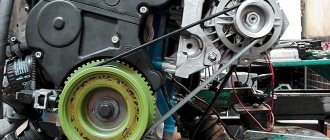
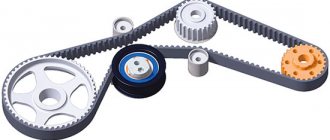
The assembly is disassembled: this is what the strap looks like on the shafts
If the vehicle is equipped with a generator sensor that determines its performance, then it will be easier to identify the malfunction. For example, if you heard a whistle from under the hood, and at this time the indicator on the sensor came on, then you need to pay attention to the strap. This indicates that the belt needs to be tightened, since it may be in a weak state or that its service life has been exhausted.
One way or another, if the slipping and whistling of the strap cannot be eliminated by adjusting the belt or rollers, it needs to be changed.
Repair process
Now that we have dealt with the signals and reasons for blocking a fastened and unfastened seat belt, let’s move on to the repair process. Cleaning seat belts is one of the main tasks in this process, so we will consider this procedure separately. So, what should you do if you receive a signal that the lock is jammed? How can I clean it or turn it off? You will learn more about this below.
Tools
To disable the lock if a corresponding signal appears, the entire mechanism will need to be cleaned. To do this, you need to thoroughly prepare in advance and collect all the necessary tools. so what to prepare:
- a Phillips screwdriver, preferably a short one;
- flat head screwdriver;
- a wrench set to “17”, it will be more convenient to use a socket wrench;
- stationery pin;
- syringe with tube;
- some gasoline (lighter fuel is ideal).
Step by step instructions
When the entire list of tools is ready, you can begin repairing and cleaning.
- Using a Phillips screwdriver, unscrew the screws that secure the strap protection.
- If the lock is not working, pull the strap out to its full length and secure it with a clothespin.
- Take a wrench and remove the screw that secures the element coil. The screw must be removed from its installation location. To prevent the element from starting to unwind, you can attach it directly to the same spool using the same clothespin. In any case, in order to disable and clean the lock, it must be locked to make further actions easier.
- Put the reel aside and sit in the next seat. To disable and clean the lock, you will need to find the lid behind which the inertial device is hidden. As a rule, it is slightly thicker in design. Shake the coil - under which cover you hear the noise - under that one it is located.
- Now to dismantle the protective cover you will need to remove four plastic pistons. This can be done using a slotted screwdriver or a thin knitting needle. The pistons should be supported by hand so that they do not fly out and you do not have to look for them and collect them throughout the cabin. Then pry up the cover with a screwdriver and remove it. Set the lid aside.
- Your view will now be presented with the first mechanism of the component. It is a kind of box with a cylinder and thus a locking ball and a so-called rocker inside, which jams the lock. This mechanism can be dismantled freely from the installation site.
- Check the functionality of this rocker - ideally it should move freely along the axis of rotation. This device should be positioned vertically with the top angled toward the locking ball. One way or another, the rocker arm must be positioned vertically so that it does not jam. If you feel that the so-called rocker arm does not move freely, then you need to clean its rotation axis. Pour some gasoline and rinse the device until it rotates freely on the axis, without the slightest jamming.
- Now let's move on to the second, inertial device. It is located under the gear, which is made of plastic and in most cases is made of steel. The gear comes off freely, so remove it.
- Note the center of the serrated hole. It contains an eccentric with teeth. It is these teeth that jam the strap when it is suddenly pulled out. The space under this very eccentric needs to be cleaned. Pour a little prepared gasoline around the entire perimeter of the hole, add a little fuel to the center. At the same time, hold the strap, preventing it from winding up, for which you can temporarily remove the clothespin. Make sure that the liquid gets into all parts of the element, otherwise cleaning it will be useless.
- Take the dismantled spool with one hand so that the plastic guide along with the spring can be supported with one finger. Using your other hand, pull and wrap the safety element several times. Also pull it a few times until the device itself engages. Next, hook it on the reel one more time. These steps should be repeated several times.
Repair options
Troubleshooting measures directly depend on the cause of the breakdown:
- If you have successfully pulled out the belt, buckled it, but when you need to unfasten the belt does not return to its original position, the problem may lie in the spring. It often comes off due to prolonged use or under stress. It is necessary to disassemble the lining and reach the drum to install the spring in the correct position. If it is still there, you will have to change the drum.
- Dirt on the belt and in its fixation areas can also cause the belt to not return to its original position. This problem is most common with older cars. Just rinse the entire device and dry it thoroughly.
- If the device is jammed and the seat belt does not extend at all, the cause may also be the accumulation of dirt, but not on the belt, but directly in the mechanism. To fix the problem, use a special composition, which can be purchased at any auto supply store. Spray it as close to the mechanism as possible and try moving the tape a couple of times to develop the device. You can also disassemble the device yourself and clean it, but first pull out the tape to the end and secure it with improvised devices, which can be a clothespin or a paper clip.