Instructions
Open the back door of the car.
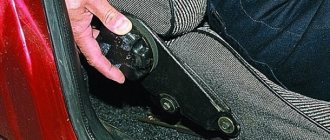
Feel under the seat for the small airbag lock handle. Press the handle while controlling the applied force. Finding a replacement for a broken one will be quite difficult. Carefully lift the edge of the pillow to stretch it out. Go around the other side of the car and do the same operation so that both ends of the cushion come out of the grooves.
Lift and pull the seat cushions out of the passenger compartment. The left rear seat cushion of the Priora is slightly larger than the right one - because of this, it comes out a little more difficult.
Now take care of the headrests. Move them to the lowest position, then with sufficient force, pull up until it stops. After this, press the latch to pull the head restraints out of the back of the rear seat.
Find the fastener strap on the back of the seat. Pull it up. In a car with a lot of mileage, and occasionally even a new one, the locking mechanism can jam. If this snag remains after several attempts to remove the rear seats, you will need to lubricate the mechanism with lithol. In addition, it happens that it is impossible to find the strap due to the fact that the interior seats have been reupholstered. At the same time, the locking strap remained inside, behind the cover on the rear seat.
Pull up slightly to extend the rear seat backrest. That's right, pull out the second one in the same way. Remove the armrest screw attached to the hinge. Later, remove the hinge screw attached to the body. Release the loop and carefully inspect the pillow retainer. If it is faulty, disconnect it too and replace it with a new one later.
Drivers who occasionally transport large cargo in their cars often try to increase the interior space by removing the mdash seats of both the second and first rows. Occasionally, seat dismantling is performed for other reasons. In any case, it would be useful for every motorist to know how to remove the seats by himself if such a need arises.
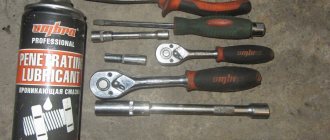
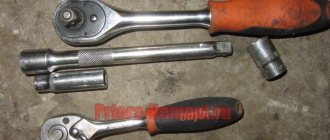
- In order to dismantle the seats, you will need the most primitive tools - a wrench, a socket wrench and 2 screwdrivers - a Phillips and a slotted one. You will spend no more than 15-20 minutes of your personal time dismantling one seat.
- To remove the seats of the first row, you need to open the cover (the easiest way to do this is to use a flat screwdriver, prying the cover from above). Under the cover you will see a bolt, the one that needs to be unscrewed and removed. Each seat is secured with four such bolts, therefore, after performing this operation four times, you will disconnect the seat from the base and be able to remove it.
- In some vehicles, the second row seats are slightly more difficult to remove than the first row seats. But they can also be dismantled without any special difficulties. First you need to unscrew the screws that hold the decorative plastic trims in place and remove the decor. After this, the rear part of the lining must be bent back, slightly moved to the left, and then moved forward and removed in one motion.
- – inspection hole or overpass;
- – lift or jack;
- – a set of ring and open-end wrenches and socket heads.
Perform all movements carefully and carefully so as not to damage the plastic parts of the seats. Having performed this primitive operation several times in a row, in the future you will be able to perform it mechanically. When removing decorative parts, help yourself with a flat-head screwdriver, but in no case use excessive force. After removing the pads, unscrew the seat clamps and remove them.
The rear suspension springs need to be replaced if they sag or are damaged in any way. Regardless of which spring the damage is found on, be sure to replace both springs at the same time and install identical springs. Also, removing the springs is necessary when replacing a shock absorber or compression stroke buffer.
Instructions
To remove the rear springs on classic VAZ models, before starting work, place the car on an inspection hole or overpass with excellent lighting. Stop the car with the hand brake and chock the wheels. The ignition must be turned off.
Using a 10mm wrench, unscrew the nut securing the pressure regulator rod to the rear axle. In this case, support the bolt with a suitable wrench. Disconnect the lower end of the pressure regulator rod. Using the same wrench, unscrew the brake pipe tee fastening. If the car has a lot of mileage, lubricate this connection with penetrating lubricant. Remove the tee.
Disconnect the rear shock absorber from the mounting bracket. Hang up the rear wheel. Remove the rear spring together with its plastic spacer. Remove the upper rubber spring gasket from the support cup. Inspect all gaskets and, if damaged, replace them with new ones.
To remove springs on front-wheel drive VAZ cars, also place the car on the inspection hole and fix it. Remove the rear seat back and move the rear wheel well trim aside. Using a 17mm wrench, unscrew the nut located on top of the niche. At the same time, hold the shock absorber rod with a key at 6.
Remove the nut, backing washers, spring washers, and top pad. Using two 19mm wrenches, unscrew the nut securing the shock absorber to the beam. Remove the shock absorber bolt, using a drift if necessary.
Remove the shock absorber and spring. Remove the spring, bottom pad and compression buffer from the shock absorber. Often the spring gasket “sticks” to the body. If there are deformations or breaks on it, replace it with a new one.
To remove the spring on “Kalina” and “Priora”, hang its rear part. Remove the rear wheels. Lower the rear until the springs begin to compress. Remove or recline the rear seatbacks. Having locked the rods of the rear shock absorbers, unscrew the two nuts securing them to the body.
How to remove seats on a Priora (hatchback-station wagon)
Remove the spring washers, upper cushion washers and upper rubber cushions. Hang the rear part again so that the springs relax. Disconnect the shock absorber from the suspension arms and remove the shock absorber assembly. Remove the spring, spacer, bushing, washer, bottom pad, housing and compression buffer from the shock absorber.
Fans of the Lada Priora like everything about the car, but they also notice that the car’s ceiling lining is rapidly wearing out. In order to update the ceiling by covering it with a different covering, you must first remove the dilapidated roof. But how to do that?
How to remove the rear seat on a Priora sedan
Removing the rear seat on a LADA Priora car is carried out for the same reasons as dismantling the front one, that is, for repair or replacement, as well as when carrying out other work in which its presence will interfere with the progress of their implementation. Prepare a standard set of tools and perform the following sequence of actions:
- There will be levers on the left and right sides of the seat cushion; by pressing them one by one, we lift first one edge, then the other.
- We remove the pillow and take it out of the car.
- Now pull up the backrest lock strap.
- Now that the latch has snapped off, first remove the first backrest, then remove the second in the same way.
- Using a Phillips screwdriver, unscrew the screw securing the armrest to the hinge.
- We remove the hinge itself, having first unscrewed the screw securing it to the body.
- We remove the second one in the same way.
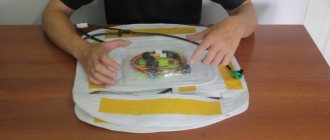
- To remove the airbag retainer (if it has failed and you plan to repair or replace it), use a Phillips screwdriver to unscrew one screw securing it.
- Carry out the necessary repair work, then install the seat in the reverse order.
READ How to remove the steering wheel on a GAZelle Next
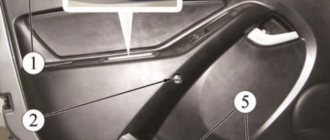
A — The rear seat cushion is secured with metal loops B — An anchor hook to which the seat cushion attachment loop attaches
B.
Removing the rear seat on Zafira models
LADA Priora is one of the latest innovations in the domestic automobile industry. The car now has its own fans and critics. To protect their favorite, Priora owners say that the car copes well with the transportation of large-sized cargo. You just need to know how to remove the rear seats.
- – wrench 10;
- - Phillips screwdriver.
Instructions
In order to remove the inner headliner, remove all interior parts that are in contact with the roof. Pay attention to the order in which the parts are disassembled. Pre-prepare a place where you will then neatly place the fasteners and the parts themselves.
Start with the ceiling light. It is best not to drop the lampshade, because it is made of a very fragile material. All ceiling lighting fixtures must be unscrewed in order. After this, proceed to dismantling the sun visors and handles in the car interior. They also need to be removed with caution.
Pay attention to the soiling of the ceiling material. Before you begin the process of dismantling the interior of the ceiling of a Lada Priora, stock up on two liters of water and detergent.
Pre-prepare a number of ceiling fasteners. There is a high probability that when removing the roof lining material, many of the fastening clips will be broken or fail. Even slight damage to the clips leads to their complete destruction.
Lower the door seals slightly downward. Pay attention to the condition of the plastic trim of the middle body parts. The fact is that the wear resistance of these skins, as well as many other parts of the car’s interior, is extremely weak. Therefore, it is necessary to carefully remove the roof lining material from under the side trims.
Please note that it is not recommended to fold or roll the material from which the inner part of the roof is made. But, as practice shows, you can’t do without it if there is a need to pull it out of the cabin. However, if you plan to replace the car's upholstery, then you don't have to worry about it.
Open the front driver's door if you are working on a LADA Priora sedan. Carefully, slowly and very smoothly pull the ceiling material towards you. Do the same, but only by opening the rear door if the ceiling is removed in the hatchback model version.
Note! If the car is not new, then difficulties may arise with the functioning of the latches; perhaps, some seat parts will need to be replaced.
Useful advice Daily use of a car brings dirt into the interior. Be prepared to work with gloves to avoid getting your hands dirty and, as a result, a dirty back seat.
Removing the rear seat back in a LADA Priora car
Pull up the seat back strap...
Remove the second seat back in the same way. 8. Remove the screw securing the armrest to the hinge.
Remove the screw securing the armrest hinge to the body...
Similarly, remove the second armrest hinge and the armrest. 12. If the airbag clamp is faulty, remove the screw securing it...
Replace a broken or loose spring or retainer assembly.
Install the removed components and parts in the reverse order of removal.
The rear seats on the LADA Priora hatchback car fold down, thereby forming a huge space in the trunk. But for some, even this space is not enough to transfer a certain load, so sometimes you have to completely remove them and take them out of the cabin. True, this method of increasing free space is very rarely resorted to.
Also, seats have to be removed for the banal reason of replacing them with new ones or for dry cleaning purposes. In any case, to complete this procedure, you will need no more than 10 minutes of time and a tool, the list of which is given below.
- Socket heads for 10 and 13 mm
- Extension
- Ratchets or cranks
How to remove seats on Priora (hatchback station wagon)
INSTRUCTIONS Removing the rear seats is easy and quick. (10 x 13 regular keys and ratchet heads)…
It is more convenient to install torsion bars as follows: move the seat back, insert first the lower end of the right 1 and then the lower end of the left 2 torsion bar into the holes of the brackets and, moving the seat forward, place the upper ends of the torsion bars behind the hooks on the seat base post.
Tools necessary for removing and installing the front seat on a VAZ 2170 2171 2172 LADA Priora (Lada Priora)
You will need: socket wrenches (heads) “13”, TORX E10, screwdriver.
New Lada Priora trunk, dimensions, dimensions, ground clearance, ground clearance Lada Priora restyling
The dimensions of the restyled Lada Priora have not changed significantly. Although, due to the new front and rear bumpers, the length of the Lada Priora has changed by several millimeters.
As before, the restyled Lada Priora sedan has the longest length, which in the new version is 4,350 mm. The length of the station wagon is 1 centimeter shorter, but the Priora hatchback is even smaller, the length of this version of the body is 4210 mm. The width of the entire family is 1,680 mm and the wheelbase is the same for all 2,492 mm. But everyone’s height is different, the Lada Priora sedan is 1,420 mm, the hatchback is 1,435 mm, but the station wagon is generally 1,508 mm in height. The high height of the Priora station wagon is explained by the presence of roof rails. In a hatchback, the design of the rear part of the body is such that the car turns out to be taller than a sedan.
As for the ground clearance or ground clearance of the Lada Priora, the manufacturer indicates a figure of 165 mm for the sedan and hatchback, while the ground clearance for the Lada Priora station wagon is 170 mm. However, in fact, the ground clearance is greater; just pick up a tape measure and make sure of this. But the manufacturer is not mistaken; he simply indicates the vehicle’s ground clearance when fully loaded. At the same time, manufacturers of foreign cars are cunning and indicate the ground clearance of their cars in an unloaded state. therefore, the real ground clearance of foreign cars and their official data often do not coincide.
The luggage compartment volumes of the new version of Lada Priora in all three bodies have changed little. The sedan's trunk volume is 430 liters. The luggage compartment volume of the Priora hatchback is smaller, only 306 liters, but if you fold the rear seats (which cannot be done in a sedan), the volume increases to 705 liters. In the Priora station wagon, the luggage compartment volume is 444 liters, and with the seats folded down it reaches 777 liters. Unfortunately, the rear seats do not fold flat with the floor, and the large wheel arches eat up quite a lot of luggage space.
Further detailed data on the dimensions of the Lada Priora are in the table below.
How to remove the rear seat on a Priora hatchback
We carry out work when it is necessary to transport large cargo, to repair or replace the rear seat, access to the fuel module and power wiring harness for the rear of the car, and replacement of rear seat belts.
By pulling the loop, we release the latch (for clarity, the rear headrest has been removed)…
...and tilting the right side of the seat back forward, unfasten the buttons for fastening the trunk trim.
We remove the backrest hinges from the body hooks and remove the right side of the backrest. The left side of the seat back is removed in the same way.
Priora sedan How to remove the back of the rear seat if the strap is pinched from below?
We press the latches on both sides of the seat cushion...
Using a Phillips screwdriver, unscrew the two screws on the top fastening of the plastic partition.
Using a 10mm socket, unscrew the two nuts securing the armrest hinges to the body...
...and a plastic partition. We install the rear seat in the reverse order.
Removal and installation of the front and rear seats on a VAZ 2170 2171 2172 LADA Priora (Lada Priora)
How to remove the front seats on a Lada Priora
How to remove seats on a Priora fret.
Operations performed when removing and installing the front seat on a VAZ 2170 2171 2172 LADA Priora (Lada Priora)
The front seat in the LADA Priora car is attached at 4 points to the floor. The need to remove the seat arises in the event of its repair (welding of power frame parts, etc.), or the need to access the floor under the carpet of the seat.
Tools necessary for removing and installing the rear seat on a VAZ 2170 2171 2172 LADA Priora (Lada Priora)
You will need: a 10mm wrench, a Phillips-blade screwdriver.
READ Corvette Grand Sport for sale by Fast; Fast and the Furious 5
Adjusting the position of the front seat and head restraints on the car:
Note! In fact, adjusting the seats is an integral part of any car, since when buying a new car, all people are different and in order for each person to sit comfortably in the car, it is necessary to adjust the seat (We are talking about the front seats), but remember once and for all , the seat only when the car is stationary (Apply only to the driver), because when adjusting the seat, for example in length, you may lose control of the car because if you do not properly fix the seat on the car, there is a possibility that it will suddenly move backwards and thus you may lose control of the car, so be careful!
1) First, let's talk about how you can adjust the front seat of a car, so in order to adjust it, for example, in length (scientifically, longitudinally), you will need to pull up the locking lever with your hand as shown below in the photo and only after this, use your body movements to adjust the front seat as you need, but after you release the lever, move your body either forward or backward and thereby you will fix the seat and it will stand clearly in one place.
2) On the side of each of the front seats there is a handle that is made of a round shape, and thanks to this handle it will be possible to adjust not the front seat itself, but only its back, for this you need to rotate this handle in the desired direction and thereby achieve a position that is comfortable for you.
3) Now let’s talk a little about the headrests that are built into the front and rear seats of cars, so adjustment of these things is also necessary, because if, for example, a taller person is sitting in the back seat, then accordingly the headrest will need to be adjusted to his height, and in order to do this, you will need (regardless of whether the front or rear seat) grab the headrest itself with both hands and do exactly those actions that you need, for example, if you need to lower the headrest then press it from above with force and it will begin to fall a little, and if you need to lift it, then do the same operation only a little in reverse, namely, grab the lower part with both hands and, using force, lift the headrest up with your hands and it will lock itself.
Note! The headrests in Priora are fixed using clamps that are installed on forks, which in turn are connected to the headrests themselves, so if you want to either lower or raise the headrest, then simply use force and overcome the resistance of the clamps, position the headrest in the way you need!
How to remove seats on Priora (hatchback station wagon)
INSTRUCTIONS Removing the rear seats is easy and quick. (10 x 13 regular keys and ratchet heads)…
It is more convenient to install torsion bars as follows: move the seat back, insert first the lower end of the right 1 and then the lower end of the left 2 torsion bar into the holes of the brackets and, moving the seat forward, place the upper ends of the torsion bars behind the hooks on the seat base post.
Removal
Disassembly should begin by loosening the backrest upholstery.
It is secured using buttons located on the side of the trunk. Next, pay attention to the sitting
First, the pillow lock handle is moved to the right. After this, you need to raise the seat on the right side. They do the same on the left. Next, move the seat cushion forward and remove it. Half the work is already done.
The head restraints are removed from the clamps. To do this, press the fastening buttons and pull the headrest up. The second section is treated similarly. Don't lose the release buttons. Next, the upholstery is completely removed, otherwise it will not be possible to remove the seat. The seat lock is pulled out through the loop. It is located behind the backrest. The right side of the backrest is raised, and its fastening loops are removed from the hooks located on the floor of the car. The left side is removed in the same way.
After this, remove the armrest. To do this you will need a 10mm socket wrench. Using a wrench, unscrew the two fastening nuts. The armrest is then removed. If necessary, you can also remove the seat belts. Installation is carried out in reverse order.
Front seats
The front seats can be removed regardless of the Priora body type, that is, the seats will be removed the same way on all types of cars.
In order to get started, you need to prepare the tool.
Lada Priora 2. How to remove the rear seats? Two ways
To remove the front seats of the Priora you will need:
- Ratchet;
- Torx head E10;
- Head for 10 and 13 mm;
After preparing the tool, you can begin to work.
How to remove the front door trim of a Priora How to remove the front door trim of a Priora
To perform upholstery removal work, you will need a set of screwdrivers. Disconnect the negative cable from the battery. We unscrew the 2 screws securing the inner door handle with the power window control module. We take the module out of the upholstery.
To perform work on removing the rear seat you will need: a 10mm wrench and a Phillips screwdriver.
- Press the seat cushion lock handle.
- Raise the edge of the pillow
- In the same way we release the second side of the pillow
- We remove the pillow.
- Pull up the seat back lock strap.
- Remove the backrest by lifting it up.
- We also remove the second seat back.
- Unscrew the screw securing the armrest to the hinge.
- Unscrew the screw securing the armrest hinge to the body.
- We remove the loop.
- In the same way, remove the second armrest hinge and the armrest.
- If the pillow clamp is broken, then unscrew the screw that secures it.
- remove the lock
- Either we change the spring, or we change the retainer assembly.
- Reinstall the rear seats in reverse order.
Removing the front seats of LADA Granta
Required tool: 8mm wrench. The front seats of Lada Granta are installed on skids that are attached to the floor.
- Move the seat all the way forward.
- Unscrew the two rear mounting bolts for the guide slides and remove the spring washers.
- We move the seat all the way back, and similarly unscrew the two front bolts with washers.
- If heated seats are installed, then disconnect the block with wires. Raise the seat and disconnect the seat belt sensor wiring harness connectors.
The 2nd front seat is dismantled in a similar way. Installation of seats is done in reverse order.
How to remove the front seats
Instructions for dismantling the front seats will be needed not only for installing heating. The front seats in Priora are installed simply, and to install and disassemble them you will need several tools and strength. By the way, on Priora 2, the seats of the “Lux” configuration have become softer and more comfortable, but the adjustment is still the same - you cannot adjust the height.
There are not many instructions on how to remove the front seat
First you will have to move the seats all the way back and remove the torsion bars. You will need a size 8 wrench (for five bolts securing the slide) and a size 13 wrench (for four bolts on the bracket fastenings). First you need to unscrew the bolts on the bracket, then tilt the back of the chair back as far as possible and unscrew the two bolts on the slide. After this, tilt the backrest as far forward as possible and unscrew two more bolts. The seat can be removed from the passenger compartment.
READ How to remove bendix from VAZ 2109 starter
Which seats fit on a Priora without modifications?
Anyone who has installed a seat from a foreign car, please share your experience
Comments 44
They offer me seats from the Accord 7. Do you think it will be difficult to install them in a Priora?
I don’t know myself from the BMW 735 in the E32 body
one of these days I’ll install a Subaru B4 for myself... while I’m preparing a neat frame for them...
From Lancer 9 2.0 to Priora we got up with some difficulties! but the impression is great
from Nissan Almera, BZ) everything is bolted and to the original fasteners) all functions are height adjustment, lumbar support, normal working slides, heating)
From paper 530 xi 2008. You buy adapters for the unp bride bucket and a similar plate on top because the bucket ones are narrower... and screw it on stupidly. I got by with 1500 without a collective farm. You can do it like this for any type of seat
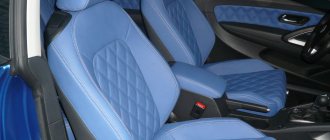
The standard seats of Lada cars may not be entirely comfortable. Some people lack more developed lateral support, others want height adjustment or adjustable lumbar support. All the shortcomings can be solved in one way - installing alternative seats, for example, from a foreign car.
The front seats themselves are different for Granta and Kalina (first or second generation), but the fastenings are similar. Distance between skid mounting bolts:
- width - 450 mm;
- length - 340 mm;
- diagonally 560 mm.
Luxury trim levels have similar seat mountings, which now have height adjustment. Seats from Lada Granta Sport, Kalina Sport or Kalina Cross are also perfect. The seats of sports versions of cars are more rigid (the seating position will be higher) and have little lateral support.
If you decide to choose seats from a foreign car, then pay attention to two things:
- Overall dimensions of the seats. They should not only fit in the cabin, but also be adjustable in all positions;
- The width of the slide (the distance between the fastening bolts). If the width of the seat slides of a foreign car is 45 cm, then it becomes possible to install them on a Grant or Kalina without alterations (with minimal modifications).
We analyzed reviews from owners on the Internet and compiled a list of “which seats are suitable for Granta or Kalina without modifications” (where the seat mounts for foreign cars have a similar width of the slide). The table is updated as new information becomes available:
| Automobile model | Note |
| Mazda 6 (2008 onwards) | Width 450 mm. Lumbar support, seat lift up/down, larger pillow under the knees ( source ). |
| Kia Rio | The slides are not symmetrical; the seats move inside the cabin by 1-2 cm. |
| Hyundai Solaris | The slides are not symmetrical; the seats move inside the cabin by 1-2 cm. |
| Skoda Fabia | Width 450 mm |
| Chevrolet Lacetti | Width 450 mm |
| Hyundai Tucson | Width 450 mm |
| Honda CRV | Width 450 mm |
| Opel Vectra C | Width 450 mm |
| Renault Megane | Width 450 mm |
| Nissan Qashqai | Width 450 mm |
| Mazda CX-5 | Width 450 mm |
| Volvo V40 | No fastening measurements were taken |
| Skoda Octavia | No fastening measurements were taken |
| Peugeot 308 | No fastening measurements were taken |
| Toyota Camry | No fastening measurements were taken |
| Opel Astra H | The width at the edges of the slide is 455 mm, in order to tighten the bolts you will have to cut off the edges of the slide |
All that needs to be modified is to saw off the excess parts of the foreign car's seat slide and drill new holes for the fastening bolts. The tools you need to have are a grinder, a drill, a hammer and a file. An example of a simple installation of seats from Hyundai Solaris/Kia Rio on Kalina:
If the width of the seat slide of a foreign car is more or less than 450 mm, then to install them you will have to make an adapter/plate and may require removing metal parts of the floor. Welding and other additional tools may also be required. An example of installing seats from a Mazda 3 on a Kalina:
Thus, before purchasing seats from a foreign car, make sure that the width of the slide exactly matches the standard one, and that the seats themselves can easily be placed according to their dimensions in the cabin of a Grant or Kalina, taking into account all the adjustments.
Heated seats LADA Priora - breakdowns, installation instructions
In frosty weather, it’s not very pleasant to sit on an icy car seat to start the engine - so heated seats come to the rescue. Inventive owners of the LADA Priora car almost immediately began installing heated seats in their Priora. Of course, the seat does not warm up instantly, but it noticeably saves you from frostbite. While the heater is not heating up (since the engine has not yet warmed up!) is it necessary to sit in complete cold? Factory seat heating is installed only in luxury versions of the Priora car. Installing it is not very difficult, the main thing is to connect everything correctly. Heated seats, like “Emelya”, do not need to be installed, the seat upholstery is not removed, because it is just a cover for the seats - it is inserted into the cigarette lighter - although for some reason, over time, they burn out the cigarette lighter fuse.
You can install seat heating on a Priora yourself; it will cost relatively little (compared to the fact that your health can suffer greatly from warming up a frozen car). The seat heating control unit can be installed in Priora where it is convenient: the main thing to remember is that this is not the most necessary button when driving a car, it should not interfere with pressing other levers and buttons. Read the article to the end and your car will be warm even at minus 45.
Seats from which foreign cars can be viewed for the Tens?
What seats are suitable for the VAZ 2110? You can install almost all seats from cars of a similar size. This could be a B or C class car, which is famous for its comfort. Thanks to the abundance of disassemblies, buying used chairs will not be a problem. All that remains is to choose the chair model directly. For such a selection, it is worth focusing on already successfully completed projects, which car owners are happy to brag about in in-flight magazines. Here are just some popular examples:
- BMW E60. The seats in these models of Bavarian cars were mostly leather, and also equipped with an electric drive and other additions that the car owner would obviously like.
- Hyundai i40 or Hyundai i30. The seats are very comfortable and well thought out, and the ones from the i30 are preferable, as they leave more space in the cabin. The appearance is good and the side supports also work very well.
- Skoda Octavia A5. The seats are very comfortable and compact, there are the necessary adjustments, and well-defined lumbar support. The quality of the upholstery in this model is also pleasing, so you will definitely be satisfied with these chairs.
- Ford Focus. The alterations will be quite complex, but nevertheless, you will get excellent results. Especially if you can find seats from more expensive trim levels of this car, they are very comfortable and beautiful.
- Recaro. Many sports style lovers would like to see Recaro seats in their car. The easiest way is to find Opel proposals, but there are also solutions from other models; altering them will not be difficult even with your own hands.
This list goes on with most compact models from Volkswagen, Mercedes and other brands. There are a lot of interesting ideas on the market. But before buying chairs, you should find out if anyone has performed such an operation on their Ten before you. This can be found on the Internet, since most owners will definitely boast about such a change. However, you can try something new by posting your experience on the Internet to help others.
Installation of standard seat heating on LADA Priora
The standard seat heating kit for Priora should include:
- Heating elements (4 in total, two for each seat);
- Block for the control unit with wires;
- Priora seat heating unit.
At the same time, the article number for heated seats for the Lada Priora must contain the numbers 2170 - this, as any Priora owner knows, is the model number. It is worth distinguishing the standard heating kit for Priora 2 by catalog number - in comparison with the kit for Priora 1, they are different. The entire installation of seat heating on Priora is best described with a detailed step-by-step algorithm, which has been tested by time and other car enthusiasts:
- We remove the front seats. Remove the factory covers from the seats, which are secured with a metal spoke and three plastic latches. You can disassemble the seats without dismantling them, removing only the covers, but then the process will become a little more complicated - it will be inconvenient to deal with wiring and laying out heating elements;
- We attach heating elements to the seats - one on the lower part, the second on the backs, in the lumbar area. Some people recommend attaching it with double-sided tape, but over time it can come off. It would be safer to sew the heating element to the pillow so that it does not move out of its place;
- Pull the wires from the heating elements through the hole in the mount under the pillow (run the wires from the lumbar heating elements to the place where the seat upholstery is attached). The piece of wire that passes through the hole can be protected from chafing using some kind of plastic tube. The power plugs for all four elements are out, all that remains is to connect them;
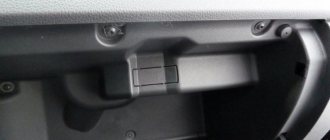
- Disassemble the central tunnel. Buttons for heated seats will be in place of the plug near the handbrake;
- The wiring is connected strictly according to the connection diagram for heated seats. Before doing this, it is recommended to disconnect the battery from the network. We install a terminal block to the heating control unit. The (-) black wire is attached under the bolt near the handbrake. A gray-red wire (for aesthetes, it is responsible for illuminating the buttons) is connected to the lighting of the cigarette lighter rim. The red 12V wire is pulled to the mounting block. You can't do without a fuse here. Then everything goes strictly “by the numbers”. Connect pin 87 to the red wire, pin 86 to the black wire. Connect the blue-black 12 V wire to pin 85, the pink wire to pin 30. You can connect to the mounting block via cut-in clamps to hold the wires tighter;
- Reassemble the tunnel and install covers on the seats.
The standard seat heating on Priora is guaranteed to last for several seasons if it is connected correctly. And if immediately after installation the heating does not work, it means the wiring connection was incorrect.
Using WD-40 or oil
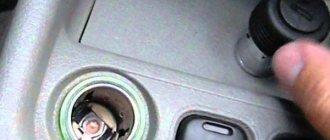
The most common, but almost always effective method. In most cases, difficulties in removing head restraints occur due to rust starting or the retainer getting stuck in the grooves of the pin. This can be corrected with a special lubricant, popularly called Vdshka. The principle of its operation is simple, it softens the rust and makes the surfaces more slippery, due to which the friction force increases and the headrest is simply pulled out.
You can also remove head restraints on Priora using oil. WD-40 is naturally better because it is faster and softens rust better, but if there is only oil left in the garage, you can use that too. The application procedure is similar.
Comments 14
In a related topic, the boys can’t remove the windshield wiper trapezoid, but here they even have headrests #oops. But it seems that everything was not simple, I still love my car))))
Press the pins (clamps on the backs where the headrest pins go in) with 2 hands at once, and pull the headrest up with the third. Just don’t ask where to get a third hand))
With acceleration and a mighty “Woohoo!”
You jerk sharply upward. But keep in mind that any traffic cop will happily punish you if you drive without them
Yes, I did it just to put on the covers.
When I put on my covers, I lifted the back of the industrial cover on the front seat and removed the headrest clamps. In my opinion this is much easier.
Is it a lot of hemorrhoids to remove the factory cover?
No, you don’t need to remove it completely, just the back part. Later you lift it up and see these fasteners, take it off, put on a new cover, put the headrest in place and the fasteners, then fix the old cover, and later the new one.
Got it, thanks for the advice
READ How to Remove the Rear Door Trim on a Kalina Universal
First, let go down, and then with a small jump up. And everything will be removed!
And if it doesn’t work (((spray on the blue rods with a VDshkoY and keep pulling)))
Essentially, the design of Russian cars is made in such a way that everything in them can be taken out and repaired without making a huge effort. But because it is not always possible to remove the headrests on a Priora VAZ 2110 without difficulty, and sometimes it doesn’t work out at all, we have prepared a set of tips. By following them, you can remove the headrest as easily as putting it back in place later.
How to remove the back sofa
Removing the rear row of seats is rarely done - only for cleaning or upholstery with new covers. However, also read the instructions for removing the rear sofa and keep it in mind “just in case.”
- Unclip the seat cushions on both sides (they are angular) and remove them from the passenger compartment.
- Find the locking strap above one of the backrests and pull it up. Do the same with the other back.
- Unscrew the bolts securing the armrest and remove it;
- Unscrew the bolts securing the hinges to the body.
The restyled and pre-restyled Priora, according to many car reviewers, are almost no different. But, if you dig deeper, you can find one big difference even in heating kits. In the kit for the pre-restyling version, the toggle switch works only in two modes: ON/OFF. And in the restyled version, the entire kit is designed to ensure that the heating operates in four modes: OFF, minimum, medium, maximum.
That is, the kit for the restyled version adds something that not all foreign cars have: the ability to change the degree and temperature of the seat heating. On Priora, which was produced from 2007 to 2012, the heating elements immediately turned on to maximum.
The standard set for the Priora Restyling is also suitable for owners of the first model, because the design has not changed at all. The heating elements themselves will fit perfectly on the seats, and the wiring will be connected the same way – “according to the standard”.
You cannot neglect comfort in the car, otherwise every winter trip will become real torture. If the stove will not heat the air while the engine is warming up, then you can find other options to warm up. To do this you will have to spend half a day, but the efforts of this day will “pay off” when it is minus 25 outside.
Sources:
https://prodemio.ru/kak-snjat-zadnee-sidene-na-priore-hjetchbek/ https://avtotehpomosch-kruglosutochno.ru/diagnostika-i-remont/kak-snjat-zadnee-sidene-na-priore. html https://avtoremont.club/kak-snyat-zadnee-sidene-s-priory.html https://priorik.ru/podogrev-sidenij-lada-priora-polomki-instruktsiya-ustanovki/