Unlike the “Sport” modification, the seats of the Lada Granta Liftback are not equipped with height adjustment. For a driver of average height this is not significant. But for those who are over 180 cm or under 165 cm, this becomes a problem.
Often, owners independently install seats from Opel, Ford, Mercedes-Benz, Audi in order to increase comfort.
Removing seats Grants
| If you decide to tune the interior, install seat covers or install seats from a foreign car, then read the instructions on how to remove the front and rear seats of a Lada Granta with your own hands . |
Removing the front seats of Lada Granta
Required tool: 8 key. The front seats of Lada Granta are installed on skids that are attached to the floor.
- Move the seat all the way forward.
- Unscrew the two rear mounting bolts for the guide slides and remove the spring washers.
- We move the seat all the way back, and similarly unscrew the two front bolts with washers.
- If seat heating is installed, then disconnect the block with wires. Raise the seat and disconnect the seat belt sensor wiring harness connectors.
The second front seat is dismantled in a similar way. Installing the seats is done in the reverse order.
Removing the rear seat of Lada Granta
Required tools: 10mm wrench, flat screwdriver.
- Pull the front part of the rear seat cushion up.
- Remove the pillow loops from the holders on the body.
- Remove the rear sofa of Grants.
To remove the backrest:
- Bend the edge of the carpet and remove the 3 bolts securing the backrest to the body.
- Tilt the backrest forward and remove the 3 rear bolts securing the backrest to the body.
- Remove the seat back.
Installation of the rear sofa and backrest is carried out in the reverse order.
Owner reviews
| № | Positive |
| 1. | Kirill , 33 years old: I am completely satisfied with the original seats on the Granta Liftback, comfortable, ergonomic. Height is 175 cm, I don’t feel any discomfort. |
| 2. | Vitaly , 41 years old: I installed heating on the standard seats, nothing else is needed. It’s very nice that they installed lateral support, it was so lacking in Priora and Vesta. |
| 3. | Mikhail , 30 years old: my positive review of the back sofa. Comfortable, practical, good material, easy to clean. |
| 4. | Gennady , 29 years old: the quality of the seats is average, I’m satisfied, I put on the covers. I'm going to install heating. |
| Negative | |
| 1. | Victor , 24 years old: I don’t like standard seats, I bought a second generation Opel Astra at the market and installed heating. My advice to motorists. |
| 2. | Peter , 36 years old: everything is good in the Grant Liftback, except for the seats, they are not comfortable, too soft, the fabric is the cheapest. Replaced from third generation Ford. |
| 3. | Vitaly , 28 years old: my height is 185 cm, my original seats are not equipped with height adjustment, it’s so lacking. Replaced from Opel Astra. |
Removal and installation of front seats Lada Granta
Tools:
- Ratchet wrench
- Extension
- Torx head E11
Note:
The front seats are mounted on skids, the guides of which are attached to brackets on the floor of the body.
1. Move the front seat all the way forward, and remove the two rear mounting bolts for the front seat slide rails and the spring washers.
2. Move the front seat all the way back, remove the two front seat rail mounting bolts and remove the spring washers.
Note:
On a Lada Granta car equipped with front seat heaters, when removing the seats, disconnect the connectors of the heater wiring harness.
3. Raise the front seat and disconnect the seat belt sensor and heated seat harness connectors, and remove the front seat from inside the vehicle.
4. Remove the front seats from the Lada Granta.
5. Install the front seats on the car in the reverse order of removal.
Car compatibility
Approximate list of compatibility of covers size S*
| Audi | A1, A2 |
| BMW | Episode 1 (04 - 07) |
| Chery | |
| Chevrolet | Lanos, Lacetti, Aveo, Spark |
| Citroen | C2, C3 |
| Daewoo | Tico, Matiz |
| Fiat | Panda, Punto, Albea, 500 |
| Ford | Ka, Fiesta, Fusion |
| Honda | Jazz, Civic |
| Hyundai | i20, i30, Atos, Getz, Accent |
| Kia | Rio, Picanto |
| Mazda | 2, 3 |
| Mitsubishi | Colt |
| Nissan | Note, Micra |
| Opel | Tigra, Corsa, Astra |
| Peugeot | 1007, 107, 206, 207, 306, 307, 308 |
| Renault | Logan, Symbol, Twingo, Clio |
| Seat | Ibiza, Leon |
| Skoda | Fabia, Roomster |
| Suzuki | Swift, Ignis, SX4, Jimny |
| Toyota | Aygo, Yaris, Vitz, Corolla, Echo |
| Volvo | C30 |
| VolksWagen | Lupo, Polo, Golf |
| VAZ | 1111, 2104-2109, 21099, 2110-2121, Granta, Kalina, Largus, Priora |
| UAZ | 3151 Hunter |
Complete disassembly of Grant seats
How to remove upholstery from Granta seats?
The information will be useful to those who are planning to wash the seat upholstery, replace it with a new one, replace foam molding or install heated seats.
For work we will need: - Needle nose pliers - Side cutters - Plastic clamps
The front part of the casing is attached to the frame using metal elements marked in green:
Orange indicates the plastic removable seam of the back. And blue - elements that do not require dismantling when replacing or removing the upholstery.
But let's start with the headrest. We remove it and remove the rubber decorative washers.
Next, applying force, we disconnect the plastic seam (training before disassembling the backrest).
And we tighten the upholstery, squeezing the foam.
We turn the chair over and begin to disassemble the seat. From below, the upholstery is attached to the springs with metal rings.
Don't even try to remove them carefully. Even if you succeed, you’ll waste a lot of time, and you still won’t be able to put them back on. Therefore, we simply take the wire cutters and destroy them.
It is convenient to hold and remove these rings with thin-nose pliers. As a result, nothing holds the upholstery underneath.
We begin to pull off the upholstery from the front of the seat...
... and we rest against the fastening element that tensions and creates the relief of the front part of the upholstery.
A fastening element in the form of a wire rod is sewn into the casing (places highlighted in green) and tightened with the same rings to the foam casting reinforcement.
We take wire cutters and remove the rings...
... first releasing 2 longitudinal fastening elements, and then 1 transverse one.
The longitudinal elements are freed, the transverse elements are shown in the photo. It is placed where there is a transverse seam on the seat
When all 7 rings are removed, remove the upholstery.
And, if necessary, foam casting.
Having completely folded the backrest, we see a plastic seam like on the headrest. Let's disconnect it.
And we begin to roll up the upholstery until we come across the same fasteners...
We remove the same 7 rings as in the seat and tighten the upholstery.
The upholstery remains on the two headrest guides. You can either simply pull it off or remove the guides.
Well, the foam casting is not secured in any way...
The chair is disassembled. It took an hour to disassemble one seat, but if I had these instructions, it would have taken about 20 minutes. In the second part, I’ll tell you how to put the trim back in place.
So, the seat is disassembled...
If you did it like I did, you destroyed all the mounting rings. Well, after you have washed/replaced/repaired the upholstery, you need to somehow secure it to the seat. This is where plastic ties come to the rescue. By the way, I used polyamide ties from DKS - a reliable thing...
We find reinforcement in foam casting...
... and thread the ties through it.
Then we begin to tighten the upholstery until the fastening element coincides with the corresponding part of the foam casting. Next, we attach the fastening element with ties.
... and tighten them.
We remove the tails of the clamps with pliers.
We do the same with the rest of the fasteners on the back and seat.
We fasten the plastic seam of the back and fasten the seat straps.
Installing heated seats on Granta
Contents of the article: 1. Installation of standard heated seats from VAZ 2115 in Lada Granta 2. Installation of heated seats
Features of the bodies of “Ladovo” models
ATTENTION! A completely simple way to reduce fuel consumption has been found! Don't believe me? An auto mechanic with 15 years of experience also didn’t believe it until he tried it. And now he saves 35,000 rubles a year on gasoline! Read more"
Since we started with QOL, let’s continue this topic. For the frame of Ladovsky models without glued glass, the quality of life is 14 thousand N*m/degree, which is a very good mark. And with glass this figure is even higher.
The testing of the Lada body in the rear turned out to be especially good. Thus, in the rear door opening, after a tough diagonal pressure test, the changes were recorded as only 1.5 mm, whereas on most foreign cars the same figure was 5-6 mm.
The body design of the Lada Largus and other similar models fundamentally complies with current European standards in terms of protecting passengers and the driver. The front subframe on Ladovsky models is one of the most important body elements responsible for this indicator. It is even considered an auxiliary spar, significantly increasing the strength of the body, as well as absorbing impact force.
The high quality of life of the Ladovsky body also has a beneficial effect on obtaining high-quality sound comfort in a car showroom. The frame does not twist over bumps and bumps, no deformations or anomalies occur between the interior and body elements, which ultimately has a positive effect on the absence of squeaks.
Note. Of course, in addition to the quality of life indicator, the quality of interior elements also affects the high level of sound comfort. They were obtained through proper calculation so as not to come into contact with the body in places where squeaking might occur. This was achieved by fixing the plastic components with special fasteners and minimizing the various gaps that arise one way or another between them and the body.
A lot of original parts, interchangeability of interior elements between Ladovsky models, enlargement of some parts of the body - all this was only a plus. In particular, the increase in some body elements led to a decrease in their number, which reduced production time and had a positive effect on performance.
Lada Largus
Called a budget station wagon with increased cross-country ability. The body was assembled based on Dasia/Renault Logan. The car was initially adapted for the market of Eastern European countries.
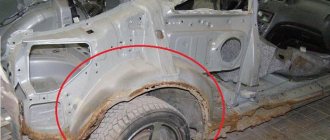
Even in the basic version of Logan, engineers took effective measures to enhance anti-corrosion protection, using protective inserts for the wheel arches. In addition, anti-corrosion and anti-gravity protection is installed over larger areas than before (at Samarov’s vehicles), with a thicker layer of mastic.
- The engine compartment is well protected. Additional protection was used correctly;
- The front suspension reinforcement has been increased. This was achieved through the use of leverage;
- The washer reservoir has become larger and holds more fluid;
- The wheels received protective aprons;
- The change got a torpedo;
- The bumper and radiator grille have been modernized.
It is noteworthy that the station wagon is made in 2 body versions: 5-seater and 7-seater. In addition, a van is also produced. The price of cars is low - only 350 thousand rubles and good comfort. When compared with foreign cars, the cost is heaven and earth.
In general, the Largus exterior is designed in such a way that it makes it possible to rightfully call the car roomy. A large family, along with bags and suitcases, as well as pets, fits comfortably inside. As for the design, the abundance of straight lines gives the car some speed and dynamism to the slightly clumsy family station wagon.
Height with rails is 167 cm, which is 10 cm more than Dasia Logan. The remaining sizes are also quite individual and do not copy “anyone”.
Lada Kalina
A car with 4 body types: sedan, regular 5-door hatchback, station wagon and sports hatchback.
"Sedan" version
- From the new family of Kalina cars, AvtoVAZ is produced;
- The modern elegant appearance and comfortable interior are called the root reasons for the sedan's good sales;
- It has good handling at high speeds;
- It maneuvers well in the city traffic rhythm;
- Practical and incredibly convenient for daily use;
- The sedan body received wedge-shaped silhouette lines, visually creating the image of a strong, brutal car;
- The opening angle in the luggage compartment has been increased by 120 degrees, which makes loading easier. Inside the trunk, the manufacturer has wisely provided special loops that allow you to secure the cargo being transported.
The body as a whole is very durable, and its seat crossbar is subject to reinforcement. This rail saves passengers in the event of a side impact. In addition, the manufacturer provides special pads designed to protect the heads of the driver and passengers.
These are the body dimensions of the Lada Kalina sedan shown in the photo.
Station wagon version
The Kalina station wagon is, in fact, a full-fledged class B hatchback. AvtoVAZ is also produced. Sales of the model began in 2007, although orders were received based on individual requests long before that.
The versatility of this version is the main advantage of the hatchback over others. Sufficient maneuverability, despite its large size, and enviable dynamics for confident passage of city and country roads cannot leave the buyer indifferent.
The Kalina station wagon also has good cross-country ability. This makes the car popular among a wide range of car enthusiasts. So, with this station wagon you can safely go into nature, outside the city, even if there are very rough roads along the way.
As for the flat track, there is nothing to blame the car for here either. Handling is excellent, the car handles well, long trips are not tiring.
Kalina station wagon is practically unpretentious in terms of operating conditions and maintenance.
The salon is thought out to the smallest detail. Everything is done competently so that the driver and passengers feel comfortable. Five people can easily fit inside, and there is still room for luggage.
The cargo compartment is generally a separate matter. It holds all 380 liters of volume, and if you fold the back, the trunk can be transformed into a carrier.
The length of the station wagon body is 428 cm, the height without roof rails is 146 cm, and the width from one edge of the front wheels to the other is 168 cm. Now let’s compare it with a hatchback: the 1st indicator of the latter is 20 cm shorter, the 2nd indicator is 4 cm higher , and the 3rd indicator is 2 cm wider.
"Hatchback" Kalina
This full-fledged hatchback with 5 doors acts as a new version in the line of Kalinovsky modifications. The Kalina hatchback first appeared only in 2007, while Kalina has been produced since 1996. It is clear that drastic changes were made regarding the body, but the model also received other engines, more modern and meeting European toxicity standards.
The hatchback is ideal for passing city “traffic light” roads, as it is compact and equipped with an accurate power unit with ESVT. This ensures not only high speed characteristics, but also affects minimal fuel consumption.
The short body length (only 408 cm) helps the hatchback not only successfully maneuver among traffic, but also affects overall safety.
“Korotysh” can be called the most purchased “Kalinovskaya” model today, and this is not only a matter of novelty. Russian motorists have always liked hatchbacks, and this one is also equipped with the latest peak of auto fashion: a single key for locks, remote control. control, PU alarm and much more.
Lada Granta
The most popular version of the Grant today is the sedan. The liftback has also become a good seller, but it is still far from being a sedan. The VAZ 2190 is designed for 4 passengers, according to the documents it looks like a B-class car, but after considering the dimensions, you can safely classify it as a C-class.
Being a successor of the “Kalina” traditions, the sedan was even assembled on its platform and borrowed a lot of things from Kalina: body, chassis, interior. On the other hand, it is a different car with a different character, larger cargo compartment, redesigned design, etc. The trunk has been increased to 500 liters.
Here are the standard body dimensions of the Lada Grant.
As you can see, the dimensions of this VAZ model are 22 cm longer than those of the Kalina, but 7 cm shorter than the “Samarov” modifications.
Now other characteristics in more detail:
- The radiator grille has received a new corporate style, now resembling a Volga rook, which is held in place by a powerful molding. This grille cools the engine compartment more effectively, as it is equipped with large “nostrils”;
- The bumper is much softer than the VAZ ones and is painted in body color on some car trim levels;
- The general lines of the hood and trunk roof are slightly raised;
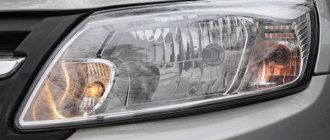
- The front optics have received more enlarged outlines, and in the basic version the cars are also equipped with daytime side light.
As for the trim levels, the new sedan can be purchased in 3 versions. The coolest is the Lux, equipped with a 98-horsepower engine and featuring a completely different level of interior equipment.
Among the features of the Granta body, one can highlight the good quality of the assembly and good quality of materials. The body parts are connected to each other using high-tech automated German welding. This allowed domestic producers to reach a completely different level.
We also highlight the good quality of painting and resistance to anti-corrosion treatment. Both of these processes are also carried out on German-made automated lines with excellent precision.
The modified body geometry gave the new Russian car a stylish, aspirational lines. This had a beneficial effect not only on the exterior, but also made it possible to significantly reduce the AED resistance. Now this coefficient is 0.36, which is more than 6 percent less than the base model. In addition, the pointed hood is less harmful to pedestrians, experts say.
Important functions are performed by overhangs:
- The Granta's rear overhang has been extended by 15 cm. In turn, this makes the interior even more spacious than before;
- The front overhang is designed in such a way as to reduce the thermal load on the engine and its environment.
As for other body differences:
- The underbody was specially designed for the new Russian car. Special metal sheets with special hardening and double-sided galvanization are a good solution that significantly increases service life;
- As for quality of life, in this particular case the indicator is increased by 12 percent when compared with Kalina;
- The weight of the car was reduced by as much as 40 kg, which could not but affect the handling. Now it has become much easier to maneuver in city tight rows, it is more convenient to take turns;
- It has become easier to install an additional roof rack, since the manufacturer has provided good, strong fastenings on top of the door seals.
Unfortunately, Granta did not lose the traditional VAZ “sores”:
- It is inconvenient to adjust the side mirrors. But this is not necessary, since they provide quite good visibility;
- On the other hand, short drivers will have poor visibility of the road due to the raised lines of the hood and trunk.
Lada Priora
Another VAZ model – Priora – is presented in 4 body versions. Let's look at the body features of each version separately.
"Sedanovskaya" Priora
It is an improved “ten”. The model is distinguished by an elegant, expressive design, good AED quality, and a pleasant interior.
As is typical for sedans, the Priora’s design has better adherence to geometry. This gives the exterior a stylish look.
- The optics are elegantly designed, both front and rear;
- The radiator panel with an elegantly carved large brand name looks very aesthetically pleasing;
- The shape of the wheel arches, made in an open style, deserves approval.
Here are the standard sedan sizes.
Priora hatchback
The second model in the Lada Priora family. The ideal embodiment of the best 5-door hatchback ever assembled at AvtoVAZ.
The new hatchback has received a lot of innovative solutions regarding appearance and technical capabilities.
The 2172 body was designed using the popular PC geometric modeling method. Thanks to this, it was possible to achieve high precision, and it, in turn, had a beneficial effect on the mating of body parts, eliminating large gaps and differences in surfaces.
Priora station wagon
The final model of the Priora family. The body is assembled on the basis of a sedan. Moreover, this version is carefully designed by modernizing the design features of the eleventh VAZ model. Thus, this sample received all the advantages of previous versions, losing their weak points.
The Priora station wagon receives about 200 original body elements. Bumpers of a completely different tempering, fenders of an original and unusual shape, a stylish roof - all this is new for the Russian motorist. The trunk, if transformed, can accommodate 777 liters of cargo.
Coupe Priora
A small-scale model from the manufacturer, designed for the amateur. Assembled on the basis of the 5-door 2172. It is a replacement for the Lada 21123 from the Lada 110 family.
The Priora 3-door coupe is an ideal option for drivers who prefer an active, somewhat “aggressive” driving style. This version, like the station wagon, also received many original body parts.
Seats
Seats Lada Granta (VAZ 11183, 21116)
The driver's seat and the front passenger seat of the car are equipped with headrests and equipped with mechanisms for moving the seat in the longitudinal direction and changing the tilt of the backrest.
Front seat
:
1 – backrest tilt adjustment handle;
2 – seat position adjustment lever. To adjust the position of the front seat in the longitudinal direction, pull up the locking lever located under the seat and, while holding the lever, move the seat forward or backward. After installing the seat in the required position, release the lever and make sure that the seat is securely fixed.
To adjust the tilt of the seat back, rotate the handle.
It is prohibited to adjust the position of the driver's seat while driving, as this may lead to loss of control of the vehicle. The front seat headrests are height adjustable. To remove the headrest or adjust its height...
...press the lock on the right side, then raise or lower the headrest. The rear seat cushion is one-piece. The back of the rear seat, depending on the configuration, can be either solid or consist of two parts. To increase the luggage compartment area, it is possible to fold the backrest completely or in parts.
What is tuning and how is it useful?
Car tuning (from English tuning - setting, adjustment) is a modification, technical improvement of a car, making changes to the factory characteristics in order to improve its characteristics. In simple words, tuning is a modification of a car to suit individual needs and tastes.
Almost everything in the car is subject to tuning: engine, transmission, suspension, wheels, brakes, seats, steering wheel, dashboard, lights, headlights, bumpers, mirrors and much more.
Tuning the appearance of a car (painting it in unusual colors, installing cast or forged wheels, stickers, airbrushing, tinting windows, installing spoilers, changing headlights, etc.) is also called styling, as it allows you to create an individual style for the car, making it stand out in traffic.
With the help of tuning you can turn your favorite “seven” into a sports car
According to my observations on the city streets, “classics” are often subject to tuning of both external elements and the interior. There were “sevens” that were almost as good as modern foreign cars in terms of comfort: with air conditioning, electric windows, powerful acoustics, comfortable seats, and beautiful dashboard lighting. I believe that tuning offers almost unlimited possibilities that are worth using; it gives a second life to an old but beloved car.
Lada Granta seat with height adjustment
What I wanted to find
I decided to find something more convenient to put on this car. The main search criterion was that the width of the runners be the same as in the Lada Grant. The width distance between the fastening bolts is 45 cm. The length of the main skids that are attached to the car body is 41 cm.
If the runners are narrower than on the Grant, then the plates will have to be welded on. But I didn’t want this, since this is already re-equipping the car. If I screw the seats back to the standard places, there will be no conversion. The seats will hold securely and will definitely not come off. If there is welding, then it is unknown how it will all turn out.
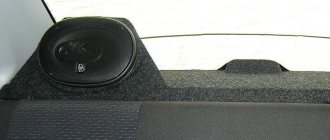
I looked on the Internet, read, studied this topic. I decided on seats from Hyundai Solaris. They also have a width at the centers of the mounting holes of 45 cm. The length of the runners is also 41 cm. The only drawback is that the “ear” is riveted in front.
There is also a reinforcement at the back that will have to be removed.
After removing these elements, what remains are completely bare runners, which will be screwed into the Lada Granta. There is no need to drill anything, everything matches the standard fasteners - very convenient.
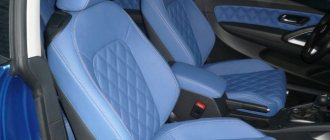
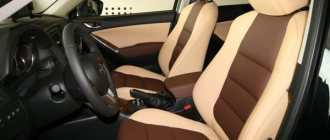
Seats on the fret grant from a foreign car
The standard seats of Lada cars may not be entirely comfortable. Some people lack more developed lateral support, others want height adjustment or adjustable lumbar support. All the shortcomings can be solved in one way - installing alternative seats, for example, from a foreign car.
The front seats themselves are different for Granta and Kalina (first or second generation), but the fastenings are similar. Distance between skid mounting bolts:
- width - 450 mm;
- length - 340 mm;
- diagonally 560 mm.
Luxury trim levels have similar seat mountings, which now have height adjustment. Seats from Lada Granta Sport, Kalina Sport or Kalina Cross are also perfect. The seats of sports versions of cars are more rigid (the seating position will be higher) and have little lateral support.
If you decide to choose seats from a foreign car, then pay attention to two things:
- Overall dimensions of the seats. They should not only fit in the cabin, but also be adjustable in all positions;
- The width of the slide (the distance between the fastening bolts). If the width of the seat slides of a foreign car is 45 cm, then it becomes possible to install them on a Grant or Kalina without alterations (with minimal modifications).
We analyzed reviews from owners on the Internet and compiled a list of “which seats are suitable for Granta or Kalina without modifications” (where the seat mounts for foreign cars have a similar width of the slide). The table is updated as new information becomes available:
| Automobile model | Note |
| Mazda 6 (2008 onwards) | Width 450 mm. Lumbar support, seat lift up/down, larger pillow under the knees ( source ). |
| Kia Rio | The slides are not symmetrical; the seats move inside the cabin by 1-2 cm. |
| Hyundai Solaris | The slides are not symmetrical; the seats move inside the cabin by 1-2 cm. |
| Skoda Fabia | Width 450 mm |
| Chevrolet Lacetti | Width 450 mm |
| Hyundai Tucson | Width 450 mm |
| Honda CRV | Width 450 mm |
| Opel Vectra C | Width 450 mm |
| Renault Megane | Width 450 mm |
| Nissan Qashqai | Width 450 mm |
| Mazda CX-5 | Width 450 mm |
| Volvo V40 | No fastening measurements were taken |
| Skoda Octavia | No fastening measurements were taken |
| Peugeot 308 | No fastening measurements were taken |
| Toyota Camry | No fastening measurements were taken |
| Opel Astra H | The width at the edges of the slide is 455 mm, in order to tighten the bolts you will have to cut off the edges of the slide |
Step-by-step installation instructions
I'll tell you in what order I worked:
- I unscrewed 2 bolts front and rear in the cabin.
- I pulled out the old seats.
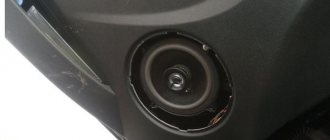
- When installing a new seat from Solaris, I used the second internal hole. A standard bolt was screwed into it.
- The outer runners are a little tight, so I had to put a little pressure on them. But the tension is very small.
The inner runners fit well. The alignment with the original hole is one to one. But I had to put a washer in, since the hole is slightly larger than the required diameter.
The seats stood up like family. They are slightly worn, not new. As a result, the size of the seats takes up exactly the same amount of space as standard ones.
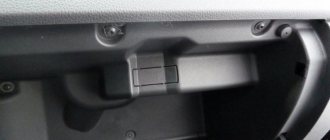
If you measure the distance between the seats, it is a little more than 12 cm. Standard armrests are 12 cm wide, so it turns out that they will be flush. But there is such an accessory from Granta Sport, which is 11 cm wide. I ordered such an armrest and want to install it.
Now the armrest will not interfere with the adjustment of the backrest - there are no twists. They are now on the outside, and not knobs, but levers. This is more convenient - you can quickly recline and fold the seat.
The driver's seat now has a lift that can be used to adjust the height. With minimal lowering, it turns out to be slightly higher than on Grant.
That's why I'm riding in the lowest position for now. The seat belts fit without any problems.
Purchase and installation of new seats
From the very first days of car operation, standard-type seats were not particularly satisfactory for vehicle owners. The seats were very soft, you could literally “sink” into them when you sat down, and the quality of the upholstery left much to be desired. The seats on the Kalina Sport were a completely different matter. At first, seats for the sports version of Kalina were produced by the famous German company RECARO GmbH & Co. KG.
The price for one seat was more than 10,000 rubles. Most recently, they were able to master production at AvtoVAZagregat OJSC in the city of Tolyatti. You won’t be able to find such seats in retail, but you can buy them directly at the factory. The estimated price is from 14,000 rubles for two front seats. The downside is that there is no delivery, and you can only pick them up directly at the enterprise, which is not entirely convenient.
As a result of the unification of the Kalina and Granta bodies, the attachment points for components and elements are in many ways similar. The same can be said about the seats. The process of removing the front seats is extremely simple.
- Sit in the front of the car and move the seat back as far as possible, lifting the lever to do this. As a result, access to the skid mounting bolts from the front will open. The bolts should be unscrewed.
- Next, you need to move the seat forward all the way, unscrew a couple of bolts securing the slide at the back. The seat can now be removed.
The seats on the right and left sides of the front detach in the same way. Removing the rear seat.
- To remove the rear seat cushion, you will need to pull the tab and fold it out. At the bottom, the pillow brackets are secured with stops. Pull them towards you and remove the pillow. If the rear seat is of a split type, then the principle of removing the cushions of the two halves is the same.
- Next, remove the seat back. First of all, press the backrest lock handle and tilt it forward.
- Several backrest fastening nuts will be visible from the luggage compartment of the car. Unscrew them and remove the proper backrest (with a split rear seat). If you need to remove the mounting brackets, you should unscrew the corresponding bolt with which they are secured.
This completes the steps to remove the backrest and rear seat cushion. Features of installing seats front and rear: each seat is installed in the opposite order of removal. When installing the slide at the front, the rubbing parts can be lubricated using Fiol-1. Thus, there are no significant features for dismantling the seats.
In the Lada Kalina, the updated seats have a more developed profile, and in the “luxury” configuration it is possible to adjust the height of the driver’s seat.
Refurbishment or not
Some may consider this a refurbishment, but I think not. I installed the seats on the Grant from a foreign car in the standard places. Skids without welding, also with 4 attachment points. Therefore, the reliability and installation method have not changed. And I doubt that it will be noticeable.
Legality of tuning
So, the question of whether it is possible to install a spoiler, bumpers, non-original alloy wheels and other body kit and tuning elements, a muffler, a guard and other parts not provided by the factory on a car is regulated by 3 regulations:
- Technical Regulations of the Customs Union on vehicle safety (hereinafter referred to as the “Technical Regulations”),
- Federal Law on Vehicle Registration (hereinafter referred to as the “Order”),
- finally, traffic rules.
And we will start with the latest legal act - the Rules clearly tell us that if changes are made to the design of a car without registering them with the traffic police, then we cannot operate such a car.
From June 1, 2022, Government Decree No. 413 comes into force. The procedure for making changes to the design has not changed, but the procedure itself has become clearer and more regulated.
But why should the above tuning elements be changed?! And since this is exactly what the Technical Regulations say. It has a clear definition of making changes:
All that remains is to understand what the components of the car are. And here the regulations have a clear answer to the question:
What does not apply to tuning?
Thus, in order to answer the question about the legality and fine for a muffler, bumpers, alloy wheels, roof fairings, tow bar, roof rack and other tuning elements, we need to understand 2 things: are they provided for or not by design, do they influence they are on road safety.
But there is another important auto subtlety - the Technical Regulations contain an exhaustive list of components regulated by it. Does this mean that if some component is not regulated by this legal act, then it can be installed in any case, and it is no longer a component according to the letter of the law?
This is where disputes often arise between car lawyers. And the logic should still be followed: the regulations clearly prescribe what a design change is and that the components must pass tests as part of the car and be certified, and even if, for example, a spoiler is not regulated by the regulations (and also, on the one hand, is not component, since it is not included in the list of components; on the other hand, by definition of a design change, it is still prohibited), this still does not mean that it can be installed.
You will also be interested in:
- Is athermal tinting prohibited according to GOST and what is the fine?
- Is it possible to install eyelashes and DRLs on headlights according to traffic regulations and what is the fine for this?
- Is it possible to knock out the catalyst? What are the consequences: fine and technical inspection?
How to remove wheel caps on a Lada Granta
How to remove the radiator grille of a Lada Granta
Before tuning this element, let's figure out how it can be removed from the car.
The Lada Granta radiator grill can be removed in 2 ways. According to the classical method, you need to proceed as follows:
- remove the front bumper;
- on its inner side, unscrew the nuts securing the grille, there are 9 of them;
- Click to open 2 locks under the headlights.
Removing the radiator grille along with the bumper on the Lada Granta The second method makes it possible to do without dismantling the front bumper. The algorithm looks like this:
- Unscrew 6 bolts from the top of the grille;
- bend it, stick your hand in, find by touch 4 bolts at the top and 5 nuts at the bottom - for this you will need a figure eight wrench;
- Under the headlights, use a screwdriver to open the 2 clamps.
After dismantling, you can begin tuning. After this, installation is performed in reverse order.
Lada Granta: repair, operation, tuning and maintenance
Sometimes situations arise when it is necessary to remove and install Lada Granta seats. If you know the correct algorithm for these manipulations, such work will not take much time. It should be noted that the methods of attaching the front and rear seats are completely different. Therefore, the methods of installation and dismantling work are completely different.
Removal and installation of Lada Granta front seats
The front seat is attached to the slide using two pairs of nuts and bolts. In order to remove the seat, you will need to unscrew them. In the normal position of the chair, the nuts are inaccessible and their removal is difficult. Therefore, to remove the chair, you should perform a couple of manipulations.
First, the front pair of nuts is unscrewed. To do this, you need to move the seat to the maximum rear position. To do this, press down the lever attached to the slide. It is located under the front of the chair. And then move the seat back all the way. After this, you can freely unscrew the front nuts 1 that secure the seat to the slide.
At the next stage, you need to get to the rear pair of bolts 2. To do this, the chair moves all the way forward, it should take the most forward position. After this, the bolts become accessible for unscrewing. Now the seat is not attached to the slide; it can simply be lifted up and pulled out of the cabin.
Installation of seats is carried out in the reverse manner. Those. the chair is placed on top of the sled, pushed forward all the way, and secured to it with bolts 2. Then the seat is moved back and screwed with nuts 1.
Removal and installation of Lada Granta rear seats
Removing the rear seat is carried out in two steps. First, the lower part - the pillow - is removed, and then the back is dismantled.
The pillow is attached to the body using special hinges and nuts. To get to them, you need to remove the facings 3. After the nuts are unscrewed, you need to pull the pillow lock loop 4. Now the pillow can be easily removed.
To make it easier to dismantle the backrest, it is recommended to first remove the headrests. They are easy to remove if you simply pull them up. Now you need to press the backrest lock drive handle 5 and tilt the backrest forward. The final stage is unscrewing the nuts and bolts on the fastening hinges and directly removing the backrest.
Installation of seats begins with attaching the backrest and ends with installing the cushion. Actions are carried out in the opposite sequence to the withdrawal algorithm.
Removing and installing Lada Granta seats is an excellent way to carry out preventive treatment of metal fastening parts. Particular attention should be paid to the skids.
‹ Removing and installing roof trim Up Body glazing ›
Tuning using a utility net
Tuning the front part of a Lada Granta car using a Chain-link mesh is very common. Such a mesh can be bought at any hardware store - it can be metal or plastic.
We choose the option with medium-sized cells. This is important to avoid excess dust getting under the hood of the car.
Fine mesh netting for making radiator grilles
Next you need to follow a simple algorithm:
- using one of the methods described above to remove the radiator grille;
- cut off all horizontal and vertical jumpers, leaving only the outer frame;
- using cold welding, seal all the holes that were created after the jumpers were cut off;
- clean the surface from all irregularities and burrs;
- Cut the mesh to size and attach it to the frame. If the mesh is plastic, you can simply glue it. If it is made of metal, heat the frame so that it does not burst, and screw the mesh with self-tapping screws;
- paint and wait for it to dry. At this point the tuning can be considered complete.
Torpedo tuning
The “Seven” is known for its interior, which is very modest by modern standards. Therefore, VAZ 2107 owners change the internal structure of the car in various ways, trying to make it stylish and ergonomic.
The dashboard (colloquially referred to as a dashboard or dashboard) is the part of the car that both the driver and passengers see most often, so it is the part that receives the most attention when tuning the car’s interior. The dashboard of a car is a set of arrows and light indicators that allow the driver to monitor the technical condition of the car, control the performance of devices and systems, as well as the speed of movement.
The dashboard of a car is a set of arrows and light indicators that allow the driver to monitor the technical condition of the car, control the performance of devices and systems, as well as the speed of movement.
The standard “seven” torpedo looks quite simple and mean. In addition, it has a serious drawback - very weak backlighting, which is why at night the driver has to be distracted from the road, looking closely at the numbers. This is extremely unsafe when driving on the highway at high speed.
The standard VAZ 2107 torpedo has an outdated design and a small number of functions
Directions for improving the “Seven” torpedo could be as follows:
- purchasing tuned elements and installing them instead of standard ones;
- introduction of additional mechanisms and systems (thermometer, parking sensors, on-board computer, etc.);
- independent installation of instrument scales, lighting, etc. - both “native” and from other car models.
Any tuning option begins with dismantling the car’s dashboard.
Before any work related to the electrical circuits of the car, including removing the dashboard, it is necessary to de-energize the car, that is, remove the negative terminal from the car battery.
After removing the torpedo, you can begin to remake it. For this you will need:
- multi-colored LEDs (purchased at electrical stores);
- instrument scales (sold in a large assortment at car markets);
- arrows (you can choose from other cars at auto repair shops or in stores);
- hand tool.
Tuning of the instrument panel is carried out according to the following algorithm:
Remove the instrument panel from the dashboard.
Remove the arrows very carefully without damaging the pins on which they are attached.
Remove old stickers.
Degrease the surface with an alcohol-containing liquid, cut out and install new stickers.
Install new arrows and install the panel in place.
When replacing the hands, you need to take into account the main point: it is very important to install the hands correctly. In the zero position, the speedometer needle is between the 0 and 20 km/h marks
The new indicator must be in the same position after installation is complete, otherwise the speedometer readings will be distorted. To do this, at the beginning of work, you need to mark the location of the arrow on the dial, and during the installation of a new one, align it with the mark.
When replacing pointers, it is important to note the place where they are in the zero position to avoid distortion of instrument readings
You can improve the backlight by installing additional LEDs.
The dashboard of the VAZ 2107 after installing LED backlighting becomes much brighter than the standard one
Replacing the electric window
If the window lift cable on a Lada Kalina car has become unusable or the motor has burned out, the ESP must be changed. We carry out the replacement operation in the following order:
- dismantle the power window control unit;
- remove the door trim;
- to disconnect the window regulator from the glass, the latter must be raised all the way up;
- unscrew the four bolts that secure the glass to the ESP (two in the front and two in the back). The glass is held on by seals, but it can also be secured so that it does not fall down;
- unscrew the black metal strip (three screws);
- unscrew the eleven window regulator fasteners (10 bolts), disconnect the power plug from the electric motor;
- We begin to remove the power window from the rear, first removing one half of it;
- then we take out the front part along with the motor from the door cavity;
A burnt-out electric motor on a lift can be easily replaced. For this:
- unscrew the three studs on the mechanism body, then four more screws;
- dismantle the motor, holding the cable spool with your hand, install a new part;
- We install the window regulator in the door, connect it to the glass guides, and put the trim in place.
Description
Equipment: Front seats - 2, rear sofa 40/60, rear backrest 40/60, front headrests - 6, rear headrests - 6. Features of Rival covers: - eco-leather material 1 mm thick; — lining foam rubber 5 mm thick; - have high strength; — have a special seam in the front covers, which does not interfere with the operation of the airbag; - “breathe”; - protect from moisture; - do not cause allergies; - do not have an unpleasant odor; — resistant to temperature changes; - pleasant to the touch.
Information about technical characteristics, delivery set, country of manufacture and appearance of the product is for reference only and is based on the latest available information from the manufacturer
We install new silent blocks
Now the moment has come when you can install new silent blocks on the Lada Granta, the main thing is to know how to press them in. The landing site will need to be pre-lubricated, you can use graphite lubricant, then the nut is screwed on, the silent blocks of the grant are pressed in, the price for them is not high. In this case, you can do without special devices that allow you to press parts. And you don’t need to remove the lever itself, as some people do.
When you have figured out how to change the silent blocks on the grant, it is worth remembering that after replacing you need to loosen the nut so that you can attach the crab. It must be taken into account that the holes intended for fastening are displaced. So Lada Granta, replacing silent blocks is not complete without a hammer, which is useful for adjusting the holes. It will be necessary to use it on both sides.
After replacing the silent blocks on the grant is completed, you may encounter an amazing effect. Drivers notice that the roughness in steering disappears, the steering wheel becomes more obedient, and the road holds without problems. Therefore, if there is a suspicion that the silent blocks of the front levers of the grant have become unusable, it is better to immediately look for the cause and replace them. As a result, you will receive a machine whose performance will only please you.
Source
COMFORTABLE
Both models are equipped with spacious interiors. Nothing interferes with the movement of the driver's and passengers' legs. But Kalina 2 has modern seat materials and plastics of much higher quality. The interior of the Grants is made of low-quality materials, they are highly wearable and creaky.
The new Kalina seats have an orthopedic structure. This provides high comfort for motorists traveling long distances.
The Granta chairs are made without pronounced lateral support and cannot be called comfortable.
Leather interior and cruise control are not available in Russian cars in any of the trim levels. But Kalina 2 has climate control in the “luxury” version, as well as a heated windshield + rain and light sensor. Granta does not have all these options.
Noise insulation is poor in both models. But in Kalina 2 it is still a little better and the ride is quieter.
So, in terms of the quality of interior materials and sound insulation, Kalina 2 takes the lead
Knock in the front suspension of Lada Kalina
Many motorists dread the day when strange knocking noises appear in the suspension, especially the front suspension, which increases with increasing speed. Of course, there is reason to worry, but at the same time, a car’s suspension is a strong and reliable unit that will clearly withstand a few more kilometers to a service station or garage, where it can be diagnosed.
There are four main reasons for the occurrence of knocks and squeaks in the front suspension of the Lada Kalina. Of the three possible causes of knocking, two of them can be eliminated independently.
So, the first reason why a knocking sound may occur in the suspension is the quality of the road surface. Yes, suspensions, even the most ideal and new ones, can squeak and knock on a bad road, even if this has not been observed before. To test this theory, you should drive onto a well-paved road and drive a few hundred meters; if there is no knocking, everything is fine with the suspension; if not, look at the second reason.
The second reason for the knocking sound, if it is accompanied by vibration in the steering wheel, is a malfunction of the steering, or rather the steering rack, or thinning of the brake discs. If the discs can be replaced independently, then in the case of steering, if you are not a level 80 mechanic, it is better not to flirt with it right away bring the car to the service station.
The third reason is the springs that have lost their tone, as a result of which the car body practically hits the suspension. You should not deal with this problem on your own - it is better to immediately take the car to a service station or service center, since self-repair may seriously damage the front suspension strut.
The fourth reason is a worn-out silent block, which is designed to dampen vibrations and knocks when driving. You can replace the silent block yourself; see the step-by-step replacement of the silent block in the Lada Kalina mono in the next paragraph.
Replacing front suspension silent blocks
Replacing the silent blocks of the Lada Kalina front suspension is necessary after 15-17,000 km, otherwise noises and knocks may be observed when driving. In most cases, the loss of its functions is observed after 15-17,000 km; knocking noises that appeared during this period of kilometers are a problem of faulty silent blocks.
Silent block
The silent block replacement diagram looks like this:
- The machine is placed above a hole or ditch in order to be able to comfortably see the entire suspension. The movers are fixed by the wheels, we put the car itself on the handbrake, then it’s worth checking again that the car is stationary.
- Use a jack to lift the car and remove the front wheel.
- After this, you should fix the bolts of the ball joint with your hands, after which its fastenings are removed.;
- The SPU nut is unscrewed, before this the ball-type support is knocked out into the lower part, after these manipulations the bolts are removed.
- After removing the bolts, the sleeve blocking the lever is pulled out. After pulling out the bushing, the lever is pulled out.
- There are marks on the lever that indicate the direction of installation of new silent blocks; this should be taken into account when installing new blocks.
- The silent blocks must be lubricated at the point of contact with the lever. Using a vice or pliers, apply pressure to the blocks until they fall off.
The diagram is approximate and is for informational purposes to understand how many manipulations need to be made to replace silent blocks.