If you are the owner of a VAZ 2110-2115 with a conventional 8-valve engine, then you probably know about such a procedure as adjusting the thermal valve clearances. Of course, if you have a 16-valve engine, then you don’t need to do this, since you have hydraulic compensators installed and no adjustments are made.
So, for conventional internal combustion engines, which are not much different from the VAZ 2108, this procedure is not carried out so often. After purchasing a new car, you can drive about 100,000 km without it, but this is not always possible and not every owner is so lucky. This type of maintenance of the VAZ 2110 can be performed either at a service station, having paid a certain price for the work, or independently, having understood this work. If this is your first time doing this, the guide below will help you with this.
VAZ 2115 2114 2113 8-valve valve clearance adjustment. Video instruction
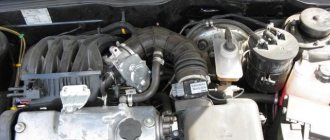
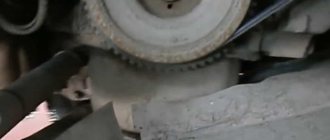
We will show you how to adjust the valve clearances on an 8-valve engine of a VAZ 2115 VAZ 2114 VAZ 2113 with your own hands. Open the hood, unscrew everything that will interfere with us. Jack up the right front wheel. We engage 4th gear, spin the wheel, and set a mark on the camshaft gear:
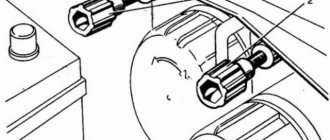
Here is the adjustment diagram for better understanding:
Let's rotate the gear 2.5 teeth from the set mark:
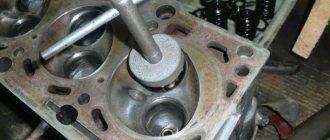
We check the gap on the first exhaust valve, it should be 0.35 plus minus 0.05. In our case, the probe at 0.30 does not pass, which means the valve is clamped, we try the probe at 0.25, it also does not pass, it passes at 0.20. We use a special device for adjusting the valves; you can buy it at any specialized store. If oil interferes, it can be pumped out using a syringe. Using our special tool (or a screwdriver if you don’t have one), press on the valve and fix it with a “hatchet”. Use tweezers to remove the adjusting washer. We look at the size of the washer (ours is 2.72). Let's calculate the size of the new washer:
We install a new washer with the calculated size 2.57 written down (so that it does not wear off). After installing the washer, measure the gap again. Now let's measure the gap on the third intake valve, it should be 0.20 plus minus 0.05. The probe at 0.20 does not pass, the probe at 0.15 passes freely, which means there is approximately 0.18, which is acceptable.
We turn another 11 teeth from the last position of the gear:
We check valves 5 and 2 in the same way. We turn it 10.5 teeth, check the gaps on valves 8 and 6.
Video adjustment of valve clearances in an 8-valve VAZ 2115 2114 2113 engine:
Backup video on how to adjust valve clearances in an 8-valve VAZ 2115 2114 2113 engine:
Guide to adjusting valves on VAZ 2110-2115
If you are the owner of a VAZ 2110-2115 with a conventional 8-valve engine, then you probably know about such a procedure as adjusting the thermal valve clearances. Of course, if you have a 16-valve engine, then you don’t need to do this, since you have hydraulic compensators installed and no adjustments are made.
So, for conventional internal combustion engines, which are not much different from the VAZ 2108, this procedure is not carried out so often. After purchasing a new car, you can drive about 100,000 km without it, but this is not always possible and not every owner is so lucky. This type of maintenance of the VAZ 2110 can be performed either at a service station, having paid a certain price for the work, or independently, having understood this work. If this is your first time doing this, the guide below will help you with this.
Work procedure and instructions with photographs
So, before we begin, we will need to install the engine crankshaft and camshaft according to the gas distribution marks. More details about this procedure are written here.
Then we completely remove the valve cover from the engine, after which you can install the rack and fix it on the studs that secure the cover itself, as is clearly demonstrated in the photo below:
There is no need to rush to remove the washers, since it is first necessary to check the thermal clearances between the camshaft cams and the adjusting washers. And this is done in the following sequence:
- When we find the crankshaft and camshaft according to the marks, we check the gaps in those valves whose cams are directed upwards. These will be valves 1, 2, 3 and 5.
- The remaining 4,6,7 and 8 valves are adjusted after turning the crankshaft one revolution
Required Tools
To quickly and efficiently adjust the valves, you need to prepare the following set of tools:
set of adjustment probes;
All tools are readily available and can be easily found at any auto store. To ensure that the adjustment of the VAZ 2109, 2108 or 21099 valves does not stop in the middle of the process, prepare all the tools; without them it is very difficult to do anything.
First of all, before adjusting, we need to find the valves themselves. To find them, the cylinder head is removed. Under the head you will see a camshaft with cams, and under them you can see shims. Under the washers there are pushers that push the valves themselves; there are eight of them in total. The gaps are adjusted using adjusting washers. In the presented photo you can see the camshaft cams and washers marked with arrows, and under the arrows the number designation of the valves. These numbers will be used to make adjustments, so this photo may come in handy more than once.
How to adjust the valves of a VAZ-2115 injector 8 valves
Owners of a VAZ-2115 with an injector regularly contact the service center to carry out vehicle maintenance.
The same situation occurs when it is necessary to adjust the valves. This is essentially a definition of the clearance, which is the space between the top of the valve stem and the camshaft cam. The gap is needed to compensate for valve expansion in different temperature conditions of engine operation. An incorrectly adjusted gap has the following consequences:
- The increased space will prevent the valve from opening completely.
- A small gap will not allow the valve to close completely.
In this article we will look at the features of valve regulation on the fifteenth model, and you will see that this process will take you more than half an hour. Thus, you will learn how the work is performed and decide for yourself whether to do everything yourself or contact a service station.
Why are thermal gaps needed?
Almost all car owners use the phrase “valve adjustment”, but if we speak correctly, the work process is called adjusting the thermal gap between the camshaft and the valve end. But, as practice shows, this name is used only in specialized technical literature. A common term is used among people.
As noted above, the thermal gap is the space between the end of the valve and the camshaft cam.
This gap is designed for high-quality closing/opening of the valve in any temperature conditions of the internal combustion engine.
It is necessary to measure the gap on a cooled motor at a temperature of no more than 20 degrees Celsius. For this, a special probe is used, which is placed in the space between the fist and the pusher adjusting washer. It is important that the camshaft cam is at the top of the pushrod.
When this gap changes, as a rule, characteristic knocking noises appear when the engine is running. Accordingly, if you notice a similar phenomenon, you need to adjust this gap.
By doing all the work yourself, you immediately save money up to one thousand rubles. All you need is to purchase special tools that you will use during your next work on the car.
How to adjust the thermal gap
All work is carried out using specialized washers, which must be folded in the area between the fist and the end of the valve.
On the fifteenth VAZ model, all work is done with the engine idling. The whole process is quite simple, but if you do not have even minimal experience in car repair, the best solution would be to contact a service center. In addition to standard tools, you need to prepare:
- A set of measuring pliers for determining the gap.
- A device with which you will recess the valve tappet.
- Before purchasing washers, it is recommended to take measurements so as not to take unnecessary elements that you do not need at all.
The work execution looks like this:
- First of all, the valve cover is removed. To do this, remove the air filter, loosen the pipe going to the cylinder head and disconnect it. Next, dismantle the throttle valve control device and carefully remove the cylinder block cover.
- Unscrew the spark plugs.
- Remove the cover that protects the gas distribution system.
- Rotate the engine crankshaft clockwise until the mark on the timing pulley aligns with the mark on the rear cover. The shaft can only be turned using a wrench using the bolts that secure the generator pulley.
- If you miss the mark, crank the engine in the same direction a few more revolutions.
- As soon as the marks come together, rotate the crankshaft a few more teeth of the gas distribution system.
- Now measure the clearance of the exhaust valve on the first cylinder and the intake valve on the third cylinder. According to the standard, the gap at the inlet should be about 0.2 mm, at the outlet 0.4 mm.
- If the clearances coincide with the recommended values, lower the cylinder piston to the bottom position using a special tool and remove the washer.
- Now measure the size of the washer you need. This is done by subtracting the thermal gap from the recommended value, and then adding the thickness of the washer used to the resulting number.
- Measure the thermal clearance for each valve in turn with each crankshaft half turn.
- Place washers of appropriate sizes and repeat all measurements.
Groove on top
To call them plug-free is not literary, but in a “garage” way - they will immediately understand you and appreciate your technical potential! This name comes from a simple trick - the piston does not meet the valve with the help of a special groove on top - that is, the valve DOESN'T fit into the piston, that's the name.
However, if you tell it technically and literary correctly, it turns out that there are several grooves in the upper part of the piston. Their number can be different - from 2 to 4 pieces. It is thanks to these grooves that these two engine elements do not meet. That is, the correct name is a piston with grooves.
Adjusting the clearances in the valve drive
To compensate for the thermal expansion of the valve, a gap is structurally specified between the end of the valve stem and the camshaft cam. With an increased gap, the valve will not open completely, and with a decreased gap, it will not close completely.
The gap is measured with a feeler gauge on a cold engine (at a temperature of +20 ° C) between the camshaft cam (the cam should be directed upward from the pusher) and the valve pusher adjusting washer.
The nominal clearance for the intake valve is (0.2±0.05) mm, for the exhaust valve - (0.35±0.05) mm. The gaps are adjusted by selecting the thickness of the shims. Spare parts are supplied with washers with a thickness of 3 to 4.5 mm every 0.05 mm.
Counting from the camshaft drive belt, valves 1, 4, 5 and 8 are exhaust, valves 2, 3, 6 and 7 are intake.
The order in which the gaps are adjusted does not matter.
You will need: a device for adjusting the gaps in the valve drive, a set of feeler gauges for checking the gaps, shims.
1. Remove the cylinder head cover (see “Replacing the cylinder head cover gasket”).
2. Set the piston of the first cylinder to TDC on the compression stroke. To do this, turn the crankshaft so that the mark on the camshaft pulley coincides with the mark (antennae) on the rear camshaft drive cover. Then turn the crankshaft another 40-50° - the camshaft cams will turn from the pushrods.
3. Using a set of feeler gauges, measure the clearances in the drive of those valves whose cams are directed upward from the pushers (in this case, these are the 4th, 6th, 7th and 8th valves). It is necessary to replace the adjusting washers of those valves whose clearances differ from the nominal ones. Record the measured clearances.
4. To make it easier to remove the adjusting washer, two grooves are made in the pusher. Using a screwdriver, turn the pusher by the groove so that it is convenient to pry off the washer. For ease of operation, remove oil from the top of the cylinder head (around the pushers).
5. Install a special device for compressing the valve springs on the head cover mounting studs.
6. Place the washers on the studs, turning them over so as not to crush the flange on them, and tighten the cap nuts.
7. Pressing down the lever of the device, press down the pusher on which the adjusting washer is being replaced, and insert the lock under the camshaft so that...
8. ...the protrusion on the clamp 1 fixed the pusher 2 in the recessed position.
9. Use a screwdriver to pry up the adjusting washer and, using, for example, tweezers, remove the washer from the pusher.
10. Write down the thickness of the shim - it is marked on one of its sides. If the inscription is not visible, measure the thickness of the washer with a micrometer.
11. Calculate the thickness of the new adjusting washer using the formula (all values in mm) H = B+A-C, where A is the value of the measured gap; B - thickness of the old washer; C—nominal gap; H is the thickness of the new washer.
For example (for inlet valve):
A=0.26 mm, B=3.75 mm, C=0.2 mm, then H=3.75+0.26-0.2=3.81 mm.
Within the tolerance of the gap (±0.05 mm), we select the closest washer in thickness to 3.8 mm.
12. Install a new washer into the pusher with the thickness calculated according to the formula with the inscription facing down (towards the pusher). Press the pusher with the tool and remove the lock.
13. Check the gap with a feeler gauge. If it differs from the nominal value, repeat the adjustment.
14. Turn the crankshaft one revolution (360°) and adjust the clearances in the drive of the 1st, 2nd, 3rd and 5th valves in the same order. Then fill the top of the block head with oil if it was removed.
15. Check the condition of the head cover gasket and replace it if necessary.
16. Install the removed parts in the reverse order of removal.
Step by step instructions
- The gap on the intake valve should be 0.2 mm - an error of 0.05 mm is allowed.
- The gap at the outlet should be 0.35 mm - an error of 0.05 mm is allowed.
- keys;
- a device that retracts valve pushers - costs about 100 rubles;
- set of probes;
- micrometer;
- adjusting washers - they have a thickness from 3 to 4.5 mm. They come with an interval of 0.05 mm. That is, you can find washers in sizes 3.05 mm, 3.1 mm, etc. up to 4.5 mm. (one puck costs about 20 rubles).
- retract the pushers and fix them in the lowest position;
- remove the adjusting washer and use a micrometer to measure its thickness;
- determine the thickness of the washer that you need so that the gap becomes normal (how to do this is written below);
- take a washer of the required thickness and place it in the pusher with the side on which the thickness of the washer is written;
- Check the gap again.
- 5 (outlet) and 2 (inlet);
- 8 (outlet) and 6 (inlet);
- 4 (outlet) and 7 (inlet).
Why adjust the valves in the VAZ 2115?
Most owners of a VAZ 2115 car with an injection engine, in the event of even such a fairly simple operation as the need to adjust thermal clearances, decide to seek help from a car service center. The clearance between the camshaft lobe and the end of the valve stem was created by the designers to compensate for thermal expansion of the valve. Moreover, if the fuel gap is increased, the valve will not be able to fully open, and if the thermal gap is very small, it will not be able to fully close. Today we will try to show you that the process of adjusting the valves on a VAZ 2115 car is a completely simple process, and it will take no more than thirty minutes. This article contains answers to the following fairly common questions:
- What is the process of adjusting thermal clearances on a VAZ 2115 with an injector engine?
- Why are thermal clearances needed on a VAZ 2115 car?
What does the price depend on?
Motorists who need engine overhaul of a VAZ-2114 are faced with different prices for such a service.
The cost depends on the influence of factors:
- Engine capacity.
- The prestige of the service company, its pricing policy.
- Urgency.
- Scope of work.
- Difficulty of repair.
- The need for a specialist to visit.
- Cost of spare parts.
- Equipment used.
- Automotive technician qualification level.
The more work is required to restore the engine of a VAZ-2114 car, the more expensive the service of a specialist will cost. You will have to pay extra for urgency and a specialist visit.
Why are thermal clearances needed on a VAZ 2115 car?
In everyday life, the term valve adjustment is used, but it would be more correct to call this process this way: adjusting the thermal gap between the camshaft cam and the end of the valve stem. But usually such a slightly abstruse name is used exclusively in technical literature, and in colloquial speech people who at least understand something about cars use the wording - valve adjustment.
As you already understand, there is a thermal gap between the camshaft knuckle and the end of the valve stem, which is measured at the manufacturer. This gap is called thermal, and it is intended to ensure smooth closing and opening of the valve at any engine temperature. The thermal gap on a VAZ 2115 car is measured using a special probe on a cold engine, that is, at a temperature of up to +20 degrees between the camshaft cam and the pusher adjusting washer. Please note that the camshaft cam should be located at the top of the pusher. When changing the size of the thermal gap, a certain metallic knocking occurs when the injection engine is operating. That is, if there is some knocking on the valves of the injection engine, then valve adjustment is necessary.
The process of adjusting the valves on a VAZ 2115 car cannot be delayed, since if the fuel gap is increased, the valve will not be able to fully open, and if the thermal gap is very small, the valve will not be able to close completely. If such a breakdown occurs, you should not immediately go to a car service center, as you can try to carry out such a fairly simple procedure yourself.
If you carry out this procedure yourself, you can save about a thousand rubles, since this is exactly the amount of money that is requested at car service centers. Believe me, this procedure is not so complicated that you need to pay that kind of money for it, because for this you will only need to purchase a special set of tools.
Main signs of failure
When thermal clearances decrease or increase, the driver may observe a number of symptoms. The car may even stall after warming up to operating temperature (metal expands when heated). Adjusting the valve clearances of the VAZ-2114 is necessary in the following cases:
- Extraneous noise appears from the engine valve mechanism.
- When power decreases significantly, which is especially noticeable at high loads.
- The engine is running unstable.
- Sometimes it shoots and slams into the silencer.
- Gasoline consumption increases significantly, despite the fact that all sensors are in good condition and the power system is functioning normally.
If you notice one or more signs, then you definitely need to check the condition of the valves.
