What the standard alarm system of Kalina 1 can do
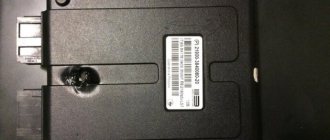
Lada Kalina has been produced since 2004, but already then standard security systems began to be installed on it. The main components of this alarm are:
- Control block;
- actuators in the form of door drives and a horn;
- radio key;
- standard immobilizer.
The main way to get into the car is to use the key. It has three buttons - these are:
- arming;
- disarming;
- unlocking the trunk.
By pressing one of the buttons, the car owner controls the security system. When arming, all doors and trunk are locked. The system goes into security mode. When the door is opened, the car notifies the car owner with audible horn signals about penetration.
Also, the doors will not close if the limit switch of one of the doors is faulty or the door is not closed. In security mode, the car cannot be started. The system will sound alarms.
The key fob has a trunk release button. By holding it down or pressing it twice in a row, you can unlock the trunk without disarming it, for example, to load luggage. If the trunk is not opened within 20 seconds, the system will again go into security mode.
Disadvantages of the standard system:
- lack of autostart;
- short range;
- lack of shock and tilt sensor.
The last point can be corrected, since the standard alarm makes it possible to install shock or tilt sensors. All other shortcomings can be easily eliminated by installing a full-fledged car alarm.
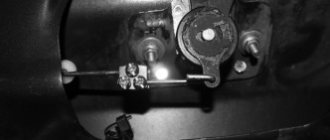
The driver's actuator toggle switch is damaged
Alarm system "Lada-Kalina", part two. Password!
What should a motorist do if his anti-theft system suddenly fails - he is confused in determining the reasons, and he has been waiting for a long time for help or there is no one from anyone?
There is a reserve for this case. The developers have provided the ability to start the engine without reading the code key: you need to tell the controller a certain password. On Kalina it is asked by pressing the gas pedal. The algorithm is recorded in the non-volatile memory of the controller. Of course, initially this password is not activated: if the ignition is turned on and the engine is not running, then the “Check Engine” symbol on the instrument panel, without blinking, lights up. If the password is activated, then a minute after turning on the ignition the symbol will go out: enter the required numbers and start.
The procedure for recording a password is similar to training an APS.
1. Having inserted the training key into the lock, turn the ignition on and off, then remove it: the APS indicator flashes for 6 seconds - during this time you need to…
2. ...turn on the ignition with the working key. Three buzzer beeps sound, then two more - turn off the ignition and remove the key. The indicator blinks again for 6 seconds - you need to be in time...
3. ...turn on the ignition with the training key... Three beeps, then two - turn off the ignition, but do not remove the key. Soon, one beep will sound and the indicator will flash faster.
4. Turn on the ignition - the “Check Engine” symbol flashes. After about a minute it will go out - it’s time to enter the password. It must consist of six digits. The limits are 111111 and 999999. Choose to your taste. For this…
5. Press the gas pedal all the way. The "Check Engine" light will come on. Hold for no more than 3 s, release - the lamp will go out.
What kind of alarm can be installed on Kalina
The 1st generation Lada Kalina was not equipped with a CAN bus, which means that any alarm system that uses analog signals for operation can be installed in it. It is best to give preference to systems with feedback and autostart.
Among the manufacturers, the following can be noted:
- Starline;
- Scher-Khan;
- Pharaoh;
- Sheriff;
- Pandora.
These alarms are characterized by more stable operation, increased reliability and have representative offices in many cities, which simplifies the installation process and technical support during the warranty period.
Proper use of autorun
Compliance with the correct operation of the autostart will eliminate the occurrence of such unforeseen situations as the car moving independently. The sequence of using autostart for a manual gearbox Kalina 2:
- Engage neutral gear.
- Engage the handbrake (parking brake).
- Get out of the car and close all doors.
- Turn on the alarm.
- Activate engine autostart.
It often happens that car owners, when turning off the engine, leave the gear in gear. You will have to get used to this, since in this situation the autorun module simply does not activate. However, some manufacturers have found a solution to this very common problem: they equipped the device with “soft neutral” - a function that does not allow the engine to be turned off until the driver engages neutral gear.
How to set the alarm on Lada Kalina 1 yourself
To install a security system on Lada Kalina, you need to take the following steps:
- Carefully study the installation instructions and diagram.
- Study the installation map for the VAZ-2117 car.
- Connect to the desired points in the car.
- Correctly install all alarm elements in the car.
Each stage should be considered separately, as there are many nuances in them.
Connection points for Lada Kalina
The most basic instructions for installing an alarm are connection points. Without this information, it is very difficult to install a security system in the car. The essence of installing the system is to connect the alarm wires to the points indicated in the table below:
| What is he responsible for? | Wire color and polarity | Where to look |
| Central locking - unlocking | Pink-black (minus) | Under the plastic sill trim on the driver's side |
| Central locking - locking | Pink-white (minus) | Under the plastic sill trim on the driver's side |
| Door switch | White-blue (minus) | Under the plastic sill trim on the driver's side |
| Direction indicators | Blue-black and blue (plus) | Under the plastic sill trim on the driver's side |
| Driver's door switch | Red-blue (minus) | Under the plastic sill trim on the driver's side |
| Generator | Brown-white (plus) | Instrument wiring harness |
| Handbrake signal | Brown-blue (minus) | Instrument wiring harness |
| Starter | Red (plus) | Egnition lock |
| Ignition | Blue-black (plus) | Egnition lock |
| +12 V | Brown (plus) | Egnition lock |
Using connection points, you need to wind the wires so that they go in a group to the places where they should be connected.
Please note that the central locking is controlled by minus, which means you need to use the appropriate signaling circuit. It's in the instructions. As an example, there is a diagram from the Starline A92 alarm system:
What you need to know about installation
Installation begins with disassembling the car interior. It is necessary to disassemble those parts behind which the connection or installation of any alarm element will be carried out. In the case of the Lada Kalina, you need to disassemble:
- dashboard;
- driver's door pillar;
- steering column;
- driver's threshold.
Having disassembled everything, a decision is made about where the unit will be mounted, and after that, the alarm wires are wound into bundles that go to different places in the car. Equally important is to correctly place the main elements:
| Element | Where to hide |
| Antenna | Installed on the windshield of the car. This is necessary to improve the signaling range. Under no circumstances should you glue the antenna onto silk-screen printing, as it contains metal particles that impair the performance of the radio device. |
| Light-emitting diode | Mounted on the driver's door pillar. To do this, you need to drill the stand and put an LED in the resulting hole. |
| Shock and tilt sensor | There can be two sensors. In any case, they need to be installed on metal parts of the machine. As a rule, they are glued with double-sided tape and reinforced with metal screws or plastic ties. |
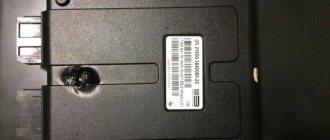
| Autorun block | Attached to the main unit. The block can be built into the alarm system. |
| Alarm block | It needs to be hidden away. As a rule, it is mounted behind the instrument panel and secured to the wiring harnesses using zip ties. Installation on metal parts is allowed, but provided that a shock sensor is built into the unit. |
| VALET button | This is the service alarm button. Its task is to program functions and emergency shutdown of the system if the key fob is lost. The button must be installed in a hidden but accessible place. |
| temperature sensor | Attached to the heater pipe. |
| Siren | Installed in the engine compartment. |
An equally important part of the auto-start alarm system on Kalina is the immobilizer bypass. It allows you to start the car from the key fob without using a regular key. You only need the chip that is in the spare key.
The chip is hidden inside the crawler's antenna, and its receiving ring is wound around the ignition switch. When starting, the system will use the chip from the crawler and does not reduce the efficiency of the standard immobilizer.
Setting up basic functions
After installing the alarm, it needs to be configured. This is done in programming mode. How to use it and how to enter is described in the instructions for the alarm. This is done differently for different models.
Popular customizable features include:
- Autostart duration.
- Duration of the door closing pulse (for window closers).
- "Polite lighting." Necessary for delaying door arming in order to prevent false alarms when the lamp is not turned off. After all, on Kalina the lamp turns off 30 seconds after the doors are closed.
It is imperative to configure the shock sensor. There are two screws on it. One regulates the 1st level sensor - light impact, and the second regulates the 2nd level sensor - strong impact. By tightening the screws, you can adjust the sensitivity.
It is allowed to check the settings on hard parts of the body - the front door pillars - and only with blows of the palm or fist.
Mounting block fuses and relays
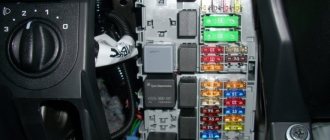
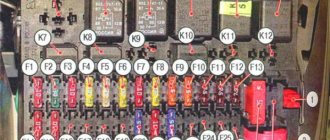
The main fuse and relay box is located in the passenger compartment, under the instrument panel on the driver's side, behind the protective cover.
K1 Relay for the electric fan of the engine cooling system K2 Relay for turning on the door lock K3 Additional relay for the starter K4 Additional relay (50 A) K6 Relay for the windshield wiper K7 Relay for turning on the high beam headlights K8 Relay for the sound signal K9 Relay for turning on the low beam headlights K10 Relay for turning on the heated rear window K11 Relay main Lada Kalina 2 K12 Fuel pump relay K13 Engine cooling system electric fan relay 3 K14 Heated windshield relay 1 K15 Heated windshield relay 2 K16 Compressor relay
| № | A | Circuit breakers |
| F1 | 15 | Ignition coils, injectors, engine control system controller, cooling fan relay (No. 1, 2, 3) |
| F2 | 25 | Norma, Lux: Central body electronics unit, driver's door module |
| 5 | Standard: Daytime running lights | |
| F3 | 15 | Norma, Lux: Automatic gearbox control controller, automatic gearbox control drive |
| 10 | Standard: Hazard Alarm | |
| F4 | 15 | Airbag system controller |
| F5 | 7.5 | Instrument terminal 15 (instrument cluster, engine control system controller, body electronics module, electromechanical power steering, brake pedal switch, speed sensor, automatic transmission selector, windshield wiper switch, rear window defroster switch relay, heated windshield relay ( No. 1, No. 2), seat heating relay, unloading relay) |
| F6 | 7.5 | Standard: Reverse lamps, turn signals |
| 7.5 | Normal, Lux: Reversing lamps, automatic transmission control controller, safe parking system control unit | |
| F7 | 7.5 | Canister purge valve, mass air flow sensor/pressure sensor, phase sensor, oxygen concentration sensors |
| F8 | 25 | Rear window heater, outside mirror heaters (Normal, Lux) |
| F9 | 5 | Side lights on the right side |
| F10 | 5 | Side lights on the left side, instrument and key lights, license plate lights, trunk light, glove box light |
| F11 | 5 | Rear fog lights |
| F12 | 10 | Low beam (right headlight), electric corrector of the right headlight |
| F13 | 10 | Low beam (left headlight), electric corrector of the left headlight |
| F14 | 10 | High beam (right headlight) |
| F15 | 10 | High beam (left headlight) |
| F16 | 10 | Norma, Lux: Right fog lamp |
| F17 | 10 | Norma, Lux: Left fog lamp |
| F18 | 15 | Standard: Cigarette lighter |
| 20 | Norma, Lux: Cigarette lighter, heated front seats | |
| 10 | Norma, Lux: Cigarette lighter | |
| F19 | 20 | Standard: Central locking |
| 7.5 | Norma, Lux: Anti-lock brake system (ABS) control unit | |
| 5 | Norma, Lux: Anti-lock brake system (ABS) control unit | |
| F20 | 15 | Beep 2192 |
| F21 | 10 | Fuel pump |
| F22 | 15 | Standard: Front wiper and washer, rear wiper and washer |
| 25 | Norma, Luxury: Central body electronics unit, windshield washer, rear window washer, rear window wiper | |
| F23 | 5 | Instrument cluster, diagnostic connector |
| F24 | 7.5 | Norma, Lux: Air conditioning compressor clutch, automatic climate control system controller |
| F25 | 7.5 | Brake light lamps, interior lamp (Standard) |
| F26 | 25 | Normal, Lux: Electronic valves of the anti-lock brake system (ABS) |
| 10 | Norma, Lux: Central body electronics unit | |
| Delrhi mounting block | ||
| F27 | 25 | Normal, Lux: Electronic valves of the anti-lock brake system (ABS) |
| F28 | 30 | Standard: Heater |
| 30 | Norma, Lux: Heater, automatic climate control system controller | |
| Mounting block 1118 | ||
| F31 | 30 | Standard: Front door windows |
| 30 | Norma, Lux: Central body electronics unit, short-term activation of high beams, windshield wiper motor | |
| 25 | Normal, Lux: Electronic valves of the anti-lock brake system (ABS) | |
| F32 | 30 | Standard: Heater |
| 30 | Norma, Lux: Heater, automatic climate control system controller | |
| Relay | ||
| K1 | Cooling fan | |
| K2 | Norma, Lux: Cooling fan | |
| Standard: Window lifters | ||
| K3 | Starter 2192 | |
| K4 | Ignition switch unloading relay | |
| K5 | Standard: Hazard and direction indicators | |
| K6 | Standard: Wiper | |
| Norma, Lux: Heated front seats | ||
| K7 | High beam | |
| K8 | Sound signal | |
| K9 | Low beam | |
| K10 | Standard: Heated rear window | |
| Norma, Lux: Heated rear window and exterior mirrors | ||
| K11 | Engine control unit (main relay) | |
| K12 | Fuel pump | |
| K13 | Standard: Alarm (additional relay) | |
| Norma, Lux: Reversing lamps | ||
| K14 | Standard: Alarm (additional relay) | |
| Norma, Lux: Cooling fan | ||
| K15 | Norma, Lux: Heated windshield | |
| K16 | Norma, Lux: Heated windshield | |
| K17 | Norma, Lux: Air conditioning compressor clutch | |
Fuse box under the hood near the battery
- 30 A Low beam headlights or main relay, circuits protected by fuses F1 and F21 of the mounting block in the passenger compartment
- 60 A Generator
- 60 A Generator
- 30/40 A Heater fan (heater fuse grants)
- 50 A Electromechanical power steering
- 60 A ABS unit
