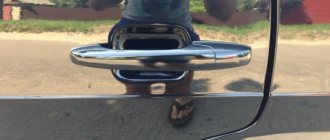
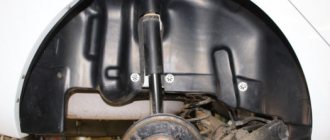
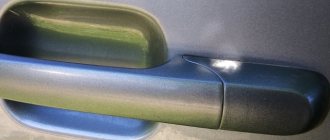
Tuning is a common phenomenon among modern motorists. But if some fully fit into the design of the engine, chassis and other units that affect the speed and power of the car, then others prefer external tuning. The installation of Euro handles on the VAZ 2114 is a prime example of this.
Photo of installed euro handles on VAZ 2114
What are Euro pens?
It is impossible to say for sure why they are called Euro pens. Apparently, this somehow relates to European cars, Western auto production. Let's be honest, the factory door handles on the “fourteenth” are far from being an example of automotive design art.
Euro handles are a set of door handles that significantly transform the appearance of the car and allow you to open and close doors more comfortably. They have a comfortable design and are pleasant to hold with your hands. Plus, the quality of individual handle models significantly exceeds even VAZ factory elements for opening front and rear doors.
How to install Euro handles “Lynx” on a VAZ 2115?
- The first step is to remove the door trim; underneath there are rods and handle fasteners that we need to replace. To do this, unscrew the screws holding the “pocket” and turn off the power to the speaker and power window buttons.
- Next, we pry up the plastic cover of the door handle and remove it in order to unscrew the screws securing the handle and door card.
- Then we pry up the plastic body of the handle that opens the door and take it out.
- Remove the plastic trim for adjusting the rear view mirror, then carefully pry up the door card and remove it.
- We remove the protective curtain and proceed to dismantling the rods and the external door handle. Using a key “8”, unscrew the nut securing the handle inside the door on the driver’s side, as well as the second nut located on the edge of the door in the area of the seal.
- Now you can remove the rods. I’ll say right away that many people have a lot of difficulties with this, since the space inside the doors is limited and working there is not entirely convenient, but if you get used to it, you can deal with it quite quickly. Using a screwdriver, pry up the plastic tips and remove the rods that do not allow the handle to come out.
- After the rods are disconnected, you can take out the handle. We pull it towards ourselves and take it out along with two small rods.
Handles "Lynx"
Despite the fairly extensive range of Euro handles suitable for the VAZ 2114, domestic owners of the “fourteenth” most prefer to use the “Lynx” kits. These are high-quality, reliable products with excellent design, smooth lines, streamlining, and excellent grip comfort.
Handles Lynx
Plus, of course, quality plays a big role in the popularity of accessories. Here it is not possible to make any claims to the Lynx Euro handles for the VAZ 2114 car.
Useful video
You can glean additional useful information from the video below:
High-quality and correctly installed European VAZ 2114 handles will delight you with their appearance and convenience for a long time. Together with them, you can install silent locks for full approximation to Euro doors.
Many modern car enthusiasts are trying to tune their car. The owners of the VAZ-2114 were also no exception, and often one of the types of modifications is the installation of European-style handles. Of course, at first the process itself may seem complicated, but there is no easier tuning than this.
Video about installing Euro handles on a VAZ-2114 below:
The video will tell you how you can easily install European-style handles on a domestic VAZ-2114
Varieties
The Lynx Euro pens have a factory designation, which determines the differences between the sets.
- IN 1. This designation indicates that the package contains four handles - two rear and two front. In this case, the front larvae do not have.
- AT 2. There are also four handles, a pair for the rear and front doors. Only here the larvae are present.
Which one should I choose? The question is purely individual. On the one hand, B1 have a solid, smooth structure that is not spoiled by key holes. For external tuning they are simply perfect.
The second option is preferable for those who value quality, visual appeal, but at the same time reliability. After all, the presence of a cylinder will give you the opportunity to open the car with a key if problems arise with the alarm or key fob.
Quality checking
Whether it be Lynx or European pens from another manufacturer, you definitely need to make sure of the quality of the products offered to you. There are some useful tips for this.
- Buy directly from good stores rather than ordering online. Today it is important to order many spare parts online. But the problem is that you won't be able to see or touch them until delivery. If we are talking about online ordering, check the reliability of this online store, read reviews about it, study the nuances of delivery and payment. The best option is to pay the courier on the spot. This way you can first look at the handles, and only then, if everything is good, pay for the order. Well, when you are in a regular store, there will be nothing difficult in studying spare parts in detail.
- Package. Surprisingly, it is important to pay attention to the packaging. Factory products must have barcodes, certificate marks, full instructions, a warranty, and so on.
- Content. If each pen is packaged in a separate bag, this indicates a responsible approach by the manufacturer. After all, the transportation process takes a lot of time, and you yourself know the quality of our roads. Constant shaking leads to friction between parts, which leads to scratches and damage. Separate packaging will prevent this from happening.
- Instructions. Good manufacturers provide detailed instructions for installing them along with Euro handles. There is nothing complicated about this, but the very fact of the presence of this instruction already speaks volumes.
- Quality. Alas, it cannot always be determined visually. Nowadays low-grade materials are so skillfully disguised that only laboratory tests can help you in some cases. As for European pens specifically, the best guarantee of quality is purchasing products from a trusted manufacturer. Such as Lynx, for example.
Installation
Installing Euro handles on a VAZ 2114 is a lengthy process. Get ready to devote a whole day to this issue. It is best to learn the disassembly and assembly sequence using visual videos.
The stages of installing euro handles are as follows:
- The door trim is removed. This is a rather lengthy task that can take up the most time among all other processes. Don’t forget, the casing still needs to be put in place later.
- There is no need to drill, saw or cook anything. The only exceptions are those Euro handles that are not intended for the VAZ 2114. They are adjusted, something is cut out. Complex and sometimes pointless tuning. Today there are many excellent Euro handles that fit perfectly on the “fourteenth” model without unnecessary manipulations during the installation process.
- Each new part is installed in place of the standard one.
- It is advisable to arm yourself with additional fasteners for the trim in advance, since an inexperienced car owner can damage them during disassembly or reinstallation. They are cheap, but can come in handy at any time when replacing Euro pens.
- After removing the old handles, be sure to clean the socket and treat the surfaces with polish. After this, proceed to install new elements. There is nothing complicated there if you remember the dismantling process well.
- The penultimate stage is reassembly.
- The process of installing Euro handles on a VAZ 2114 is completed by cleaning new accessories and putting things in order inside and outside the car.
Euro pens are a simple but effective way to look at your car differently. Initially, it seems that installing such elements will have little effect on the appearance. But after installation you realize how different the car looks. Such a small accessory has a very positive effect on the VAZ 2114. This is a good and fairly simple type of tuning.
Installation process
Euro pens - general view.
So, in order to install Euro handles on a car, you will need the products themselves, a flat-head Phillips screwdriver, some knowledge of door design, as well as hands that have grown from the right place. The parts are installed on standard fasteners, so the door does not require additional manipulations, which many people love so much - drilling or welding.
So. Let's consider the sequence of actions aimed at installing Euro handles:
- First of all, we dismantle the inside door handle, the window handle, and the door card.
- Disconnect the door handle rods.
How to remove the door handle of a VAZ 2109, 2114.
So, we'll start by removing the door card. To do this, unscrew the pin that closes the door from the inside. Next, we take out the plugs from the door handle and unscrew the bolts that secure the handle.
Now, perhaps, the most difficult thing that will have to be done, and at this stage many people have a question about how to remove the window lifter handle of the VAZ 2109, 2114. To do this, take a thin, narrow minus screwdriver. We insert it between the latch and the washer and carefully press out the jammed handle latch. Next, pull it towards you and take it out completely.
I hope the photo makes everything clearer.
We unscrew the bolts securing the door card from the bottom (if you have a VAZ 2114 with electric windows, then unhook the pads from the window buttons) and take out the rubber seal from the top. Remove the decorative trim of the interior door handle by prying it off with a screwdriver or knife. Now nothing prevents us from removing the door trim and pulling it out from the bedbugs.
We pull out the rods coming from the handle lock and from the handle itself. It is more convenient to do this by grasping the plastic part of the rod with pliers. Or you can try to pry them off with a screwdriver.
The handle is held on by two nuts. We unscrew them and pull out the handle.
Installing euro handles on a VAZ 2114
Now let's look at the whole process of self-replacement. To carry out the work you will not need any special tools, lifting mechanisms or other favorable conditions. All you need is:
- flat and Phillips screwdrivers;
- key to "8";
- spare clips for fastening the casing (may be useful if you damage the old fastenings);
- a couple of hours of free time and a little patience.
So, the whole stage includes the following steps:
- The first, rather lengthy and responsible job is removing the door trim. First we need to remove the so-called card. It is better to start work from the front doors. First, use a Phillips screwdriver to unscrew several screws around the perimeter of the bottom of the door (storage niche). To remove the trim, you will need to disconnect the window handles and door handles. Disconnect the contact chips. Try to remove the trim carefully, gradually snapping the clips off the fastenings and metal of the doors. It happens that some clips get damaged, so stock up on a small amount in advance.
- Now that the door card has been removed, we can observe the entire interior space. We are, of course, interested in the handle mount. So, we take a regular “8” key and unscrew the nut from inside the door, while at the same time holding it with our hand (so that it does not fall into the internal cavity). The second fastening nut is located at the very edge of the door, above the locking unit. As in the first case, unscrew it.
- Next, you need to remove the two internal rods from the handle.
- From the outside of the car, pull the door handle towards you, while rotating it so that the rods come out of the hole in the metal.
- Take a new product and transfer the internal contents from the factory handles (locking mechanism, cylinder and rods) onto it. Sometimes certain models of Euro handles are equipped with their own rods.
- At the replacement stage, it would not be superfluous to lubricate the internal parts of the lock with a special product. In addition, the places where the handles are attached must be cleaned of dirt or dust.
- Rear handles are much easier and faster to change (they do not have a locking mechanism or cylinder).
- Install everything in reverse order. At the same time, before installing cards on the doors, it is very important to make sure that the mechanism is working. Check each door individually; opening and closing should be done without any complaints.
Now the question of how to install Euro handles on a VAZ 2114 will not cause you confusion or any difficulties.
How to insert the cylinder into the euro handle of a VAZ 2109, 2114.
In order to insert the old lock cylinder into the Euro handle of the VAZ 2109, you first need to remove it from the old one. To do this, use a thin screwdriver to press the stopper (if it does not press on one side, try it on the other).
- We pull out the stopper with pliers.
- We insert the key into the lock and use a screwdriver to remove the spring from the inside of the handle. The larva is pulled out and thoroughly wiped.
- We take out the sealing ring from the set with the euro handle and pull it onto the cylinder.
- Take lithol and lightly coat the larva. After which, the larva is inserted into a new handle.
- We install the spring on the lock cylinder. We install the lock release rod on the cylinder and insert the stopper. Lubricate all rubbing parts.
- Now you know how to insert the cylinder into the euro handle of the VAZ 2109, 2114 and the handle is ready for installation.
