Thanks to the camshaft of the VAZ 2114, the intake and exhaust strokes of the internal combustion engine are synchronized. The camshaft is driven by rotation of the crankshaft, which, in turn, rotates through the movement of the crankshaft. The most important structural part of the camshaft is the so-called “cams”. The cams are directly responsible for the process of opening/closing valves.
Thanks to the cams, the valve timing of the engine is regulated. On all cars, the camshaft is located in the RBC (cylinder block camber). The VAZ 2114 is equipped with a cast iron camshaft, the design of which can be seen in the screenshot below. The standard eight-valve engines of the Samara-2 family have one camshaft installed.
"VAZ" camshafts have an average resource potential: 90 - 100 tkm. At this point, a major overhaul of the internal combustion engine is usually carried out.
Purpose of the camshaft
The camshaft is a moving element located inside the cylinder head and is responsible for the operation of the valves (their opening and closing). Thanks to it, the intake and exhaust strokes are controlled and, as a result, the entire operation of the engine is synchronized.
The camshaft itself is connected by a drive to the crankshaft, but rotates twice as slow as it. The cams mounted on the camshaft alternately act on the intake and exhaust valves, bringing them either open or closed.
At the same time, the VAZ 2114 8-valve camshaft has one significant drawback - it does not provide the car engine with good “throttle response” at low speeds (less than 3,000 rpm). This is caused by the shape of its cams, leading to “stretching” of the working phases.
The solution to such a problem can be either regrinding (it is worth remembering that for camshafts of domestic cars it practically does not help) or installing a special camshaft (we will talk about this a little later).
Determination of DF failure
If it breaks down, slight difficulties arise with idle stability; when starting to move, a trimming effect is likely, as well as increased fuel consumption. These symptoms are associated with failure to receive data from the on-board driver about the ignition angle at a certain moment in engine operation. If there is no signal from the sensor, the control unit enters emergency mode, in other words, it starts working on a pre-programmed program without a sensor and generates an emergency error “0340” or “0343”.
Camshafts OKB Engine RS45/500 VAZ 2114
Let me start by saying that I ordered shafts for myself. I studied the information for a very long time, probably from the very assembly of the gear; even then there were ideas about shafts. In general, I ordered the following: — VAZ 2112-1006014-RS45 camshaft (exhaust) — VAZ 2112-1006015-RS500 camshaft (intake) — VAZ 2112 RS hydraulic pusher (INA, Germany, 16 pcs.) — Modified VAZ 2112 valve spring plates (16 pcs.) — Adjustable pulley VAZ 2112 (without curtain/with curtain) (2 pcs.)
Camshafts RS45/500, RS hydraulic pusher VAZ 2112 (INA, Germany), Modified valve spring plates VAZ 2112, Adjustable pulleys VAZ 2112
Camshaft replacement
You can find out that it’s time to replace the camshaft 2114 with a new one by two signs - either a corresponding error began to appear during a computer check, or a characteristic knock appeared when the engine was running. Be that as it may, you can replace the camshaft yourself if necessary.
To do this you will need the following tools:
- set of keys;
- screwdrivers;
- torque wrench.
In addition, you will also need a bottle of sealant.
Dismantling
The shaft replacement process itself must be performed as follows:
- Remove the camshaft pulley.
- Remove the pulley key from the camshaft groove.
- Unscrew the nut securing the rear timing belt cover.
- Unscrew the nuts holding the bracket together.
- Loosen the screws on the crankcase ventilation system hoses.
- Remove the hoses.
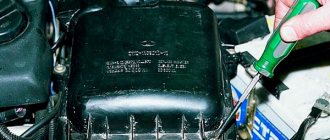
- Unscrew the nuts securing the valve cover.
- Remove the valve cover.
- Remove the gasket.
- Unscrew the nuts and bolts, and then remove the plug.
- Unscrew the nuts securing the shaft bearing housing.
- Remove the camshaft cover.
- Remove the rear timing belt cover.
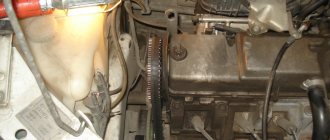
- Remove the camshaft.
- Remove the camshaft oil seal.
- Clean all surfaces of the cylinder head from any remaining oil and sealant.
At this point, dismantling the old camshaft can be considered complete.
The nuts securing the camshaft bearing housing should be unscrewed in stages, in several circles. This is necessary in order to reduce the impact of the springs on it.
Installation
Once the old camshaft is removed, you can begin installing the new one.
It is done in the following order:
- Lubricate the cams and shaft journals with fresh grease.
- Place the camshaft in the cylinder head supports (at the same time, make sure that the cams of the first cylinder are facing upwards).
- Apply sealant to all surfaces of the block head that come into contact with the bearings.
- Install the bearing housing.
- Tighten 10 nuts of the bearing housing (they should be tightened in the same way as they were unscrewed - in several circles). In this case, you should not apply much force - you just need to wait until the case touches the cylinder head, after which you should stop tightening.
- Tighten all nuts with a force of 2.2 kgf/m (for this you will need a torque wrench).
- Remove any sealant that has leaked through the joint.
- Install the oil seal.
- Install the timing pulley and belt.
- Rotate the crankshaft (this should be done clockwise) so that the marks on the camshaft pulley and the timing cover match.
- Rotate the crankshaft 50 degrees.
- Using a feeler gauge, measure the gaps around camshaft cams 1 and 3. For intake valves it should be 0.2 mm, and for exhaust valves - 0.35 mm. The permissible deviation from the specified values is no more than 0.05 mm.
Once the clearances around all valves have been checked, the camshaft installation can be considered complete.
We make a washer.
For the material for the washer, I took a piece of galvanized sheet about 0.5mm thick and secured it to a piece of MDF panel with four self-tapping screws (so it wouldn’t fidget).
I drew 2 circles with a marker (inner diameter 25mm, outer 35mm) and hollowed out the inner diameter with a chisel.
I cut out the outer diameter with metal scissors, and I ended up with a curve like this, with the washer blank all covered in burrs:
I processed the inner diameter of the washer with a round file, and sharpened the sharp corners on the outer one:
Install the washer.
We put the washer on the camshaft (it should fit freely, if not, then adjust the dimensions).
I entered freely:
Put the cover back and tighten it.
Attention! Be sure to check if the camshaft is jammed.
To do this, take a key set to 17 and try to rotate the camshaft.
It should turn with the same force as before installing the washer.
If the camshaft becomes very difficult to turn, or is completely jammed, then remove the cover again, take out the washer and grind it to thickness:
Special camshafts
As was said at the beginning of the article, not all drivers are satisfied with the “native” camshafts installed on VAZ cars. They do not provide sufficient torque (and, as a result, “throttle response”) at low speeds. This problem can be solved in two ways - by regrinding the cams of the existing camshaft or by installing a new, special one.
It is highly not recommended to grind a camshaft from a VAZ car due to the low efficiency of such an operation and the large number of special shafts that can be easily purchased at car dealerships.
Among such shafts, two directly opposite options can be distinguished - sports and tuning, as well as a large number of intermediate modifications between them.
The sports camshaft delivers an increased volume of mixture into the cylinder during operation due to higher valve lift, and its cams have a rounded, smooth profile. This ensures “wider” operating phases and good throttle response at all speeds.
How to remove and install the camshaft on a VAZ 2113, 2114, 2115
Thanks to the camshaft of the VAZ 2114, the intake and exhaust strokes of the internal combustion engine are synchronized. The camshaft is driven by rotation of the crankshaft, which, in turn, rotates through the movement of the crankshaft. The most important structural part of the camshaft is the so-called “cams”. The cams are directly responsible for the process of opening/closing valves.
Thanks to the cams, the valve timing of the engine is regulated. On all cars, the camshaft is located in the RBC (cylinder block camber). The VAZ 2114 is equipped with a cast iron camshaft, the design of which can be seen in the screenshot below. The standard eight-valve engines of the Samara-2 family have one camshaft installed.
"VAZ" camshafts have an average resource potential: 90 - 100 tkm. At this point, a major overhaul of the internal combustion engine is usually carried out.
Typical camshaft malfunctions, their symptoms
The main reasons why the described part may break:
- The cams wear out: a knocking noise appears when the engine starts. When wear reaches an extreme stage, sounds can be heard while the car is moving;
- The camshaft is deformed: the malfunction is also characterized by extraneous noise during operation of the power unit;
- The camshaft bearings wear out;
- Shaft elements break.
The breakdowns described above lead to disruption of the fuel supply due to desynchronization of the camshaft and cylinder valves. In some cases, a part malfunction is caused by the use of low-quality motor oil with a large amount of impurities or a small amount of oil in the engine.
New camshaft for 2114
Replacing the VAZ 2114 8-valve camshaft is one of the stages of engine overhaul. Online stores offer many options for the design of the part, including so-called “sports camshafts,” which supposedly promise a significant increase in power. But we will focus on the standard part with catalog number 21110100601000. This part is sold in most major online stores. Price range: 2100-2600 rubles.
Dimensional characteristics of the standard part:
- Length: 46 cm;
- Width: 4.5 cm;
- Height: 4.5 cm;
- Weight: 2.45 kg.
The appearance of the new camshaft can be seen in the figure below.
Gas distribution diagrams
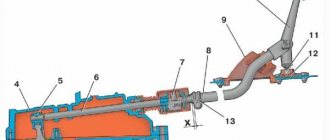
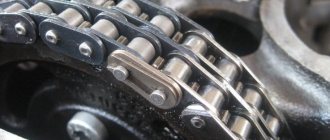
The timing belt of a passenger car consists of the following elements:
- crankshaft gears (sprockets);
- camshaft gears (sprockets);
- drive belt or chain;
- camshaft;
- block head valves;
- tensioners and dampers, tension rollers (these parts may vary depending on the timing device).
The drive belt or chain is put on the crankshaft and camshaft gears, and transmits movement from the crankshaft (CV) to the r/shaft. The cams PB open and close the valves, thereby ensuring that the cylinders are filled with the working mixture. At the moment of compression, the mixture ignites and a working cycle occurs in the internal combustion engine cylinders.
Many modern cylinder heads have 4 valves per cylinder. To drive a large number of valves, you need quite a lot of cams, so often two valves are installed in the gas distribution mechanism.
- 1 Gas distribution diagrams
- 2 Timing faults
- 3 Replacing the VAZ camshaft
- 4 Replacing p/v on VAZ 2101-07 cars
- 5 Replacing the VAZ 2114 r/shaft (8 valves)
- 6 Replacement of VAZ 2110 shaft (16 valves)
- 7 Replacing Opel camshafts
- 8 Chevrolet camshaft replacement
- 9 Renault camshaft replacement
- 10 Replacement price 10.1 Related articles:
Steps to replace the camshaft on Lada 2114
We warn you that the actions described below imply interference with key vehicle systems. Ignoring the proposed algorithm and accompanying recommendations will lead to irreversible consequences - in particular, to the failure of the internal combustion engine. If you are not confident in your abilities, then it is better to seek qualified help from professional auto mechanics. The material presented below is aimed at experienced car enthusiasts who understand the structure of a car.
To replace the VAZ 2114 camshaft seals or the camshaft itself, the car owner will need:
- A set of wrenches: spanners, open-end wrenches, socket heads - everything will be used;
- Containers for fasteners and chalk parts;
- Screwdriver Set;
- Sealant;
- Dynamometer wrench (picture below).
Repair algorithm:
- We dismantle the camshaft pulley;
- We remove the pulley key from the camshaft groove;
- Unscrew the nut securing the gas distribution system;
- Remove the nuts securing the bracket to the cable;
- We dismantle the crankcase gas exhaust hoses, having first loosened the clamps;
- We dismantle the engine valve cover by unscrewing the nuts;
- Remove the gasket under the cover;
- Unscrew the bolts and nuts and then remove the plug;
- The camshaft bearing housing nuts are unscrewed. Under no circumstances should you unscrew the nut right away - they need to be loosened gradually in order to avoid breaking the fasteners and reduce the tension of the springs. We do this: slightly loosen one nut and move on to another. And we continue like this until we unscrew all ten pieces.
- We remove the camshaft housing and remove the timing belt drive cover from the cylinder head;
- Remove the camshaft;
- Remove the camshaft oil seal;
- Before installing a new part, we clean the shaft cavity from carbon deposits, lubricant and sealant residues. You also need to clean the contacting elements of the cylinder head and bearings;
- Apply fresh lubricant to the camshaft supports and “cams”;
- We place the shaft in the cylinder head supports. The cams of the 1st cylinder should be directed upward;
- Apply fresh sealant to the contact points between the cylinder head and bearings;
- We place the cylinder head housing cover and tighten the nuts in several circles, gradually increasing the tension of the springs and the fit of the bearings to the cylinder head;
- The final degree of tightening of the nuts should not exceed 2.2 kg/cm;
- We wipe off any excess sealant and install the oil seal;
- Install the belt drive and toothed pulley;
- Rotate the crankshaft clockwise until the installation marks on the crankshaft pulley and the rear timing belt drive cover coincide;
- Rotate the crankshaft so that the camshaft pulley “steps” approximately 2-3 teeth;
- We measure the gaps of the 1st and 3rd cams. The clearance for the intake valves is 0.2 mm, for the exhaust valves - 0.35 mm.
- Replacement of the camshaft on the “fourteenth” is completed.
Of course, to perform the described manipulations, dismantling the internal combustion engine is required. Carry out work in a dry and well-lit garage. After replacing the camshaft, be sure to fill the engine with new oil. The lubricant must be new, regardless of the timing of the previous replacement.
If after the work the engine began to run smoother, fuel consumption returned to normal, and extraneous noise and vibration disappeared, then the repair complex was completed successfully. If used carefully, the new camshaft will last at least 80,000 km.
If you still have questions about the procedure for replacing the camshaft VAZ 2114 8 valves, then check out the useful thematic video
The camshaft is an extremely reliable and, one might say, practically indestructible part. It has a very long service life, and emergency breakdowns are extremely rare. However, many car enthusiasts are still interested in how to replace the camshaft of a VAZ 2114 if necessary. We’ll talk about how to do this, as well as what types of camshafts there are, today.
Crankshaft oil seal
Today we will talk in more detail about the crankshaft oil seal, a spare part that is designed to seal (seal - approx.) connections in this moving part of the engine, as well as prevent engine oil from leaking. Below, we will describe in detail how to replace this element as quickly as possible.
Signs of crankshaft oil seal failure
The very first and main sign of failure of the crankshaft oil seal is considered to be the loss of its tightness.
Oil leak due to leaky crankshaft oil seal
And if in the case of oil seals on other engine elements it doesn’t look so bad, then if there is a malfunction on the crankshaft, oil can leak from the system in liters per 1000 kilometers.
Main causes of wear
- Wear and tear due to natural reasons due to expiration of service life.
- Incorrect installation of the oil seal in advance can cause cracks on its surface.
- Mechanical damage.
- The material is not original, made in violation of production technologies.
Please note that with an increase in oil consumption, due to leaks of the crankshaft oil seal, traces of oil will certainly be observed under the car; they are clearly visible and will not leave any owner unnoticed.
>
Also think about the presence of oil seal leaks and slight slipping of the clutch. This effect can be observed due to oil getting on the clutch disc and basket located near the gearbox.
Camshaft replacement
You can find out that it’s time to replace the camshaft 2114 with a new one by two signs - either a corresponding error began to appear during a computer check, or a characteristic knock appeared when the engine was running. Be that as it may, you can replace the camshaft yourself if necessary.
To do this you will need the following tools:
- set of keys;
- screwdrivers;
- torque wrench.
Torque wrench
In addition, you will also need a bottle of sealant.
Dismantling
The shaft replacement process itself must be performed as follows:
- Remove the camshaft pulley.
- Remove the pulley key from the camshaft groove.
- Unscrew the nut securing the rear timing belt cover.
- Unscrew the nuts holding the bracket together.
- Loosen the screws on the crankcase ventilation system hoses.
- Remove the hoses.
- Unscrew the nuts securing the valve cover.
- Remove the valve cover.
- Remove the gasket.
- Unscrew the nuts and bolts, and then remove the plug.
- Unscrew the nuts securing the shaft bearing housing.
- Remove the camshaft cover.
- Remove the rear timing belt cover.
- Remove the camshaft.
- Remove the camshaft oil seal.
- Clean all surfaces of the cylinder head from any remaining oil and sealant.
At this point, dismantling the old camshaft can be considered complete.
Removed camshaft VAZ 2114
The nuts securing the camshaft bearing housing should be unscrewed in stages, in several circles. This is necessary in order to reduce the impact of the springs on it.
Installation
Once the old camshaft is removed, you can begin installing the new one.
It is done in the following order:
- Lubricate the cams and shaft journals with fresh grease.
- Place the camshaft in the cylinder head supports (at the same time, make sure that the cams of the first cylinder are facing upwards).
- Apply sealant to all surfaces of the block head that come into contact with the bearings.
- Install the bearing housing.
- Tighten 10 nuts of the bearing housing (they should be tightened in the same way as they were unscrewed - in several circles). In this case, you should not apply much force - you just need to wait until the case touches the cylinder head, after which you should stop tightening.
- Tighten all nuts with a force of 2.2 kgf/m (for this you will need a torque wrench).
- Remove any sealant that has leaked through the joint.
- Install the oil seal.
- Install the timing pulley and belt.
- Rotate the crankshaft (this should be done clockwise) so that the marks on the camshaft pulley and the timing cover match.
- Rotate the crankshaft 50 degrees.
- Using a feeler gauge, measure the gaps around camshaft cams 1 and 3. For intake valves it should be 0.2 mm, and for exhaust valves - 0.35 mm. The permissible deviation from the specified values is no more than 0.05 mm.
Installing a VAZ 2114 camshaft
After the clearances around all valves have been checked, the installation of the camshaft can be considered complete.
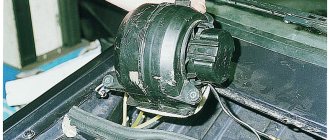
What is a phase sensor used for?
VAZ 2114: replacing rear brake pads with your own hands
To understand possible malfunctions of the phase sensor, it makes sense to briefly dwell on the question of what it is, as well as the principle of its design.
Thus, the main function of the phase sensor (or DF for short) is to determine the position of the gas distribution mechanism at a specific point in time. In turn, this is necessary so that the electronic engine control unit (ECU) gives the command to inject fuel at a certain point in time. In particular, the phase sensor determines the position of the first cylinder. The ignition is also synchronized. The phase sensor works in conjunction with the crankshaft position sensor.
Phase sensors are used on engines with distributed phased injection. They are also used on engines that use a variable valve timing system. In this case, separate sensors are often used for the camshafts that control the intake and exhaust valves.
The operation of modern phase sensors is based on the use of a physical phenomenon known as the Hall effect. It lies in the fact that in a semiconductor wafer through which an electric current flows, when it moves in a magnetic field, a potential difference (voltage) arises. A permanent magnet is placed in the sensor body. In practice, this is implemented in the form of a rectangular plate of semiconductor material, to the four sides of which contacts are connected - two input and two output. Voltage is applied to the first, and a signal is removed from the second. All this happens on the basis of commands coming from the electronic control unit at a specific point in time
There are two types of phase sensors - slot and end. They have different shapes, but work on the same principle. So, on the surface of the camshaft there is a mark (another name is a benchmark), and during its rotation, a magnet included in the sensor design records its passage. A system (secondary converter) is built into the sensor body, converting the received signal into information “understandable” for the electronic control unit. End sensors are designed in such a way that there is a permanent magnet at their end, which “sees” the passage of a benchmark near the sensor. In slot sensors, the use of the letter “P” shape is implied. And the corresponding reference point on the distribution disk passes between the two planes of the housing of the slotted phase position sensor.
In injection gasoline engines, the master disk and the phase sensor are adjusted in such a way that a pulse from the sensor is generated and transmitted to the ECU at the moment the first cylinder passes its top dead center. This ensures synchronization of fuel supply and the moment of spark supply to ignite the air-fuel mixture. Obviously, the phase sensor has a direct impact on the operation of the engine as a whole.
Special camshafts
As was said at the beginning of the article, not all drivers are satisfied with the “native” camshafts installed on VAZ cars. They do not provide sufficient torque (and, as a result, “throttle response”) at low speeds. This problem can be solved in two ways - by regrinding the cams of the existing camshaft or by installing a new, special one.
Tuning and sports camshafts
It is highly not recommended to grind a camshaft from a VAZ car due to the low efficiency of such an operation and the large number of special shafts that can be easily purchased at car dealerships.
Among such shafts, two directly opposite options can be distinguished - sports and tuning, as well as a large number of intermediate modifications between them.
The sports camshaft delivers an increased volume of mixture into the cylinder during operation due to higher valve lift, and its cams have a rounded, smooth profile. This ensures “wider” operating phases and good throttle response at all speeds.
Nuzhdin camshaft for VAZ 2114
In turn, tuning camshafts are distinguished by an increased base diameter and a “sharper” cam profile. They provide the vehicle with quiet, uninterrupted engine operation at all, even critically low, speeds. In addition, the use of such a shaft makes it possible to “push back” the limit of the onset of detonation at low rotational speeds.
It is also worth noting that the use of tuning camshafts can reduce fuel consumption, exhaust toxicity, and also slightly increase the overall service life of the engine before major repairs.
To summarize, it is worth noting that replacing a camshaft is not the most difficult operation and can be performed by any experienced motorist. But when to carry it out - in case of severe wear of the “native” shaft or when replacing it with a special camshaft - everyone decides for themselves.
Published March 24, 2019
Instructions with photos and video materials for anyone who is faced with the need to replace the camshaft on VAZ 2114, 13, 15 cars
Withdrawal procedure
- Removing the timing belt
- Unscrew the nut and bolt of the upper fastening of the rear timing belt cover
- Removing the cylinder head cover
- On engines with phased fuel injection, disconnect the wiring harness connector from the camshaft position sensor
- Disconnect the wiring harness from the coolant temperature sensor
- Using a 10 mm socket wrench, unscrew the bolt and two nuts securing the plug. A rubber sealing ring is installed under the plug mounting bolt. Replace the damaged o-ring.
- We remove the plug. On an engine with a camshaft position sensor, the plug can only be removed if the pin (1) is located opposite the slot (2).
- Remove the sealing ring of the plug. The O-ring must be replaced if it is damaged or if oil is leaking from under the plug.
- Using a 13 mm socket wrench, evenly (in several steps) unscrew the ten nuts securing the two bearing housings.
- Remove the front bearing housing.
- Remove the rear bearing housing.
- Remove the camshaft from the cylinder head by slightly pulling the rear timing belt cover.
- Remove the oil seal from the camshaft.
Camshaft installation:
- Lubricate the camshaft journals with clean engine oil.
- Place the camshaft in the cylinder head with the pin facing up.
- Before installing the bearing housings, apply a thin layer of sealant to the mating surface of the block head in the areas of the front oil seal and plug.
- Evenly, in several steps, tighten the nuts of the bearing housings until the housings come into contact with the cylinder head (following the sequence indicated in the photo). Then tighten the nuts to a torque of 18.4–22.6 N m (1.9–2.3 kgf m).
- Pressing in a new camshaft oil seal
- Before installing the plug, put an O-ring on it.
- Further assembly is carried out in the reverse order of removal.
. 2115
| , ͷ () | ||
| 121,25 | . «» | |
| 8 | 20,87-25,77 (2,13-2,63) | |
| M10x1.25 | 33,23-41,16 (3,4-4,2) | |
| 8 | 18,38-22,64 (1,87-2,31) | |
| M10 | 67,42-83,3 (6,88-8,5) | |
| 6 | 6,66-8,23 (0,68-0,84) | |
| 8 | 15,97-22,64 (1,63-2,31) | |
| M10x1.25 | 68,31-84,38 (6,97-8,61) | |
| 6 | 5,15-8,23 (0,52-0,84) | |
| 91 | 43,32-53,51 (4,42-5,46) | |
| M10x1.25 | 60,96-87,42 (6,22-8,92) | |
| 6 | 7,64-8,01 (0,78-0,82) | |
| 121,25 | 97,9-108,78 (9,9-11,1) | |
| 6 | 4,17-5,15 (0,425-0,525) | |
| 81,25 | 20,87-25,77 (2,13-2,63) | |
| 81,25 | 15,97-22,64 (1,63-2,31) | |
| M10 | 41,65-51,45 (4,25-5,25) | |
| M10 | 41,65-51,45 (4,25-5,25) | |
| M10 | 31,85-51,45 (3,25-5,25) | |
| M10 | 27,44-34 (2,8-3,47) | |
| M12 | 60,7-98 (6,2-10) | |
| 6 | 8,33-10,29 (0,85-1,05) | |
| 6 | 6,86-8,23 (0,7-0,84) | |
| 6 | 8,33-10,29 (0,85-1,05) | |
| 6 | 7,2-9,2 (0,735-0,94) | |
| 161,5 | 45,5-73,5 (4,64-7,5) | |
| 201,5 | 37,48-87,47 (3,8-8,9) | |
| 141,5 | 24-27 (2,45-2,75) | |
| 8 | 12,8-15,9 (1,3-1,6) | |
| 6 | 1,96-4,6 (0,2-0,47) | |
| 121,25 | 54,2-87,6 (5,53-8,93) | |
| 121,25 | 54,2-87,6 (5,53-8,93) | |
| 6 | 3,8-6,2 (0,39-0,63) | |
| 8 | 19,13-30,9 (1,95-3,15) | |
| 8 | 15,7-25,5 (1,6-2,6) | |
| 6 | 4,78-7,75 (0,49-0,79) | |
| 8 | 16,3-20,1 (1,66-2,05) | |
| 6 | 5,1-8,2 (0,5-0,83) | |
| 8 | 15,7-25,5 (1,6-2,6) | |
| 8 | 15,7-25,5 (1,6-2,6) | |
| 201,5 | 120,8-149,2 (12,3-15,2) | |
| 141,5 | 28,4-45,1 (2,9-4,6) | |
| 6 | 11,7-18,6 (1,2-1,9) | |
| 8 | 15,7-25,5 (1,6-2,6) | |
| M10x1.25 | 63,5-82,5 (6,5-8,4) | |
| 6 | 4,5-7,2 (0,45-0,73) | |
| 8 | 15,7-25,5 (1,6-2,6) | |
| 8 | 15,7-25,5 (1,6-2,6) | |
| 161,5 | 28,4-45,3 (2,89-4,6) | |
| 8 | 28,4-35 (2,89-3,57) | |
| 8 | 15,7-25,5 (1,6-2,6) | |
| 221,5 | 28,7-46,3 (2,9-4,7) | |
| 8 | 19,6-24,2 (2-2,47) | |
| 121,25 | 77,5-96,1 (7,9-9,8) | |
| 121,25 | 77,5-96,1 (7,9-9,8) | |
| 121,25 | 77,5-96,1 (7,9-9,8) | |
| 121,25 | 77,5-96,1 (7,9-9,8) | |
| 161,25 | 160-176,4 (16,3-18) | |
| 101,25 | 42,1-52,0 (4,29-5,3) | |
| 8 | 12,9-16,0 (1,32-1,63) | |
| 101,25 | 42,14-51,94 (4,3-5,3) | |
| 141,5 | 65,86-81,2 (6,72-8,29) | |
| 101,25 | 49-61,74 (5,0-6,3) | |
| 201,5 | 186,3-225,6 (19-23) | |
| 201,5 | 225,6-247,2 (23-25,2) | |
| 121,25 | 65,2-92,6 (6,65-9,45) | |
| 121,25 | 115-150 (11,72-15,3) | |
| 8 | 31-38 (3,16-3,88) | |
| 101,25 | 29,1-36 (2,97-3,67) | |
| 101,25 | 34,3-42,63 (3,5-4,35) | |
| 8 | 9,8-15,7 (1,0-1,6) | |
| M10 | 26,5-32,3 (2,7-3,3) | |
| M10 | 26,5-32,3 (2,7-3,3) | |
| M10 | 14,7-18,16 (1,5-1,9) | |
| M10x1.25 | 29,4-33,4 (3,0-3,4) | |
| M12x1.25 | 66,6-82,3 (6,8-8,4) | |
| M12x1.25 | 66,6-82,3 (6,8-8,4) | |
| 101,2 5 | 27,4-34 (2,8-3,46) | |
| 101,25 | 30,01-37,07 (3,06-3,78) | |
| 201,5 | 186,3-225,6 (19-23) | |
| 8 | 15-18,6 (1,53-1,9) | |
| 8 | 15-18,6 (1,53-1,9) | |
| 6 | ||
| 8 | 25,5-27,4 (2,3-2,8) | |
| 161,5 | 31,4-51 (3,2-5,2) | |
| 181,5 | 121-149,4 (12,3-15,2) | |
| 121,25 | 27,05-33,42 (2,76-3,41) | |
| M10x1 | 70-86 (7,13-8,6) | |
| 38×1,5 | 45-55 (4,6-5,6) | |
| M14x1.25 | 30,67-39 (3,13-3,99) | |
| 94.3701 | 8 | 15,8-24,2 (1,5-2,46) |
| 37.3701 | 121,25 | 58,3-72 (5,95-7,35) |
| 37.3701 | 101,25 | 28,08-45,3 (2,86-4,62) |
Video on the topic:
Hi all! Any extraneous knocks or sounds when the car is operating should alert the driver. Regardless of the nature and origin, there should not be any unnecessary sounds during normal operation of the machine. Today I propose to talk about how the camshaft knocks, whether it can knock, why this happens and what to do in this situation.
The job of the camshaft or simply the camshaft is to control the opening and closing of the internal combustion engine valves. With its help, engine strokes are synchronized. As you know, valve knocking is also possible. We have already talked about them.
You should find out why such symptoms occur, what actions the car owner needs to take, and what consequences you should be prepared for if you do nothing.
A little about the camshaft
Fortunately for many, the camshaft is not one of the components that are positioned as capricious, often and quickly failing. The resource largely depends on the quality of the part and operating conditions.
The camshaft has a life limit. Uninterrupted operation can last from 50 to 150 thousand kilometers. These are fairly average indicators, since each situation is still individual. Active work is already underway to remove this element from the engine design. Moreover, experts say that in the future the camshaft may completely cease to be part of the engine. It will be replaced by electromagnetic actuators.
It is difficult to say how effective and realistic this will be in the near future. Plus, some skeptics doubt the correctness of the transition from a mechanical part to a computer-controlled actuator.
Can the camshaft make a knocking noise?
Many people have encountered crankshaft knocking in their lifetime. But not all drivers know how and when exactly the camshaft knocks.
It's all about the sounds. They are really very similar to each other. This appears the same on different cars:
- for VAZ 2106;
- Niva has 8 valves;
- VAZ 2107;
- VAZ 2109;
- on Priora;
- VAZ 2110;
- VAZ 2114;
- for Daewoo Nexia;
- for Subaru Forester, etc.
But what should a car owner do when he hears a sound, but cannot understand what exactly is knocking? Is it the crankshaft or the camshaft?!
Here you just need to listen and observe the behavior of the car and specifically the engine. Sometimes this makes it quickly clear where the source of extraneous sound is, and which unit needs to be prepared for repair.
The key role is played by the fact whether you hear sounds when it is cold or when it is hot.
You will be able to hear sounds from the camshaft only when the internal combustion engine is cold, when the engine starts and the lubricant has had time to leave the rubbing elements. After starting, the oil will gradually lubricate them, causing the knocking noise to disappear.
- The camshaft makes so-called dull sounds;
- Noises appear precisely when the engine is cold, when the engine starts;
- Initially the crankshaft sounds similar;
- As it gains speed, the faulty crankshaft acquires a louder sound;
- In fact, the camshaft is dull and the crankshaft is sonorous;
- An increase in speed will help to accurately determine;
- If you still can’t identify it by sound, you will have to carry out diagnostics.
Based on these points, you will be able to independently diagnose the nature and source of the malfunction without any problems, and then begin the appropriate actions to eliminate them.
Algorithm for setting timing marks
To perform the operation you will need the following tools:
- Jack;
- The key is 13 (in some cases – 10);
- Flat thin screwdriver.
Labeling is carried out according to the following algorithm:
- Raise the car from the front right side with a jack.
- Open the hood.
- Unscrew and remove the timing case.
- Remove the alternator belt by loosening its tensioner.
- Start turning the right front wheel of the car until the camshaft mark on the block and pulley coincide. You need to turn it with first gear engaged.
- Remove the plug on the manual transmission housing.
- See if the markings on the flywheel and housing match. If yes, then you don't need to do anything else.
- If the marks do not match, turn the right wheel until the mark on the flywheel and camshaft coincides with the marks on the block.
- Sometimes it is not possible to get them to match the first time. Often this requires cranking the crankshaft several times.
- If after 4-6 marks do not coincide, it is necessary to remove the timing belt, freeing its rollers. You need to remove the belt when the mark on the camshaft coincides.
- Rotate the crankshaft until the marks on the flywheel match.
- Reinstall the timing belt.
After placing, you should make sure that all marks are set correctly. Then you can install the casing in place. Operating a vehicle with incorrectly marked signs is dangerous. If installed incorrectly, the belt may break. Of course, on the 8-valve engine of this VAZ model, the valve will not bend as a result of this. But this can lead to burnout of pistons or valves. There may be problems with ignition and other malfunctions.
What to do
Drivers had to deal with the fact that occasionally after the start an incomprehensible knocking sound began to appear, but when accelerating and warming up the engine it disappeared. As we have already figured out, most likely the camshaft on the engine has failed.
Now another question. What to do in such a situation? If it is the camshaft that starts knocking, you should be prepared to spend a considerable amount of money. But this is not a 100% probability, since sometimes hydraulic compensators begin to knock, or knocking noises are made by worn gears and bearings. Not all situations solve the problem by replacing the entire camshaft. If you suspect a knocking noise from this unit, it is better to immediately go for diagnostics. Due diligence can help you find out where the source of the problem is and what needs to be done about it.
It’s definitely not worth delaying diagnostics. If the compensators fail, and the problem was in them, then the chain reaction will lead to the breakdown of the shaft itself. And these are completely different expenses. So it would definitely be a good idea to check the hydraulic compensators.
You can drive a car without hydraulic compensators with a knock from the camshaft for more than 50 thousand km, but then you will probably have to completely change the engine or carry out major repairs.
As you can see, delaying the check is definitely not in your interests.
Kurgan trailers official website: price, range
- Play in the shaft bed. It is unlikely that you will be able to solve the problem on your own. This requires boring or honing of the bed itself, or a complete replacement of the unit;
- Problems in the lubrication system. Even with a slight disruption of its operation, sound may appear. Moreover, the reason is not only in the quantity, but also in the quality of the lubricant;
- Deformation and mechanical damage. Most often, the supports burst and the neck breaks;
- Violations in the regulation of fuel supply processes;
- Development of the resource of cams. If the problem is definitely in the camshaft, and the knocking noise appears even when it’s hot, then the problem is in the cams.
It is almost impossible to give an accurate forecast as to what exactly was the source of the knocking noises without conducting comprehensive diagnostics. Masters often talk about this in various videos where the problem under consideration is described.
In any case, the knock should alert you. Whether you have hydraulic compensators or not, it does not matter. The sooner you send your car for diagnostics, the higher the chances of getting by with little damage and spending a minimum of effort and money to fix the problem. All in your hands.
Subscribe to our website, leave comments, ask relevant questions and tell your friends about our project!