The VAZ-2114 and VAZ-2115 models are in stable demand. These are inexpensive, quite dynamic and comfortable cars, with affordable spare parts. From time to time they have problems with the heating system, many of which can only be solved by replacing the radiator of the VAZ-2114 or model 2115 stove. You can do this yourself, and without removing the dashboard, as required in the operation and repair manual.
Location and principle of operation of the car heater radiator
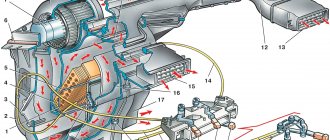
The radiator is the main component of the heating system of the car and is located in the heater housing. It is responsible for heating the air in the cabin. This is both a free flow of air and forced from a fan. The radiator, passing coolant, heats up and heats the air passing through it.
Many drivers prefer to use the services of a car service to repair the radiator, although it is quite easy to dismantle it yourself. The fact is that at first glance, its location suggests a complex repair process.
Changing the faucet
A leaking faucet is considered one of the most annoying problems with a heating system. If the problem is not detected in time, it may simply flood the car interior with coolant. To diagnose a leak, it is enough to have a flashlight with you and visually inspect the condition of the faucet. But leaks can also be caused by cracks in the pipes or radiator.
https://www.youtube.com/watch?v=GcNZ7y50KQ4
Faucet replacement procedure
It is better to carry out replacement in a special repair pit:
- Drain the coolant.
- Get to the pipes that connect the engine and the heater valve. Loosen the pipe clamps and clean the threads of the 2 studs that secure the faucet. To do this you will need a metal brush and WD-40.
- Disconnect all the pipes one by one. In this case, coolant may leak.
- After that, in the cabin you will need to remove the side trim of the torpedo and, if necessary, replace the pipes.
- Then you will have to go back under the car and use a 10mm socket to unscrew the nuts securing the faucet.
- Return to the cabin again and pull the faucet towards you, then remove the spring clamp and disconnect the faucet from the control cable.
- Then, when the tap is unscrewed, you can replace it with a new one. Then put everything back together in reverse order.
After repairs and modifications there should be no problems with the stove. The main thing is to notice the beginning problems with the heating system in time in order to have time to prevent them.
Classification of radiators
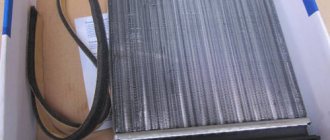
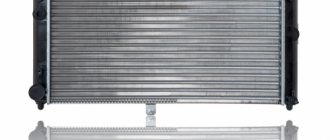
Radiators for the VAZ 2114/15, installed by the manufacturer, are made of aluminum; they are replaced after 3-5 years (at the end of their service life). For Samara cars, two types of radiators are produced:
- 2108-8101060
- 2108-08101060-00
The dimensions and installation method are the same for both models.
You can also install a copper radiator for the interior heating system on a VAZ 2114/15. Its advantages over aluminum: longer service life, higher heat transfer and more suitable for repair. However, the price is almost twice as high.
Work order
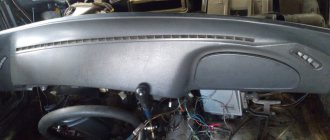
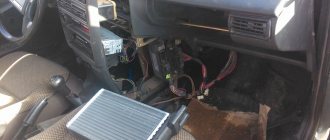
Replacing the radiator of a VAZ-2114 stove without removing the dashboard allows you to save time, and this does not require any special skills. Let’s immediately make a reservation that part of the torpedo will still have to be disassembled, but the center console will remain in place, and this is the most labor-intensive part of the operation. At the initial stage of work, the side part of the panel on the passenger side is removed; to do this, use a screwdriver to unscrew the screws securing it.
To drain the coolant, you need to unscrew the bolts of the front protection, which is located under the engine compartment. The antifreeze is drained through a special plug located in the cylinder block; to unscrew it, you will need a 13 mm spanner. To prevent it from spilling on the ground or the garage floor, a container is placed under the car. To increase the rate at which antifreeze flows out, you can open the cap of the expansion tank.
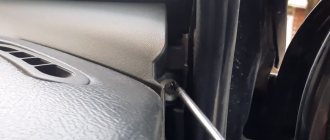
Using a hexagon on the passenger side, the torpedo mount is unscrewed, after which it can be easily bent.
Next, you need to unscrew another fastener, located on the passenger side under the lower part of the center console. After this, the torpedo can be easily raised so that it remains in the same position, a stop of suitable length can be installed under it; a block with a cross-section of 50x50 mm and a length of about 40 cm is enough.
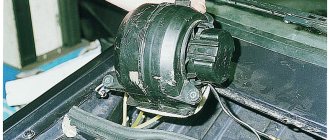
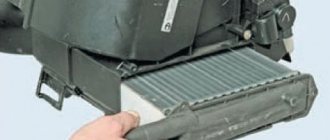
In the opened space you can see the heater radiator, which is attached to three self-tapping screws. They must be unscrewed so that it can be safely removed from the socket. In this case, a problem will arise - another self-tapping screw is hidden behind the plastic body of the torpedo, which needs to be unscrewed. To get to it, it is advisable to drill a small hole in the plastic through which you can insert a screwdriver. To do this, you first need to remove the glove compartment. If you try to move the torpedo, you can break the plastic and then removing the heater radiator on a VAZ-2114 will turn into an expensive procedure.
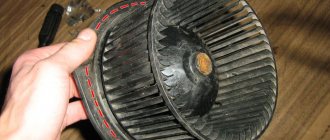
Next, you can proceed directly to dismantling the heater radiator. To do this, remove the clamps and disconnect the pipes, under which it is better to place a small container or rag, since there is still antifreeze in the system, which will spill directly into the cabin. After this, the radiator is removed from the mounting socket without any effort. It is advisable to examine it to see where the damage was and where the antifreeze is leaking from; corrosion damage appears in this place and streaks are visible, which once again confirms that the stove radiator needs to be replaced.
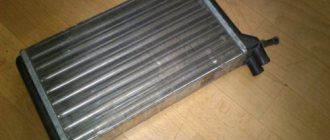
The new heater core fits into place effortlessly and should not cause any problems. It is secured with self-tapping screws, including through a hole previously drilled in the dashboard. In this case, it is advisable to inspect the faucet, since this is another weak point of the heating system. It should be completely dry and the lever should be easy to turn. The glove compartment is installed in place, the dashboard and the removed side panel are screwed to the mounts.
Before adding coolant, you need to check whether the plug on the cylinder block is tightened so that the coolant does not spill out. Fresh antifreeze is poured into the expansion tank to the level; if during operation the level drops, it will have to be topped up.
To carry out the tests, you need to start the engine and, after waiting until it warms up, turn on the heater. It should heat well in different modes, and the interior should remain dry, without stains of spilling antifreeze with a characteristic odor. At first, it is recommended to periodically look at the floor to make sure that all connections are tight and the new radiator is not defective.