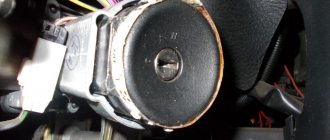
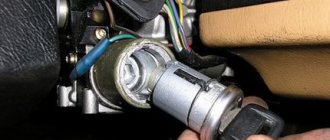
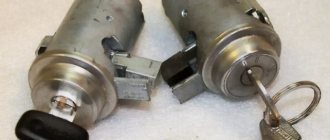
I think that many car owners have encountered such a problem when, with excessive force when turning the key, it could remain in the ignition switch, or rather, its blade. In this case, you will have to replace the lock, since it is almost impossible to get the key.
On the Grant, as on other front-wheel drive VAZ cars, the lock is mounted on the steering shaft and secured using breakaway bolts. This was done specifically for security purposes, so to speak, to prevent unauthorized access to your car.
To replace the lock, you will need the following tool:
- Phillips screwdriver
- The chisel is narrow and sharp
- Hammer
- Key for 10
Lada Granta ignition key
4 February 2015, 13:42 #5
Jonny, February 4, 2015, 08:47, #1
Good morning. A question. The Grant is standard equipped without a key with a remote control. Is it possible to buy such a key from the office? dealer and train him for use on this machine? Also, I saw in a store a flip key specifically for a vase, but can such a key be somehow adapted so that it works, not only starts, but also opens/closes?
if you have an immobilizer in your car and there are electric locks, then buy a key, whatever you like, a simple one with a remote control or a flip-flop one, it doesn’t matter, change the tip to the one that starts your car, then take your key with a red tag, this is a training one and go through the procedure training. Below is everything in the text, it won’t work right away, I got it right on the 8th or 9th try, good luck.
Before starting the training procedure, fill the car with at least 10 liters of gasoline so as not to get confused by the squeaks.
1.Close all doors. Turn on the ignition with the training key and wait in the on state for at least 6 seconds.
2. Turn off the ignition. The warning light in the warning lamp unit should flash quickly (at a frequency of 5 times per second) as long as the learning procedure is carried out correctly. If the lamp stops flashing quickly, it indicates an incorrect operation, an out-of-time interval, or a malfunction. Remove the training key from the ignition switch.
3. While the indicator light is flashing (about 6 seconds), insert the remote control and turn on the ignition. The immobilizer buzzer should emit three beeps.
If the buzzer does not sound and the indicator stops blinking, this means:
- the time interval of 6 seconds has been exceeded and it is necessary to repeat the learning procedure, starting from step 1;
4. Wait 6 seconds until the buzzer gives two more beeps and turn off the ignition.
5. If it is necessary to train the second remote control, then you should perform steps 3…4 again, using the second learning remote control to turn on the ignition. If not, continue from step 6.
6. After turning off the ignition for no more than 6 seconds, while the indicator is flashing, remove the remote control, insert the learning key and turn on the ignition. The buzzer should beep three times. Wait 6 seconds until the buzzer gives two more beeps.
7. Turn off the ignition without removing the training key, wait 6 seconds until the buzzer sounds a single sound signal. The indicator should flash twice as fast.
If the sound signal does not sound and the flashing indicator stops, you should return to step 1 and repeat the learning procedure. If a repeated failure occurs when performing step 7, this means that the ECM was previously trained with a different key, in which case the controller should be replaced.
8. After the buzzer gives a single sound signal, no later than 3 seconds, turn on the ignition for 2...3 seconds and then turn it off (after turning on the ignition, the buzzer will sound three times and the indicator will stop flashing).
The hazard warning lights should flash and the car horn should beep.
9.Remove the training key. Wait with the ignition off for at least 10 seconds. Insert the working key and turn on the ignition. Wait 6 seconds, if the indicator does not flash, test start the engine, the engine should start. If the indicator flashes, turn off the ignition and wait at least 10 seconds.
Turn on the ignition. The warning light should not flash and the engine should start.
If, after turning on the ignition, after 6 seconds the indicator lights up with a constant light, then the learning procedure must be repeated, starting from step 1.
Removing the ignition switch, replacing the contact group and immobilizer coil of Lada Granta
Tools:
- Ratchet wrench
- 10 mm head
- Medium Phillips screwdriver
- Small flat screwdriver
- Driver for socket attachment
- 8mm wrench attachment
- 24mm wrench attachment
- Chisel and hammer or electric drill
- Long nose pliers
Parts and consumables:
- Sandpaper (fine grit)
- Return spring (if necessary)
- Microswitch (if necessary)
- Contact plate on light guide (if necessary)
- Ignition switch contact group (if necessary)
- Bolt with shear head M6 – 4 pcs.
Notes:
Remove the ignition switch to replace it if its cylinder mechanism fails, to replace the contact group of the ignition switch, and also if it is necessary to replace the immobilizer coil.
Removing the ignition switch
grant ignition keys
4 February 2015, 13:42 #5
Jonny, February 4, 2015, 08:47, #1
Good morning. A question. The Grant is standard equipped without a key with a remote control. Is it possible to buy such a key from the office? dealer and train him for use on this machine? Also, I saw in a store a flip key specifically for a vase, but can such a key be somehow adapted so that it works, not only starts, but also opens/closes?
if you have an immobilizer in your car and there are electric locks, then buy a key, whatever you like, a simple one with a remote control or a flip-flop one, it doesn’t matter, change the tip to the one that starts your car, then take your key with a red tag, this is a training one and go through the procedure training. Below is everything in the text, it won’t work right away, I got it right on the 8th or 9th try, good luck.
Before starting the training procedure, fill the car with at least 10 liters of gasoline so as not to get confused by the squeaks.
1.Close all doors. Turn on the ignition with the training key and wait in the on state for at least 6 seconds.
2. Turn off the ignition. The warning light in the warning lamp unit should flash quickly (at a frequency of 5 times per second) as long as the learning procedure is carried out correctly. If the lamp stops flashing quickly, it indicates an incorrect operation, an out-of-time interval, or a malfunction. Remove the training key from the ignition switch.
3. While the indicator light is flashing (about 6 seconds), insert the remote control and turn on the ignition. The immobilizer buzzer should emit three beeps.
If the buzzer does not sound and the indicator stops blinking, this means:
- the time interval of 6 seconds has been exceeded and it is necessary to repeat the learning procedure, starting from step 1;
4. Wait 6 seconds until the buzzer gives two more beeps and turn off the ignition.
5. If it is necessary to train the second remote control, then you should perform steps 3…4 again, using the second learning remote control to turn on the ignition. If not, continue from step 6.
6. After turning off the ignition for no more than 6 seconds, while the indicator is flashing, remove the remote control, insert the learning key and turn on the ignition. The buzzer should beep three times. Wait 6 seconds until the buzzer gives two more beeps.
7. Turn off the ignition without removing the training key, wait 6 seconds until the buzzer sounds a single sound signal. The indicator should flash twice as fast.
If the sound signal does not sound and the flashing indicator stops, you should return to step 1 and repeat the learning procedure. If a repeated failure occurs when performing step 7, this means that the ECM was previously trained with a different key, in which case the controller should be replaced.
8. After the buzzer gives a single sound signal, no later than 3 seconds, turn on the ignition for 2...3 seconds and then turn it off (after turning on the ignition, the buzzer will sound three times and the indicator will stop flashing).
The hazard warning lights should flash and the car horn should beep.
9.Remove the training key. Wait with the ignition off for at least 10 seconds. Insert the working key and turn on the ignition. Wait 6 seconds, if the indicator does not flash, test start the engine, the engine should start. If the indicator flashes, turn off the ignition and wait at least 10 seconds.
Wear and deformation of the key
In a situation where a worn ignition switch is jammed, it is necessary to perform all the manipulations described above. The goal is to start the engine and deliver the car to the repair site. Use a similar approach: swing and turn the key, lubricate the cylinder with aerosol.
If you are on the road away from any shops, use motor oil for lubrication. Remove the dipstick from the engine and drip lubricant onto the working part of the key, then insert it into the well several times. If there is no result, disassemble the lock - there is no other way out.
Often the cause of a jammed lock is a bent key. Having discovered deformation, bend the splined part on a flat area with light and careful blows of a hammer. A cracked or broken key cannot be used - a piece of metal may remain in the lock the next time you try to start the engine.
Source
The key in the ignition switch does not turn
Added: August 17, 2009 16:26
I can't turn the key. Those. I inserted the key and nothing. He twisted it, shook it, swore, and turned it around. I applied some oil and WD - no result. Who knows - the whole lock can be replaced or can it be disassembled and repaired?
Added: August 17, 2009 16:32
Maybe it's the steering lock that's doing the brain work?
Added: August 17, 2009 16:58
No. This is exactly the lock - insert the key and the first turn. I turned it on and the ignition turns on normally.
Added: August 17, 2009 17:12
Before turning the key, turn the steering wheel in one of the directions it will turn. This happens to me all the time. If the steering wheel is locked, then you cannot turn the key; you need to turn it to one side and then turn the key.
Added: August 17, 2009 17:16
In! Me too!
Added: August 17, 2009 17:32
Guys, I’m telling you it’s not the steering wheel that’s locked! The steering wheel turns wherever you want.
Added: August 17, 2009 18:55
Most likely, one of the pins under the key teeth does not come out. It’s possible to fix it in principle, but it’s painstaking. Try tapping some kind of piece of wood from below. Just be careful. If it turns after tapping, it means the pin is definitely jammed.
Car: VAZ-2107 1989, OZONE, BSZ, steering wheel, wheels
Lada Granta is a popular and reliable car of the Russian concern AvtoVAZ, which was developed on the basis of the Lada Kalina model.
This is an inexpensive “people’s” car with front-wheel drive, which has firmly won its niche in the market. Its factory marking is VAZ 2190, serial production began in October 2011.
Technical characteristics : in terms of body type, the Lada Granta is a five-seater four-door sedan or liftback (hatchback) with an engine capacity of 1.6 liters. Manual 5 or automatic 4-speed gearbox, depending on the model.
The car is equipped with front-wheel drive, independent front and semi-independent rear suspension. Available in “standard”, “norm” and “luxury” trim levels.
The “luxury” package includes electric power steering, an ABS system, power windows, air conditioning and a modern audio system.
The disadvantage of this car is flaws in the design, not always high-quality assembly and frequent problems with starting the engine.
Activation of the electronic anti-theft device
The Lada Granta immobilizer is installed on all models, starting with the standard configuration. The Granta became one of the first domestically produced cars to be standardly equipped with an immobilizer. And the first problem that the owner of a new Grant faces after he finds out what the “immobilizer” is for is activating the anti-theft device. As a rule, the controller is activated by specialists from the car sales center in the presence of the owner.
If the buyer refuses to activate the immobilizer, a note about this is written in the service book. When the owner, some time after purchasing the car, changes his mind and decides to activate the device, he will have to do it himself. The main thing is to strictly follow the activation algorithm to avoid possible problems. Lada Granta is delivered to the owner with a set of keys, including two for the ignition, one of them is marked in black, the other in red.
The black key is used for everyday use; it must be entered into the immobilizer memory for smooth engine starting. The red key, the so-called training key, is designed to enter the initial code into the controller’s memory. After activation has taken place, it should be hidden in a safe place and taken out only when necessary. If the red key is lost, all warranty obligations of the seller become void.
Problems with the immobilizer (APS)
Often the Lada Granta does not start due to improper operation of the APS. If it is activated, the key is read and the engine starts. The immobilizer (APS) identifies the “native” key by reading the code from it.
If it is incorrect, then the APS blocks the operation of all vehicle systems. Here it is necessary to immediately clarify that APS is not activated upon sale in all trim levels. Lada Granta sedan is equipped with an anti-theft alarm in models 023, 024 and 050.
Lada Granta liftback in the 711, 713, 750 and 751 configurations. Many car dealers cheat when selling and say that the immobilizer cannot be activated. But by law they must do this at the request of the car owner.
If the key is not registered, the indicator lights up continuously for about 20 seconds. without blinking, and then goes out. During training, blinking occurs at a frequency of 5 Hz, at the end of training at a frequency of 10 Hz. When problems arise in the system, a sound alert is added to the light indication; it appears at the 10th and 20th second.
Decoding signals:
1 signal + flashing indicator – the code from the key cannot be read, possible reasons:
- problems in the communication coil circuit. In this case, you need to check the resistance and inspect the circuit;
- There is no transponder in the key. To eliminate the problem in the training key, you should check the presence of the transponder and its markings; if it is missing, then use a “clean” key and the CSUD to retrain the entire system;
- The transponder (located in the red key, you need to remove the red head) may be broken. In this case, for a training key, you need to retrain the system with a clean key, and for a working key with a remote control, you need to replace the remote control with a new one and train the system again;
2 beeps + flashing indicator – the relationship between the APS and the ICS is broken, possible malfunctions:
- There was a communication failure on the w line. In this case, it is necessary to eliminate violations in the chain between the APS and the ICS;
- violation in the APS and KSUD chain. It is necessary to replace them one by one to identify where the malfunction occurred;
- there is no voltage on the APS and KSUD power supply. In this case, you need to check and restore the voltage.
3 beeps + intermittent indication - “foreign” key or APS. In this case, it is necessary to carry out training using a “clean” key and a “clean” KSUD. For APS, you need to configure the system using a training key native to the ICS.
4 signals + flashing indicator – the controller does not provide confirmation to start the engine. This suggests that the KSUD has already been trained with another system; it needs to be changed to a clean one and retrained.
To find out exactly the cause, it is necessary to make a diagnosis. If the controller is broken, it must be replaced and re-learned.
If there is an APS, then you need to replace it and train it along with all the working keys, since structurally in the Lada Granta the APS is located in the instrument cluster.
If there is a suspicion that the keys have been read, then retraining should also be done.
Step-by-step instructions for training the immobilizer and working keys:
- close the driver's door tightly;
- turn on the ignition using the red key;
- turn off the ignition and remove the key, the indicator flashes at a frequency of 5 Hz;
- quickly (within the next 6 seconds) turn on the ignition using the black key;
- further: we hear 3 beeps and after 6 seconds - 2 beeps;
- turn off the ignition and remove the key;
- if you need to train several more working keys, then you need to repeat steps 4 to 6 (the maximum number for training is 4 keys);
- over the next 6 seconds, turn on using the red training key;
- then: 3 beeps, after 6 seconds - 2 beeps;
- turn off the ignition, after 6 seconds we hear 1 signal;
- the indicator starts blinking very quickly (with a frequency of 10 Hz);
- turn on the ignition - we hear 3 beeps, the indicator goes out, the learning process is completed;
- turn off the ignition;
- Now you need to check the immobilizer: to do this, you need to turn on the ignition with a working or training key, if the indication does not light up, then everything went well, we try to start the engine.
P O P U L A R N O E:
Not all cars have a mains voltage monitoring system. Previously, domestic cars had a regular light in the dashboard indicating that the battery was charging. This is clearly not enough information. It would not be a bad idea to install an additional digital voltmeter or at least an indicator of several multi-colored LEDs showing the main thresholds of permissible voltages. Below are three simple car voltage LED circuits.
In some cases, you can independently diagnose a washing machine malfunction by reading the indicators on the front panel of the washing machine. The washing machine's fault code is displayed on the digital or LCD display. Next, we will take a closer look at the diagnostic codes of Indesit and Ariston washing machines.
Another charging scheme is very similar to the previous one, but differs in that it turns off after charging is complete. The charger is started by pressing the “start” button on the front panel; when supply voltage is applied to the circuit, relay K1 is activated and provides “self-capture”. Know more...
The starter does not turn
If you are sure that the problem is not in the APS, then most likely the starter is not working. The Lada Granta is equipped with a cable-driven gearbox and the starter often acts up, especially with a new gearbox.
It is very easy to find out that the starter is not turning: when you turn the ignition key, you do not hear the specific sound of its operation.
Sometimes a car with a robot does not turn the starter, this is due to a weak battery, we recommend charging it and trying again, although sometimes it helps to simply remove and put on the terminals.
About installing the larva
The lock is broken, does not allow the car to start, does not turn at all or turns with difficulty, the key is stuck in the hole. All this suggests that the ignition switch cylinder needs to be repaired. Perhaps the problem will be solved with simple lubrication.
It is enough to use contact cleaner. Even the one designed for battery terminals will do. This is a very effective remedy. For repairs, the mechanism must be disassembled. Removing the larva is not easy. Sometimes it is necessary to remove the retainer using a rough mechanical method. When the element is removed, the cylinder is easily removed from the lock body. Then they take a new larva and insert it into the body. Sometimes it looks like the lock is broken, but in reality it may just be frozen. If the key cannot be inserted, you should warm it up a little.
Computer malfunction
The unit itself is very reliable and rarely fails without external intervention. But water can get on it, and this is the main reason for malfunction.
There are significant flaws in the body design; the drainage holes near the filter are often clogged with dirt and water gets into the block through them.
To do this, you need to check and clean the drainage more often. Also, water can flood the ECU after installing the alarm, when the plugs are not installed tightly or they are completely forgotten to be installed.
You can try to dry the block, but if this does not help, you will have to replace it. This problem can be partially solved by wrapping the block with film or filling it with sealant, but then this is fraught with the appearance of condensation inside the ECU.
It is not difficult to remove the ECU; it is located opposite the front passenger seat, under the glove compartment, behind the soundproofing upholstery, almost on the floor, near the passenger’s feet.
ECU removal sequence:
- Disconnect the on-board network.
- Remove the screw that secures the upholstery.
- Carefully peel back the upholstery and sound insulation layer.
- Unscrew the three nuts securing the ECU.
- Carefully move the unit to the side and remove the two wire clamps one by one.
After unscrewing the computer, you need to disassemble it and assess the extent of the damage. We remove the board from the case and carefully inspect it. If it is partially burnt out and blackened, then nothing can be done about it; it needs to be replaced.
But if the board has no visible damage or only the output key has burned out, then in this case the key must be replaced, and the board must be washed and dried. First, you need to wipe it with a clean rag, then rinse it with WD-40 and blow it out with a compressor.
After this, rinse with alcohol several times and blow again. Now the most crucial moment is drying. Using a hair dryer set for a maximum of 1.5 hours, we blow through the board on both sides.
Self-diagnosis of the module
You can check the module in the following ways:
- Checking for weight. To carry out the test you will need a multimeter. The tester should be set to resistance measurement mode. One probe of the tester must be connected to pin 15, and the second one must be shorted to the housing. If the unit is working properly, the resistance should tend to infinity.
- Checking the primary windings of the short circuit. The primary windings are checked for breaks using a tester. To check, you need to connect the probes of the meter to the outer contacts on the short circuit. If the resistance tends to infinity, this indicates the presence of a break in one of the windings.
- Checking secondary windings. Since there are two windings, the test is carried out in two stages. First you need to check the short-circuit winding of cylinders 1 and 4. To do this, the multimeter probes must be placed in the appropriate terminals. A resistance of about 5.4 kOhm is considered normal. If the resistance tends to infinity, then there is a break in the winding. The short-circuit winding of cylinders 2 and 3 is checked in the same way.
In case of malfunction, the ignition module is replaced with a new one.
Engine and spark plugs
Often candles simply flood, especially in winter. This could be due to a weak battery spark, wiring problems, or unsuitable spark plugs.
The most primitive way to dry them is to press on the gas and crank the engine for 10 seconds using the starter.
But in winter this rarely helps, and the candles need to be dried. To do this, they need to be removed and thoroughly cleaned of dirt. This can be done with a toothbrush. In this case, you need to leave the same gap of 0.7-1 mm .
After cleaning, the candles need to be dried. This can be done using a hair dryer. Thrifty and experienced drivers recommend carrying spare spark plugs with you and, if necessary, simply replacing them on the road. To reduce the risk of flooding, monitor the battery charge and once every three days, load the engine up to 5000 rpm for a few seconds. for cleaning and preventing contamination .
Functions
The ignition lock or switch is a switching component.
Using this element, you connect and disconnect the vehicle’s on-board network to the battery, and when the engine is running, to the generator. Thanks to the lock, you can turn on or turn off the ignition. The mechanism starts the starter and engine. If the engine is not started, the lock allows the operation of various devices. These are multimedia, anti-theft systems and other equipment. And finally, just like before, the lock functions as a steering wheel lock. The mechanism is responsible not only for the process of starting the engine, but also for connecting or disconnecting the entire electrical on-board network of the car to the battery, as well as for protection against theft. As for the structure of the mechanism, the technical structure of the element is simple. However, the principle of operation on different car models may differ slightly.
Fuel system
It happens that the tank simply runs out of gas, do not forget to monitor its level. You also need to pay attention to its quality. Due to low-quality gasoline, spark plugs often flood, the filter becomes dirty, and moisture forms.
If you have filled in with low-quality fuel, then in this case you need to remove the gas tank and change the coarse and fine filters, you can try to blow out the fuel pipes.
If the injectors are dirty, they can be cleaned using any available method. When there is a lot of water in gasoline, you can add a little alcohol to the tank.
But if there are a lot of impurities and dirt, then only strong cleaning will help. You see that the starter is spinning, but the engine refuses to work and you can’t hear the fuel pump pumping. It may fail, there is no tightness in the power system or the pressure regulator is malfunctioning.
The first thing you need to do is check the pressure in the rail, the normal value is 3.5-4 atmospheres .
Then you need to remove the hatch and measure the voltage in the connector; the light bulb can be inserted into the two terminals in the middle and cranked with the starter. It should light up and if the voltage reaches, but there is no pressure, you can try to hit it. The brushes could simply be stuck. If they are normal, then the coarse mesh may be clogged, it needs to be cleaned or replaced; in winter it may freeze up.
If electricity is not supplied, you need to check fuse F21 and relay k12. The relays (power coils) need to be removed, tapped on them a little, or simply warmed thoroughly in the palms of your hands.
Main signs of failure
Drivers need to take into account during operation that breakdowns can occur both due to failure of the mechanical part and due to problems with the electrical system. Popular mechanical problems manifest themselves in the following factors:
- the lock is stuck in one position and there is no way to unlock it without using significant effort;
- the steering column is jammed;
- an attempt was made to gain unauthorized access to the lock using a master key or other object unsuitable for this purpose.
The electrical part may also fail. This can be determined by the following factors:
- the starter does not rotate after turning the key to the desired position;
- The dashboard indicator lights do not light up or go out after a short time;
- the operation of devices activated through the lock positions is unstable or absent.
Other factors that are less common among motorists may also occur. They are resolved according to the identified breakdowns.
Timing belt, valves and damper
The gas distribution mechanism often breaks. The belt breaks only when the car is moving. Unfortunately, no one is immune from rupture, and to prevent this from happening to you, you need to pay attention to its rubbing more often and change it in time.
Sometimes the valves come into contact with the pistons and they bend. To solve this problem, you can install pistons with special grooves. Sometimes the engine does not start due to the damper being turned several teeth, in which case the sensor makes a mistake and shows the wrong phase.
Clogging and freezing of the larva
Due to dirt accumulated inside the lock, the key jams and jams in various positions. If the jam occurs in the intermediate position indicated by the letters ON and ACC, it cannot be removed. What to do:
- purchase WD-40 lubricant in an aerosol can from your local auto parts store and blow it into the mechanism through the keyhole slots;
- make attempts to turn the key by rotating it in different directions and swinging it in the lock;
- periodically add lubricants to dissolve the dirt inside the larva;
- Gently tap the key head and lock with a light hammer or similar object.
Recommendation. During the manipulations, keep the car on the hand brake. By focusing on the stuck mechanism, you may not notice the car rolling away.
Usually the blockage can be cleared using these methods and the key is turned at least once. This is enough to get to the nearest car service center or garage. If attempts are unsuccessful, it is necessary to dismantle the lock or get to the contact group in another way. Without disconnecting the wires, turn the shaft with a screwdriver and start the motor. Do not touch the key - you may accidentally engage the mechanical lock.
Crankshaft sensor
If the starter turns normally, the fuel pump works, the spark plugs and the “brains” are normal, you need to check the sensor. You need to look at the tachometer; if there is a failure, the revolutions are not visible.
You need to remove it and connect it to a multi-meter. You need to quickly wave a screwdriver in front of the sensor.
If there are no power surges, then it has “died” and needs to be replaced.
You can check it by testing the resistance; it should be approximately 750 Ohms.
If jumps are still observed and the resistance is normal, you need to look carefully to see if contamination has appeared and, if necessary, cleaning should be done.
Repair features
As a rule, the ignition switch is one of the most reliable components in a car, but after a certain time it also fails. Often, car owners may encounter jams in the cylinder or problems with the contact unit. These damages may be mechanical in nature. If the cylinder is faulty, then repairing the ignition switch (including VAZ 2106) involves completely replacing the cylinder.
If the problem is related to the contact group, you can replace the element without the need to interfere with the well of the mechanism. Practice shows that it is easier to completely replace the Mercedes ignition switch. Repairing it is possible, but the process is labor-intensive. Plus it's cheaper. Some problems are solved even without the need for replacement. For example, if the lock just jams and is installed on a domestic car, you can solve the problem with the help of graphite lubricant. If the contacts or conductors in the contact assembly are broken, then the damaged areas are soldered or the broken elements are replaced.
Ignition coils
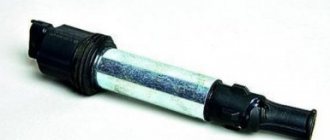
Custom ignition coil
The Lada Granda has two types of ignition coils: individual and four-terminal, they are controlled by the engine controller.
One of the signs of poor coil performance is poor idling, a drop in power and high gasoline consumption. The car starts poorly or stalls.
If the coils are partially broken, then paired misfires and ignition in the cylinders often occur. To remove the coil, you need to reset the terminals from the AMB and remove the leads from the controller. Then disconnect all high voltage wiring.
After this, the coil must be disconnected from the bracket by unscrewing the mounting screws. If you plan to replace the coil, make a note of its markings.
There are several ways to test the coil for faults:
- Testing a short to ground. To do this, using an ohmmeter, you need to connect the wire from the coil to the first end of the ohmmeter, and the body to the second. It should show an infinite value, if you see a specific value then there is a leak.
- We check the primary winding for a break. To do this, you need to connect the ends of the device to the contacts; if the device shows an infinite value, then one of the coils is broken and needs to be replaced with a new one.
- We check the secondary winding (for a 4-lead coil). To do this, first test the winding on the 1st and 4th cylinders using an ohmmeter. If it shows an infinite value, then the coil is working. Repeat these steps with the winding on the 2nd and 3rd cylinder.
- Checking high voltage wiring. The wires are checked one by one. To do this, connect an ohmmeter to the wire, measuring the resistance with a maximum value of 20 kOhm. The normal value is approximately 3 to 8 kΩ. If it shows infinity, then the wire must be replaced. It is advisable to carry out such a check annually.
After installing the coils in their place, you must strictly observe their markings; the cylinder number must match the number on the wire.
If the Lada Granda started and immediately stalled. The most common reasons:
- Damage to the ignition coil connections. Needs to be repaired or replaced with new ones.
- Low fuel pressure.
- Poor sealing in parts of the catalytic manifold or receiver.
- Poor performance of the engine control system.
The Lada Granda has many design flaws, but if you know all the weak points of this car, then finding the cause of the breakdown will not be difficult. Carefully monitor your car, undergo regular maintenance, replace parts in a timely manner, and the Lada Granda will serve you for many years.
A breakdown of the ignition switch is a rare but unpleasant problem, the solution of which requires replacement of the unit or part of it. Replacing the ignition switch of a LADA Granta is quite feasible in a “garage” environment and does not require high plumbing skills or specialized equipment.
What to do with blocking?
When the ignition switch is stuck in the Lock position, the operation of the mechanical lock depends on the angle of rotation of the wheels. If the steering wheel gets into the sector of action of the locking rod, the latter will lock the shaft in a certain position. As a result, it will be possible to deliver the car to the repair site only with the help of a tow truck - it will not be possible to tow it.
What actions can a driver take in such a situation:
- overcome a jammed mechanism with patience and hard work;
- break off the locking rod, start the engine and move to the garage;
- remove the ignition switch by pulling the rod out of its socket.
The first method involves numerous attempts to turn the key in order to “catch” the position when the mechanism opens. Be patient, exhale and try to rotate the key head while moving the steering wheel. An aerosol lubricant like WD-40 sometimes helps to disengage jammed parts of the cylinder - blow it through the tube into the keyhole.
The first option is the only one that allows the car owner to get by with “little loss” and get to a garage or service station.
Try the method before taking drastic measures .
Let your wife twist the key - maybe she will succeed the first time. On cars where electronic starter locking is not provided, you can break off the rod by sharply turning the steering wheel, applying medium force. Then the car starts by shorting the wires or turning the released key. What are the consequences of such a barbaric method:
- the broken rod will remain inside the steering column, where it will begin to rub, jam and wedge the shaft;
- from excessive force, the shaft may bend and during the repair of the lock it will have to be replaced with a new one;
- if the larva remains motionless, you will need to remove the casing, get to the contacts and find the necessary wires to start the power unit.
The complete disassembly option is suitable for all situations where the lock is jammed.
The task is not an easy one - you need a tool and an understanding of how to dismantle the unit in a certain car model. The task is to get rid of the blockage and get to the contact group, whose shaft can be turned manually or with a screwdriver. In any case, unscrew the plastic lining of the steering column and examine the fastening of the lock: you may be able to remove it. After unscrewing the nuts or screws, disconnect the housing and at the same time move the steering wheel to release the locking rod. If things go wrong, the only thing left to do is call a tow truck.
Malfunctions of the ignition switch LADA “Granta”
Ignition switch failures can be divided into two types: electrical and mechanical. Electrical faults include malfunctions of the contact group of the lock, as a result of which individual energy consumers (most often the starter) or the entire Granta electrical system as a whole stop working. This also includes a breakdown of the car's immobilizer. Mechanical malfunctions occur due to breakdown of parts of the ignition switch or contact group, as well as physical wear of the contacts. This also includes cases when, due to poor contact, heating and melting of the plastic parts of the contact group occurs. Signs of a malfunction in the ignition switch of the LADA Granta:
- the key does not turn;
- when turning the key the ignition does not turn on;
- The starter or other electrical appliances do not work.
The last two signs do not necessarily indicate problems specifically in the ignition switch, but they certainly appear when the contact group is faulty.
To eliminate the malfunction, it is necessary to replace the LADA Granta ignition switch or part of it, for example, a contact group.
What is needed to replace the Granta ignition switch
To replace the ignition switch you will need:
- key to 10;
- a thin chisel and a hammer (or a drill with a drill bit to drill out bolts with self-cutting heads);
- screwdriver;
- new ignition switch LADA “Granta” or contact group.
Reasons for replacement
It is necessary to replace the entire lock or just the contact group, depending on the nature of the breakdown and the situation with your car. Therefore, we will consider options when replacement may still be required.
Reason for replacement
Your actions
There was an attempted theft, as a result of which the integrity of the lock was compromised
In this case, only the contact group and the cylinder can be replaced, since the lock itself is most likely intact. Lower costs and required repair efficiency. Although experts advise purchasing a new lock right away and installing it
The keys were lost and there was no spare
There is no point in trying to find a master who will turn you exactly the same key as before. You will have to purchase a lock and install it on your car
Problems with contacts or contact group
It is not difficult to check whether this is really the problem. Turn off the battery by disconnecting the negative terminal, then remove the cover under the steering column and check the wires for resistance. Switch the key alternately to positions 1,2 and 3, while measuring the resistance. If the ohmmeter shows “zero”, then the lock really has a problem and needs to be replaced.
There was a desire to improve the castle
Often, car owners replace the standard ignition with a more modern one, equipped with lighting. It is not expensive, but it is convenient to use in the dark. No need to fumble for the key slot
When checking the contact group, be sure to disconnect the negative terminal from the battery, otherwise a short circuit will occur, and not only the contactor will have to be replaced.
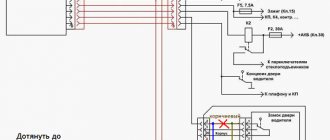
Pinout in photo
Circuit and pinout
First of all, get acquainted with the lock diagram and wire connection diagram, which will allow you to better understand the features of the 3Z pinout.
As you can see, the pinout includes 8 elements. What does each of them mean and what functions are they responsible for? We'll figure out.
- Power supply for the inserted key sensor microswitch (+12Volt).
- Power supply to ground when doors are opened on the driver's side.
- Power supply that supplies current to the starter (+12Volt, pin 50 on the diagram).
- Source at +12Volt. Activated after turning on the ignition. Power supply for additional equipment, such as video recorders, clocks, etc. (pin 15 in the diagram).
- Source at +12 Volts. Triggers when the key is inserted. Goes to pin 5.
- Power supply +12Volt. The illumination of the 3Z larva is activated.
- +12V source from the battery (pin 30 in the diagram).
- Not active.
Wiring
How to replace the ignition switch of a LADA Granta
The work can be done both indoors and outdoors. To avoid a short circuit, before removing the ignition switch, you must disconnect the ground terminal from the Granta battery. The ignition switch of the LADA “Grant” is removed as follows:
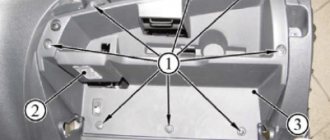
- Unscrew the five lower screws securing the steering column casing;
- Unscrew the left and right side bolts securing the casing;
- dismantle the lower part of the “Grants” steering column casing;
- remove the upper part of the casing;
- squeeze the latch of the wire connector connected to the ignition switch;
- disconnect the connector from the contacts of the Grant ignition switch;
- release the lock of the immobilizer antenna unit wire connector;
- disconnect the connector of the antenna unit of the LADA “Grant” immobilizer;
- using a thin chisel and a hammer, unscrew and remove the bolts with self-cutting heads that hold the ignition switch to the steering column or drill out the bolts with a drill;
- remove the LADA Granta ignition switch from the steering column.
Tip: it is not necessary to change the lock assembly. It is cheaper to find the cause of the breakdown and limit yourself to replacing one part, for example, a contact group.
Installation and connection of a new lock
Now that the old ignition switch has been removed, you can begin installing the new one. In order to do this, you need:
- Take a new lock, insert the key into it and turn it to position number one. This is necessary so that the latch responsible for locking the steering shaft goes inside and does not interfere with the installation process.
Breakaway bolts to prevent the lock from being stolen
- Reinstall the lock and tighten the release bolts. There is no need to tear off the bolt heads right away, so that if something happens, you won’t have to work with a chisel again. This can be done later.
Do not immediately tear off the bolt heads
- Connect the electrics of the new lock to the mating part of the car; you should be careful when working with electricity.
Ignition switch terminal VAZ 2114
How to disassemble the ignition switch of a LADA Granta
To disassemble the ignition switch, follow these steps:
- bend the wire harness clamp on the Grant ignition switch connector housing;
- remove the terminals with wires from the housing;
- Squeeze the latches securing the plastic cover and remove it from the lock;
- press out a pair of plastic clips of the contact group;
- pull the contact group out of the lock body.
After disassembling the lock, it is necessary to inspect the condition of the contact group and terminals on the wires and clean them with fine sandpaper or replace them with new ones.
Assembling the ignition switch and installing it on the LADA Granta is performed in the reverse order of disassembling and removing it from the car.
The procedure for disassembling the lock
Before starting work, you should prepare the necessary set of tools. The kit will come in handy with a Phillips screwdriver, a set of keys, a narrow chisel or punch, and round nose pliers with curved ends for gripping. Provide yourself with easy access to the lock and adequate lighting.
At the initial stage, the entire device assembly is removed. The protective element of the plastic casing is sequentially dismantled, the lock is unscrewed and pulled out. To avoid errors during reassembly, mark the installation location and purpose of each wire. Take the time to take a legible photo.
Be sure to evaluate the terminal block with the wires inserted. If cracks or traces of melting are detected, feel free to remove each wire from its socket and replace it with a new part.
There is no clear answer to the question of how to remove the ignition switch contact group. It all depends on the design features of the device. Let's consider dismantling the required element using the example of the VAZ model of the 10th family:
- Disconnect the backlight wires if present.
- Disconnect the decorative cover at the top of the device by unlatching the latches around the perimeter.
- Disconnect the contact group. Usually the fastening is also carried out in the form of several clamps.
After removing the part, you should examine the condition of the contacts. Minor oxidation can be removed by simply sanding with medium-sized sandpaper. Do not rush to reassemble. Try to simulate a launch right on the scale.
If burnt contacts are detected or if it is impossible to identify a visible defect, the part should be replaced without regret.
When performing reassembly, consider the sequence of operations. A well-installed lock should not only perform its functions, but also not move with each turn of the key. Please pay attention to the following points:
- the mounting bolts are firmly tightened only if the outer part under the steering wheel is properly installed;
- make a test rotation of the steering wheel without a key to make sure that the locking device is working properly;
- When selecting bolts, do not forget about the ease of access to the lock for potential burglars.
When completing all work and connecting the wires, check that the harness is securely fastened. If everything is done correctly, the first test run will allow you to hear the rustling sound of a running engine.
Pinout of the ignition switch for LADA “Grant”
The number of ignition switch connector terminals on the Grant has been reduced to three:
- contact “30” (“plus”, connected to the ignition switch);
- contact “15” (circuits powered when the ignition is turned on);
- contact “50” (power supply for the starter solenoid relay).
The ignition switch has three positions: “ignition off”, “ignition on” and “starter”. Accordingly, the power circuit is either open or supplied to the ignition or to the ignition and the solenoid relay at the same time.
Briefly about the operation of the lock
This switching unit is designed to turn on electrical equipment, ignition and engine starter using a key. For the convenience of the driver and the anti-theft (locking) function, the element is integrated into the design of the steering column on the right side.
In old Soviet cars, the keyhole was located to the left of the steering wheel.
The castle consists of the following elements:
- Cylindrical steel body.
- A secret key mechanism is installed inside the case - the larva.
- Contact group connecting to the larva with a leash.
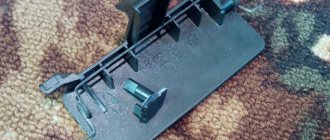
- A locking rod connected to the lock mechanism protrudes from a side slot in the housing.
Simultaneously with turning the key, the cylinder rotates the shaft of the contact group. Depending on the selected position (usually there are 4), voltage is supplied to different consumers - electrical equipment, ignition system and starter. The locking rod locks the steering wheel only in the first position (Lock). In the same position, the key is removed from the well.
Recommendations from the magazine “Behind the Wheel”
Let’s turn again to the “Behind the Wheel” review, which discusses how to remove door locks in a VAZ-1118 Kalina. If the casing has been dismantled, this is not bad. Next, according to the recommendations, unscrew the screw securing the inner handle:
The lock mechanism is connected to two rods made in the form of rods. Both of them are dismantled by disconnecting the plastic clips:
To disengage the latch, press on the plastic tab with a screwdriver.
At the last step, as you might guess, all that remains is to unscrew the screws holding the mechanism motionless.
But first, you need to dismantle the external handle. To do this, unscrew two bolts equipped with an “8” hex head.
By the way, if the central locking connector is attached to the mechanism module, it is also disconnected.
Let the wiring harness for the central locking drive remain in the door.
Of course, all door locks must be unlocked with one key, which is supposed to be used in the future.
The work indicated here is carried out on each of the four doors. In addition, it is very desirable that the ignition key also unlocks the doors. However, replacing the cylinder on the steering column will not be so easy. Can you handle the total amount of work that needs to be done? Decide for yourself.
Replacing the larva in Kalina
First of all, replacing the lock elements means that the door trim will be completely missing. Therefore, first we will figure out how to dismantle the trim on Lada Kalina cars. The second chapter is devoted to how to remove the larva and install a new one in its place. The last step will actually be the simplest.
Removing the door trim yourself
The casing is attached not only to screws, but also to plastic pistons. The number of screws holding the part in question is four:
Numbers here indicate all fastening elements. But to get to them, you need to remove the screw cap “3”, as well as the inner door handle. The pawl handle also needs to be unscrewed.
If these actions are completed successfully, the casing begins to be dismantled, moving it away from the metal. Dismantling is carried out starting from any of the corners, but care must be taken: the pistons holding the plastic are fragile.
If the package includes power windows, you will need to disconnect the connector connected to the button block. Also, another similar connector is present in most trim levels - where there is a central lock. Both connectors must be disconnected.
All the steps described here involve electronics in any case.
Therefore, at the stage before dismantling the trim, you need to open the hood, take the “10” key and unscrew the negative terminal. We are talking about the battery terminal, which can be connected last (when the last screw is screwed in). Anyone who breaks this rule will look for blown fuses. Draw a conclusion.
How to get to the door mechanism
According to the recommendation of the magazine "Behind the Wheel", in the absence of casing, access to the lock is always available. Simply put, there will be no need to remove the inner lining made of metal. The steel sheet is simply bent to the side.
The rotating part with the protrusion is called the “drive”, and this is what you will need next.
Replacing the larva will be easy:
- The key in the cylinder currently fixed in the door is turned 90 degrees;
- Using a steel ruler, knife or thin screwdriver, you need to press the locking tongue located opposite the slot in the body of the cylinder. You need to place a screwdriver between the rotating and stationary parts of the mechanism. Know that in the driver's door the slot is made from the bottom (looks “to the floor”), in the passenger doors - from the top!
- By pulling the key towards you, the larva is pulled out;
- The new cylinder is installed like this: with the key inserted, it is pushed into the lock until it stops. The locking tab will need to be pushed inward.
