Headlight installation on Lada Kalina
Many car owners have thought about the design and design of the Lada Kalina headlights.
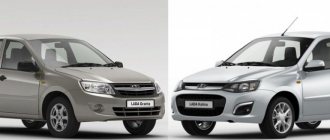
In fact, the design features of this element are quite simple. Since 2004, Kalina has been equipped with monoblock headlights. Video about replacing headlight glass on a Lada Kalina. In the process, the headlight is completely disassembled:
The video material will tell you how to replace the headlight glass, design features, as well as the stages of dismantling the element.
The video story will tell you how to disassemble the headlight, features and elements of the device
To replace the daytime running light lamp and side light, turn the lamp socket counterclockwise...
We install the new W21/5W lamp in the reverse order.
Replacing headlight bulbs on a car manufactured before 2013
The only difference in the procedure for replacing lamps in the headlight of a car manufactured before 2013 is that the side light lamp is located under the high beam lamp cover, and the daytime running light lamp is simply absent.
We will show you the replacement of the side light lamp on the right headlight unit.
How to remove glass from a Kalina 2 headlight
There are quite a few ways to remove glass from a headlight, in one case the glass is removed without any problems (usually on Bosch headlights), in another, to remove the sealant with glass and the headlight unit, it is preheated with a hairdryer or in the oven, after which it is worked with a stationery knife and a flat screwdriver (see how to disassemble a headlight on a viburnum).
The situation with removing glass from a 2nd generation Kalina headlight is slightly different. The fact is that removing the sealant that holds the glass in place is not easy. It is difficult to soften and resembles plastic.
It was possible to disassemble the headlight only after completely cutting/removing the seam using a circular saw. Then carefully pry the headlight glass around the perimeter using a knife and screwdriver.
Be careful and take your time, the process may take several hours. In the event of a breakdown, it is unlikely that you will be able to buy the Kalina 2 headlight glass, because... The headlight unit is most often sold only as an assembly.
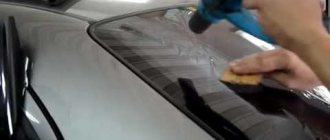
How to glue the headlight glass? It is recommended to use a sealant that will not allow moisture to get inside the headlight unit (to avoid fogging) and will be easily removed the next time you disassemble the headlight. For example, ABRO multi-purpose gasket sealants. Before applying it, the surface should be thoroughly cleaned of old sealant. Apply sealant along the perimeter to the entire mating surface, forming a layer 2-3 mm thick. Let dry for 10 minutes and glue the glass. The sealant dries completely within 24 hours. Video example of working with sealant:
By the way, do you know how to do tuning of Kalina 2 headlights with your own hands?
Disassembling lanterns
To disassemble headlights of any brand on a Lada, you will need:
- hair dryer (household or industrial);
- flat screwdriver;
- stationery knife.
To separate glass or polycarbonate, you will need to remove the material's fastening brackets. After this, heat the sealant that holds the glass or polycarbonate in place with a hairdryer. Next, the softened sealant can be cut off. This makes it possible to remove the glass with a flat screwdriver.
Source: https://okuzove.ru/osveshhenie/fary-na-kalinu-ustrojstvo-regulirovka-zamena.html
How to remove a headlight without removing the bumper on Kalina
The second way to remove a headlight on a Kalina is when the bumper is not removed. By the way, the first option is considered more difficult. It is recognized that you can only remove the bumper yourself if you have some experience. In addition, this operation takes a lot of time.
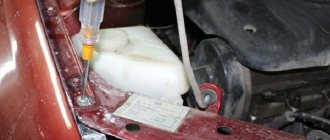
To dismantle the headlight without removing the bumper, first remove the device with coolant. It is usually called the expansion tank. You also need to remove the air filter housing. We remove the PTF plugs using a screwdriver.
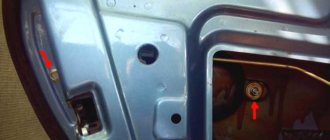
Now nothing interferes with access to the lighting unit. True, due to the tightness, some things will have to be done by touch. This is how you need to find the lower fastening element of the headlight. There's a bolt there. It's easy to unscrew it. When this is done, we simply stick our hand into the PTF hole. There are bolts at the top of the lighting unit. They are located near the radiator. To unscrew them, you need to use an 8 key.
How do Kalina lighting devices work?
Regardless of the type, the headlights on Kalina have the same design. Each lamp has three sections for lamps with different light levels:
- further;
- near;
- dimensional (also rotating).
To activate the low beam, you need your own lamps, and when switching to high beam, both units work at once with a power of 55 W. To make the light wave stronger, manufacturers use special diffusers, transparent in the center in each section. The block of side lights and direction indicators differs in color (orange) and power - the bulbs produce only 20 W.
In order to adjust the light, it is necessary to use a corrector on an electromechanical drive. To use it, you will have to completely disassemble the headlight. The corrector is a device on the instrument panel associated with an electromechanical drive. Due to this, the wires of the light source are connected.
What's the result?
As you can see, if the low beam or other lamps on Kalina need to be replaced, the procedure can be performed on the spot with your own hands. The main thing you need to remember is that each lamp (low, high, side light) has its own designation and power. For this reason, only suitable labeling and power solutions should be purchased in advance.
It is also not difficult to replace the side turn signal bulb or the entire turn signal housing itself. The main thing is to pay attention to the recommendations given above, and also separately take into account some features when removing and installing certain elements.
How to polish car headlights yourself: grinding headlights and polishing optics made of plastic and glass. How to polish headlights, subtleties and nuances. Recommendations.
How to change the heater radiator on Kalina: the recommended method, as well as replacement without removing the dashboard. Choosing a replacement radiator for the Kalina stove.
Heated rear window: repair or install a heated rear window yourself. Subtleties and nuances, what to pay attention to, recommendations.
Why is engine cut-off needed, types: by speed, by maximum speed, by exhaust gas pressure, etc. Why is the internal combustion engine cutoff pushed back?
Selecting PTF for VAZ 2114 and 2115: how to choose VAZ fog lights (housing, type of lamp, standard or universal, etc.). Installation of fog lights VAZ 2114, 2115.
How to connect PTF in a car yourself: do-it-yourself fog light connection diagram. Subtleties and nuances, what to pay attention to when connecting.
Replacing the headlight glass of a Lada Kalina will force the technician to work more. For high-quality repairs, you will need to remove the unit itself. Actually there is no problem here, but to gain access you will need to disassemble half of the front fascia of the vehicle.
- Set the car to the handbrake. For the convenience of the master, you can drive the car onto a viewing hole or a special lift - this will make it convenient to work.
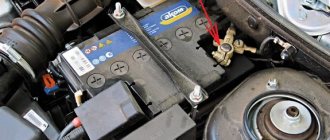
- Remove the positive terminal from the battery.
- Unscrew the front fastenings of the crankcase compartment protection. In principle, it can be dismantled entirely. If the panel is not in the way, you can simply move it away.
- Remove the license plate and radiator trim. All fastening elements are not durable. Use a screwdriver and wrenches carefully.
- Unscrew the bumper and its amplifiers. In this case, you will need to apply force - the bolts often stick.
- Next, use key No. 10 to unscrew the headlight from its mount and pull the module out of the socket.
- The glass in the block is attached to 8 plastic clips. The latches are pryed off with a flat screwdriver or similar tool and the part is completely released.
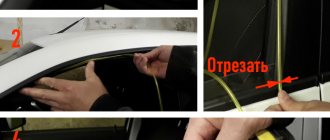
- Next, you will have to use a stationery knife, a special blade - the glass is seated on the sealant, it needs to be cut off.
- Installation is carried out in reverse order.
How to replace headlight bulbs
The bulbs in Kalina's car headlights cannot work forever, and when they burn out, they are replaced, often without even removing the headlights. You can select new lamps by studying the catalog in the VAZ dealer showroom. Low beam bulbs are replaced as follows:
- The protective cover, which is made of rubber, is removed from the entire car headlight; you just need to pull one of the 3 tabs.
- Disconnect the wiring from the light bulb.
- Remove the spring clip, disengage it from the 2 hooks, and also separate it from the body.
- The new light bulb is installed by performing all the steps in reverse order.
If the light bulb is halogen, there is a risk of damaging the glass bulbs if you touch them with your hands. When heated, the headlight glass begins to darken, but a clean rag made of natural material, which must be moistened with alcohol, will help get rid of the marks.
How to replace Kalina marker lamps:
- remove the protective cover from the headlights;
- disconnect the light bulb socket;
- remove the lamp from the socket and then install a new one.
How to replace turn signal lamps:
- turn the turn signal socket to the left by 45°, and then remove it from the headlight housing;
- press on the car headlight glass and then scroll all the way to the left. Then replace the light bulb with a new one.
How to replace bulbs in rear headlights:
- the cartridge is removed to the left;
- You need to press the light bulb and scroll to the left, then it will come out freely. Insert a new one, performing all the steps exactly the opposite.
Owners love to do headlight tuning: they paint the mask, tint or attach eyelashes, and create angel eyes. It comes out unusual and original. Such tuning will make the car noticeable on the track.
Source: https://1ladakalina.ru/komplektuyuschie/fary-na-kalinu.html
Removing the headlight from the car
The particular difficulty of removing the headlight on a Priora to replace the glass is that the lower edge of the headlight unit is covered with a bumper, and it also controls the glass, and under it there are two lower mounts for the headlight itself. Therefore, whatever one may say, for a trivial replacement, you will have to remove the entire bumper.
Removing the Priora bumper to repair or replace headlights
This action will require both effort and tools. In general, you will need the following equipment:
- Phillips screwdriver;
- flat screwdriver;
- socket wrench with a “10” head.
First you need to unscrew the lower mounting screws. They are located along the lower edge of the bumper and along the edge of the front part of the wheel arch. The Priora has 6 mounting bolts on each side: three on the bottom and three on the fender liners. Next, unscrew the 4 bolts securing the bumper to the upper front part of the body wall - the cross member, and the 2 bolts securing the headlight casing. Carefully inspect the fog lights in the bumper, if installed, for repair or replacement. Remove and set aside the bumper.
Removing the headlight to replace the glass
On top of the front light there is a plate covering it - a casing. It is secured with 3 screws to the upper cross member of the engine compartment. After removing it, you will have access to the upper mounting bolt of the Priora headlight. Since the bumper has already been removed, all that remains is to unscrew the top and 2 bottom screws. That's it, you can carefully move the headlight forward and disconnect the control wire harness from the connector. The Priora headlight has been removed. You can disassemble and replace the glass.
Dismantling and repair of optics
One of the most common malfunctions in the operation of optics, if you do not take into account the failure of lighting sources, is damage to the headlight glass. If the lamp itself is damaged, it will have to be removed and disassembled to change the glass.
How to disassemble the headlight and how to replace the brake light bulb:
- First you need to open the trunk and move the brake light source to the left.
- The Kalina brake light lamp must be pressed and turned to the left, so that the device can be removed from the installation location. The installation procedure is performed in reverse order.
- If you need to replace the glass, you will have to remove the bumper to do this. To do this, you need to unscrew the corresponding fasteners.
- After dismantling the bumper, it is necessary to disconnect all the wiring connectors that are connected to the optics.
- After completing these steps, you can unscrew the lower fasteners of the flashlight; to do this, use a wrench. After this, similar actions are performed with the upper bolts securing the optics. When all the screws are removed, the optics themselves can be removed.
- The next stage will be the glass repair itself. You need to pull the headlight towards you and carefully remove the rubberized seal. It is usually attached to the lantern quite tightly, so most likely you will have to use a utility knife to cut the elastic.
- After the headlight housing and glass are separated from each other, all remaining adhesive and sealant should be removed from the perimeter of the housing. To do this, you will also need to use a utility knife, and if the residues are small, then use sandpaper. Make sure that the surface on the housing is clean and free of sealants and dirt.
- Before installing new glass, the housing around the perimeter of the installation will need to be treated with a solvent. This will allow the surface to be degreased, so that the fit of the new glass will be maximum.
- Next, apply glue to the new seal and connect the glass itself to the body. The tightness of the structure must be optimal, otherwise the problem of fogging of the optical glasses from the inside may arise. Press the headlight on both sides so that the lens is connected to the housing as firmly as possible.
- At this stage, the repair can be considered complete; assembly is carried out in the reverse order. When installing the lights, they will need to be readjusted.
Disassembling lanterns
To disassemble headlights of any brand on a Lada, you will need:
- hair dryer (household or industrial);
- flat screwdriver;
- stationery knife.
To separate glass or polycarbonate, you will need to remove the material's fastening brackets. After this, heat the sealant that holds the glass or polycarbonate in place with a hairdryer. Next, the softened sealant can be cut off. This makes it possible to remove the glass with a flat screwdriver.
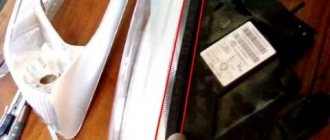
Hello everyone! I decided to tint the “eyes” of my Kalinka, because makeup does its job)) If this photo doesn’t scare you)) - let’s move on...
To get to all the headlight fasteners, you need to remove the front bumper and bumper reinforcement (Google can help). I will describe what concerns the headlights themselves. So, turning to the great Google and removing the front bumper with reinforcement, we got to the headlight. We unscrew 2 bolts from above (under the hood), one of them is for a Phillips screwdriver, the other is for a key/head for 8 or 10 (sorry, I forgot)) Now 2 bolts from the bottom (under the bumper amplifier) are a key/head, again, sorry , 8 or 10.
We slightly pull the headlight towards ourselves and remove 2 plugs, one from the turn signal (by prying the latch towards the top) and one common (by pressing the latches on both sides). That’s it, we have the headlight in our hands. We turn the headlight upside down with the glass, remove the rubber bands from it, disconnect the terminals of the low and high beam lamps, remove the latches from the lamps and take out these lamps. We take out the turn signal lamp and the sidebar lamp.
Remove the 4 latches securing the glass to the headlight housing (some may have 6 of them) by prying them off with a flat screwdriver,
and take out the glass. Now we have access to the reflector and mask. To remove the mask, you need to remove the reflector. The reflector is held on 3 hinged mounts (for adjusting the direction of light vertically), which, in turn, are screwed onto 4 self-tapping screws “under an asterisk”.
We have a choice: to disconnect the 3 hinges. You can unclip the fastening using a flat-head screwdriver
and at the same time pull the reflector towards you, and so on from 3 sides, alternately. Or unscrew the 4 screws and remove the reflector along with the hinges. It’s not so easy to separate the hinges inside the headlight, and I was afraid of breaking them, so I went with the second method... It’s not difficult to unscrew two screws, the third one is a little more difficult, but the fourth one (the one in the low beam) will not be very easy to unscrew, because .To. it is "in the depths". I unscrewed it with a flat screwdriver (swearing))) After removing the reflector, you can start removing the mask itself. To do this, you need to unscrew 3 more self-tapping screws, also for an asterisk, but with a slightly smaller diameter.
Next, take out the mask. The chrome was difficult to remove, so I didn’t remove it completely, but simply covered it with fine sandpaper.
Well, then the actual painting of the mask. I wrote more about painting in this post, the principle is similar. After painting, if possible, leave it to dry longer. Now let's put everything back together in reverse order. And if, like me, you went the second way, then I advise you to do so so as not to have to worry about tightening the screws on the assembled headlight: on the removed reflector, it is not difficult to separate the hinges using a flat screwdriver; after disconnecting, you need to screw part of the hinge to the reflector,
Source: https://prodemio.ru/razbor-fary-kalina-1/