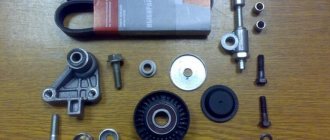
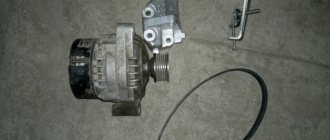
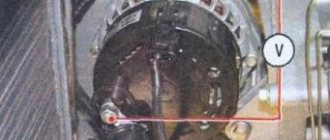
Disassembling the unit
AvtoVAZ products have always been distinguished by a certain number of defects in the production process, and the Lada Kalina model was no exception to the rule. After about six months of operation, various breakdowns and malfunctions are revealed. The most serious problem is the Kalina generator, which fails on almost all new cars. As a rule, this happens after 5-10 thousand kilometers.
AvtoVAZ management is aware of the existence of a similar problem. It considers it a flaw in the car assembly process. In particular, the car plant refers to a batch of defective generators that were installed on the Lada Kalina. The management emphasizes that they use low quality bearings. But not a word is said about the generator bracket, although it is its design that is the main source of all troubles.
Perhaps in the future this problem will actually be solved by AvtoVAZ designers, but now owners of domestic cars have to fix the breakdowns themselves. You can repair the Kalina generator yourself if you understand a little about the design features of the unit and acquire the necessary tools.
Removing and disassembling the Lada Kalina generator
Disconnect the wire terminal from the negative terminal of the battery.
Remove the generator belt (see “Checking the condition and replacing the generator drive belt”).
By pressing the lock of the generator pre-excitation wire block. . disconnect the block from the voltage regulator connector.
Using the “13” socket, unscrew the nut securing the wire lugs to terminal “B+”. . and remove them from output.
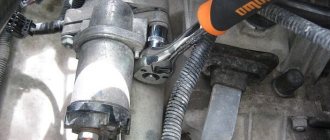
Using a 17mm socket, unscrew the bolt of the lower mounting of the generator and remove it. Remove the nut from the generator bracket.
Using a 13mm socket, unscrew the nut of the bolt for the upper mounting of the generator.
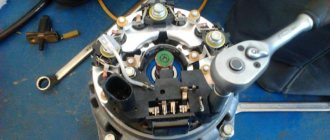
. and remove the generator. We disassemble generator 5132. 3771 to replace the voltage regulator, rectifier unit, rotor, stator and bearings.
Using the “8” socket, unscrew the three nuts securing the casing.
. and remove the casing.
Remove three metal washers from the casing mounting studs.
Using a slotted screwdriver, unscrew the two screws securing the voltage regulator terminals.
Using the “8” socket, unscrew the two nuts securing the voltage regulator.
. and remove the regulator.
We use a marker to mark the relative positions of the generator covers.
Using a 7-point socket, unscrew the four bolts holding the covers together.
Remove the back cover with the stator assembly. If the stator does not come out of the front cover, pry it off with a screwdriver from different sides relative to the front cover.
We put a high “24” head on the pulley fastening nut and through its hole insert a “8” hexagon into the hole of the rotor shaft. We unscrew the pulley fastening nut, holding the tool head with a pipe wrench or in a vice.
Remove the spring washer
. and a spacer washer.
Push the rotor shaft out of the front cover.
. and remove the cover to replace the front bearing.
. Using a slotted screwdriver, unscrew the four screws securing the bearing pressure plate.
Remove the pressure plate.
Use your hands to push the bearing out of its seat.
. and remove it. If it is not possible to push out the bearing, we knock it out using a mandrel or tool head of a suitable diameter.
To replace the rear bearing...
. Using a two-jaw puller, press the bearing from the rotor shaft. When performing this operation, the puller screw should be pressed exactly into the center of the shaft so as not to damage the plastic insulator of the rotor slip rings. To install the puller grips, two flats are made on the plastic rotor bushing.
If it is necessary to remove the rectifier unit or stator.
. We unsolder the six terminals of the stator winding from the terminals of the rectifier block. . and, having unscrewed the three fastening nuts with a “8” wrench, remove the rectifier unit and the stator.
Using a tester, we check the stator and rotor windings for open circuits and short circuits to the housing (see “Checking the generator”).
We assemble the generator in the reverse order.
To install the rear bearing, rest the front end of the rotor shaft on a wooden block.
. and press the bearing onto the rear end of the shaft using a mandrel or a piece of pipe of a suitable diameter, applying force only to the inner ring of the bearing. If the front bearing cannot be inserted into the generator cover...
. We press it in with a suitable tool head, applying force to the outer ring of the bearing.
Video on the topic “Lada Kalina. Removing and disassembling the generator"
Removing the generator from Kalina and troubleshooting. Generator Lada Kalina, Priora. repair Replacing the slip rings of the VAZ Kalina generator. How to remove the generator.
- Registration
- Entrance
- To the beginning of the forum
- Forum Rules
- Old design
- FAQ
- Search
- Users
- List of forums AUTOLADA.RU
- “Tenth” family (VAZ-2110, VAZ-2111, VAZ-2112) and LADA PRIORA
The bearing installation location is rolled. When removing the bearing there will be chips, and then you won’t be able to fix it. So along with the lid. Bearings with boots, I don’t remember the numbers, they usually know them in stores. In Kuzmich’s surveys, he started a dozen topics on design flaws, write there that starters and generators don’t run more than 80,000.
150 thousand - original gene (changed the diode bridge and voltage regulator) and original starter (changed only the retractor)
