The VAZ 2108 device, like any other vehicle, involves powering electrical circuits from a battery. To ensure that the battery is always in good condition and does not let you down at the most inopportune moment, a generator is always connected to it.
The battery is especially important when the engine is ignited; while driving, when the car develops sufficient speed, the entire electrical circuit is powered by the generator.
When the question arises about connecting additional powerful electrical appliances to the car, it is very important to match their load with the permissible power of the generator. To do this, it is important to know its technical characteristics. And if the battery lack of charge indicator suddenly lights up, it’s better not to even look under the hood without understanding how the electrical charging circuit, voltage regulator and ignition work.
After reading today's article to the end, you will learn about the connection diagram and dimensions of the VAZ 2108 generator, the main reasons for failure and how to check the voltage in the circuit. If trouble happens to the generator, then don’t worry, we will clearly show you the process of removing and installing it.
VAZ 2108 generator circuit
The VAZ-2108 generator has a rather massive stator winding, since it uses a large cross-section wire. It is with its help that electricity is generated. The wire is wound evenly over the entire inner surface of the stator into recesses specially provided for this purpose in the magnetic core.
It’s worth talking about the latter separately. The middle part, the generator stator, consists of a series of thin metal plates pressed tightly together. They are often boiled on the outside to prevent separation.
- Alternator. The 37.3701 or 94.3701 series can be installed.
- Negative diode.
- Additional diode.
- Positive diode.
- Alternator warning lamp, also known as battery discharge lamp.
- Instrument cluster.
- Voltmeter.
- Relay and fuse box located in the engine compartment in the compartment between the engine and the vehicle interior.
- Additional resistors built into the fuse mounting block.
- Ignition relay.
- Egnition lock.
- Accumulator battery.
- Capacitor.
- Rotor winding.
- The voltage relay is located in the engine compartment.
Pros of switching to an injector
There are quite a lot of positive aspects when switching from a carburetor to an injector. The main reasons are the following:
- Saves fuel by supplying it directly to the engine cylinder.
- Engine power increases, especially at low speeds.
- Increases stability at idle speed.
- Carbon dioxide emissions into the atmosphere are reduced by using 90% of the total potential of the fuel mixture.
The injection system is considered more modern and environmentally friendly. It ensures compliance with Euro-2 standards, which a carburetor engine cannot boast of. Due to the presence of a special controller, even when running cold, the car will start easily and operate stably.
It is worth noting that the injector also has its drawbacks. Among them:
- demands for good fuel;
- more complex diagnostics and maintenance;
- high cost of repairs.
Technical characteristics of the VAZ 2108 generator
The following generator models are installed on VAZ 2108 cars:
- 3701
- 3701
Technical characteristics of the first:
- The value of the delivered current (at 6000 rpm-1 and a voltage of 13 V) – 55 A — The voltage value – 13.6 – 14.6 V
- Rotor rotation direction – right – Maximum rotor speed – 13000 rpm-1
- Engine/generator gear ratio 1/2.04
Technical characteristics of the second:
- The value of the delivered current (at 6000 rpm-1 and a voltage of 13 V) – 80 A — The voltage value – 13.2 – 14.7 V
- Rotor rotation direction: right
A normally working, serviceable generator of VAZ 2108, 2109, 21099 cars and their modifications produces a voltage in the range of 13.6 V - 14.6 V. This can be visually tracked using a voltmeter on the instrument panel, but it is better to measure the voltage with a voltmeter (multimeter, autotester
Disassembling the device
For disassembly you will need the following tools:
- set of wrenches;
- bearing puller;
- vice.
With their help, the disassembly process will significantly speed up. When starting work, you need to unscrew the hardware securing the rotor shaft with a 19mm wrench. Usually they are secured very tightly, so you will have to put in a lot of effort. In the process of unscrewing the fastener elements, it is important to remember their location, so it is recommended to make a rough sketch on paper. This diagram will help you not get confused when assembling the device.
Place the generator with its back side up and unscrew the 4 fastening elements using an 8 key. This way you can open the front part of the generator housing. There is a bearing located there, which is secured using plates. Unscrew the hardware securing its plates and release the bearing from its seat.
If it does not give in, it is necessary to help it with a wooden strip, the size of which coincides with the dimensions of the bearing. The undisassembled part of the generator will need to be secured in a vice and the back of the housing will need to be pulled to release the element. All that remains is the rotor shaft and another bearing, which are removed using a puller. To do this, you need to place the tool on the bearing and release it from the shaft seat.
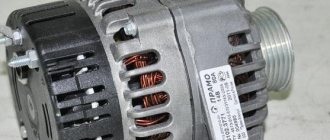
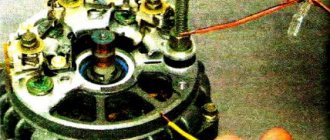
Generator parts: 1 – voltage regulator assembled with brush holder for generators produced since 1996; 2 – voltage regulator and brush holder for generators produced before 1996; 3 – terminal block for additional diodes; 4 – insulating bushings; 5 – rectifier block; 6 – contact bolt; 7 – stator; 8 – rotor; 9 – spacer sleeve; 10 – inner bearing mounting washer; 11 – drive side cover; 12 – pulley; 13 – outer bearing mounting washer; 14 – coupling bolt; 15 – front rotor ball bearing; 16 – bushing; 17 – cover from the side of the slip rings; 18 – buffer sleeve; 19 – clamping sleeve; 20 – capacitor
If you have diagnosed bearing wear, you need to write down their markings and purchase new ones. There is no need to go to the spare parts store, taking bearings with you. It is not recommended to listen to advice from sellers about similar bearings that will also work. Buy products that strictly comply with the markings of original parts.
Having dealt with the bearings, you will need to check the diode bridge, which is located inside the back of the device housing. If mechanical damage or oxidation is detected on the surface of the part, you need to dismantle the bridge by unscrewing the 4 fastening elements and replace it with a new one. The cost of all the above-mentioned parts does not exceed 800-1000 rubles. in total, so you can replace everything at once if possible.
Reasons for failure of the VAZ 2108 generator
Experts believe that the main reasons for the failure of the VAZ 2108 generator are:
- voltage regulator failure;
- damage to the diode bridge (aka rectifier);
- wear of current collecting brushes;
- defects in the charging circuit wires;
- damage or operational wear of the pulley;
- wear of slip rings or commutator;
- short circuit of individual turns on the stator winding;
- bearing failure.
Every self-respecting car enthusiast should understand what causes generator malfunctions most often and how they can be dealt with. It is also necessary not to forget that timely prevention helps to avoid serious problems. Towards the end of the article, we will look at some tips that will help you learn how to test the generator yourself. But let's first learn about the internal structure of the node.
Principle of operation
The principle of operation is this: you turn the key in the lock, and current flows to the excitation wire. The magnetic field that the armature creates penetrates the stator windings, at the terminals of which voltage appears. When the armature reaches a sufficiently high rotation speed, which is provided by the pulley and belt drive, the so-called self-excitation mode occurs.
The rectifier unit converts alternating current into direct current. The voltage regulator starts working when the crankshaft speed changes (accordingly, the armature rotates faster or slower) and regulates the time for which the field wire is turned on. Sometimes a generator malfunction may occur due to a blown fuse in the circuit.
How to check the voltage of the VAZ 2108 generator
In order to check the performance of the VAZ 2108 generator, you need to perform the following steps:
- Using a voltmeter, diagnose the voltage at the battery terminals. When the engine is running and the generator unit is operating normally, this parameter should be around 13.8-14.5 volts.
- Try placing your palm on the unit body with the engine running, you need to feel the vibration. If there is vibration, you will notice it immediately. Moreover, it may be due to wear of bearing parts.
- It is also necessary to diagnose the tension of the device strap, while the motor must be turned off. Press the strap with your finger - the deflection should be no more than 1.5 cm
Dismantling the electric generator
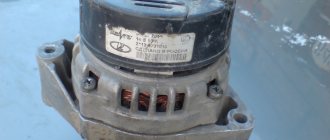
Before removing the generator, you will need to turn off the engine, turn the steering column all the way to the right and look under the hood. On the 2108, the device is located in the lower part, to the left of the engine, next to the cooling radiator. Once you have located the generator, be sure to free the battery terminals before starting work. If you suspect brush wear, you should first remove the charging relay, which is located on the back of the generator housing.
It is secured with two bolts. After unscrewing the hardware and disconnecting the contact plug, you need to inspect the condition of the brushes. If their resource is exhausted, you will need to purchase a new charging relay. This is determined by simply measuring the length of the brush; its size must be at least 4 cm. When the brushes are in working condition, it is enough to fasten the relay back. In case of other problems, you will need to completely dismantle the generator itself.
First of all, you need to disconnect the wiring, which is divided into 2 parts. The first one includes two red wires, they are connected to the back of the generator housing and secured with hardware. The second part consists of one red wire, it is connected to the generator terminal using a plug on the same side of the device. Having disconnected both wiring, you need to dismantle the generator in a certain sequence.
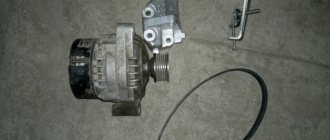
First, the hardware that is attached to the belt tensioner bar (on top of the generator) is untwisted. Then the nut securing the same bar to the motor block is unscrewed. After this, you need to unscrew the nut that secures the generator bracket to the engine block. Next, remove the device belt and unscrew the hardware securing the generator to the car body. After completing these steps, you can remove the generator with a slight movement and begin disassembling it.
Interchangeability of the VAZ 2108 and VAZ 2106 generator
The idea of replacing a generator on a classic is as old as the history of the car itself, because everyone who installs more bells and whistles on their own car than a weak Chinese radio, the native 42A G-221 is no longer enough for everyone.
True, even those who neglect the hassle of installing a more powerful generator are annoyed by the weak low beam at idle and poor battery charge. Once, an acquaintance fitted me with a 55A generator on a ball and the idea arose about telling you how to install it in our classic.
Having scoured the Internet to find at least something about installing and connecting it to a car, I didn’t find anything useful, a lot of comments like “Plug it in and forget it” or long discussions of professional electricians, but they spoke in a language that would suit a simple Russian to a person, it’s like a Chinese song, nothing is clear.
In this regard, it was decided to write an understandable article for ordinary people in order to help them do this simple procedure of replacing the generator themselves, without any problems and special skills in working with electricity, but with their hands. It is important to know: There are many alternatives to a standard generator, since with the appropriate skills, means and desire it is possible to install any generator. In the provided article I examine only “economical” VAZ generators from other models, because:
- They are cheaper.
- They are more common.
- They are easier to change - you don’t need to find or make any special fasteners and completely change the electrical system.
Standard option
Which generator is better to install on VAZ 2106 and 2107? The question is quite complicated. It needs to be considered starting with the most common option. After all, any manufacturer will say that it is the standard version that should be installed on the car. Let's look at the features of the standard version G221.
In this type of relay generator, the regulator is installed separately from the brush assembly. This makes it easier to troubleshoot some problems to some extent. The advantage is the ease of installation, there is no need to adjust the wiring for connection, everything is done according to the standard scheme. But such a generator is low-power; it produces a charge of a maximum of 42 A, which is not enough for most modern batteries.
From all this, we can conclude that a standard generator is certainly good. But, if you have additional devices, it is not very profitable to use it. It is best to choose a more powerful option.
This generator is intended for use on Niva cars. It is capable of delivering 50 A of current, which is quite enough for full-fledged electrical work. It differs from a standard “six” generator in the presence of a built-in regulator relay. Here it is assembled into one unit with brushes. Therefore, to install it on a VAZ 2106, you just need to make some minor modifications. This electric machine is installed on 2107 without any special interference or modifications.
There are several ways to refine such a generator. The easiest way would be to install brushes from the G221 generator. They fit perfectly in place of the relay assembled with the brush assembly. No modifications are required, this allows you to install such a generator, even for people without special skills. It is possible to install the G222 with a standard regulator, but to do this, you will have to redo the generator connection diagram. Otherwise, nothing will work out.
How to remove the generator on a VAZ 2108 yourself step by step instructions
In order to remove the VAZ 2108 generator with your own hands, you must perform the following procedure:
- In order to easily remove the VAZ 2108 generator, it is necessary to remove the engine protection.
- During the dismantling process, the VAZ generator must be removed together with the bracket, since its fastening bolt will be impossible to pull out due to the position of the body side member.
- Now disconnect all electrical terminals from the generator
- Then you need to loosen the adjusting nut and the generator mounting nut from below.
- Move the generator forward and remove the loose belt
- Unscrew the bolt and remove the adjusting bar
- We find it at the bottom of the engine compartment (shown in the photo) and unscrew the two bolts securing the bracket.
- Then, carefully pushing down, remove the VAZ 2108 generator
- After repairing or purchasing a new generator, we install it in the reverse order, taking into account the fact that the long bolt securing the bracket should be closer to the generator drive.
- After completing the installation of the VAZ 2108 generator, tension the drive belt
Options for replacing a broken unit
The main thing to remember is that to replace a broken generator, it is forbidden to take the first one you come across. Failure to comply with this rule will lead to lengthy and expensive repairs of the VAZ 2107 or other modifications. The most common modification is G-221. To carry out a technically correct replacement, it is necessary to study the following manufacturer’s recommendations:
- Replacing a VAZ generator is possible using a unit from modification 2105. The maximum current level is 55 A, which is suitable for cars with a small number of consumers. Replacement does not imply modifications or modifications.
After the car owner decides on the power, it is necessary to install the device correctly. Car mechanics recommend exercising extreme caution. Poor installation of the generator leads to many problems during subsequent operation.
Source
How to install and connect a VAZ 2108 generator - step-by-step instructions
Installation of a new generator is carried out in the reverse order. Take a close look at the condition of the bottom bolt. If there is damage to the threads, it is better to replace it.
It will be easier for you to repair the generator later. When installing, pay special attention to belt tension. If it is not tensioned enough, your battery will not charge well. But if you tighten the belt too much, the bearing in the front cover will be destroyed. As a result, you will get an unpleasant whistle when the engine is running. And the reason for this is the appearance of play in the bearing.
The installation of the generator on the VAZ 2108 must be carried out in such a way that even the slightest distortion does not occur.
