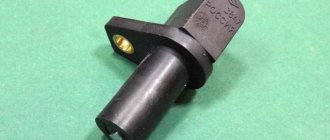
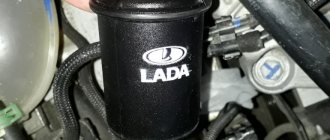
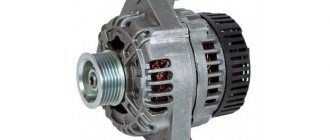
Lada Kalina cars are equipped with generators of two brands - 5132.3771 or 9402.3701-06. The standard Kalina generator is a three-phase alternating current device, which has a built-in rectifier unit and an electronic voltage regulator.
There are very different reviews regarding the quality and reliability of the devices with which these cars are equipped during factory assembly. If the unit fails, you can replace or repair it yourself.
Generator check
To check the generator set, start the engine and increase the speed to approximately 3000 rpm-1.
We turn on all consumers: – external lighting, high beam headlights, heater fan, heated rear window, windshield wiper, etc.
We take a voltmeter and measure the voltage on the battery, this needs to be done together. One maintains engine speed, and the second assistant measures the voltage.
The voltage must be at least 13 V. If the voltage at the battery terminals is less than 13 volts, then the generator windings are faulty (open or shorted). The voltage regulator may be faulty or the rotor slip rings may be oxidized.
To make sure that the voltage regulator is working properly, turn off all consumers except the high beam headlights and measure the voltage on the battery again.
The voltage must be at least 14 volts. If the voltage is less, the regulator should be replaced. The regulator can be changed without removing the generator.
For removal of the voltage regulator, see the article “Generator Repair”.
To check the valves of the rectifier unit, it is necessary to disconnect the wires from the battery, generator and the “+” terminal of the voltage regulator.
We take a conductor, connect it to the “+” of the battery, and through a light bulb (1-5 W, 12 V) connect it to the “B+” terminal of the generator, and connect the “minus” to the generator housing.
If the light is on, then there is a short circuit in both the block of positive and negative terminals of the valves.
To check the short circuit in the positive valves “+” of the battery, we connect it through a light bulb to the “B+” terminal of the generator, and connect the “minus” valve to the terminal of one of the phase windings of the stator.
If the lamp is on, one or more positive diodes are broken.
To check the short circuit in the negative valves, “+” of the battery is connected through a light bulb to the output of one of the phase windings of the stator, and “minus” to the generator housing.
If the light is on, one or more negative valves are broken or the stator windings are shorted to the generator housing.
In order to prevent short-circuiting of the windings, remove the generator from the car and, having disconnected the windings from the voltage regulator and rectifier unit, check them for short-circuits using a lamp or ohmmeter.
To check for an open circuit in the stator windings, connect the tester probes (in ohmmeter mode) to the terminals of the stator winding.
If the ohmmeter shows infinity, then there is a break in the winding. We also check the other two windings.
To check for a short circuit between the stator windings, connect the tester probes between the terminals of the two windings.
The ohmmeter should show infinity, otherwise the windings are short-circuited.
Check the other two windings in the same way.
To check whether the stator winding is shorted to ground, connect the tester probes to the winding terminal and the generator housing.
The ohmmeter must show infinity, otherwise the winding shorts to ground. Check the other two windings in the same way.
Inspect the stator windings. There should be no signs of overheating on the winding insulation, which is a consequence of a short circuit in the valves of the rectifier unit.
If there are signs of overheating on the windings, the stator must be replaced
To check for a break in the rotor winding, connect the tester probes to the slip rings. If the ohmmeter shows infinity, then there is a break in the winding.
To check the short circuit of the rotor winding to ground, connect the tester probes to the slip ring and to the rotor shaft (or pulley).
The ohmmeter should show infinity, otherwise the winding is shorted to ground
1200 rub. for the photo report
We pay for photo reports on car repairs. Earnings from 10,000 rubles/month.
Write:
Checking the generator voltage regulator may be necessary when problems with the battery begin to occur. In particular, it began to undercharge or overcharge. When such a malfunction occurs, it’s time to check the generator voltage regulator relay.
The task of this simple device is to regulate the voltage of the electric current that is supplied from the generator to the battery. When it fails, the battery is either not charged enough or, on the contrary, overcharged, which is also dangerous, since this significantly reduces the battery life.
Agree that this prospect is not very good because of one small detail.
This is why it is so important to monitor the operating condition of the voltage regulator (it can also be called a pill or a chocolate bar). But in order to properly check the voltage regulator, you need to know its type and several important features.
Why did it happen so?
Perhaps the automatic requests do not belong to you, but to another user accessing the network from the same IP address as you.
You need to enter the characters into the form once, after which we will remember you and be able to distinguish you from other users exiting from this IP. In this case, the page with the captcha will not bother you for quite a long time. You may have add-ons installed in your browser that can make automatic search requests. In this case, we recommend that you disable them.
It is also possible that your computer is infected with a virus program that is using it to collect information. Maybe you should check your system for viruses.
If you have any problems or would like our support team, please use the feedback form.
Replacing the alternator belt
Domestic cars have been and remain popular among car enthusiasts. Therefore, current issues relating to spare parts and their replacement in case of wear and breakdown require detailed consideration and study. One of these spare parts is the Kalina generator belt. Usually it is changed every 30-60 thousand km of the car.
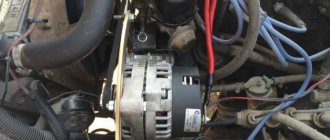
A car generator is a device that recharges the battery and maintains the voltage necessary for the system to function. After starting the engine, the battery partially consumes its charge, but due to engine operation, energy is returned through transmission through the generator.
It is noted that the professionalism of the driver directly affects the power of the generator. Also, in the process of converting the mechanical energy received from the engine into electrical energy by the generator, the operation of all electronic devices of the car is ensured.
Kalina has a lot of devices and systems that require electrical energy. It is required to turn on the ignition system, operate both low and high beam headlights, to be able to use air conditioning, which is indispensable in the warm season, and, of course, to maintain the battery charge at the required level.
Popular faults
If the car cannot start, and you hear that the engine compartment begins to hum and howl, or the car periodically stalls with or without load, this may indicate a breakdown of the generator. Removing and disassembling your humming generator is the last thing; first you need to understand the main faults and causes. There may be two types of breakdowns that require repair of generators - mechanical and electrical types.
The main mechanical damage includes breakdown of fasteners, the device body, problems in the operation of bearing devices, pressure springs, and belt drive. In principle, there are very different reasons for the malfunction of a mechanical generator, but one way or another, they are not related to the electrical part. As for electrical breakdowns, these include malfunctions of windings, diode bridges, failure of brushes, short circuits, breakdowns, problems with relay operation, etc.
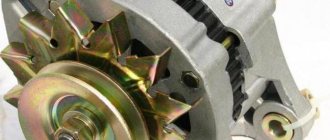
Diode bridge of a car generator
As practice shows, quite often symptoms indicating a failure of the generator device may appear as a result of other problems. For example, if there is a poor connection in the fuse connector, you may think that the problem is with the device. But the same symptom can appear as a result of burnt out contacts in the ignition switch. In addition, if the device failure lamp is constantly on, this does not mean that there are problems with the generator, since this may indicate a relay failure.
What are the signs of a generator malfunction:
- With the engine running, the low battery light began to blink. It can also burn continuously.
- Do-it-yourself generator repair can be done when the battery boils over.
- When the optics are operating, dimmer illumination is noticed. Also, when the engine is running, rattling noise may occur. In turn, when the driver presses the gas pedal, that is, the engine speed increases, the brightness of the optics increases significantly. As a rule, this manifests itself when re-gassing, but the optics, which began to work brighter, no longer work brighter.
- The generator is humming. If the generator howls or hums, this primarily indicates its malfunction, which must be resolved as quickly as possible.
- Repair of car generators should also be carried out if the car periodically stalls. If the generator howls and the car stalls while driving, this may indicate a lack of voltage. Of course, when the car stalls while driving, the driver will first check the battery, but if the battery is charged, it is necessary to diagnose the generator unit (GU).
Generator Voltage Regulator Relay
In what cases is it necessary to replace a generator or repair and maintain it?
The generator will need to be disassembled for the following faults:
- Mechanical damage or pulley wear. If the damage is quite significant, then the generator pulley is replaced.
- Disassembling the manufacturer's generator in case of wear or damage to the current collection brushes.
- Failure of the generator slip rings (commutator wear). Usually replacing slip rings is done with your own hands without any problems.
- Failure or problems with the regulator.
- Removal of the generator and its repair should also be carried out when the turns of the stator winding are short-circuited.
- Servicing of generators should be carried out when the bearing parts are completely destroyed or worn out.
- Malfunctions of the diode bridge of the generator will also lead to its disassembly and repair. The main signs of a diode bridge malfunction are a weak spark at the spark plugs, as well as reduced battery voltage.
- Various damage to charging network cables.
Circuit for measuring voltage at battery terminals
Replacing bearings
AvtoVAZ cars are very often subject to fair criticism from the owners of cars produced by this company. The Lada Kalina model was no exception to the general rule. Almost all current converters installed on cars of this brand break down after 10 thousand kilometers, after which the generator requires repair or replacement.
As practice has shown, the cause of many breakdowns is not only the bearings, but also the Kalina generator bracket. Car owners often fix this problem on their own. Doing this with certain skills is not so difficult.
To repair the generator, it is necessary to disassemble it. To do this, use a screwdriver to hook the tips of the stator wires and pull them out a little from the springs of the diode bridge. Then unscrew the bolts that attach the diode bridge. After this, the connecting bolt is unscrewed.
After disassembling the generator, check whether the rear bearing is in good condition. To do this, you need to twist its outer ring. If it rotates easily, without noise or rattle, and there is no play, then the bearing is in good condition. At the slightest suspicion of a malfunction, it is better to replace the bearing.
Next, you need to dismantle the Kalina generator bracket. Using a screwdriver, the stator is picked up and removed from the device casing. The bracket includes a bearing, which should also be checked. If a malfunction is detected, the part must be replaced.
The front bearing of the unit is rolled into its casing. Although AvtoVAZ does not recommend changing it, it would still be more advisable to do so, because otherwise you may then need to buy an expensive new generator for Kalina.
The bearing is removed by removing the pulley and spacer plug. After this, the rotor is removed from the rubber using a hammer, and the front casing of the unit is clamped in a vice. The bearing is carefully removed.
How to remove the generator on the LADA Granta
The “Grants” generator has to be removed for various reasons: for repair, maintenance, modification of the unit. You can do this without the help of others if you know how to remove the generator on the Grant. Depending on the modification of the car (8 or 16 valve engine, presence of air conditioning), the procedure for dismantling the generator has its own characteristics, so it is worth considering each option separately.
How to remove a generator on an 8-valve Grant without air conditioning
The following will be useful for work:
Before removing the generator on a Grant without an air conditioner, you should disconnect the ground from the battery by removing the negative terminal. The procedure is as follows:
- unscrew the 2 rear bolts securing the motor protection;
- unscrew the 4 front motor protection bolts;
- remove the engine protection (mudguard) from the car;
- disconnect the wiring block from the generator;
- remove the protective cap of the nut holding the power wire;
- unscrew the nut and disconnect the generator power cable;
- unscrew the top nut securing the “Grant” generator;
- press out the generator with a mounting spatula and remove the upper mounting bolt;
- unscrew the lower bolt securing the generator;
- move the generator away from the engine with a mounting blade and remove the lower mounting bolt;
- move the generator towards the right mudguard;
- remove the generator belt from the unit pulley;
- pull out the generator;
- Remove the alternator belt from the crankshaft pulley.
To put the LADA “Grant” generator in place, you need to perform the steps in reverse order.
Important: when installing the generator belt, make sure that the pulley grooves and the groove tracks on the belt match
How to change the generator on a 16-valve Grant
The generator mount on the 16-valve Granta variation is distinguished by the presence of a belt tensioning mechanism. Therefore, the procedure for replacing the generator on this model is slightly different. To work, you will need socket wrenches 8, 10 and 13. As when dismantling the generator from the 8-valve Granta, before starting work you need to remove the ground terminal from the battery to eliminate the possibility of a short circuit.
Removing the generator
Lada Kalina
, change the armature contact rings.
Replacing the slip rings of the VAZ Kalina generator. How to remove the generator.
How to remove the generator
for 16th grade Kalina
.If you have any questions, you can ask them in the VKontakte group -…
After this, you need to remove the engine protection by unscrewing the 4 front and two rear bolts securing it to the body parts. The 16-valve “Granta” generator is removed as follows:
- disconnect the block from terminal “D” on the generator;
- remove the rubber cap covering the “B+” terminal of the generator;
- Using a 10mm wrench, unscrew the nut holding the wire tip;
- loosen the tension bar nut using a 13mm wrench;
- by rotating the tensioner adjusting bolt counterclockwise, loosen the tension on the Grant generator belt (a 10mm socket wrench is required);
- move the generator towards the engine and remove the belt from the pulleys;
- Unscrew and remove the adjusting bolt of the belt tension mechanism from the generator mounting bracket;
- remove the tension bar;
- unscrew the lower nut securing the “Grant” generator;
- remove the spacer bushing and remove the lower mounting bolt;
- remove the tension bar;
- pull out the LADA Granta generator.
Disassembling the device
To disassemble the generator, you need to perform several simple manipulations:
- Remove the drive pulley. Try not to lose the key.
- Unscrew the nuts from the back cover that secure all parts of the structure.
- Remove the voltage regulator. At the same time, evaluate the condition of the brush assembly.
- Disconnect all parts of the generator.
After this, you can begin to carry out repairs.
Bearings often fail, especially the one located in the front cover. The reason for this is excessive belt tension. To make a replacement, you need to unscrew four screws and press the bearing out of its seat. Instead, install a new bearing. To increase reliability, change both rollers at once.
Replacing generator brushes for Lada Kalina sedan (VAZ Kalina)
If the voltage regulator unit, capacitor and not a tight fit of the brushes are faulty, or if they are worn out, the vehicle's supply voltage deviates from the norm. In this case, it is necessary to check the above listed elements and, if necessary, replace them. In this article we will talk in more detail about diagnosing and replacing generator elements in a Lada Kalina car.
To remove the Lada Kalina voltage regulator you will need the following tool:
flat-blade screwdriver, 8mm and 10mm open-end wrenches and 7mm, 8mm and 24mm socket wrenches, hammer, soldering iron, universal meter (with DC voltmeter and megger)
Checking the functionality of the voltage regulator on the Lada Kalina generator
1. Move aside the rubber insulating cover of the positive terminal from the generator.2. Start the engine and allow the engine to warm up so that the vehicle operates normally at idle speed.3. Measure the voltage between the positive terminal and the body (negative terminal). The voltage should be 14.5-15.1 volts.
If there is a deviation from the specified range, the voltage regulator must be replaced. See also checking the Lada Kalina generator regulator in the section “Replacing the voltage regulator”
Checking the functionality of the Lada Kalina generator capacitor
The capacitor is usually checked with a specialized meggometer, since not all universal devices have a measurement of up to 10 MoM. The device is set precisely in the range of 1-10 MΩ. Before connecting to the capacitor, the device shows infinity. If connected to a working capacitor, it begins to charge and an electric charge accumulates on its plates - current flows and, accordingly, the resistance on the device drops. After charging it (saturating the capacitor plates), the resistance again becomes infinite.
Replacing the voltage regulator Lada Kalina
carried out as follows
1. Disconnect the negative cable from the battery.2. Disconnect the excitation block from the generator.
3. Disconnect the positive terminal from the battery by unscrewing the nut.
4. Remove the factory seal from one of the screws holding the plastic casing and remove the screws. Remove the protective plastic cover.5. Remove the two screws securing the regulator and remove the voltage regulator.
6. Check the ease of movement of the brushes. They must protrude at least 5 mm from the voltage regulator housing.7. You can check the voltage regulator by connecting a 12 V lamp to its outputs and applying a voltage in the range of up to 12 volts to its inputs, while the lamp should light and the voltage is more than 12 V to 16 V.
If the voltage is too high, the lamp should go out. If this algorithm does not work, then the regulator must be replaced. Installation of the regulator is done in the reverse order.
Replacing the rectifier unit with a capacitor Lada Kalina
1. Using a soldering iron, unsolder the six leads and remove the 3 bolts.
2. Remove the rectifier unit from the generator. Installation of the rectifier unit is carried out in the reverse order
Checking diodes on the rectifier block Lada Kalina
1. Dodas are checked with a universal device. (6 diodes in total) Connect the black “negative” probe to the negative plate, and the positive “red” probe alternately to the three contact terminals of the diodes. The resistance should be 580-620 Ohms.
Attach the red “positive” probe to the negative plate, and the negative “black” probe alternately to the three contact terminals of the diodes. The resistance should be 580-620 Ohms.
Checking the windings of the Lada Kalina generator
1. Check the generator windings with a device. All windings should have approximately equal resistance, without significant deviations. Deviations indicate a break or short circuit.
Any electrical equipment fails sooner or later. Thus, the most common generator malfunction on the Lada Kalina remains the regulator relay. Replacing this element is not difficult, but requires certain knowledge and skills.
Video on replacing the voltage regulator relay on a Lada Kalina:
This video story tells about replacing the generator regulator relay on a Lada Kalina, the nuances of installation and configuration.
When is it time to change?
On Lada Kalina cars, the manufacturer does not regulate the replacement of this part. However, its failure is a common problem. In particular, we are talking about Lada Kalina cars. This applies to both 16-cl and 8-cl engines.
This is what a deformed element of a Kalina generator with an 8-cyl internal combustion engine looks like
Therefore, let’s look at the signs that indicate that the belt may fail in the near future:
- Whistle when moving. As a rule, this whistle appears when the electrical appliances of the vehicle begin to load. For example, if you start the car, and when you press the gas, a loud whistle is heard from the engine compartment, this indicates that the belt is loose. In this case, it must be tightened using a tensioner or replaced.
- Cracks on the strap. If you open the hood, look at the belt and see cracks on it, then you know that it’s time to change the element. Neither tensioning nor adjusting the rollers will help here. The component can be tightened, but this will not be enough for a long time. The only option left is replacement.
- Deformation. As in the previous case, neither tightening the tensioner nor adjusting the rollers will give much effect. You just need to change the element.
- Noise when the engine is running. If the element has already served its service life, this can be understood by the noise that appears when the motor is running. For example, some Lad Kalin car owners report loud knocking and even impacts when the engine is running.
The assembly is disassembled: this is what the strap looks like on the shafts
If the vehicle is equipped with a generator sensor that determines its performance, then it will be easier to identify the malfunction. For example, if you heard a whistle from under the hood, and at this time the indicator on the sensor came on, then you need to pay attention to the strap. This indicates that the belt needs to be tightened, since it may be in a weak state or that its service life has been exhausted.
New Lada: Topic: Turn signal fuse blows. Where is the source of the problems?
One way or another, if the slipping and whistling of the strap cannot be eliminated by adjusting the belt or rollers, it needs to be changed.
Changing the generator regulator relay on Lada Kalina
A three-phase voltage regulator (charging relay) is installed on the generator. Responsible for maintaining the voltage of the on-board network within a given limit in all operating modes.
Failure is considered one of the most common problems associated with the operation of the generator. Replacing an element does not require practical skills.
Replacement process
The process of removing the generator on Kalina depends on whether it has a tensioner on it or not. A belt without a tensioner can only be removed together with the generator or simply cut (if it’s old).
- Disconnect the negative wire from the battery.
- Loosen the generator and remove the belt.
Use a 13 key to loosen the tensioner and remove the belt.
By pressing the latch, we snap off the plastic block.
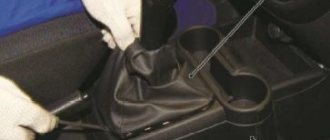
Lift the boot and unscrew the nut by 10.
The mounting bolts are located at the top and bottom of the generator.
The latches are located on the side surface of the cover.
Mounting the regulator relay: 1 – contact under the bushing, 2 – bolts securing the relay body.
View of the generator with the relay removed.
After assembling the unit, it is necessary to check the reliability of the wire connections and tighten the generator belt.
Critical wear of the brushes on the old relay.
Briefly about articles and applicability
The same 9402.3701-06 or 9402.3701-14 (14 V, 85 A) were predominantly installed on Kalina, Granta and Priora. Part numbers of compatible voltage relays:
- KZATE "Orbita" (Saransk) 849.3702, costing 500-750 rubles.
New voltage regulator made in Saransk.
Important ! On Priors with a generator 3701010, which has an output current of up to 115 A, the voltage relay is not interchangeable with the Kalinovsky one!
Causes and symptoms of malfunction
The regulator will need to be replaced if the part fails. This can happen for several reasons:
- A short circuit in the circuit that led to its breakdown. This happens quite often, since the “relay” is a power source, and there is no fuse between it and the rotor.
- Brushing of brushes resulting from friction against the rotor.
You can find out about problems with the operation of the generator, in particular with the charging relay, by changing the voltage of the on-board network.
In practice, during the operation of the car this is determined by the following symptoms:
- Headlight beams of different brightness. When you press the gas pedal they light up brighter, at idle they dim.
- An undercharged battery will affect the morning start-up. The starter turns much harder than usual.
Overcharging of the battery due to increased voltage. It can affect you in several ways:
- Electrolyte boiling in jars. It will manifest itself as a sharp, unpleasant odor emanating from the battery;
- Frequently blown fuses. If they are missing, the “weakest” part of the wiring will burn out (places with pockets of copper oxidation, poor contacts).
Traces of electrolyte are visible along the edges of the battery. This occurs due to overcharging.
Preparatory stage
Before you begin replacing the generator in Lada Kalina, you should first prepare the necessary set of tools and materials. The list includes:
- open-end or ring wrenches of different diameters;
- small and large ratchets;
- brushes for cleaning the interior;
- wrench with extension.
Only after preparing the instruments can you proceed directly to the procedure.
About the principle of operation of a car generator
The operation of the Lada Kalina generator unit is based on the following principle: an alternating current is induced in the stator winding, which is subsequently transformed into direct current through a rectifier module located on the body of the unit. The generator cover is also equipped with an electronic voltage regulator and a brush holder. The rotor of the device receives torque from the crankshaft pulley. The transmission link is a poly V-belt.
The basic characteristics of the generator set include the following parameters:
- maximum generated current – 85-90 Amperes;
- operating range of on-board voltage – 14.4-15.1 Volts;
- rotation ratio of the motor and rotor – 1:2.4;
- right-hand direction of rotation.
The housing of the unit is held together by pins that tighten the stator with the covers. The mounting sockets of the indicated covers contain bearings, which ensure the ability of the rotor to rotate.
The rear bearing is installed inside the cover with a minimum gap. The front element is equipped with the ability to slide along the surface of the rotor shaft. It is fixed inside the front cover with a slight interference fit, and a pressure plate covers it from the outside.
The back of the device is protected by a plastic casing.
Let's move on to the switching diagram of the generator with the on-board network. The connection diagram is very simple. After turning on the ignition, power begins to flow to the voltage regulator through the battery discharge lamp circuit. When the motor starts, the excitation winding is supplied with supply voltage from three diodes mounted in the rectifier unit.
Using the indicated signal lamp, the generator unit can be checked. If the device is working properly, the lamp lights up when the ignition is on. It goes out when the engine starts.
When this phenomenon is not observed and the lamp continues to shine, the generator set should be diagnosed for the presence of malfunctions.
In some cases, replacement is required, and many are interested in how to remove the generator?
How to replace a generator set?
How to remove the generator? In some cases, repairing the generator unit is impractical or cannot restore the functionality of the device.
Replacement is required here. The process itself is not an intricate undertaking, so it will not take much time from the owner of the Lada Kalina.
For a successful replacement operation we will need:
- Remove the belt, first loosening the tension element.
- Disconnect the plug together with the cable terminals.
- Unscrew the nut securing the upper section of the unit and remove the bolt.
- Use the same method to remove the bolt at the bottom of the device.
- Remove the generator unit from the engine compartment.
Replacement and installation of a new device is carried out using the reverse algorithm.
The generator must always be in good working order
Any modern car is equipped with electrical equipment that is absolutely necessary for the vehicle:
- without a starter it is impossible to start the engine;
- a car cannot be driven without lighting at night;
- The heater motor creates heat in the cabin;
- The wiper motor clears the windshield of rain and snow;
- FM radio makes it possible for the driver not to get bored on the road.
But all these devices cannot work without electricity, so the car must have a power source.
The current from which all consumers in the car are powered is produced by the generator, and the performance of the entire electrical circuit of the vehicle depends on its condition.
Therefore, the generator must always be in good working order, and if any breakdowns occur with it, they must be eliminated in a short time.
Which generator is better to put on a VAZ 2110
VAZ 2110 factories install KATEK generators with a current of 80 A. The service life is 140,000 km, which is approximately 10 years of vehicle operation. Answering the question of which generator is better to install on the VAZ 2110, experts recommend products from Russian manufacturers.
What to consider when choosing
- Russian manufacturer or foreign? Of course, first of all, Russian manufacturers are preferable. If only because it is easier to find spare parts in the event of a minor breakdown. If you purchase a generator for a VAZ 2010 from a not so popular company, it may be difficult to find spare parts, and they will not cost you so much.
- Current strength. Factory models for VAZ 2010 - 3771 or 94.3701 - are designed for 80 A, this current is enough, even if there are additional devices that consume it. More powerful ones - 120 A - are installed in the presence of powerful acoustics, no harm is done to the battery, and you will provide all energy consumers with uninterrupted current.
- It is better to purchase a generator if there is a warranty on it. There may well be a defective product, and the warranty will provide the opportunity to replace it with a new one.