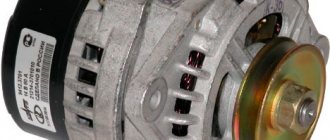
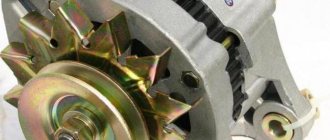
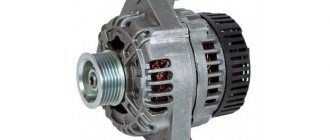
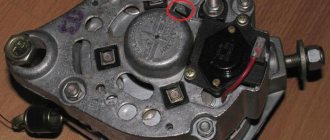
Which generator is better
put on VAZ
2106
and 2107? Several variants
Probably wondering which generator is better?
install on VAZ 2106 and 2107. After all, the standard device has some shortcomings that negatively affect the performance. Standard generators were developed quite a long time ago, and they were not designed for significant volumes of energy consumers. The office one used a couple of light bulbs and a starter. It is clear that with a larger number of devices, the generator cannot cope with its obligations.
We have to find a suitable replacement for him. For this purpose, it is important to take into account what remains for our client to do about the electronic circuits of the machine. The new device must fit this list one hundred percent.
Which generator is better to install on VAZ 2106 and 2107?
The question is quite difficult. It is necessary to consider it, starting with the development of the most ordinary option. Any manufacturer will say that a specific standard version must be installed on the car. Let's look at the features of the standard version G221.
Here, in the type of relay generators, the regulator is installed separately from the brush assembly. This, within certain limits, simplifies the work to eliminate certain defects. The advantage is the ease of installation; there is no need to adjust the wiring for connection; our client can only do it according to the standard scheme. However, such a generator is low-power, it produces a maximum charge of 42, which is not enough for the majority of modern batteries.
Replacing the VAZ 2106 generator with a more powerful one.
From all this, they conclude that the standard generator is naturally excellent. However, if you have additional devices, it is not entirely profitable to use it. It is best to choose a more powerful option.
This generator is intended for use on Niva cars. It is capable of delivering 50 A of current, which is enough for real electrical work. Its difference from a standard “six” generator is the range of built-in regulator relays. Here it is assembled into one unit with brushes. For installation on VAZ 2106
, it is very important to make small improvements. This electronic machine is installed on 2107 without any special interference or modifications.
VAZ Generator Replacement
If you have set a goal to MAKE EARNING ON YouTube You must: 1. Make your own channel 2.7. Connect it to AIR by filling out .
There are several methods for modifying such a generator. The most common would be to install brushes from generator . They are perfectly installed in the area of the relay assembled with the brush assembly. No modifications are needed, this allows you to install such a generator, even for people without special abilities. It is possible to install the G222 with a standard regulator, but for this purpose you will have to redo the generator connection diagram. Otherwise, nothing is possible.
Replacing the VAZ 2106 generator with a VAZ 2107.
> myth the device is quite often installed on 2106, 2107. This is all due to its greater efficiency, it produces a charging current of 55 A, which is quite enough for the majority of motorists. If your car has more than just equipment, then it is better to choose something more powerful.
These generators are similar in terms of mounting, so there will be no problems with the installation itself. This is if you remember to remove the terminal from the battery. The fun starts when you connect. What remains for our client to do, what exists, that 4 wires are connected to the native device. There are only 3 for the “eight” one. This is all connected with the integrated voltage relay. To obtain the usual result, you need to insulate the dark wire, and connect the others as usual. While the generator is operating, the light indicating the discharge will glow. This is a common occurrence with this connection. Accordingly, it should fade away in the absence of charging.
By and large, this is already an option to drive, but if you want to do everything possible, as expected, you will have to make some more modifications. We remove the old relay and replace it with an ordinary power relay. Now the light will glow only when the engine starts, and at low speeds, which is completely acceptable.
To install on a VAZ 2107 you will only need to add a power relay.
Fans of various additional equipment require an even stronger “gene”. Of course, they should be advised to install a device from a VAZ 2107i. > myth the unit produces 80 And this is quite enough to perform the work of all electronic systems added by the owner. In purchasing such a generator
, please note that there are a number of their varieties. For installation on a VAZ 2106, only model 2107-3701010 is suitable; on carburetor “sevens” there is an option to install any generators of this series.
Replacing the VAZ 2101 generator with a more powerful one.
It is better to modify the device for installation on the “six”. For this purpose, the relay regulator is replaced with a similar one from G222. The connection is quite similar to working with a figure-of-eight generator.
Conclusion
. Initially, rather weak generators were installed on the “sixes” and “sevens”. But, in the process of technology development, their power was no longer enough to provide adequate power to the car. So the question arose, which generator is better to install on the VAZ 2106 and 2107. Fortunately, there is plenty to choose from. The next generations of devices are perfect for old Zhiguli cars after a little modification.
Recent Entries
BMW 530e Hybrid revised for 2022
The BMW 530e PHEV has been updated with a new battery, improved efficiency, lower emissions and increased electric power range. The hybrid BMW 530e was
Watch a plane crash land on a public road, caught on police dash cam
Starman Adventures Is a Big Hit Among Teslas - SpaceX Fans
New deal offers drivers a free car - life-saving brakes for drivers up to £1,600
Categories
Test Drive
Ferrari Portofino 2019 review
Ferrari Portofino. this is a super stallion that you will ride every day Maximums Spectacular gearbox with excellent shift mechanics
Options for replacing a broken unit
The main thing to remember is that to replace a broken generator, it is forbidden to take the first one you come across. Failure to comply with this rule will lead to lengthy and expensive repairs of the VAZ 2107 or other modifications. The most common modification is G-221. To carry out a technically correct replacement, it is necessary to study the following manufacturer’s recommendations:
- Replacing a VAZ generator is possible using a unit from modification 2105. The maximum current level is 55 A, which is suitable for cars with a small number of consumers. Replacement does not imply modifications or modifications.
After the car owner decides on the power, it is necessary to install the device correctly. Car mechanics recommend exercising extreme caution. Poor installation of the generator leads to many problems during subsequent operation.
Generator VAZ 2106: purpose and functions
A car generator is a small electrical device whose main task is to convert mechanical energy into electrical current. In the design of any car, a generator is needed to charge the battery and feed all electronic devices while the engine is running.
Thus, the battery receives the necessary energy for engine operation from the generator, so we can say that the generator is an indispensable attribute in the design of any car.
How exactly does the generator work on a VAZ 2106? All processes of energy conversion from mechanical to electrical are carried out according to a strict scheme:
- The driver turns the key in the ignition.
- Immediately, the current from the battery through the brushes and other contacts enters the excitation winding.
- It is in the winding that the magnetic field appears.
- The crankshaft begins to rotate, from which the generator rotor is also driven (the generator is connected to the crankshaft by a belt drive).
- As soon as the generator rotor reaches a certain rotation speed, the generator enters the self-excitation stage, that is, in the future, all electronic systems are powered only from it.
- The generator performance indicator on the VAZ 2106 is displayed in the form of a control lamp on the dashboard, so the driver can always see whether the device has enough charge for full operation of the car.
Design of the G-221 generator
Before talking about the design features of the VAZ 2106 generator, it should be clarified that it has unique clamps for mounting on the engine. On the body of the device there are special “ears” into which studs are inserted and tightened with nuts. And so that the “ears” do not wear out during operation, their internal parts are equipped with a high-strength rubber gasket.
The generator itself consists of several elements, each of which we will now consider separately. All these devices are built into a light-alloy cast housing. To prevent the device from overheating during long-term operation, the case has many small holes for ventilation.
Winding
Due to the fact that the generator has three phases, windings are installed in it immediately. The purpose of the windings is to generate a magnetic field. Of course, only special copper wire is used for their manufacture. However, to protect against overheating, the winding wires are covered with two layers of heat-insulating material or varnish.
Relay regulator
This is the name of the electronic circuit that controls the voltage at the output of the generator. The relay is necessary to ensure that a strictly limited amount of voltage reaches the battery and other devices. That is, the main function of the relay regulator is to control overloads and maintain an optimal voltage in the network of about 13.5 V.
Rotor
The rotor is the main electric magnet of the generator. It has only one winding and is located on the crankshaft. It is the rotor that begins to rotate after the crankshaft starts and gives movement to all other parts of the device.
Generator brushes
The generator brushes are located in brush holders and are needed to generate current. In the entire structure, it is the brushes that wear out the fastest, since the main work of generating energy falls on them.
Diode bridge
A diode bridge is most often called a rectifier. It consists of 6 diodes that are placed on a printed circuit board. The main job of a rectifier is to convert alternating current into direct current to maintain stable operation of all electronic devices in the car.
The pulley is the driving element of the generator. The belt is tensioned simultaneously on two pulleys: the crankshaft and the generator, so the operation of the two mechanisms is continuously interconnected.
Generating Device Replacement Procedure
Before starting work, check the serviceability of the regulator relay. It is advisable to choose a model with the highest possible temperature compensation. This characteristic allows models 2106-2107 to operate at high speeds without failure. This indicator should be studied especially carefully if the VAZ 2106 or later modifications are used in areas with a hot climate.
Removing a broken device and installing a new one does not cause problems, thanks to the clear mounting method.
Difficulties arise at the stage when you need to connect a new VAZ generator. To begin with, the wires coming from the relay regulator are disconnected and subsequently insulated. Further connection of the VAZ 2108 generator is carried out as follows.
The wires, formed in the form of a ring terminal, are connected to the old place in the VAZ 2108. It is imperative to insulate the gray wire, which is not connected anywhere. Completes the installation procedure by connecting the yellow wire to the terminal. If the car owner was unable to find a device with the required power, then a model from a VAZ 2108 to a VAZ 2106 can be installed, provided that the total power of consumers is taken into account.
Careful attitude and regular preventive inspections will ensure long-term reliable operation of the machine. Even with a slight drop in speed or problems when starting the engine, there is a reason to look under the hood. The faster this is done, the less likely it is that the problem will spread further.
Technical characteristics of the VAZ 2106 generator
The “six” comes from the factory with a G-221 generator, which is classified as a synchronous alternating current device. The device is fixed to the engine on the right side, but it can only be adjusted or changed from under the body, since it is difficult to get to the generator from above due to the presence of many hoses, devices and instruments.
The nominal voltage of the G-221 corresponds to the voltage of a typical VAZ battery - 12 volts. The generator rotor rotates to the right (when viewed from the drive side), since this feature is due to the position of the generator relative to the crankshaft.
The maximum current that the VAZ 2106 generator is capable of delivering at a rotor speed of 5000 rpm is 42 amperes. Power indicator - at least 300 watts.
The device weighs 4.3 kilograms and has the following dimensions:
- width - 15 cm;
- height - 15 cm;
- length - 22 cm.
Possible causes of malfunctions
There are several common reasons that require the driver to look under the hood of the “iron horse”:
- partial or complete combustion of the VAZ 2107 winding;
- cases of interturn short circuit;
- physical wear of parts;
- external physical influence;
- mechanical damage.
Inexperienced drivers of the VAZ 2108 or earlier modifications need to remember one nuance. When choosing lighting fixtures, you need to take into account their power. For example, if you decide to install fog lights, the power of which is 40-50 W each, you should look at the technical description of the VAZ 2106 or 07. Their installation is allowed only if the vehicle’s generator produces more than 55 A of current.
Failure to comply with this rule leads to dire consequences. The increased load of the VAZ generator leads to its rapid wear. The power of the unit gradually decreases, which is mistakenly perceived as a minor breakdown. That is why the total power of all voltage consumers should not exceed the maximum current level of VAZ 2107, 08 or 06.
The problem described above leads to another one - improper charging. The 2107 passenger car is designed in such a way that the generator is charged while driving. All electricity consumers are selected taking into account the power of the device. If individual elements are replaced without taking into account their power, the VAZ generator receives less energy than necessary.
What generators can be installed on the “six”
Structurally, the VAZ 2106 is ready to install a generator not provided by the manufacturer. The question arises: why change the “native” G-221 at all? In fact, for its time, this generator was the optimal device, since Soviet Zhiguli cars used a small number of electrical appliances.
However, over time, the VAZ 2106 began to be equipped with more modern devices, each of which requires “its share” of energy . In addition, drivers connect navigators, cameras, pumps, powerful audio systems and other devices to the battery, which makes it difficult for the generator to generate the required amount of current.
Therefore, car owners began to look for equipment options that, on the one hand, would allow all the equipment in the car to operate in normal mode and, on the other hand, would have an optimal effect on the battery life.
Today the following types of generators can be installed on the VAZ 2106:
- G-222 is a generator from the Lada Niva, which is designed for higher loads and produces 50 amperes of current. The G-222 design already has its own regulator relay, so when installing it on a VAZ 2106, the relay will need to be removed.
- G-2108 can be installed on both “six” and “seven” and “eight”. The device in normal operation produces 55 amperes of current, which even by modern standards is quite enough for the functioning of all electronic devices in the car. The shape and fasteners of the G-2108 are identical to the standard G-221, so there will be no problems with replacement.
- G-2107–3701010 produces 80 amperes and is intended for lovers of high-quality acoustics and additional electronic devices in the car. The only caveat: the generator for the VAZ 2106 will have to be slightly modified, since the regulator relay is not suitable for this model.
How does the generator 2106 2107 work?
Correct operation of the generator 2106 2107 ensures the proper functioning of all vehicle devices. According to the attached operating instructions, the technical condition of the VAZ 2106 generator is checked at least once every 4 months. Failure to pay attention to this requirement leads to wear and tear of the device. As a result, the question of which generator is better to install on the VAZ 2106 becomes relevant.
If the car is involved in an accident or major repairs, it is imperative to ensure that the device is in working order. Otherwise, the voltage drop will cause serious damage to all electricity consumers in the car. In most cases, a VAZ generator malfunction can be repaired in a garage.
Generator connection diagram
Being an electronic device, the generator needs to be connected correctly. Therefore, the connection diagram should not cause double interpretation.
A schematic diagram of exactly how the G-221 is connected to a VAZ 2106 can be viewed here.
Many car owners wonder when replacing a generator where which wire should be connected. The fact is that the device has several connectors and wires, and when replacing, you can easily forget which wire goes where:
- orange is not useful for connection, it can be left as is, or connected to gray directly to autostart the car;
- a gray thick wire goes to the brushes from the regulator relay;
- a gray thin wire connects to the relay;
- yellow - coordinator of the control light on the control panel.
Thus, when working independently with the G-221, it is better to sign the meanings of the wires so as not to connect them by mistake later.
Tuning the “classic” series VAZ 2101 – VAZ 2106 – replacement of the standard generator
In general, it would be unfair to accuse the generator of the G-221 model, previously installed on VAZ 2101 - 2106, of low reliability or of the fact that it cannot cope with providing energy to the car in its basic configuration. At the same time, it should be recognized that the maximum 42A produced by this generator cannot be considered too impressive and already on the VAZ 2106 model, in which the high beam, compared to previous versions, is “heavier” by 100W, the characteristics of the G-221 are at the limit . If we talk about even minimal tuning of classic VAZ cars, such as installing additional electricity consumers in the form of powerful fog lights, a modern sound system, heated mirrors, etc., then you can practically forget about regular battery recharging using the G-221. The optimal solution in this situation is to replace the G-221 generator with its more powerful analogue.
Generator malfunctions on VAZ 2106
Like any other mechanism in a vehicle, the “six” generator can work incorrectly, break down and fail. However, cases of unexpected breakdowns are extremely rare, since the driver can always track the occurrence of a “disease” by noticing its first signs.
The charging indicator light came on
There is a lamp on the instrument panel that indicates the functionality of the generator. It can blink or stay on continuously. In any case, the activation of this indicator is considered the first signal of a malfunction in the generator.
| Cause of malfunction | Remedies |
| Slipping of the generator drive belt Break in the connection between plug “85” of the charge warning lamp relay and the generator The battery charge warning lamp relay is misregulated or damaged Break in the power supply circuit of the excitation winding The voltage regulator is misaligned or damaged Wear or freezing of the generator brushes; oxidation of slip rings Open circuit or short circuit to ground of the excitation winding of the generator Short circuit of one or more positive diodes of the generator Open circuit in one or more diodes of the generator Open circuit in the connection between plugs “86” and “87” of the charge control lamp relay Open circuit or interturn short circuit in stator winding | Adjust the tension of the generator belt Check and restore the connection Check the relay, adjust or replace it Restore the connection Clean the contacts, adjust or replace the voltage regulator Replace the brush holder with brushes; wipe the rings with a rag soaked in gasoline Attach the winding leads to the slip rings or replace the rotor Replace the radiator with positive diodes Replace the generator rectifier unit Restore the connection Replace the generator stator |
Battery won't charge
The generator can work, but the battery is not charging. This is the main problem of the G-221.
| Cause of malfunction | Remedies |
| Weak tension of the generator belt: slipping at high speeds and when the generator is running under load. The fastening of the wire lugs on the generator and battery is loose; battery terminals are oxidized; Wires are damaged Battery is faulty Voltage regulator is misaligned or damaged | Adjust the tension of the generator belt Clean the battery terminals from oxides, tighten the clamps, replace damaged wires Replace the battery Clean the contacts, adjust or replace the regulator |
The battery is boiling over
If the generator connection is poor, there may be a problem with the battery.
| Cause of malfunction | Remedies |
| Poor contact between ground and voltage regulator housing Voltage regulator is misaligned or damaged Battery is faulty | Restore contact Adjust or replace voltage regulator Replace battery |
The generator is very noisy
The device itself should make sounds during operation, since the rotor is constantly rotating. However, if the operation sound is extremely loud, you need to stop and find out what's wrong.
| Cause of malfunction | Remedies |
| The generator pulley nut is loose The generator bearings are damaged Inter-turn short circuit of the stator winding (generator whine) Brush creaking | Tighten the nut Replace the bearings Replace the stator Wipe the brushes and slip rings with a cotton cloth soaked in gasoline |
Generator operation diagnostics
All diagnostic procedures can be carried out both on the removed device and directly in the car. Before starting work, be sure to remove the wires from the battery and generator.
To diagnose the rectifier unit, disconnect the regulator wire. If you don't have an ohmmeter, you can use a battery and a test light. On the ohmmeter, the needle should point to “infinity”, and the control light should not light up. This indicates that the valves are working properly.
We carry out general diagnostics of the device . You need to check if the valves are broken. To do this, we attach the “plus” of the device to pin 30, and the “minus” to the body. If the device shows zero, this indicates a short circuit, which is a consequence of a breakdown of the valve.
Clarifying diagnostics. We check the resistance of the negative valves. To do this, we attach the “plus” to one of the mounting bolts, and connect the “minus” to the body of the device. A short circuit or breakdown is indicated by a reduced resistance.
To check the positive valves, you need to attach the “plus” of the ohmmeter to terminal “30”, and the “minus” to one of the mounting bolts. If the resistance is low, you can judge that the valve is broken.
In such cases, the easiest way is to replace the entire rectifier unit. Of course, you can replace individual diodes, but this is a labor-intensive process that includes re-coring. Only a specialist can handle this work.
Rotor winding diagnostics
First remove the brush holder (the procedure is described below).
We find a window on the device cover through which you need to check for a short circuit. We connect one terminal of the device to the ventilation impeller, and the second to the winding.
In a similar way, you need to check whether there is a break in the winding. To do this, we connect the ohmmeter leads to the contact rings.
How to check the generator
Checking the functionality of the device will give the driver confidence that it is working properly and there is no cause for concern.
It is prohibited to check the generator on a VAZ 2106 when it is disconnected from the battery while the engine is running, as a voltage surge is possible. In turn, instability of operation can damage the diode bridge.
Checking the functionality of the generator can be done in various ways. The most common are:
- checking with a multimeter;
- at the stand;
- when using an oscilloscope.
Self-check with a multimeter
This technique is the simplest and does not require special devices or extensive knowledge of how the car works. However, it is necessary to purchase a digital or indicator multimeter, and also enlist the help of a friend, since the test involves the work of two people at once:
- Set the multimeter to DC measurement mode.
- Connect the device to each battery terminal in turn. The voltage should be between 11.9 and 12.6 V.
- The assistant should start the engine and leave it idling.
- At this time, the measurer must carefully monitor the multimeter readings. If the voltage in the network drops sharply, it means that the generator is not working fully, or its resource is not enough to charge.
- If the indicator is more than 14.5 V, the driver needs to know that such operation of the device will in the near future lead to the boiling of the battery.
Testing at the stand
The check is carried out on a computer stand by service station specialists. In this case, the generator will not need to be removed from the car, since the computer is connected to the device through special probes.
The stand allows you to simultaneously check a working generator in all respects with high accuracy. Current performance indicators will be displayed on the computer screen, so the car owner can determine the “weak” points of his generator in real time.
Checking with an oscilloscope
An oscilloscope is a device that reads basic voltage readings and converts them into waveforms. The device screen displays curved lines, from which a specialist can immediately identify defects in the operation of the generator.
Criteria for choosing car generators
- Maximum power . Power is one of the main characteristics of VAZ generators. It must ensure an uninterrupted supply of current and supply electricity to the battery, which is discharged due to the operation of regular electricity consumers at low speeds of the power unit. To perform basic tasks, the device must have the required power. The required indicator is indicated in the vehicle operating instructions.
- Current strength . The factory generator installed in the car is not designed for a large number of additional consumers, but at the same time it has a certain reserve. If the autogenerator is “not enough,” then before purchasing a new device, first inspect the old equipment, clean the contacts, check the bearings, etc. You shouldn't use 120A generators in every car. First of all, it's expensive. Secondly, the current may be excessive. Such power-generating devices are installed in tuned cars with a powerful acoustic system.
- Dimensions . Before purchasing, it is also worth comparing generators by overall dimensions. The device must be compact with high technical characteristics.
- Noise level . The generator should not make too much noise during operation. This “disease” often affects high-power generators that are sold at a low price. One of the main reasons for the appearance of extraneous sounds (hum) is the poor quality of bearings, which wear out quickly.
- Availability of guarantee . If there is a warranty, you can exchange a faulty device for a new one if it is defective.
How to remove, disassemble and repair a generator on a VAZ 2106
The G-221 generator on the “six” cannot be called a simple device. Therefore, in order to carry out certain repair work, careful preparation will be required, since you will have to first remove the device from the car and then disassemble it.
Removing the generator from the car
To quickly and safely remove the G-221 from the machine, it is recommended to prepare the tools in advance:
- open-end wrench 10;
- open-end wrench 17;
- open-end wrench 19;
- mounting blade.
Repair of under-hood power plant
Removing the generator is a simple procedure. However, to perform it you will have to crawl under the car. In addition, it is better to remove the battery in advance, as it will interfere with unscrewing the nut securing the device to the adjustment bar.
- We roll the car into a hole or lift the right front part of the car with a jack and place bricks under it. Don't forget to put the car in gear or put the handbrake on.
- We remove the crankcase protection if it interferes.
- Slightly unscrew the nut of the lower mounting of the generator.
- We get out from under the car and loosen the nut on top that secures the unit to the adjustment bar.
- We push the generator towards the engine and remove the drive belt, first from the pump pulley, and then from the generator and crankshaft pulleys.
- We finally unscrew the nut securing the unit to the adjusting bar and remove it together with the washer.
- We climb under the bottom again, unscrew the cap of contact “30”, then disconnect the remaining wires and remember where to plug them in later. If the memory is bad, we mark everything with a marker.
- We finally unscrew the nut securing the generator from below, remove the bolt with one hand, and support the device with the other so that it does not fall.
- We pull the generator down, after tilting it.
Generator belt
Of course, the G-221 will not work without a drive belt. The belt for the VAZ 2106 generator is 10 mm wide and 940 mm long. It is wedge-shaped and toothed in appearance, which allows it to easily cling to the teeth of pulleys.
The belt resource is designed for 80 thousand kilometers.
How to tighten a belt
Tensioning the alternator belt after installing it is considered the final stage of work. For fast and high-quality work, you will need to comply with the factory tension regulations:
- Loosen the self-locking nut (on the top of the generator).
- Loosen the lower generator fixing nut.
- The body of the device should move slightly.
- Insert a pry bar between the generator housing and the pump housing.
- Move the pry bar to tighten the belt.
- Without releasing the mount, tighten the self-locking nut.
- Then check the belt tension.
- Tighten the bottom nut.
Belt replacement
To make it more convenient to work, you will have to remove the battery.
- Unscrew the fastening nut. Using a mounting spatula, we move the device closer to the cylinders. If this is difficult to do, then unscrew the lower mounting bolt.
- Now that the generator has been moved to the engine, you can easily remove the old belt and put on a new one instead.
- We move the generator away from the engine, monitoring the belt tension. Having achieved the required tension, tighten the fastening nut to the adjustment bar.
- We adjust the belt tension more accurately. To do this, we measure the deflection in the place between the pulleys and the pump with a force of 10 kgf. It should be from 10 to 15 millimeters. And between the pump and the crankshaft it should be equal to 12 to 17 millimeters.
- Once the correct adjustment has been achieved, tighten the fastening nuts and put the engine mudguard in place.
