Every year the number of electricity consumers in cars is growing. At the same time, cars spend more time in traffic jams when the generator efficiency is minimal. Previously, a negative energy balance at idle was found on Moskvich and Volga cars, today such a “luxury” is unacceptable. Therefore, if the autogenerator fails, it is worth improving the power supply characteristics using a new energy source.
Carburetor engines
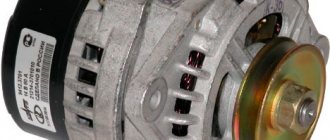
The connection diagram for the VAZ-2107 generator (carburetor and injector) depends on the year of manufacture of the car. The first carburetor models had a G-222 generator installed. The same device can be found on commercially produced VAZ-2105 and VAZ-2104 models with a carburetor injection system.
The maximum output current for such an installation is 55 amperes. But in recent years, cars with fuel injection systems have become widespread. Its use implies a large current consumption, so it is necessary to use a generator with a high current to ensure a normal charge level and power supply to all consumers.
What will it take to improve?
First of all, of course, the generator itself and the VTN type voltage relay (9111.3702). Later you will feel the difference why we chose it.
In addition, you will need a fastening mechanism from a VAZ 21214, a bracket, a bracket and a bolt for the generator itself, but from a VAZ 2110. In terms of mechanical installation, there should be no problems. The old fasteners are removed and installed in their place from Niva - anyone can do it.
The most difficult thing is the connection.
Injection engines
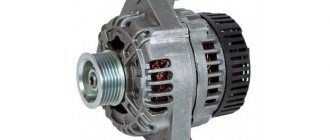
On injection engines, generator sets 5142.3771 or similar are used. They have increased energy, the maximum current is about 80-90 A, it all depends on the design option. Cars of the seventh series and similar models are good because they are like a designer set. You can install almost any generator on them, similar in design to the “native” one.
For tuning, installations with an output current of 100 amperes and higher are used. But the use of such devices is justified only if many powerful consumers are connected to the electrical equipment. Regardless of the design, the generators produce alternating current; a voltage regulator, capacitor and diode block are installed in the housing.
Cars before 1986
The G-222 generator was used in cars. The connection diagram for the VAZ-2107 is almost the same as on later models. But there are features, among the main ones - there is a control lamp indicating battery charging. Moreover, it worked using an electromagnetic relay.
When the ignition is turned on, power is supplied from the lock through the instrument panel fuse to the electromagnetic relay of the battery charge lamp and the coil contact. The second contact of the coil is connected to the center wire on the generator (the point where the three windings connect).
The electromagnetic relay has normally closed contacts, so when the ignition is turned on, the lamp lights up. But as soon as the engine starts running, the generator produces current. And a current flows through the control lamp coil, which causes the armature to attract and open the contacts.
At the same time, the power to the incandescent lamp stops and it goes out. This indicates that the battery is charging normally. Only when the power supply to the lamp stops will voltage be applied to the excitation winding and the generator will be able to return to operating mode.
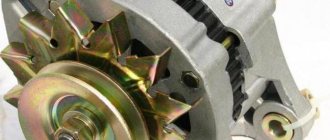
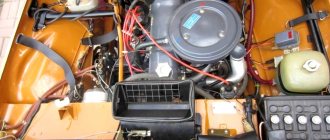
Generator VAZ 2101, 2102, 2106, 2107 CLASSIC
Generator 80A from VAZ 2110 for VAZ 2106: preparation for installation
I bought myself a generator with sufficient power. Of course, my budget is limited, the generator is not new, but in good condition.
Here are some photos of the generator.
I disassembled it, as expected, carried out an inspection, looked at the voltage regulator,
I don't see any point in changing the regulator yet.
The contact rings should be cleaned with sandpaper.
I rang the stator winding with a tool to check for a break, short circuit. onto the body, measured the resistance (just in case) between the terminals of the star.
I also checked the armature winding for an open circuit and a short circuit to the housing
I checked the condition of the bearings - one seemed suspicious, I will replace it soon.
I checked the condition of the diodes and rang them in different polarities. I think that the diode bridge will still serve.
Then, I assembled the entire structure in the reverse order of disassembly. I did not clean the contacts or coat them with grease, since I will be changing the bearing this weekend.
Overall, I'm happy with the purchase. All that remains is to replace the bearing, buy mounts for installation on the car and, in fact, install and connect, I will definitely post photos, maybe someone will find it useful.
I continue to assemble the constructor from the tenth gene. Today I purchased: - the front cover of the generator 21214 complete with bearing - 450 RUR - the lower bracket of the generator 21214 - 320 RUR - the crankshaft damper pulley 2123 - 1100 RUR - the pump pulley 2123 - 110 RUR - the tensioner bar 21214 - 56 RUR - the generator bolt 2110 - 4 4p-relay 527 - 55r - generator belt from viburnum, 6rk882 (I’ll try to install it, I’ll cut off one stream, for this I bought the cheapest =) ) - 172r - wrench for the ratchet bolt (on the injection pulley, it’s deeper) - 280r - new voltage regulator (new sample) - 112r - capacitor (just in case) - 22r
left - cover 2110, right 21214
bracket 21214 and bolt 2110 assembled with bushings
relay 527
on the left is the old one, was when I bought it, on the right is the new one
left - pump pulley 2123, right - standard
All that remains is to buy washers and try to install it on the engine, I want to try it tomorrow.
Generator 80A from VAZ 2110 for VAZ 2106: installation
0) we go through the generator: — we ring the stator and rotor windings, check for the presence of short circuit. — we check all the diodes in the diode bridge, they should ring only in one direction and show approximately the same resistance, we check the voltage relay, the condition of the brushes, I advise replacing them with new ones, immediately — we check both bearings — we change the front cover from 2110 (model 94.401-40) on the cover from the VAZ21214 (model 904.401-40) - we check the presence of all the textolite washers that separate the generator housing from the diode bridge when we screw the terminals of the star windings to the diode bridge. If some are steel, then we put a rubber band under them, in general, we insulate them with what we have at hand. — we change the capacitor (for prevention) — I cleaned all the contact connections with sandpaper and lubricated them with Litol-24 — we use washers to eliminate the rotor play in the generator housing, it should not move in the bearing axis, I had a gap of 2 mm, I eliminated it with a D17 washer. — we put on the pulley and monitor its alignment. otherwise the bearing will quickly die.
The generator is ready
1. Remove the battery from the car
2. Remove the crankcase protection and boot 3. Put the car at any forward speed, put a stop under the rear wheel to prevent the car from rolling back when we unscrew the crankshaft pulley nut. 4. Unscrew and remove all contacts from the old generator, unscrew the lower nut securing the generator to the bracket, go upstairs, unscrew and remove the tension bar of the generator. 5. Remove the electric fan, don’t forget about the wires at the sensor on the radiator (otherwise you’ll tear them off)
We take the old belt in our hands, use it to clamp the pulley on the pump and, using a 13mm head, unscrew the three bolts securing the pulley to the pump.
We screw the new water pump pulley 2123 into its original place. We take a new belt (if, like mine, it’s 6rk882, then we cut off one stream with a utility knife),
Using a belt, we lock the bolts on the pump pulley and climb into the hole.
6. Remove the bolt from the bracket, remove the generator from the car, unscrew the two bolts securing the bracket to the cylinder block and remove the bracket. Until this very moment everything was going smoothly.
7. We take the wrench for the ratchet nut and try to unscrew the nut on the crankshaft, although I did this in the summer, I could barely unscrew it. Tip: unscrew it in the same direction as all standard bolted connections (that is, counterclockwise). For convenience, I advise you to find a pipe of the required diameter and, increasing the lever, unscrew this nut. Unfortunately, we didn’t find the pipe, so, after pushing hard against the walls of the pit and suffering for a long time, I unscrewed this nut...
8. Take a new pulley 2123 from the shnivy. We check it with the old one to see if the mark for installing the ignition matches. To be honest, I spent a long time combining the pulleys so as not to make a mistake before I noticed a small mark on the pulley itself - it coincided with the mark on the old one, so I decided to take it as the correct option.
We put the new pulley in place of the old one, tighten it, after switching the speed from forward to reverse. Leave the support under the wheel in place. Tighten the nut clockwise.
9. (there is no need to do this point, I described how it worked out for me, look directly at point 10). We take the new lower bracket of the generator 21214 and place it on the block. We take the tenth bolt of the generator, the generator itself and assemble the unit (that is, we try on the generator). This is where we understand that despite the fact that the front cover on the generator is already from 21214, it still sticks out relative to the other two pulleys by about 4-6mm.
10. We remove everything that we installed (generator and bracket). We get out of the hole, go to a vice, clamp bracket 21214. Take a hacksaw and saw off the interfering part on the bracket (about 5 mm, I took it by eye, I was too lazy, and there was no time, to use the bar).
After which I tried to assemble everything again, but it turned out that I still needed to saw, so we made another notch on the bracket before installing it again.
11. We are looking for several washers slightly larger in diameter than the bracket bolt. I had a nut that happened to turn up in my hand. We take a metal sleeve with an elastic band, cut off the excess part so that they then fit into the shortened eye of the bracket.
12. We climb into the hole, install the bracket, the generator (by moving it back and placing a nut or washers), attach the bolt until it is tightened.
13. Take the belt and try it on. If your belt is longer than 883 mm, then you are happier than me. I had to first try to pull one stream (which I cut off), and my friend and I barely succeeded. I checked the alignment of all three pulleys by eye. The length of the belt is critically minimal, you need to look for a longer one, but it was already late, I had to remove this one stream and try to install the main one. It will be very difficult to install a five-ribbed belt 5rk883 alone. We installed it together: I turned the crankshaft, and my friend used a screwdriver to adjust the belt on the pump pulley. On the third try we pulled it on. This belt is still in place temporarily, because with such a tension I am afraid for the bearing on the pump. When installing, be careful - our screwdriver jumped off the pump pulley and almost pierced the radiator (deep dents were left, it was lucky that the screwdriver landed between the tubes in the radiator.
13. We get out of the hole, take the electric fan, and try it on in its regular place. Now the new pulley on the knee rests on it and does not allow it to be installed. We take metal scissors and cut off a section of 1 cm * 10 cm. We try everything on in place. Personally, I scored and folded this piece.
14. We got out of the hole, take the tension bar 21214 and put it in its normal place. Since we moved the generator back, we add a nut or washers between the bar and the generator ear.
Due to the short belt, I had to grind down the place on the bar towards the block, otherwise I simply would not have inserted the bolt.
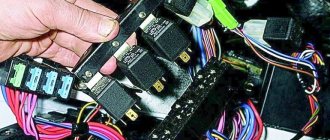
15. Now the electrical part. We take the purchased RS527 light relay, install it instead of the standard charge relay (RS702 - I had this), connect it the same way as it was. We connect the wires on the generator, those with rings - we put them on the bolt and tighten them with a nut (pin 30), we connect the yellow one to the second terminal, and we no longer need the gray one (if desired, it can be insulated).
We go around the car, completely disconnect all two contacts from the standard voltage relay, and isolate the contacts. that’s all (we don’t need the relay anymore).
16. We replace the battery, start the car and rejoice.
Idling, music on, headlights (high + low), heated rear window, interior lighting, heater on full, mains voltage 13.3 V - everything can be seen in the photo. I am satisfied with the work done.
All that remains is to buy a belt 5rk905 - 5rk940, I saw a belt from a viburnum on the BBC today, length 1018mm, maybe I’ll buy it and check it, but in the meantime, I’m looking for a belt from a UAZ, 6rk905. Daewoo Nexia also uses a 5rk940 drive belt. So far I haven’t found either one, I want to quickly change the Kalinovsky (883mm), I’m afraid that the pump will die before this belt weakens.
Generator 80A from VAZ 2110 for VAZ 2106: selection of belt length for the generator
I finally decided on the length of the belt for my new generator. I bought a 6rk905 belt for a UAZ in a store,
I thought it would be a bit short, but I bought it anyway. Just like last time, I cut off one stream. By the way, the belt from Kalina has already run 300 km in city mode, on the whole, successfully. But it’s too tight, so I would advise carrying the 6rk883 belt from Kalina only as a spare wheel. The main length of the belt (subject to: pump pulley 2123, knee pulley 2123, generator pulley 2110 of the new type with a shaft mounting diameter of 17 mm) is 905 mm. With such a length, the belt is easy to install/remove/tension/adjust.
Here are some photos for visual comparison:
belt 6rk883
It can be seen that it is short by the position of the tension bolt.
And these are dents on the radiator. First time wearing a poly V-belt. I was not prepared for such resistance - the screwdriver jumped off and almost pierced the radiator.
And this is a 6rk905 belt. As you can see, the adjusting bolt is located in the middle of the tensioner bar 21214. Now you can safely remove the belt. To remove the 6rk883 belt, I had to remove the electric fan, use a screwdriver to pry the belt on the pump and remove it by turning the crankshaft. Now the belt can be easily removed and put on without removing the fan.
The generator was pushed aside with a spray bottle. I didn’t really like it, I want to come up with a tensioner in the form of a bolt, something like a tensioner on tens. To make it easier to tighten the belt. Because today I encountered a belt whistling under full load and applying the gas. The belt is now looser. I hope the bearing on the pump didn't break.
Now, I’m thinking about ordering a 5rk905 belt online, from some foreign car, because it will last longer than the one I cut with a knife.
Installing a generator from Shniva 120A in a VAZ 2106
It was decided to install a generator from Shniva in a VAZ 2106. To install the generator I needed:
1) front cover of the generator 21214 price 500 rub.
2) lower bolt of generator 2110 price 100 RUR
3) lower bracket for generator 21214 price 300 rub.
4) tension bar 21214 price 70 rub.
5. Charging indicator relay RS 527 price 100 RUR The pulley, by the way, is also needed from 21214 Niva. I didn’t need it - I found a Chinese one from a tractor in the garage, and it fit like a homegrown one. But still, it needs to be sharpened a little. Let's go install it)
I removed the old one and installed everything new. I couldn’t take a photo of the process because my hands were dirty and I wanted to get it done quickly. Well, that’s basically what happened.
We do not connect the gray wire and disconnect the wires from the old voltage regulator and insulate them. Connection diagram to make it clearer (I stole it from someone, I don’t remember)
I was very pleased with the charge - at about 850-900
everything is off
low + high beam, heater and heated rear window
https://www.drive2.ru/l/888904/, https://www.drive2.ru/l/922970/, https://www.drive2.ru/l/969946/, https://www .drive2.ru/l/5694612/, https://www.drive2.ru/l/5703896/
next article:
Ignition timing angle for VAZ 2101, 2106, 2107 classic
Contents of the article: Adjusting the ignition timing to the compression ratio of VAZ 2101, 2106, 2107 classic Video:
Rating 0.00 [0 Vote(s)]
Cars manufactured in 1996 and later (carburetor engines)
The connection diagram for the G222 generator on a VAZ-2107 after 1996 differs from the previous one in one small feature - the power supply to the excitation winding has been changed. Cars have been improved, and some improvements make it possible to kill two birds with one stone - simplify the design and make the fate of the driver easier.
After 1996, instead of a warning lamp, they began to install a voltmeter, which more or less accurately shows the battery charge level. And if the lamp allows you to monitor only the presence or absence of voltage on the generator, then using a voltmeter the driver visually assesses the level. And if necessary, it can understand that repairs or maintenance are necessary.
Generator tuning - increasing output
What should owners of classics and carburetor “nines” do if they need more electricity? Installing heated seats, mirrors, and “music” with an external amplifier requires its own amperes, which are nowhere to be found in a jam at idle.
When there is not enough electricity only at idle, we select or grind a pulley of a smaller diameter. This will increase the output at low speeds. But you will have to avoid prolonged movement at maximum engine speed to avoid overloading the bearings.
Are the headlights shining dimly, is there not enough electricity throughout the entire operating range of the engine? Clean the battery terminals. We measure the voltage at idle speed. If it is less than 13.5 V, we will increase the voltage using a diode added to the excitation circuit. The drop across the semiconductor will be about 1 volt, so we will “deceive” the relay regulator.
The optimal charging voltage is considered to be in the range of 13.4-14.4 volts.
Is your carbureted car still running low on amps? We replace the “dynamo” with a similar model from the “injection” modification, specifying the correspondence of the mounting points. If necessary, repress the old pulley.
Example of compatibility by models (families) and generated power:
- "Samara" 2108 (55A) - 2111 (80-110 A). The option without modification is “KZATE” for 73 A.
- "Classic" 2101 (50A) - 2107 (80A). The recommended replacement is “Pramo”.
- Niva 2121(50A) - 21214 (80-100A). For example, 100-amp "Iskra"
Data on interchangeability are approximate. Any tuning is done at the owner's responsibility. Therefore, if you just want to replace a broken generator, buy the “original”. It is guaranteed to fit your car. If you love experiments, go for it, your efforts will be rewarded.
Review of generator 9402.3701-14 for VAZ-2170, VAZ-2190, VAZ-1117-1119
Generator circuit for injection engines
In fact, the design of the generator set is not much different from those installed on carburetor engines. Only the type of excitation and serviceability monitoring differ. The dashboard contains not only a warning lamp, but also a voltmeter; these two devices allow you to assess both the presence and level of charging. Current flows through the lamp filament and is supplied to the field winding when the engine starts. The connection diagram for the VAZ-2107 generator, regardless of the year of manufacture, implies operation in the following mode:
- When the ignition is turned on, power is supplied to the excitation winding. A magnetic field appears around the armature.
- When the crankshaft rotates with the starter, the generator armature also begins to move. With the help of movement and a magnetic field, a potential difference arises at the ends of the stator windings.
- From the windings, voltage (alternating, three-phase) is supplied to the rectifier unit, and from it to terminal “30” of the generator.
- Pin “30” is connected to the battery (positive terminal). Consequently, the entire electrical system is powered and the battery is charged.
In this case, the battery and generator G221A work in parallel. The connection diagram for the VAZ-2107 with carburetor and injection engines is almost identical, with only minor features.
Principle of operation
The basis for obtaining electric current is the phenomenon of electromagnetic induction. It represents the occurrence of an induction current in a closed circuit under the condition of a change in the magnetic flux penetrating this circuit. There may be several ideas for implementing a generator set. It is enough to recall all the experiments on observing EMR.
But rational and technical components impose their limitations. It is irrational to use a permanent magnet as a source of magnetic field, since it will be impossible to regulate the magnetic flux. By changing the current strength in the electromagnet, you can ultimately influence the output parameters of the induction current.
The rotor includes not only the windings of the electromagnet, but also the shaft with slip rings. Thanks to the sliding contact of graphite brushes with slip rings, the movable winding is excited. Current is supplied to the voltage regulator through one of two circuits. Initially, when the engine is turned off, the winding is powered by the battery.
The operation of the generator is monitored by turning on the lamp on the instrument panel.
When the device is operating, the potential at the generator contact and at the output of the diode bridge is the same, therefore, current cannot flow through the lamp. If the light is on, this means low voltage at the diode connector, which indicates a faulty power source. The rectified current powers the on-board network and recharges the battery.
Difference between carburetor and injection systems
Many car owners independently replaced the carburetor with an injector, and some bought a car with an already updated system. One thing is certain – this is a step forward. But this means changing the operation of many nodes. How are things going with the generator, its operation and repairs?
There are differences, albeit minor ones. The injector assumes the presence of an ECU on board the VAZ 21074. And this is another consumer of electricity. Additional wiring is connected to the generator to provide power to the elements of the electronic control system. There are no more changes.
Note
You cannot check the functionality of the generator by disconnecting the terminals from the battery while the engine is running. This will damage the ECU.
What factors should you consider when purchasing a new generator?
When choosing a generator for VAZ cars, it is necessary, first of all, to calculate the total power of all energy-consuming devices and devices in the on-board electrical network. The power of the power source must exceed this total value by 20%.
The type of engine must be taken into account when choosing a generator model. A generator paired with a gasoline engine can be compact and more economical. A diesel generator should be larger and more expensive.
The choice of generator also depends on the technology of combustion of the fuel-air mixture in engines of various types:
- In gasoline engines, fuel is supplied using a carburetor or injector. Here, the fuel-air mixture is sucked into the combustion chamber due to the vacuum created. There it is compressed and ignited by a spark from the spark plug. In this case, the supply of mixture to the combustion chamber is not regulated (does not depend on engine speed).
- Diesel engines use only an injector. Here the combustible mixture is injected into the combustion chambers under pressure and enters through the nozzles. Their opening is regulated by an electronic device (controller) with many sensors that respond to the speed of the vehicle, the voltage in the on-board electrical network and other indicators. Such engines consume less fuel, but are more energy-intensive due to the presence of auxiliary electronic devices. A car with such an engine requires a more powerful generator.
Installing a weak power source on the “injector” will lead to its rapid breakdown and damage to the battery.
Types of breakdowns
Generator VAZ 2107
What problems occur if the generator is not working properly?
- Extraneous noise appears.
- Complete lack of battery charging while the engine is running.
- Overheating and failure of the same battery.
- Damage to any or all energy consumers, including the injector.
- Increased or decreased voltage in the electrical system. The standard voltage is 13.6-14.5 V.
- Mechanical or electrical damage to the elements of the generator itself.
Obviously, this node requires special attention.
Design Features
A standard generator for AvtoVAZ JSC cars consists of the following elements:
- Back and front covers.
- Air intake.
- Brush holder.
- Rectifier block.
- Stator.
- Capacitor.
- Voltage regulator.
- Pulley.
- Rotor.
Some electric generators do not have a built-in voltage regulator. For example, this element is missing in generators for the VAZ-2101.
Main details
To understand where to look, you need to remember the main components that make up the generator. This:
- pulley;
- front bearing;
- rotor impeller;
- stator winding;
- magnetic circuit;
- rotor;
- rear bearing;
- “chocolate” (relay-regulator);
- diode bridge.
Most often, the brushes that are part of the relay-regulator unit wear out. Bearing wear is also common. You should also expect breakdowns of the diode bridge and the generator belt (which drives the pulley). Another part that requires periodic replacement is slip rings. They are located on the rotor and are in contact with the brushes.
To increase service life, you should regularly lubricate the mechanical components of the device (especially bearings), measure the voltage, the battery charge level and its condition, and tighten the fasteners. If you suspect any kind of breakdown, you must immediately begin repairs, otherwise there is a risk of failure of any connected device and component. If an injector and an ECU are installed on the car, then they do not joke with electricity. And the most ordinary care and prevention will reduce the likelihood of breakdown to almost nothing.
Characteristics of the standard generator
The main characteristics of the generator installed by the manufacturer in Niva 21214, 21213, 2121 will be considered using the example of generator type 9412.3701:
- current – 80A;
- voltage – 13.2 V,
- rotation is right.
The cost of standard models of electric generators is 5-7 thousand rubles. If the unit breaks down, it is possible to replace its components or completely replace it with the original or analogues. The prices of the most common ones are presented in the table.
| Analogue | vendor code | Cost, in rubles |
| Generator VAZ-2104-21073,21214 | 9412.3701-03 | 5900 |
| Generator VAZ-2104-21073,21214 | 372.3701-03/05 | 3800 |
| Generator VAZ 2121-21213,21214 | 9412.3701 | 5450 |
The table shows that in the process of replacing a generator on a Niva, you can give preference to a cheaper universal analogue.
What should you pay attention to?
To carry out repairs, you need to have a general understanding of electricity and its properties. If with mechanical breakdowns everything is much simpler and often a visual inspection is enough to detect a part that needs replacement, then with electrical faults there is no such clear visualization. Moreover, the initial cause of generator breakdowns may be a malfunction of another component of the VAZ 21074, for example, the same battery. And vice versa. Very often a chain reaction is detected, with damage to several nodes.
In such cases, it is important to discover the cause before taking action. Otherwise, there is no guarantee that after replacing one or another element everything will not happen again.
As mentioned earlier, you cannot check the operation of the generator on the VAZ 21074 using the old method of tilting the terminals. Don't forget about the injector and ECU.
Choosing a quality generator
To replace a failed generator, both original spare parts and analogues are used. Products from domestic and foreign manufacturers have stable quality and sufficient resources.
To extend the life of the generator, avoid forcing deep fords and do not overload the power grid with non-standard equipment. If a neighbor asks you to “light up”, do it correctly, do not allow sparks and polarity reversal.
Stable electricity and bright headlights!
Malfunctions and their elimination
Let's start with the simplest and most obvious. From the work of indicators. These are the difficulties that may arise.
Constantly lit indicator (even when the ignition is turned off)
To eliminate the problem, you will need to replace the diode bridge with a new one. The reason for this was a short circuit on it. You can try to repair it, but this requires knowledge. Replacement cost is low.
Devices and sensors do not work
To do this, you will need to check all wiring and contacts. Often the cause of such an incident is the fuse box. It is necessary to check the voltage in all areas to determine the location of the fault. If the cause is the generator, then you need to check the belt tension and the stability of the pulley. Next, the “chocolate”, brushes, and diode bridge must be checked.
The battery indicator is always on when the ignition is on
You need to start by checking the battery. In this case, the inspection is carried out both on a cooled down car and on a warm one. If overheating and boiling occurs, then you need to check the voltage regulator unit on the generator and check the wear of the brushes. We must not forget about the belt, pulley and bearings. To avoid unnecessary work, you need to measure the voltage between the generator and the battery. Most often this is a signal that the battery is not charging.
The indicator flashes
If in the previous case there is often not enough charging, here, on the contrary, there is a recharge. The regulator and brush assembly need to be replaced.
The noise may be caused by worn bearings, excessive tension or loosening of the belt. You need to make sure that all fasteners are secure and the gaskets are intact. Less commonly, the cause of this is a malfunction of the rotor or stator. And, again, the same generator brushes can make the most unpleasant sounds. In this case, they are changed or wiped with gasoline.
Voltage drops
This is best seen at night. If the headlights burn unevenly and constantly change light intensity, then the voltage regulator needs to be replaced.
Is the generator from Priora suitable for Chevrolet Niva?
Yesterday my generator died. Before this there was a strange sound, like a hum, the origin of which I could not identify. I wanted to take the car to the service center, but it came out on its own. On the way home, the charger disappeared, the steering wheel became heavy, and the temperature began to rise. Turned it off and opened the hood. I found out that the belt had come off. The generator has a pulley on the side, it itself is hot and smells. The belt is intact, the crankshaft sensor has not been blown off. I drove home in short dashes of a couple of blocks with stops to cool down. Luckily it broke down not far from home. An autopsy showed that the pulley had turned and chewed up its seat on the rotor shaft. I probably won’t repair it anymore, the bridge is alive, but it’s unclear whether there is an interturn gap in the windings and whether the new pulley will be normal.
The spare parts store has the following offer: Generator KZATE 2123 80A 9402.3701-01/04 - 4351 rubles and in the same place Generator KZATE 2110 90A 9402.3701 - 3768 rubles
Externally they are almost identical, but the second one is 90a and almost 600 cheaper. What's the catch? Marketing that the Shniva (was already) a foreign car? Are they compatible with the mounts? I want to save money, get an extra 10a and not make a mistake. The equipment of the car is almost standard. There is no winch or chandelier. There is no money for a boss either.
There is another option to take a dismantled generator with a guarantee. And if you return yours, there will be a discount. New, it is clear that used is better. This one took me a year after repair. Replaced rings, bearings and regulator. Maybe I didn’t take something into account, or maybe the winding was broken and the pulley turned due to overload.
Autotech Penza. Victory Avenue 96A. Diagnostics, auto electrics, chip tuning and much more! Sign up for diagnostics - electrician +7 (8412) 211-799 or +7 967 706 17 99 Evgeniy. Sign up for plumbing work +7(8412) 666 - 500
It is not clear how many miles the old one has. After the repair (replacement of bearings, slip rings, relay regulator) a year passed. Repair does not make sense, the pulley fit on the shaft is pulled up and the interturn of one of the stator phases is short-circuited.
I took the Priorovsky one for 115 and after the capital. The old one is counted. It became bolt-on-bolt. All that remains is to buy an excitement chip for complete happiness. At idle it was 14.1-14.2, which was not the case with the old one - it did not rise above 13.8. I'll probably throw in a pigtail of mass and re-crim the power terminals.
It's no secret that a standard 80A generator is not enough. I’ll immediately explain for those who like to joke that the plant is not fools... On a regular (with regular music) VAZ 2110 there is also an 80A generator, it’s basically enough, electrically, the Chevrolet NIVA is similar to the VAZ 2110, only on the NIVA there are double fans that consume 40A, and the starting current is even greater. So in the summer there is a very heavy load on the generator and battery. In addition, my car has air conditioning, which means that in the summer the consumption will be even greater. So, in my opinion, a 100-115A generator is needed in the fields even in the poorest configuration.
I didn’t bother and just bought a new generator KZATE 115A from Priora. I already have installation experience, you can read HERE I also bought a chip for excitement, and a new belt and rollers.
Now again I will give a small explanation. It seems that in 2022, KZATE began producing a 120A Niva generator; its difference from the Priorovsky 115A generator is only in the number of rivulets on the pulley. On the Priorovsky there are 6 of them, and on the Nivovsky there are 5. And slightly different voltage regulators (which is why additional 5a appear) otherwise the generators are completely identical. But I couldn’t find a real Nivovsky, leftist everywhere. But Priorovsky had no problems, that’s why he took it.
The main criteria that prove that this is a leftist: - often sold without boxes - if there is no passport in the box, or it is obviously fake - very poor quality of processing of the case, and windings - characteristically shiny bolts, like on Chinese products - so as not to be misleading, I’ll say right away, that even on crafts there is laser engraving on the body - the inscription on the nameplate is easily erased - bad printing of the nameplate - on the Nivovsky 120ana nameplate there should be the inscription EAC (when this generator was developed, the plant already applied this marking)
Also on the KZATE website there are performance graphs of generators. Having studied the chart, it is clear that even at XX there is already a good return.
Now regarding the installation. If the car does not have air conditioning, then everything is very simple, and is done through the top. If the car has air conditioning, then you will first have to remove the air conditioning belt through the bottom. The belt should be pressed as close as possible to the engine, and 2 rivets to the generator remain free
Hi all! It's time to take a look at our SUV's electrical system. Namely, to the generator. As you know, it powers the battery and supplies current to absolutely all devices: from the cigarette lighter to the “chandelier” or winch. The “gene” is not always changed because it is broken. So let’s figure out what and why you can do with it!
Completion
The most typical and common breakdowns were presented. For correct diagnosis in serious cases, special stands are needed, which are present in many workshops. It should be noted that sometimes the cost of such repairs can be equal to or even exceed the price of a new generator. Therefore, repair is not always the answer.
From the text it becomes clear that there are no significant differences between the injection VAZ 2107 and the earlier carburetor version. The same applies to the modification of the VAZ 21074 and all others.
Generator manufacturers claim that the generator is designed for 200-250 thousand kilometers. After passing the barrier of 100-150 thousand, it is necessary to conduct a thorough inspection and lubricate all mechanical connections.