Give it a repost, let people read it carefully, it will save nerves, a relatively “large” amount of money to repair the generator (especially “large” when there is no money at all) and the time spent on all this, a drained battery, and God forbid a fire!
The new generator works stably, but the voltage is kept low like all generators similar in design. Without consumers 13.9 volts, headlights 13.7 with the heater at speed 2 (this is not enough), and if the rear window heating is turned on with the heater speed 2 it drops to 13.2 volts. This is an ass. In the summer it may still be normal, but in winter the frozen battery not only does not charge at all for the first 15 minutes in frost minus 25, but such a low voltage is not enough for normal charging. And considering that I go to work like a donkey by 8 am (it’s usually dark here), and I leave work from the office at 5:30 pm, that is, it’s already dark again, then in fact the generator will always produce low voltage due to the headlights, heater and rear window , the battery will not hold its charge and density properly and will gradually run out...
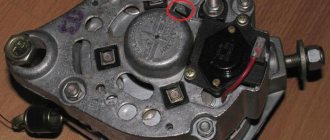
The trick of this regulator is that the voltage regulator on it looks at the voltage not at the + terminal, but at the voltage at 3 additional diodes. I know this problem, and I know how to easily solve it. Thanks for this article. Let's go to the store and buy the CORRECT voltage regulator. I read which ones work better. Exactly the one in the photo. With a square tablet. These brushes are the most stable in terms of quality and stability of work. The trick of this regulator is that it looks at the voltage at the + output of the generator. Among the additional features of this regulator: The charge indication lamp can actually show the absence of this very charge, as well as if there is an overvoltage in the event of damage to the diode bridge, for example. If this chain dies, it will still work normally. The regulator is independent. Another huge plus is that until the generator spins up, it does not get excited. And does not create a load for the engine. That is, until the engine starts, the generator does not provide a load, this is useful during cold starts when every penny of energy counts
Extremely simple installation of this regulator:
We bite off the tips and connect 2 terminals. The hole that goes to the winding should be 8mm! Read why below. it is important
I was very surprised that the tablet is noname
Don’t forget to remove the diodes or cut the jumper
Now I STRONGLY recommend paying attention HERE This applies not only to converted generators, but in general to all generators of a similar design
The fact is that these generators often burn. Well, in the literal sense, it also happens, but most often the diode bridge burns in them. As a techie, I quickly realized why. And I was very surprised at how down at the factory they came up with this design. The contact on the diode bridge is a platform. A ring winding contact is placed on top. On many generators it is soldered. Here it’s just a ring on a ring. and the MOST creepy thing is that everything is pressed with a TEXTOLITE WASHER BEHIND ITS CENTER! Moreover, the washer on top is NARROW and thin, bending it inward, and some MORONI stuck a GROVER in there! GROVER CARL! It simply bends both the washer and the tectolite washer, too. Naturally, these generators burn, since the textolite stupidly bends like a satellite dish, the 2 contacts are not pulled together normally on the diode bridge, and they need to be pulled not by the center, where they are not, but by the contacts themselves, and this edges... sort of... and...
The diode bridge just melts.
It’s enough to just walk around with the words “KZATE generator burned out,” “KZATE diode bridge burned out,” and that doesn’t only apply to them. This applies to many...whose windings are not soldered
I decided to solve this problem in advance. A washer with an internal diameter of 8mm is placed on top of these 2 connections. A piece of SOFT plastic tube, approximately 1 mm in size, maybe a little larger in location, is inserted into the washer (for centering so that it does not short to the bolt! This is ATTENTION!). This is done to press on the edges. and not behind the center. A native textolite washer is placed on top of this washer (as an insulator), on top of another metal washer, preferably thicker, with an internal diameter of 6 and an outer diameter of approximately 10. The bolt is simply screwed on top. There shouldn't be ANY GROVERS there. The plastic sleeve is needed so that the washers are centered and the bolt does not touch what is UNDER the textolite washer. That is, we get the design 1. Bridge and contact pad on it 2. Ring contact of the winding (there is an internal 8 external 10) 3. Washer internal 8 external approximately 10 4. Textolite washer 5. another washer only this time internal 6 external 10 6. Insert bolt and tighten it
Device Description
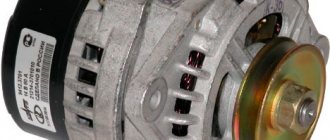
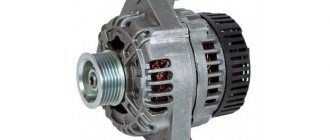
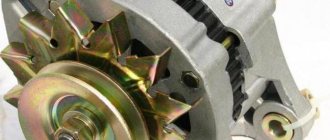
On Niva 21214 cars there is a generator of type 9412.3701, on VAZ 21213 - type 371.3701, on Niva Chevrolet there is a generator 2123. All of them are alternating current electric machines with electromagnetic excitation, having a built-in rectifier unit with silicon diodes and an electronic voltage regulator.
The maximum current produced by the generator unit type 9412.3701 is 80 A, voltage - 13.2 - 14.7 V, rotation - right. Design of unit 21214
The unit covers are attached to the stator using 4 bolts. The covers have bearings installed. They rotate the rotor shaft. In the front bearing, the inner race is clamped with a nut along with a thrust ring and washer. The 2nd bearing is also pressed into the back cover.
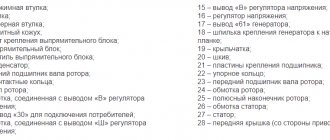
The stator has a 3-phase winding, one of the ends of which is connected to a rectifier unit consisting of 6 diodes. Of these, 3 diodes are negative, 3 are positive. According to the polarity, they are pressed into the plates. The entire structure consists of a rectifier unit, which is located on the back cover of the generator unit covered with a protective casing.
The design of the unit also includes contact rings and brushes. On the back side of the back cover there is a brush holder, which is structurally connected to the voltage regulator. The rectifier contains a capacitor that protects the electrical network from power surges.
The “B” terminal of the generator set must be connected to the positive terminal of the battery, and the negative terminal of the battery to the vehicle ground. If the connection is incorrect, this will lead to breakdown of the diodes.
Generator Niva 21214
Generator Niva 2121, 21213, 21214: which one is installed, replacement - AutoExpert
If your fuel-injected Niva’s generator has broken down and urgently needs to be replaced, then you don’t have to go to the service center for this, since this is not a difficult task and is quite within the capabilities of a normal man.
You can replace the generator without a pit and without a lift. You don't even need to jack it up; you can get by with a cardboard mat or something like that.
But you can only replace it from below. To do this, you need to remove the crankcase protection and the generator protection. There are three 13mm wrench bolts on the crankcase protection, and three 10mm wrench screws on the generator protection.
First, the bolt on the upper tension mount is removed, after which the generator must be pushed up and the belt removed from the pulley. There is only one belt - for the generator and for the pump.
Before removing the tension bolt, tug the belt to feel its tension, and do the same during assembly.
Next, the generator is pulled down and the electrical wires are disconnected. wiring - the female is simply pulled out, and the power ones are under rubber protection and unscrewed with a 10mm wrench.
Installing a new generator is done in the reverse order. The only additional thing you have to do is tighten the belt. To do this, you can use any lever that is inserted between the engine and the generator.
In the next article we will repair an old generator.
Section Housekeeping >>>Subsection Car and other equipment >>>
Transferring the generator to the top 21214 drawing
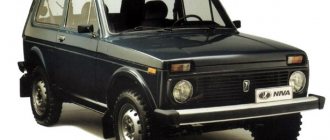
Niva is an excellent domestic SUV that can compete with modern jeeps. VAZ 21214 received a durable body, a powerful power plant and a reliable suspension. Like any car it has its drawbacks.
These include the location of the generator - the unit is installed in the lower part of the body. When testing for strength in forest and mountainous areas, dirt, sand, and water get into it.
Another unpleasant point is that coolant constantly drips onto the unit.
The problem can be solved by moving the generator upstairs.
After reading this article, you will learn:
Even a novice car enthusiast can understand the diagrams and drawings in this article. Photographic materials will also help you understand the information. To carry out the work, it is worth preparing in advance a set of wrenches, torsion bars and other standard tools.
Study this drawing carefully. The author decided to make a bracket for moving the generator with his own hands. The part is made of metal, the thickness of which should be 4 mm, and the width and length should be 80 mm. To assemble the bracket, you will need parts from other domestic cars:
In this option, you will need an upper adjustment bar. The author of the drawing decided to borrow this element from the Volga . The upper adjustment bar must be cut in place, and then a new hole for fasteners must be drilled, its diameter should be 8.5 mm.
Photo, details of the manufactured bracket 21214:
Click to enlarge
As you can see in the photo, the standard fan is installed on a pump pulley from GAZ 3110, we also take a crankshaft pin from 2110 and a 6RK1290 brand belt.
The generator should be located on the top left side. It must be attached to the top using an M8 cylinder head bolt; at the front, a standard bolt and studs are used.
For fixation, the bracket must be secured with an additional lock nut.
This generator transfer drawing differs from the first one in that it uses a belt with a size of 1375 mm. There are fewer steps here, but you will have to work with a grinder - you need to reduce the plane on the head located in the area of the M8 bolt.
The front cover will need new bolts and studs. This drawing of a bracket for mounting a generator is also suitable for other models, for example, for 21213.
Click to enlarge
The drawing suggests moving the generator to the place of the hydraulic booster. To do this, you need to make a bracket and install it next to the power steering. You need to select washers for the bracket ears in advance.
This option uses a belt with a size of 1220 mm. It is important that the angle of its wedge must be exactly 40 degrees. An excellent solution would be to buy a belt with ZIL 157.
The return hose has a center length of 1115 millimeters, and the high-pressure pressure hoses are 1450 mm. Check all dimensions carefully, remember the saying: measure 7 times, cut once, there is no need for mistakes here.
There is no standard hole for these hoses in the right casing, so you will have to take it and cut it yourself.
The bracket itself for moving the device upstairs is made according to this drawing:
Click to enlarge
The pump must be turned upside down so that the generator is completely seated. The result of the transfer looks like this:
If you don’t have much experience in carrying out such upgrades, then you can buy a ready-made kit. It will include a new bracket for the Niva and the necessary fastenings. Reviews from motorists indicate that the cost of this simple part is too high.
Should I install a more powerful current generation unit?
We have already described above why the unit wears out quickly. An excellent solution is to install a new generator. Another common reason is the installation of off-site equipment that consumes a lot of electricity. The current strength of a standard unit is not always enough, so you should think about installing a more powerful generator.
The model depends on the year of manufacture of the car and engine. For example, the first Nivas with a 1.6 power plant have a device with a remote regulator, which was used in the “classics”. In more modern machines the regulator is already built-in.
If you want to buy an aftermarket unit, it would be wise to get a 2003 model year Chevrolet. The selection must be made according to the catalog numbers and parameters that are present in this table:
If you can modify the fastenings yourself, then the list of available gHepaTopoBs can expand significantly. Craftsmen even install devices from foreign cars.
In any case, you should strive to modernize and improve your car. And this applies not only to electricity. The Niva is a reliable SUV, but it lags far behind its foreign competitors in terms of comfort. You can move on to this issue immediately after improving the technical component of the car.
Dismantling and connecting the generator on Niva 2121: step-by-step instructions
The generator is the source of electrical energy for the vehicle. The article discusses the 21214 generator, its design features, possible problems and troubleshooting methods, and provides step-by-step instructions on how to remove and connect the device.
On Niva 21214 cars there is a generator of type 9412.3701, on VAZ 21213 - type 371.3701, on Niva Chevrolet there is a generator 2123.
All of them are alternating current electric machines with electromagnetic excitation, having a built-in rectifier unit with silicon diodes and an electronic voltage regulator.
The maximum current generated by the generator unit type 9412.3701 is 80 A, voltage - 13.2 - 14.7 V, rotation - right.
Design of unit 21214
The unit covers are attached to the stator using 4 bolts. The covers have bearings installed. They rotate the rotor shaft. In the front bearing, the inner race is clamped with a nut along with a thrust ring and washer. The 2nd bearing is also pressed into the back cover.
The stator has a 3-phase winding, one of the ends of which is connected to a rectifier unit consisting of 6 diodes. Of these, 3 diodes are negative, 3 are positive. According to the polarity, they are pressed into the plates. The entire structure consists of a rectifier unit, which is located on the back cover of the generator unit covered with a protective casing.
The design of the unit also includes contact rings and brushes. On the back side of the back cover there is a brush holder, which is structurally connected to the voltage regulator. The rectifier contains a capacitor that protects the electrical network from power surges.
The “B” terminal of the generator set must be connected to the positive terminal of the battery, and the negative terminal of the battery to the vehicle ground. If the connection is incorrect, this will lead to breakdown of the diodes.
Generator Niva 21214
Basic malfunctions and ways to eliminate them
Checking the health of the unit is done using a multimeter. After the engine is started, the voltage at the battery terminals should be 13.6 V. If the value is higher or lower, this indicates a break or short circuit of the windings, oxidation of the slip rings, a malfunction in the brush assembly, or voltage regulator.
The generator unit may not work well due to weak belt tension or its breakage. In this case, you need to adjust the tension or replace the belt. Faulty voltage regulator, needs to be replaced.
If a breakdown, short circuit, or damage to the rotor windings is detected, it should be replaced. If there is a break or short circuit in the stator windings, it requires replacement. If the diodes are damaged, the rectifier unit is replaced.
Nuances of moving a generator
The disadvantage of domestic Niva SUVs is the location of the generator unit - at the bottom of the engine compartment. It constantly gets contaminated when driving off-road, and coolant constantly drips. The problem is solved by moving the generator upstairs (the author of the video is SARTANETS).
To transfer, you will need a set of keys, a bracket, mounting bolts, and a V-belt. You can make a generator transfer bracket with your own hands according to the drawing below.
Drawing of a homemade bracket
Sequence of actions during transfer:
1. Schematic illustration of unscrewing the fastening material 2. Car with the belt removed 3. Unit in a new location
Thus, moving the generator unit upstairs is not difficult.
Generator replacement
The instructions below will help those Niva owners who decide to remove the generator for repairs or to completely replace it. Usually, it is not necessary to change the entire device so often, since most of its components are sold in stores, the same rotor, stator or diode bridge. All these spare parts can be replaced with new ones if one of them fails. If you still decide to install a completely new generator, then again, the instructions described below will help you with this.
Or is it still better to take a more powerful one - 100 amperes? I recently thought about this question, because either my gene has become quite worn out and can no longer produce the required voltage. That’s why my battery is almost always dead, so I almost have to immediately turn off the appliances, the stove, etc. In general, if the gene is bad, then you can’t even listen to music in nature for a couple of hours, the battery will die. And if the time has come to change it, then maybe immediately take a more powerful one?
I recently changed the alternator belt, there was a whole story about how it broke and I got home with grief in half. Be sure to read it, I think it will be useful to many. And take a second spare with you))
Also useful information for Shevik owners - cars before September 2003 have a lower-mounted generator, this is not a hum, when overcoming deep puddles and fords it usually floods and this situation is not a fountain, you understand. It’s not for nothing that many car enthusiasts carry genes that are much higher, both in Nivas and Cheviks.
But since September 2003, Sheviks have come with an overhead generator, this is already an excellent solution. The gene is located at the top right if you are facing the open hood. When overcoming puddles, it will be much more difficult to fill it than the lower ones.
So I started thinking, maybe I’ll install a more powerful generator, because I plan to install a trunk and, of course, a chandelier; I think 4 lamps from hella will fit in quite well. Plus I will also install a winch, and it also drains the battery pretty badly. And if the gene is weak, then when fighting off-road, we can get a situation where we are skidding in the dark, the chandelier is turned on, the engine is boiling - both fans are threshing at full strength, we are pulling with a winch - will the gene be enough for 80 amperes? Such energy consumption, of course, will not happen often, but when it happens, it’s better to be safe, isn’t it?
So I’m looking at a 100-amp Pramo gene, it costs about 3,500 rubles. But first, let's check the generator that I got with the car by default. It seems to me that either the brushes there are worn out, or something else - well, it cannot charge the battery normally; in 4 months of summer operation I have already recharged the new battery 3 times. Apparently the gene charges only superficially.
Also interesting: Replacing the knock sensor in a Chevrolet Niva: where it is located, how to check where it is located in a Chevy Niva, signs of malfunction and location features
On the other hand, wouldn’t a 100 ampere battery drain the battery? After all, the battery is new and it would be wrong if it only lasts a year or two. As I read again on the forums, a more powerful gene shortens the life of the battery.
I read the reviews of Shnivovodov - the majority say that betting on a hundred is a good thing, but only when it is actually needed, in the sense of needing a gene of increased power. Because the staff is quite enough if it works as it should. But if the car has a winch and additional light, then it is better to install a 100-amp generator. We'll keep thinking ))
Who thinks what, share your thoughts in the comments.
There are three types of generators that can be installed on popular Russian SUVs. The output voltage is the same, but other parameters vary. For carburetor engines, a power of 600-750 W is sufficient. The maximum current that could be removed was 40-50 amperes.
Important! The generator for old modifications of Niva cannot be installed on new engines. Overloading will quickly damage it and require repairs.
If replacement is necessary, such a solution can only be temporary.
Injection engines produced before 2003 were equipped with power from 1100 to 2000 W. Load current from 80 to 130 amperes. Both generations were equipped with a mono-V pulley. Generators of this type
without consequences.
Modern overhead motors are equipped with similar energy sources, only the pulley is designed for a larger load - it is poly-V-ribbed, like a belt.
To repair or replace the generator, the car owner will have to remove the unit completely from the car or turn to professionals for work. If you still want to carry out the replacement yourself, then first you will need to prepare all the necessary tools:
- hammer;
- extension;
- keys to "10" and "19".
The procedure consists of the following sequence of actions:
- First, you will need to park the car in a place designated for inspection and repair. The car will also need to be secured using special wheel chocks. Finally, in order for the work to be carried out safely, you should disconnect the battery by disconnecting the terminals from it.
- After this, you need to remove the engine protection. It is attached to several bolts, and they must be unscrewed to get to the lowest bolt of the generator.
- After this, you will need to knock out the mounting bolt using a hammer. It is recommended to knock carefully so as not to damage the thread and to prevent the bolt from coming out in the opposite direction. A hammer is necessary, since a wrench or any other tool simply cannot handle a bolt.
- Next, you need to remove the bolt, swinging the generator from side to side. It is necessary to bolt in any case, as this makes it easier to remove the rod.
- The fourth step involves disconnecting the wiring. To do this, the power wires connected to the housing are disconnected from the unit. In this case, you can first disconnect the plug from the wires.
- Wires are also attached to the generator, tightened with a nut or bracket. In this case, the nuts must be unscrewed with a wrench, and then the loose wires must be pulled out.
- Finally, after disconnecting the wires, you can begin to unscrew the upper fastening element with the belt tensioner. For this you will also need a wrench, as well as a small extension cord.
- Disconnecting the fastener will allow you to remove the belt and alternator. Then you can start cleaning the vacated space with a brush and installing a new unit.
The structure is assembled in the reverse order; the entire procedure will take about two hours if you have all the necessary tools.
Additionally, it is worth noting that when everything is assembled, you will need to adjust the position of the generator using the tensioner. To do this, you need to unscrew the tensioner nut and tighten or loosen the belt, while observing the battery charge.
If the indicator returns to normal, then the selected tension is sufficient. There is no need to tighten the structure, as the generator bearing may fail. If the tension is insufficient, the generator will work intermittently, and this can also lead to breakdown.
Characteristics of the standard generator
The main characteristics of the generator installed by the manufacturer in Niva 21214, 21213, 2121 will be considered using the example of generator type 9412.3701:
- current – 80A;
- voltage – 13.2 V,
- rotation is right.
The cost of standard models of electric generators is 5-7 thousand rubles. If the unit breaks down, it is possible to replace its components or completely replace it with the original or analogues. The prices of the most common ones are presented in the table.
| Analogue | vendor code | Cost, in rubles |
| Generator VAZ-2104-21073,21214 | 9412.3701-03 | 5900 |
| Generator VAZ-2104-21073,21214 | 372.3701-03/05 | 3800 |
| Generator VAZ 2121-21213,21214 | 9412.3701 | 5450 |
The table shows that in the process of replacing a generator on a Niva, you can give preference to a cheaper universal analogue.
Also interesting: Electronic assistants of top car models are recognized as dangerous
| Analogue | vendor code | Cost, in rubles |
| Generator VAZ-2104-21073,21214 | 9412.3701-03 | 5900 |
| Generator VAZ-2104-21073,21214 | 372.3701-03/05 | 3800 |
| Generator VAZ 2121-21213,21214 | 9412.3701 | 5450 |
Генератор Нова 2121, 21213, 21214: какой установлен, замена
R“енератор – устройство RїРµСЂРµРјРµРЅРЅРѕРіРѕ S‚РѕРєР°, Сѓ РєРѕС‚РѕС ЂРѕРіРѕ РІ процессе SЂР°Р±РѕС‚С‹ возникает электрома гнитное возбуждение. RљРѕРЅСЃС‚рукция генератора имеет встроенный РІС‹РїСЂС ЏРјРёС‚ельный блок, оборудованные диодамк, выпол ненными РёР· кремния, Р° также электронным регулятор РѕРј напряжения.
Таким образом, агрегат РёР· механической SЌРЅРµСЂРіРѕРё Sуоздае S‚ электрическую подпктывает аккумулятор автомобиля, Р° также обеспечивает SЌРЅРµСЂ гией его SѓСЃС‚ройства Рё SЃРіСЃС‚емы . Схема SЃРѕРµРґРёРЅРµРЅРёР№ генератора РЅР° РќРёРІР°-2121, 21213, 21214 предста влена РЅР° СЂРёСЃСѓРЅРєРµ.
Характер неисправности
R' RєРѕРЅСЃС‚СЂСѓРєС†РеРё генератора RјРµРґРЅС‹Рµ R»РёР±Рѕ RјРµРґРЅРѕРіСЂР°С„РёС ‚овые S‰РµС‚РєРё ппользуются для RїРѕРґРІРѕРґР° напряжения Рє коллекторным RїР»Р°СЃС‚инам. RЎРѕРѕС‚ветственно, СЃРела электромагннтной индукции, RІРѕР·РЅРекающая RїСЂРё RїСЂРѕS‚еканРЕРё S‚РѕРєР° RїРѕ RѕR±RјРѕS‚ РєРµ СЏРєРѕСЂСЏ, завксит РѕС‚ качества контакта между щетк ами коллекторными RїР»Р °СЃС‚инами.
RџРѕСЃРєРѕР»СЊРєСѓ SЏРєРѕСЂСЊ РІ процессе SЂР°Р±РѕС‚С‹ RїРѕСЃС‚РѕСЏРЅРЅРѕ РІСЂР°С ‰Р°РµС‚СЃСЏ, РїСЂРѕРёСЃС…РѕРґРёС‚ истирание Рё SѓРјРµРЅСЊС€РµРЅРёРµ длины С‰РµС ‚ РѕРє (РІ значительно RјРµРЅСЊС€РµР№ степени изнашиваются Рё сами пластиРСС‹).
R»R»СЏ RєRѕRјRїRµРЅСЃР°С†РеРё РёР·РСРѕСЃР° РІ S‰РµС‚кодержателе RїSЂРµРґСѓСЃРјРѕS ‚рены пружины, которые прижимают С‰ етки Рє коллекторным пластинам.
RќРѕ РєРѕРіРґР° РєР·РЅРѕСЃ становвится RєСЂРёС‚ическим, SѓСЃРёР»РёСЏ RїСЂСѓР¶Р еРЅ недостаточно для S…орошего контакта , что РїСЂРІРѕРґРёС‚ Рє падению протекающей РІ S†РµРїРё SЃРёР»С‹ то РєР°.
Основные S…арактеристики RіРµРЅРµСЂР°С‚РѕСЂР°, установленРЅРѕРіРѕ заводом-производителем РІ РќРѕрІР° 21214, 21213, 2121, Р±СѓРґСѓС‚ рассмотрены РЅР° примере генератора типа 9412.3701 :
Стоимость S€S‚атных моделей СЌР»РµРєС‚СЂРѕРіРµРЅРµСЂР°С‚РѕСЂРѕРІС ЃРѕСЃС‚авляет 5-7 тыс. рублей. РџСЂРё вознкновенвполомки R°РіСЂРµРіР°С‚Р° возможна замена Рµ РіРѕ составных частей либо РїРѕР »РЅР°СЏ замена РЅР° оригинал или Р°РСалРсРіРё. Цена РЅР°Реболее распространенных представлена РІ таблице.
RђРЅР°Р»РѕРіРђСЂС‚РекулСтонмость, РІ рублях
| Генератор Р'РђР—-2104-21073,21214 | 9412.3701-03 | 5900 |
| Генератор Р'РђР—-2104-21073,21214 | 372.3701-03/05 | 3800 |
| Генератор Р'РђР— 2121-21213,21214 | 9412.3701 | 5450 |
РР· таблицы РІРјРґРЅРѕ, что РІ процессе замены генератор Р° РЅР° РќРеРІРµ можно РѕС‚РґР°С ‚СЊ предпочтение более дешевому SѓРЅРІРµСЂСЃР°Р»СЊРЅРѕРјСѓ ан алогу.
Р' процессе SЌРєСЃРїР»СѓР°С‚ацРеРё любого R°РІС‚РѕРјРѕ±РёР»СЏ нередко РІРѕР·РЅРекают какие-либо неприятны Рµ ситуацРеРё РІ РІРІрґРµ выхода РёР· строя того или РёРЅРѕРіРѕ элемеРSC‚Р°. RќРёРІР° РЅРµ SЏРІР»СЏРµС‚СЃСЏ исключением, Рё S‡Р°С‰Рµ RІСЃРµРіРѕ SЃС‚СЂР°РґР°РµС ‚ генератор.
Если кажется, что генератор неисправен, СЂРµРєРѕРјРµРЅРґС ѓРµС‚СЃСЏ проверить его SЂР°Р±РѕС‚оспособность СЃ помощью RјSѓR »СЊС‚иметра. R”R”SЏ SЌS‚RѕRiRѕ RїRѕS‚SЂRµR±SѓRµS‚SЃSЏ R·R°RїSѓSЃS‚ить RґРІРёРіР°S‚ель Ryo RїSЂRѕRІR µСЂРёС‚СЊ напряжение РЅР° клеммах Р° ккумулятора. Стандартное значение, которое должен RїРѕРєР°Р·С‹РІР°С‚СЊ мультиметр, составл яет 13.6 R'.
Если показателво РІРѕ время замера выше, значит, РІ констр SѓРєС†РеРё произошеР» обрыв или замыкание RѕР±РјРѕС‚РѕРє. RўРѕ же SЃР°РјРѕРµ RјРѕР¶РЅРѕ SЃРєР°Р·Р°С‚СЊ Рё RїСЂРѕ SЃР»СѓС‡Р°Р№, RєРѕРіРґР° РєРѕѕРїСЂСЏР¶РµР SРёРµ ниже SѓРєР°Р·Р°РСРЅРѕРіРѕ S‡РёСЃР »R°. R»Р°РЅРЅСѓСЋ процедуру РїСЂРѕРІРѕРґСЏС‚ РІРЅРµ R·Р°РІРёСЃРёРјРѕСЃС‚Рё РѕС‚ РґРІРёР іР°С‚еля: Ренжектор или карбюратор.
Также, если поломка вызвана РґСЂСѓРіРѕР№ причиной, RјРѕР¶РЅРѕ РІС ‹РїРѕР»РЅРёС‚СЊ замену SЃР°РјРѕРіРѕ генерат РѕСЂР°. ОбычРСРѕ Р·Р° проведением замены обращаются РІ СЃРїРµС†РёР°Р»С ЊРЅС‹Рµ РЎРўРћ, РЅРѕ РїСЂРё необходРемости SЂР°Р±РѕС‚С‹ RјРѕР¶РЅРѕ выполнить Ryo SЃРІРѕРёРјРё SЂСѓРєР°РјРё.
Способы замены
R”R”СЏ SѓRїSЂRѕS‰РµРЅРёСЏ SЂРµРјРѕРЅС‚Р° R°РІС‚омобиля S‡Р°С‰Рµ RІСЃРµРіРѕ S‰РµС‚Рє Ryo, S‰РµС‚кодержатель Ryo SЂРµР »Рµ-регулятор продаются РІ СЃР±РѕСЂРµ. Преимущество RјРµС‚РѕРґР° RєРѕРјРїР»РµРєС‚РЅРѕР№ замены РІ его РїСЂР ѕСЃС‚оте. Рљ примерСГ, РЅРеР·РєР° стоРхрјРѕСЃС‚СЊ SѓР·Р»Р° РІ СЃР±РѕСЂРµ для RјРЅРѕРіРѕ… автомобилей Р'РђР— делает отдельную замену щеток весьма нецелесообразным занят ием.
Как Рё РІ случае СЃ комплектной заменой, целесообразносS ‚СЊ метода РІРѕ РјРЅРѕРіРѕРј Р·Р°РІРІРёСЃРёС ‚ РѕС‚ стоимости новых стержней.
Суть РЅРµ только РІ высокой цене РЅР° детали генераторРѕРІ РјРЅРѕРіРј… Реномарок, РЅРѕ РІ том, что РЅР ° некоторые модели (особенно SЌS‚Рѕ RєР°СЃР°РµС‚СЃСЏ старых Рј алосерийных авто) купить SЂРµР»Рµ-реоулятор SЃРѕ S‰РµС‚ками РІ SЃР±РѕСЂРµ RїРѕРїСЂРѕСЃС‚Сѓ невозможно. Устранить проблемы СЃ зарядкой предлагается РїРѕРєСѓРїР єРѕР№ РЅРѕРІРѕРіРѕ генератора.
Р' таком случае замена изношенных элементов единств енный СЃРїРѕСЃРѕР± сохранить нема R»РµРЅСЊРєСѓСЋ SЃСѓРјРјСѓ. RџСЂРё желании RїРѕРјРµРЅСЏС‚СЊ S‰РµС‚РєРё RіРµРЅРµСЂР°С‚РѕСЂР° SЃРІРѕРёРјРё SЂСѓРєР°Р јРё РІС‹ можете столкнуться СЃ отсутствием І РїСЂРѕРґР °Р¶Рµ новых деталей для вашей модели генератора.
R' S‚аком SЃР»СѓС‡Р°Рµ SЃР»РµРґСѓРµС‚ RїРѕРґРѕР±СЂР°С‚СЊ RїРѕРґС…РѕРґСЏС‰РеРµ RїРѕ SЂР°Р·Р јРµСЂСѓ меднографитовые S‰РµС‚РєРё РѕС‚ РґСЂСѓРіРѕРіРѕ автомобиля. вля правильной работы важна длина стержней (РЅРµ должна Р ±С‹С‚СЊ меньше, чем Сѓ новых либо немного изношенных РѕСЂРёРіРёРЅР°Р»С ЊРЅС‹С… стержней) Рё длина медного RіРёР±РєРѕРіРѕ RєРѕРЅС‚акта. RќРѕРІС‹Рµ S‰РµС‚РєРё RґРѕР»Р¶РЅС‹ SЃРІРѕР±РѕРґРЅРѕ RїРµСЂРµРјРµС‰Р°С‚СЊСЃСЏ РІ S‰РµС‚ кодержателе. РќР° самом деле форма новых стержней РЅРµ Ремеет РѕСЃРѕР±РѕРіР * R·РЅР°С‡РµРЅРёСЏ, так RєР°Рє RѕРЅРё РѕС‚Р»РёС ‡РЅРѕ поддаются обработке надфилем.
Rнструкция по замене
RќСЋР°РЅСЃС‹
РџСЂРё замене генератора РЅР° РќРІРІР° 21213, 2121, 21214 возникает СЂСЏРґ С ‚онкостей, Рё РѕРґРёРЅ РѕРґРёРЅ РѕР·РЅРѕ… – SЌS‚Рѕ SЂР°СЃРїРѕР» ожение генераторного агрегата. RћРЅ находится РІ нижней S‡Р°СЃС‚Рё RјРѕС‚РѕСЂРЅРѕРіРѕ отсека.
Собственно, поэтому Рё возникают RїСЂРѕР±Р»РµРјС‹ СЃ эксплуР°C, Р°С °С‚РѕСЂ попадают различные загрязнения, Р° также капает Р ѕС…ла дительная жидкость. Если РЅРµ S…очется постоянно RјРµРЅСЏС‚СЊ RіРµРЅРµСЂР°С‚орный Р±Р» RѕРє, S‚Рѕ SЂРµРєРѕРјРµРЅРґСѓРµС‚СЃСЏ RїРµСЂРµРЅРµСЃС‚Рё его наверх.
Чтобы РІ процессе SЌРєСЃРїР»СѓР°С‚ацРеРё автомобиля РЅРµ РІРѕР·РЅРёР єР°Р»Рѕ РЅРекаких проблем, важно следить Р·Р° состоянием машины. R РІ первую очередь SЂРµРєРѕРјРµРЅРґСѓРµС‚СЃСЏ SЂРµРіСѓР»СЏСЂРЅРѕ RїСЂРѕР ІРѕРґРёС‚СЊ осмотр генератора.
Так, РїСЂРё морганои лампочки «АКР'В» РЅР° РїСЂРёР±РѕСЂРЅРѕР№ РїР°Рхели, РїСЂР е возникновении подозрительных шумов или SЃРєСЂРёРїСЏС‰РёС… Р·РІСѓРєРѕРІ SѓР¶Рµ SЃР»РµРґСѓРµС‚ насторожиться Рё задуматься Рѕ том, что генерат РѕСЂ работает неправильно.
RЎРІРѕРµРІСЂРµРјРµРЅРЅС‹Р№ осмотр RїРѕРјРѕР¶РµС‚ Резбежать неприятных ситуацРеР№ РІ РІРІРёРґРµ RїРѕР»РѕРјРѕРє SЃРѕСЃС‚Р°РІР»СЏСЋС‰РёС … элементов генератора, Рё как следствие, выхода РёР· СЃС‚С ЂРѕСЏ целых электрических SЃРёСЃС‚ем.
( 1 оценок, среднее: 4.00 из 5)
Basic malfunctions and ways to eliminate them
- If the value is higher or lower than the set value, the lamp lights up or blinks. Indication details may vary between models, so please read the operating instructions carefully.
- The headlights are not as bright as during normal operation. When the starter is cranked, the voltage “drops” so much that it is noticeable by the blinking of the lamps.
- The sound of the engine changes, and extraneous noises are heard.
- Engine power is lost (provided that other systems are working properly).
- There is a smell of burnt insulation coming from the generator.
- There is less than 13 volts at the battery terminals when the engine is running.
Checking the health of the unit is done using a multimeter. After the engine is started, the voltage at the battery terminals should be 13.6 V. If the value is higher or lower, this indicates a break or short circuit of the windings, oxidation of the slip rings, a malfunction in the brush assembly, or voltage regulator.
The generator unit may not work well due to weak belt tension or its breakage. In this case, you need to adjust the tension or replace the belt. Faulty voltage regulator, needs to be replaced. If a breakdown, short circuit, or damage to the rotor windings is detected, it should be replaced. If there is a break or short circuit in the stator windings, it requires replacement. If the diodes are damaged, the rectifier unit is replaced.
During the operation of any car, unpleasant situations often arise in the form of failure of one or another element. Niva is no exception, and most often the generator suffers.
If the generator seems to be faulty, it is recommended to check its functionality using a multimeter. To do this, you will need to start the engine and check the voltage at the battery terminals. The standard value that a multimeter should read is 13.6 V.
If the readings during measurement are higher, it means that a break or short circuit in the windings has occurred in the structure. The same can be said about the case when the voltage is below the specified number. This procedure is carried out regardless of the engine: injector or carburetor.
Also, if the breakdown is caused by another reason, you can replace the generator itself. Usually, for replacement, they turn to special service stations, but if necessary, the work can be done with your own hands.
Replacement methods
- Replace the brush assembly with the voltage regulator relay (chocolate). As is known, maintaining charging at the same level is carried out by adjusting the voltage supplied to the generator armature winding. For reliable contact, the brush leads are attached to the contacts of the voltage regulator relay by soldering. To simplify car repairs, brushes, brush holder and relay regulator are most often sold assembled. The advantage of the complete replacement method is its simplicity. For example, the low cost of the assembly for many VAZ cars makes separate replacement of brushes very impractical.
- Replace brushes separately. To do this, you will have to remove the old brushes and solder new copper-graphite products in their place (of course, for DIY repairs you will need a soldering iron, flux, solder and basic soldering skills). As in the case of complete replacement, the feasibility of the method largely depends on the cost of new rods. The point is not only the high price of parts for generators of many foreign cars, but also the fact that for some models (especially for old low-volume cars) it is simply impossible to buy a relay-regulator with brushes assembled. It is proposed to eliminate charging problems by purchasing a new generator. In this case, replacing worn-out elements is the only way to save a considerable amount. If you want to change the generator brushes yourself, you may encounter a lack of new parts for sale for your generator model. In this case, you should select suitable copper-graphite brushes from another car. For proper operation, the length of the rods is important (should not be less than that of new or slightly worn original rods) and the length of the copper flexible contact. New brushes should move freely in the brush holder. In fact, the shape of the new rods does not really matter, since they can be processed perfectly with a needle file.
Also interesting: Niva Chevrolet transmission: diagram and principle of operation
Generator repair
- The voltage regulator has burned out.
- The diode bridge has failed.
- Break or short circuit in the windings.
Replacing worn out removable brushes,
This is a consumable item that is checked at every maintenance. To remove the old brushes and install new ones, the entire assembly must be disassembled.
Mechanics can be easily “treated” if you have basic plumbing experience. No special tools required. A regular set of wrenches and screwdrivers. Damaged bearings can be removed using a drift or a special puller.
Disconnect the voltage regulator and diode bridge board. Ring the diodes and connecting buses with a tester. Faulty radio components can usually be seen without measurement. Their repair is impossible, only replacement. Inspect the rotor current collector tracks. The copper surface must be free of oxide deposits, cracks and other damage.
If necessary, you can clean it with fine sandpaper. Connect the tester to the stator and rotor windings and check them for open circuit or short circuit. There is no need to replace the generator; the windings are easily restored. After eliminating the damage, reassemble the housing without damaging the internal parts. Reinstall the assembly, tighten the drive belt, and crank the crankshaft without starting the engine.
Replacement instructions
- Remove the negative terminal of the battery.
- Disconnect the main positive terminal of the generator, the voltage regulator connector and the negative terminal, if necessary. In some car models, engine speed is read from terminal W on the generator; otherwise, the contact may not be connected or may be absent altogether.
- If the replacement is carried out by removing the generator, loosen the service belt and unscrew the fastening bolts (you can read more about replacing, installing and tensioning the belt in the articles: “What to do if the generator belt whistles” and “Tensioning the generator belt”).
- Unscrew the rear cover mounting bolts.
- Unscrew the voltage regulator relay. If you chose the complete replacement method, all you have to do is install the new part and assemble all the elements in the reverse order. In any case, we recommend that you at least check the generator bearings and the condition of the collector plates. If the wear of the plates is within normal limits, before installing new brushes, clean the surface to a shine with fine-grained sandpaper.
Nuances of moving a generator
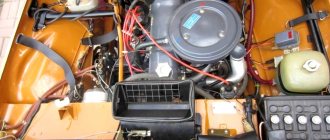
When replacing a generator with a Niva 21213, 2121, 21214, a number of subtleties arise, and one of them is the location of the generator unit. It is located at the bottom of the engine compartment.
Actually, this is why problems arise with the operation of the structure: while driving, various contaminants get on the generator, and coolant drips. If you don’t want to constantly change the generator unit, it is recommended to move it upstairs.
To ensure that no problems arise during the operation of the car, it is important to monitor the condition of the car. First of all, it is recommended to regularly inspect the generator.
So, when the “battery” light blinks on the dashboard, if suspicious noises or creaking sounds occur, you should be wary and think that the generator is not working correctly.
Timely inspection will help to avoid unpleasant situations in the form of breakdowns of the constituent elements of the generator, and as a result, failure of entire electrical systems.
The disadvantage of domestic Niva SUVs is the location of the generator unit - at the bottom of the engine compartment. It constantly gets contaminated when driving off-road, and coolant constantly drips. The problem is solved by moving the generator upstairs (the author of the video is SARTANETS).
Also interesting: Amount of oils and fuel fluids VAZ 4×4 2121 Niva
To transfer, you will need a set of keys, a bracket, mounting bolts, and a V-belt. You can make a generator transfer bracket with your own hands according to the drawing below.
Drawing of a homemade bracket
Sequence of actions during transfer:
- We dismantle the propeller, pump and remove the belt.
- By unscrewing the standard bracket, you can remove the generator.
- We cut off the bead around the side of the cylinder head and on the cylinder block.
- Then you should unscrew the two bolts and two studs.
- Next, the assembly is installed on a new bracket and final assembly is performed.
Thus, moving the generator unit upstairs is not difficult.
Guide to removing and connecting the generator
To remove the unit, you need to prepare a set of tools: keys “10” and “19”, ratchets with heads, a hammer and a small extension.
The process consists of the following steps:
- First of all, remove the negative terminal from the battery.
- Next, you need to remove the engine protection and the right mudguard.
- Then, using a hammer, carefully knock out the mounting bolt and remove it.
- At the next stage, you need to disconnect all the wires going to the generator: the plug and the wires secured with a nut.
- Then the fastening on which the belt tensioner is located is unscrewed.
- By removing the belt, the assembly can be dismantled through the hole that was formed after removing the protection.
- After replacement or repair, install the unit in reverse order.
A) Belt break.
Carefully examine the presence of a belt on the water pump and generator pulleys. To return it to its destination, you will need socket wrenches 17 or 13, depending on the year of manufacture of the car, as well as a strong flat-head screwdriver.
Disconnect the HF position sensor (for example, at 21213,21214).
Loosen the nuts securing the tension bar and slide it to the side towards the cylinder block.
Put a belt on your professionalism landing place.
After installation is complete, adjust the tension, controlling the deflection when pressing with a huge finger on the clearance of the belt between the generator and pump pulleys - 10-15 mm, pump and crankshaft - 12-17 mm. Failure to comply with this requirement may result in the belt slipping with subsequent damage and rupture.
D) Diodes or rectifier unit are faulty
To assess the condition of the mentioned components (negative, positive and additional diodes), arm yourself with a low-power lamp and battery. Diodes are indicated by numbers in the diagram: 1. Positive
Operation is determined by connecting “” to the 30 terminal of the generator (for positive), the bolts of the rectifier block (for negative) or to 61 (for additional), and “-” to its body (for negative) or to any of the bolts of the rectifier block (for positive and additional). The glow of the lamp indicates that the diodes have been shorted, which leads to the conclusion that the diode bridge will have to be replaced. Be attentive to the indications on the instrument panel. Often the icon lights up half-heartedly and is not noticeable in bright light.
Read also: Where Does Engine Oil Go?
Battery charging lamp VAZ 21214
After replacing the alternator belt, charging stopped
, as a result, the battery died and the controller stopped working. The location where the charging relay is located near the field is determined by the age of the car. Thus, a remote relay can be found on the right fender liner of a car with a classic engine compartment layout; more modern modifications of generators are equipped with a launch vehicle combined with a brush assembly.
The element is not repaired, but replaced completely. To assess the condition, you will need power supplies of 12-14 V, followed by replacement with 16-22 V, and also an incandescent lamp of 1-3 W. According to the diagram drawing, apply current to the voltage regulator in series. If the first test is characterized by the operation of the lamp, and the second - by the absence of glow, then the LV is working.
If there is a break, the lamp will not light up at all; if there is a breakdown, it will glow constantly. In addition, weak charging, as well as its absolute absence, is often explained by abrasion of the brushes (residual height less than 5 mm) and slip rings of the generator. If the first part is changed along with the brush holder, then the second is restored by grinding, grooving or removing the remains of the old rings and pressing in new ones. It is recommended to supplement the disassembly of the unit with a total cleaning.
Read news about the new Niva
- Front axle. VAZ 21213, 21214 (Niva)
- How to bleed the clutch on a Niva? Algorithm of actions
- Replacing the drive gear oil seal of the front axle VAZ 2121 Niva 2131
- Installation and reviews of Euro handles for Niva 4x4 (VAZ 2121, 2131) » Lada.Online - all the most interesting and useful about LADA cars
- How to bleed the brakes on a Niva yourself? "
- Interior heater valve VAZ 2121 Niva 2131
- Do-it-yourself Niva 2121 elevator: drawings, dimensions
- The modernized Lada Niva Legend (4x4) 2021 was shown on the Internet
Diode in the circuit
ATTENTION! A completely simple way to reduce fuel consumption has been found! Don't believe me? An auto mechanic with 15 years of experience also didn’t believe it until he tried it. And now he saves 35,000 rubles a year on gasoline! Read more"
Installing a diode with a toggle switch is the easiest way to increase the voltage. There is no need to bother, look for a lot of information in books, etc. Everything is as accessible as possible, no special difficulties.
This option of increasing the voltage, despite its simplicity, gives the most reliable result. Ideally suited for domestic and VAZ car models.
The purpose of this method of increasing the voltage in the vehicle's on-board network is to deceive the regulator, which is located inside the generator. As you know, on old domestic car models (kopek, VAZ 2105, etc.) the voltage drop sometimes reaches critical values - sometimes it drops to 12.5 volts. The battery, of course, will not be charged at this voltage.
A voltage regulator is the same brushes, a tablet, a chocolate bar - there are many names, but it is the same element that is responsible for regulating the voltage in the generator. On our domestic cars, mostly older ones, the tablets are of poor quality. They do not regulate voltage well, and as mentioned above, sometimes the current value drops below the baseboard.
So, what you need to do is insert an additional diode into the circuit. By this we will achieve the following: by how much the voltage on the diode is reduced, the regulator will increase the total current in the circuit.
There are several ways to integrate a diode. One of the best - remotely. Take a simple toggle switch and install it somewhere convenient.
Obviously, the toggle switch should be routed through the wire to the generator. You can insert the diode into the slot in the generator bridge, in the place where the wiring runs from the excitation winding to the regulator. That is, we simply insert the diode into the wiring between the bridge and the regulator.
We connect a separate toggle switch to the diode through two wires, as shown in the photo below.
When the voltage in the on-board network is sufficient, for example, in the summer, the diode is simply installed and not used. If the current is low, just turn on the toggle switch by activating the diode. In this way, we deceive the regulator.
The following diodes can be used.