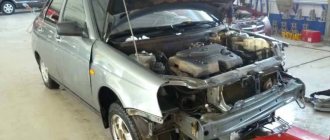
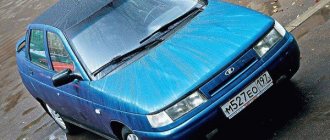
The VAZ 2123 Niva Chevrolet engine is a steel heart with a good resource. The car of this brand received an improved engine from AvtoVAZ. In it, the mechanism, consisting of 4 cylinders, is located vertically. The power unit has a fuel mixture injection control system and passed all European tests, according to the results of which it was assigned to the Euro 2 standard. The new VAZ 2123 engine, unlike other modifications, is famous for its low noise level. To do this, engineers had to use hydraulic chain tensioners in the design, as well as use single-row chain devices. The integration of the hydraulic valve support also contributed to the reduction in engine noise.
Technical characteristics of the VAZ 2123 engine
The VAZ 2123 power unit has a working volume of 1690 cubic meters. cm. It is naturally aspirated and runs on gasoline fuel. His weight is 127 kilograms. The electronic fuel injection system increased engine power to 80 hp, and the torque is 127 NxM, which becomes available at around 4000 rpm.
On the highway the car can reach a speed of 140 km/h. A five-speed manual gearbox is responsible for shifting gears. Highway consumption does not exceed 8.5 liters per 100 km. In the city it increases to 14 liters per 100 kilometers. In such an engine, for its stable operation and responsive traction, it is recommended to fill AI-95 gasoline.
A timing belt with a hydraulic chain tensioning system requires increased oil pump performance. To increase productivity without increasing power, engineers reduced the number of teeth on the pump drive gear.
To lubricate the engine, 3.5 liters of oil is required. Both synthetic and semi-synthetic oils are suitable. The only thing that requires attention is the viscosity indicator, which must correspond to the 5W30 index. To preserve the life of the Chevrolet Niva engine for many years, it is recommended to change the oil every 10,000 km.
Chevrolet Niva gearbox repair
Disassembly and repair of the Chevy Niva gearbox is required for the following malfunctions. Gearbox humming
: bearing wear;
wear of gear teeth and synchronizers; axial movement of shafts. Difficulty shifting gears
: wear of the spherical joint of the gear shift lever, lack of lubrication in the assembly;
deformation of the gear shift lever; burrs, bends, contamination of rod seats, jamming of locking blocks; contamination of the sliding coupling and hub splines; deformation of gear shift forks. Gears fly out or the switching is unclear
: wear of the holes for the balls on the rods, breakage of the clamp springs;
wear of the synchronizer blocking ring; synchronizer spring failure; wear of the teeth of the synchronizer coupling or the synchronizer ring gear. Reduced oil level or leakage
: wear of the oil seals of the primary and secondary shafts; loosening of the gearbox housing covers, damage to the sealing gaskets; loosening of the clutch housing to the gearbox housing.
Assembly and disassembly of the Chevrolet Niva gearbox - video
VAZ 2123 engine - features
The VAZ 2123 engine for the Chevrolet Niva has received many changes that have a better effect on its functional characteristics.
Unlike its predecessor models, it has a different generator location. He is now on top.
1 — oil pan; 2 — main bearing cover; 3 — connecting rod cover; 4 - crankshaft; 5 — connecting rod; 6 - piston; 7 — piston rings; 8 - valve; 9 — valve guide; 10 — valve springs; 11 - plate; 12 - camshaft; 13 — cylinder head cover; 14 — valve lever; 15 - hydraulic support; 16 — cylinder head; 17 — spark plug; 18 — cylinder head gasket; 19 — generator bracket; 20 — cylinder block; 21 — oil pump gear retainer; 22 — oil pump gear; 23 — oil filter bracket; 24 — oil pan gasket; 25 - oil pump
The new cylinder block is based on the old one, but despite this it has its own marking. The main change affected the way the oil filter is mounted. In older models it was screwed directly into the block, but now a special bracket is used for connection. It performs another function - it is a support for mounting the power steering pump.
The flywheel received an increased diameter, as a result of which its working surface became 215 mm.
A new pump has been installed, inside of which a roller bearing is located. Unlike the old ball bearing, the new type of bearing has an increased service life.
The water pump, power steering pump and generator are driven by a pulley mounted on the crankshaft. The system includes tension and support rollers. The pulleys themselves are made according to a special design, adjusted to the belt profile.
1 — tension roller of the air conditioning compressor drive belt; 2 — air conditioning compressor drive belt; 3 — air conditioning compressor clutch; 4 — thermostat; 5 — throttle assembly; 6 — outlet pipe of the cooling jacket; 7 — coolant pump pulley; 8 - phase sensor; 9 — tension roller for the auxiliary drive belt; 10 — cylinder head; 11 - generator; 12 — power steering pump pulley; 13 — support roller for the auxiliary drive belt; 14 — cylinder block; 15 — auxiliary drive belt; 16 — crankshaft position sensor; 17 — auxiliary drive pulley; 18 — air conditioning compressor drive pulley; 19 — oil pan; power unit support; an exhaust manifold; receiver; cylinder head cover;
Changes also affected the design of the engine compartment. The front axle gearbox is no longer attached to the engine. This required changes to the internal engine compartment.
How does the Chevrolet Niva cooling system work?
Conventionally, the principle of operation can be divided into two categories:
- mechanical part:
- electrical part;
Each component works differently, but together they cool the engine to operating temperature.
Mechanical part
There are two engine cooling circles in Niva - large and small. The small circle is a cooling system without a radiator. This circle is designed to quickly warm up the engine. As soon as the temperature reaches 80-83 degrees Celsius, the thermostat opens and forces the liquid to flow in a large circle - through the radiator. From this moment, the cooling of the antifreeze begins, and then the engine.
The principle of operation of the thermostat.
A water pump is used to circulate fluid through the system. It is mounted on the cylinder block and has an impeller, which, when rotated, forces the liquid to move through the engine cooling jacket, through the pipes through the thermostat, heater core and main radiator. The pump is driven through a belt drive from the engine crankshaft. The same belt drives the power steering pump and generator.
A popular type of tuning of the Niva cooling system is the installation of an expansion tank from VAG cars.
Thermal expansion of antifreeze occurs towards the expansion tank. The tank has a plug with a valve that releases excess pressure into the atmosphere. Controlling the pressure in the system allows you to avoid rupture of the tank, as well as an increase in the boiling point of antifreeze.
Electrical part
In addition to the main mechanical part, the electrical part of the system is also involved in the work. A temperature sensor installed near the thermostat sends information to the engine ECU about the current state of the antifreeze. In addition, this data is transmitted from the ECU to the instrument panel.
Temperature sensor Niva Chevrolet
When the temperature reaches 99 degrees Celsius, the right fan on the radiator comes into operation at low speed. If the temperature does not drop and reaches 101 degrees, then it turns on at full speed, and the left one starts working along with it. They will work until the antifreeze temperature drops to 93 degrees Celsius.
Chevrolet Niva fan unit
The decision to turn on a particular fan is made by the ECU based on data from the temperature sensor. If a break is detected in the sensor circuit, the system goes into emergency mode and turns on the fans permanently.
Motor device
Briefly about how the VAZ 2123 Chevrolet Niva engine works.
Cylinders
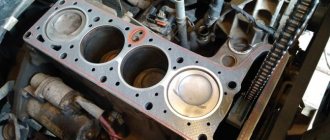
They were combined with the upper part of the crankcase. Like most VAZ engines, this power unit has cylinders operating in a 1-3-4-2 pattern. The lower part of the cylinder block is connected on five supports to the crankshaft.
1 — tension roller of the air conditioning compressor drive belt; 2 — air conditioning compressor drive belt; 3 — air conditioning compressor clutch; 4 — thermostat; 5 — throttle assembly; 6 — outlet pipe of the cooling jacket; 7 — coolant pump pulley; 8 - phase sensor; 9 — tension roller for the auxiliary drive belt; 10 — cylinder head; 11 - generator; 12 — power steering pump pulley; 13 — support roller for the auxiliary drive belt; 14 — cylinder block; 15 — auxiliary drive belt; 16 — crankshaft position sensor; 17 — auxiliary drive pulley; 18 — air conditioning compressor drive pulley; 19 — oil pan; power unit support; an exhaust manifold; receiver; cylinder head cover;
Crankshaft
Five-legged. Cast from cast iron. If necessary, the journals can be reground with a diameter reduction of 0.25; 0.50; 0.75 and 1 mm.
Exhaust valves
Welded in two parts. One is an alloy of chromium, nickel and molybdenum, and the other is made of multi-component steel. The operating temperature of the exhaust valves is 700-900 degrees, since during engine operation they are heated by processed gases. In order for them to withstand such temperatures, a special heat-resistant alloy is applied to them.
Intake valves
Their rods are treated with nitrogen and hardened under the influence of high frequency current. This is enough to withstand operating temperatures of 350-500 degrees.
Pistons
The VAZ 2123 engine has pistons cast from an aluminum alloy. A layer of tin is applied to them to make the process of breaking in the car faster. The piston stroke is 80 mm, and it itself has a diameter of 82 mm. The compression ratio is at 9.3 atmospheres.
Camshaft
Cast from cast iron and installed in a removable aluminum housing. Its rotation is carried out by a single-row roller chain.
It is stretched by a spring-hydraulic tensioner. Its size has increased significantly. Until the engine starts, the tension is carried out by a spring, and during its operation it is provided by oil pressure.
Cylinder head
Attached to the block itself with 11 bolts. Centering is performed using the power of two bushings.
Lubrication system
It is carried out using the pressure and spray method, which helps to save oil.
Crankcase ventilation system
Closed, and crankcase gases are discharged through the oil separator into the intake pipe. From there they are transferred to cylinders and burned.
Cooling system
The fluid circulation is forced and is produced using a centrifugal pump.
Ignition system
Controlled by an electronic unit. The ignition module is located on the cylinder block and is powered by the battery.
Design of a Chevrolet Niva car
- Repair manuals
- Repair manual for Chevrolet Niva 2002+.
- Car device
1.0 Car structure General information about cars Passport data Car keys Controls Heating and ventilation of the interior Doors Seat belts Adjusting the position of the front seats Adjusting the steering wheel Rear-view mirrors Interior lighting Sun protection...
1.1 General information about cars Cars of the Chevrolet Niva family represent a further development of the concept of domestic comfortable SUVs, which began with the VAZ-2121 Niva car. They differ from their predecessors in modern design, increased comfort and more advanced design…
1.2 Passport data The model and number of the vehicle, engine model, name of the manufacturer, design options and configurations are indicated on the identification plate... ...attached with tear-off rivets in the engine compartment on the front panel extension on the right side. ...
1.3 Car keys Two keys are attached to the car, each of which can unlock the doors and turn on the ignition. USEFUL ADVICE Save the tag: if you lose your keys, you can order new keys from the manufacturer using their number so as not to change the locks. This is what it looks like...
1.4 Controls Fig. 1.8. Instrument panel and controls The location of the controls is shown in Fig. 1.8. Instrument panel 1 – exterior lighting switch. The switch block contains two mechanically connected switches: – side switch ...
1.5 Heating and ventilation of the interior Fig. 1.8. Instrument panel and controls Fig. 1.13. Interior heating and ventilation controls: 1 – front door glass blower nozzles; 2 – air duct for blowing the windshield; 3 – upper nozzles; 4 – regulator of additional air supply through the upper...
1.6 Doors Locks The locks of all doors are unlocked with one key, which also turns on the ignition. The side doors are opened by pulling the outer... ...or inner handle. NOTES If the ignition is on, when you open the driver's door the buzzer...
1.7 Seat belts Seat belts are an effective means of protecting the driver and passengers from serious injuries in road accidents. Therefore, while driving, be sure to fasten your seat belt and do not carry passengers who are not wearing seat belts. The car is equipped with front (inertial...
1.8 Adjusting the position of the front seats To ensure the most comfortable seating for people of different heights and builds, the position of the driver and front passenger seats can be changed both in the longitudinal direction and in the angle of the backrest. In addition, the headrest can be adjusted in height and angle. ETC…
1.9 Adjusting the position of the steering wheel The car is equipped with a steering column that is adjustable in angle. Before driving, adjust the position of the steering wheel so that it is convenient to drive the car and at the same time so that the instruments in the combination are clearly visible. NOTE We recommend adjusting the position...
↓ Comments ↓
1. Car structure
1.0 Car structure 1.1 General information about cars 1.2 Passport data 1.3 Car keys 1.4 Controls 1.5 Heating and ventilation 1.6 Doors 1.7 Seat belts 1.8 Adjusting the position of the front seats 1.9 Adjusting the steering wheel
2. Recommendations for use
2.0 Recommendations for operation 2.1 Safety rules and recommendations 2.2 Tools and accessories 2.3 Running in the car 2.4 Operating the car during the warranty period 2.5 Checking the car before leaving 2.6 Replacing the air filter entering the cabin 2.7 Using a jack 2.8 Towing the car
3. Problems along the way
3.0 Malfunctions along the way 3.1 The engine does not start 3.2 Malfunctions of the fuel injection system 3.3 No idle speed 3.4 Interruptions in engine operation 3.5 The car moves jerkily 3.6 The car accelerates poorly 3.7 The engine stalls while driving 3.8 The oil pressure has dropped
4. Engine
engine piston of the fourth cylinder to the TDC position of the compression stroke
5. Transmission
5.0 Transmission 5.1 Clutch 5.2 Possible malfunctions of the clutch, their causes and solutions 5.3 Gearbox 5.4 Possible malfunctions of the gearbox, their causes and solutions 5.5 Transfer case 5.6 Possible malfunctions of the transfer case, their causes and solutions 5.7 Driveshaft 5.8 Possible malfunctions of the driveshaft , their causes and solutions 5.9 Front wheel drives
6. Chassis
6.0 Chassis 6.1 Front suspension 6.2 Possible malfunctions of the front suspension, their causes and solutions 6.3 Rear suspension 6.4 Possible malfunctions of the rear suspension, their causes and solutions 6.5 Shock absorbers
7. Steering
7.0 Steering 7.1 Design features 7.2 Inspecting and checking the steering on the vehicle 7.3 Checking the tension and adjusting the power steering pump drive belt 7.4 Replacing the fluid in the power steering hydraulic system 7.5 Replacing the power steering hydraulic system reservoir 7.6 Bleeding the power steering system 7.7 Adjusting the gap in the roller engagement with worm 7.8 Removing and installing the steering wheel 7.9 Replacing steering shafts
8. Brake system
8.0 Brake system 8.1 Device features 8.2 Useful tips 8.3 Checking and adjusting the brake system 8.4 Replacing brake fluid 8.5 Bleeding the hydraulic brake system 8.6 Master brake cylinder 8.7 Vacuum brake booster 8.8 Pressure regulator 8.9 Replacing hoses and pipelines of the hydraulic brake system
9. Electrical equipment
9.0 Electrical equipment 9.1 Design features 9.2 Fuses and relays 9.3 Generator 9.4 Possible generator malfunctions, their causes and solutions 9.5 Starter 9.6 Possible starter malfunctions, their causes and solutions 9.7 Ignition switch (lock) 9.8 Replacement and maintenance of spark plugs 9.9 Engine control system
10. Body
10.0 Body 10.1 Design features 10.2 Removing and installing front fender liners 10.3 Removing and installing front fenders 10.4 Removing and installing decorative trims on the front fenders and doors 10.5 Replacing buffers 10.6 Removing and installing radiator trim 10.7 Removing and installing the hood 10.8 Removing, installing and adjusting the lock and hood lock drive 10.9 Tailgate
11. Vehicle options
11.0 Vehicle options 11.1 Clutch release master cylinder 11.2 Electromechanical power steering 11.3 Brake system
12. Car care
12.0 Car care 12.1 Checking the car before leaving 12.2 Washing the car
13. Purchase of spare parts
13.0 Purchasing spare parts 13.1 Engine oil 13.2 Greases 13.3 Coolants 13.4 Brake fluid
14. A trip to the service station
14.0 A trip to the service station 14.1 Useful tips
15. Winter operation of the car
15.0 Winter operation of a car 15.1 How to prepare a car for winter 15.2 Recommendations for starting the engine in severe frost 15.3 What is useful to buy for winter 15.4 Useful winter tips
16. Preparation for technical inspection
16.0 Preparation for technical inspection 16.1 Recommendations 16.2 List of malfunctions and conditions under which the operation of vehicles is prohibited 16.3 Changes to state standards regulating the maximum permissible content of harmful substances in the exhaust gases of vehicles 16.4 Standard form of diagnostic card for instrumental control points
17. Applications
17.0 Appendix 17.1 Appendix 1. Tightening torques for threaded connections 17.2 Appendix 2. Basic data for adjustments and control 17.3 Appendix 3. Fuels and lubricants and operating fluids 17.4 Appendix 4. Filling volumes 17.5 Appendix 5. Lamps used on vehicles 17.6 Appendix 6. 17.7 Appendix 7.
What engine is on the Chevrolet Niva
The main design feature of this internal combustion engine is its vertical location under the hood of the car. Fuel injection into 4 cylinders is carried out under the control of a special electronic system built into the engine. Compared to its predecessors, the new modification of the VAZ-2123 engine is much quieter. This is due to the following factors:
- its design includes a hydraulic chain tensioning mechanism;
- single-row arrangement of the chain device;
- valve hydraulics have a special support;
- Knock sensors are installed on the cylinder head bosses of the Chevrolet Niva engine.
Technical characteristics of the Chevrolet Niva:
- Engine power – 80 horsepower.
- Engine volume – 1690 cm3.
- The capacity of the gasoline tank is 58 liters.
- The maximum speed of the car is 140 km/h.
- Developed torque – 127.5 N.m.
- Compression ratio – 9.3 atm.
- Number of cylinders – 4 pcs.
- The total number of valves is 8 pcs.
- Cylinder diameter – 82 mm.
- The minimum stable crankshaft speed is 750 rpm.
- Motor weight – 127 kg.
Depending on operating conditions, the Chevrolet Niva engine consumes fuel per 100 kilometers:
- on country roads - no more than 8.8 liters;
- on city streets - up to 14.1 l;
- combined road conditions - no more than 10.8 liters.
The main problems of the Chevrolet Niva VAZ-2123 engine
Among the most common malfunctions are the following:
- The motor does not turn on.
- The engine stalls at idle and when driving.
- Reduced power of the power unit.
Reasons for startup problems:
- contamination of fuel lines (the system is washed with water or cleaned with compressed air);
- clogging of the fuel filter (the filter element is cleaned or replaced with a new device);
- the gasoline pump is broken, the unit has stopped pumping or supplies an insufficient amount of fuel (you need to install a new gasoline pump).
If the engine often stalls, this indicates a malfunction in the fuel pump, as well as the idle air regulator, which needs to be replaced with a new mechanism. The engine may also stop working if air gets into the gasoline hoses. In order to eliminate this defect, it is recommended to eliminate damage to the hoses and their fixation points, tighten the fastenings of the clamps, etc.
If a discrepancy between the engine power and the nominal values is detected, it is necessary to check the throttle valve adjustments and the condition of its position sensor. A faulty sensor cannot be repaired; it will simply need to be replaced with a new device. It is also recommended to check the serviceability of the engine ignition system (spark plugs) and the amount of battery charge.
Chevrolet Niva engine management system
Layout of sensors in the engine compartment of the vehicle, supplying information to the electronic control unit:
The control system includes the following sensors:
- liquid temperature in the cooling system (6);
- detonation (9);
- air mass flow (1);
- machine speed (13);
- throttle position (7);
- crankshaft (3);
- oxygen concentration (10) – “Lambda probe”.
Increasing engine power in Chevrolet Niva
Some Chevrolet Niva owners are not always satisfied with some of the operating parameters and characteristics of the internal combustion engine. Considering the impressive weight of the vehicle and good cross-country ability, they believe that the power of 80 horsepower should be increased slightly. This figure can be increased with some improvements.
Refinement of the Chevrolet Niva engine in order to increase power is carried out in one of several ways:
- Replacement of original components and parts with tuning copies (change of engine configuration geometry).
- Installation of turbocharging.
- Chip tuning (reflashing ECU programs).
Thanks to modifications to the injector, mechanics achieve maximum increases in engine power and torque. In addition to power indicators, the motor gains improved acceleration dynamics. The response to driver control inputs is noticeably improved.
If they have some experience and sufficient qualifications, drivers carry out this work with their own hands:
- boring of cylinder liners (increase in volume from 1.7 to 1.9 liters);
- seats for valves of larger diameter;
- replacement of changed elements;
- reconfiguration of the fuel system (chip tuning).
Important: If the technician who tunes the Chevrolet Niva engine has insufficient experience and knowledge, working elements may break down and additional problems may arise that require expensive repairs.
Body Features
As for the body, it is worth paying attention to the thresholds. They rot very quickly under the plastic covers, so it is recommended to remove them and carry out anti-corrosion treatment. The area under the door seals should also be treated.
When operating the Chevrolet Niva exclusively off-road, you should periodically monitor the condition of the rear bumper.
It is made in the shape of a “bucket”, so it can rake in everything that gets in its way.
Features of Niva Chevrolet engine maintenance
The operational life of a Chevrolet Niva engine depends on timely, high-quality scheduled preventive maintenance. To save money, many drivers take care of their car, in particular the power unit, on their own, in a garage.
The list of main works includes measures to replace the following parts, assemblies, and consumables:
- Motor oil.
- Replacement air filter part.
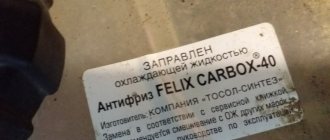
- Antifreeze.
- Fuel filter.
- Brake fluid.
The list of mandatory operations also includes regular checking of the condition of such nodes:
- drive belts for the air conditioning compressor and other auxiliary mechanisms;
- pads, drums, brake discs of front and rear wheels.
If necessary, these parts must be dismantled and subsequently replaced with new copies.
Nuances when servicing the chassis and transmission
Since the Chevrolet Niva has all-wheel drive, clever craftsmen are trying to make one of the drives switchable. To do this, install a special axle shut-off unit or simply unscrew the rear or front cardan.
Therefore, when inspecting a supported Chevrolet, pay attention to the issue of such “modernization” of the drive. And, if the answer is positive, carefully inspect the transfer case supports. Perhaps they have long been worn out due to frequent vibrations.
Of course, you can try to repair the cylinders, but it would be more advisable to completely replace them, because their cost fluctuates around 500 rubles. Replacement will cost 800-900 rubles.
As for the shortcomings of the chassis, these include the hub bearings.
They may need to be replaced after 30,000 kilometers. However, their wear directly depends on the quality of driving. If you use the Niva exclusively off-road, bearing failures will be really frequent. The price list for spare parts starts at 500 rubles, and replacement work starts at 1,500.
How to change the oil in a Chevrolet Niva engine with your own hands
According to the maintenance regulations for this power unit, the oil should be changed after a travel distance of 15,000 kilometers. When operating the machine in difficult conditions, the time period is reduced to 7,500 km.
Measures to replace the lubricant are carried out with the engine turned off, a few minutes after the trip. The car must be located on a special elevated platform - an overpass.
- clean the drain plug located at the bottom of the oil pan;
- place a container to collect used lubricant;
- unscrew the plug;
- wait 10 - 15 minutes until the hot oil drains;
- dismantle the old one and install a new oil filter;
- clean the plug and screw it into its original place;
- pour a portion of new oil (3.5 - 3.7 liters) through the filler neck;
- wait 10 minutes and check the level using the oil dipstick (at this stage it should be at its maximum value);
- start the engine;
- check for oil leaks in the area of the filter and drain plug;
- turn off the engine;
- re-check the amount of lubricant (now the level between the MAX and MIN marks is considered normal);
- If necessary, add the missing oil.
After completing all the necessary steps, it is recommended to tighten the fastenings of the filter and drain plug.
Tip: When completely changing the engine oil, it is recommended to change the outdated filter element. Initially, the Chevrolet Niva engine is equipped with a Salyut 2108-1012005 oil filter. After the first maintenance of the motor, this unit is replaced with a MANN W920/21 filter made in Germany.
Specifications and Features
The power unit that is installed on the Chevrolet Niva, as well as on the Niva 21214 and 21213 models, has the following characteristics:
There have been no significant changes in the camshaft mechanism in the new models. Thanks to the homogeneous bush-roller chain, the structure of all engine sprockets in the device is uniform. Thanks to this structure, the pump pumps oil better. The spring-hydraulic system used in the work suggests that otherwise all the elements in the motor remain the same.
Water is pumped using a generator and a pump; they interact with a pulley, which is mounted on the crankshaft and driven by a poly-V-belt. The belt used is a standard type, has catalog number 58436 5PK1888 and is called “GATES”. It is 188.8 centimeters long, 1.7 centimeters wide, and has five wedges.
Due to design features, namely the lack of attachment of the front axle gearbox to the power unit, the shape of the motor has changed slightly, as a result of which the design of the axle block and the engine compartment have undergone changes. Therefore, it is not possible to install a new engine on previous models.
Air intake
Modern engines on the Chevrolet Niva are equipped with a new air intake system, which is characterized by an increased volume of the air filter. Design changes also affected such details as:
- Inlet pipe with pipes;
- Receiver;
- The throttle type has replaced it.
The entire electronic system works thanks to a controller which can be the following:
Thanks to the improved injection control system, which has a pair-parallel design, it becomes possible to control fuel consumption. The injectors in the fuel rail are installed "SIEMENS" type. In order to protect the engine, a special plastic casing is installed.
Let's dive into history
The Chevrolet Niva was created on the basis of the classic Soviet SUV VAZ-2121 - the only car with all-wheel drive. The car got its name in the early 2000s, when a joint venture was created with General Motors, which made it possible to install the Chevrolet badge on automotive products.
Since the late 90s, Niva 2121 has been constantly subject to changes and modernizations
. The car enthusiast wanted to get a new, modern SUV, beautiful on the outside and reliable on the inside. The designers planned to take into account all the wishes of consumers, continuing to restore their creation until 2009. It was then that the latest, most modern Chevrolet Niva model was released, which can now be found on domestic roads in huge numbers.
Any domestically produced car has both fans and ardent opponents. You can understand both of them, because 90% of the spare parts in the car are made in Russia. Assembly is also carried out in our country. Therefore, at the end you can get both a problematic car and a product that can amazingly travel for five to six years without a single breakdown.
Malfunctions
The main reasons why the engine on a Chevrolet Niva may not start may be as follows:
- The fuel line is dirty. The problem can be solved by regular blowing or flushing;
- The filter installed between the engine and the fuel supply pipe is clogged;
- The fuel supply system does not have the required pressure. It is necessary to check the condition of the pump;
- At idle there are problems with the control device;
- Air has entered the fuel supply hoses;
- There are problems with the throttle valve or its sensor;
- The ignition system is faulty.
Chevrolet Niva cooling system design
Engine cooling on the Niva is represented by several elements:
- Radiator with fans - directly cools the antifreeze. Fans speed up this process when overheated.
- Temperature sensor - gives the injection ECU information about the temperature of the antifreeze to turn on the fans.
- Thermostat - regulates coolant circulation to quickly warm up the engine.
- Pump - necessary for the circulation of coolant. It is a liquid pump.
- Expansion tank - used to compensate for the thermal expansion of the coolant.
- Connecting pipes.
- Heater radiator - takes an indirect part in engine cooling, but helps warm the interior using the heat of antifreeze.
1 - pump, 2 - radiator, 3 - thermostat, 4 - expansion tank, 5 - fan unit.
The Chevrolet Niva cooling system must be completely sealed from the air. Otherwise, leaks or air pockets will appear in it.
Finalization
Some car owners, in order to improve technical characteristics and increase power, tune the Chevrolet Niva engine. But before resorting to this procedure, you need to think carefully about everything, this is due to the fact that it will not be possible to achieve any additional results.
There are several ways to slightly improve the performance of the power unit:
- Increasing the piston stroke from 1.7 to 1.9 liters. In this case, boring is performed and the internal diameter of the liners is increased, after which new pistons and rings are selected. A crankshaft with a shortened connecting rod and elongated arms is installed. In addition, the cylinder head is modified, the intake and exhaust ports are bored, and the valve is replaced with a part of a larger diameter, at the same time the valve seats are bored and replaced with new ones.
- The old carburetor is replaced with a new one and at the same time the standard connecting rods are replaced with lighter ones.
- Chip tuning. The old firmware is being replaced with an improved one.
All these modifications make sense only when traction is improved along with them, since this is the main feature of this type of car. The most important thing is that all modifications to the engine are carried out by an experienced person who knows his job, otherwise all the work done will lead to problems that will lead to breakdown of the power unit.
