Independent Wheel Bearing Clearance Repair
If you feel or feel vibration in the steering column while driving, then most likely the clearance on the front wheels in the bearings of the hub itself has increased, so their service life will be reduced, and the tires will begin to wear unevenly. And if there is no gap at all, then the hub will rotate tightly, which will also lead to a decrease in service life, so its gap should be greater than zero fifteen ml. Adjustment of the front bearings is carried out using a wheelbrace wrench, a twenty-seven wrench and a hammer.
- A wheel that is in a suspended state should be rocked; if there is play, the gap must be adjusted. After this, press the brake pedal and rock the wheel; if there is no play, then there is a gap in the bearings.
- It is necessary to dismantle the decorative cap and unscrew the lock nut from the hub, and hold it with a wrench to prevent it from turning. When repairing the chassis while adjusting the hub, it is advisable to install new hub nuts, since even after adjustment there is a high probability that the old ones will take their original place, which will not allow them to be properly locked. If this is not possible, then you can take the nut from Drugov’s car.
- Then you need to twist the hub nut so that the torque is 19.6 Nm. turning the hub several times, ninety degrees in two directions, will install the bearing itself. After this, loosen the adjusting nut and tighten it to 6.8 Nm. Having done all this, simply unscrew the nut twenty-five degrees.
- After everything is done, change the collar of the nut on the pin of the external drive joint.
- After the adjustment is made, check how the wheels rotate; if they rotate easily, then everything is fine. The final check can be made only after driving several kilometers without braking, assessing how the hub heats up.
Also interesting: Chevrolet Niva instrument cluster tuning
Step-by-step instructions for replacing the cylinder head gasket
The design features of the Niva Chevrolet make it possible to remove the cylinder head without good access from below. However, the presence of an inspection hole or lift greatly facilitates access to some nuts and the coolant drain valve. There is no need to remove the engine, but it is advisable to clear the space under the hood of interfering hoses and wires.
For repairs you will need the following tools:
- set of keys and socket heads;
- powerful wrench, ratchets, extensions;
- hammer;
- flat screwdriver;
- head or special wrench 38 for cranking the crankshaft;
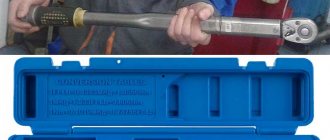
- torque wrench;
- brake pipe wrench (suitable for oil line).
Conventionally, all work on replacing the cylinder head gasket on a Niva can be divided into 2 stages: removing all attachments and all electrical sensors from the cylinder head, removing the timing mechanism and attaching the head to the cylinder block.
Procedure for removing the cylinder head of a Chevy Niva
The work algorithm is as follows:
- Drain the antifreeze from the radiator and engine block. To do this, unscrew the plug on the block with a 13 key. In this case, there is no need to drain the oil from the crankcase. Remove the terminal from the battery. We move the gearbox to neutral position.
- While the coolant is draining, we begin to disassemble the engine from the hood side. We unscrew the throttle valve, remove the throttle cable, remove the wires from the spark plugs, disconnect the electrical connectors of the injectors, TPS, IAC, oil pressure and coolant temperature sensor.
- Now you can disconnect all the cooling system hoses going to the thermostat, heater core and throttle body heating. Remove the brake booster hose from the intake manifold.
- We take the engine wiring harness and all removed hoses to the side and secure them if necessary.
- We unscrew the protective screen of the exhaust manifold, loosen the 4 nuts securing the exhaust pipe to the exhaust manifold. For the convenience of further actions, the exhaust pipe can be removed from the lower mounts and completely lowered under the car.
- On a Chevy Niva with power steering, the pump mounting bracket will interfere with us. It is not necessary to remove it completely - just unscrew the fastening bolts and carefully hang it on the wire.
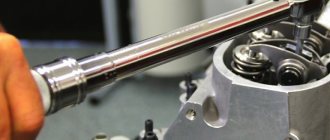
- Now you can start opening the engine. Remove the valve cover. Using a special wrench, unscrew the oil line to the hydraulic compensators and chain tensioner.
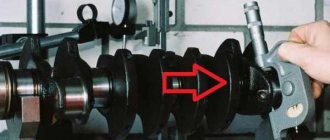
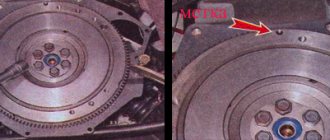
- Set the piston of the first cylinder to TDC until the marks align by turning the crankshaft. Loosen the chain tensioner and unscrew the top sprocket. We immediately fix it in this position with wire to prevent the circuit from jumping and phase failure.
- Unscrew the 10 nuts securing the camshaft housing with bearings. You need to unscrew evenly around the entire perimeter (according to the tightening order in the instructions). Remove the assembly from the engine.
- Access to 10 cylinder head mounting bolts is now open. You need to tear them off with a wrench, starting from the middle and moving to the outer bolts. The bolts are removed from their places and checked for thread condition and possible elongation (no more than 117 mm).
- Gently tapping and prying from below with a screwdriver, pull the cylinder head out of its place. After which you can remove it from the engine along with the collectors. The mass of this unit allows you to perform the operation yourself.
After removing the old gasket, possible damage and wear of the surfaces are assessed. If no repairs are required, the valves do not have carbon deposits, and all dimensions are within tolerance, then you can immediately begin replacing the cylinder head gasket and assembling the engine.
Chevrolet Niva Manual
Tightening torques for threaded connections KAMAZ 5320 - 54115
We carry out the work on an inspection ditch or overpass. We remove the cylinder head complete with throttle assembly, receiver, fuel rail, intake pipe, exhaust manifold and thermostat. Relieve the pressure in the fuel rail (see Replacing the fuel filter). Disconnect the wire terminal from the negative terminal of the battery. Drain the coolant from the radiator and cylinder block (see Replacing the coolant). We remove the tips of the high-voltage wires from the spark plugs (see Checking the condition and replacing spark plugs) and remove the oil level indicator from the guide tube. We disconnect the tip of the throttle valve drive cable from the throttle assembly sector (see Removing the throttle drive, replacing the cable). Then we disconnect from: • the receiver - the throttle cable and the brake booster hose (see Replacing the receiver gasket); • cooling jacket outlet pipe - upper radiator hose (see Removing and installing the engine); • thermostat - lower radiator hose and fluid supply hose to the coolant pump (see Replacing the thermostat); • cylinder head pipe and heater radiator outlet pipe - heater radiator hoses (see Removing and installing the engine); • canister purge valve - a tube connecting the valve to the adsorber (see Removing elements of the fuel vapor recovery system); • fuel rail - fuel supply hose (see Removing the fuel rail and injectors); • exhaust manifold - exhaust pipe (see Removing the exhaust pipe) and starter shield (see Replacing the gasket of the intake pipe and exhaust manifold); We disconnect the engine management system wiring harness connectors from the injector wiring harness, the control system coolant temperature sensors and the coolant temperature indicator, the crankshaft position sensor, the phase sensor, the idle speed controller, and the canister purge valve (see the relevant sections). Remove the cylinder head cover. Turn the crankshaft until the mark on the camshaft sprocket aligns with the mark on the camshaft bearing housing (see Removing the camshaft and valve drive levers). Remove the hydraulic timing chain tensioner (see Removing the hydraulic timing chain tensioner). We remove the sprocket from the camshaft toe and tie the chain with wire. Remove the camshaft and valve drive levers (see Removing the camshaft and valve drive levers). Using a 13mm socket, unscrew the cylinder head mounting bolt located next to the upper mounting bolt of the generator bracket. Using the E16 head, unscrew... ...ten bolts securing the head to the cylinder block... ...and remove the bolts. Remove the cylinder head assembly with thermostat, throttle assembly, receiver, intake pipe, fuel rail and exhaust manifold. The cylinder head can also be removed from the engine by first removing the intake pipe and exhaust manifold (see Replacing the intake pipe and exhaust manifold gasket). Remove the cylinder head without the exhaust manifold and intake pipe. Remove the cylinder head gasket. Before installing a new gasket, clean the mating surfaces of the head and cylinder block from remnants of the old gasket, deposits and oil. Using a syringe with a needle or a rubber bulb, remove oil and coolant from the holes in the cylinder block for the head bolts. We install the gasket and cylinder head using two centering bushings. When installing the head on the cylinder block, we thread the chain with wire through the hole in the head. Having installed the cylinder head bolts, tighten them in the order shown in the figure. Procedure for tightening the cylinder head bolts. To ensure a reliable seal and avoid tightening the bolts during vehicle maintenance, we tighten them in four steps: 1st step - tighten bolts 1–10 with a torque of 20 N m (2.0 kgf m); 2nd step - tighten bolts 1–10 to a torque of 69.4–85.7 Nm (7.1–8.7 kgf m), and bolt 11 to a torque of 31.4–39.1 Nm ( 3.2–4.0 kgf m). Then we turn bolts 1–10 by 90° (3rd step) and another 90° (4th step). We carry out further assembly in reverse order.
Independent Wheel Bearing Clearance Repair
If you feel or feel vibration in the steering column while driving, then most likely the clearance on the front wheels in the bearings of the hub itself has increased, so their service life will be reduced, and the tires will begin to wear unevenly. And if there is no gap at all, then the hub will rotate tightly, which will also lead to a decrease in service life, so its gap should be greater than zero fifteen ml. Adjustment of the front bearings is carried out using a wheelbrace wrench, a twenty-seven wrench and a hammer.
- A wheel that is in a suspended state should be rocked; if there is play, the gap must be adjusted. After this, press the brake pedal and rock the wheel; if there is no play, then there is a gap in the bearings.
- It is necessary to dismantle the decorative cap and unscrew the lock nut from the hub, and hold it with a wrench to prevent it from turning. When repairing the chassis while adjusting the hub, it is advisable to install new hub nuts, since even after adjustment there is a high probability that the old ones will take their original place, which will not allow them to be properly locked. If this is not possible, then you can take the nut from Drugov’s car.
- Then you need to twist the hub nut so that the torque is 19.6 Nm. turning the hub several times, ninety degrees in two directions, will install the bearing itself. After this, loosen the adjusting nut and tighten it to 6.8 Nm. Having done all this, simply unscrew the nut twenty-five degrees.
- After everything is done, change the collar of the nut on the pin of the external drive joint.
- After the adjustment is made, check how the wheels rotate; if they rotate easily, then everything is fine. The final check can be made only after driving several kilometers without braking, assessing how the hub heats up.
Also interesting: Suspension lift in the field yourself
Engine
| Name of the unit, parts | Tightening torque, Nm |
| Bolt securing the left power unit support bracket to the gearbox housing | 48 |
| Bolt and nut securing the adapter to the left power unit support bracket | 68 |
| Bolt securing the rear power unit support bracket to the gearbox housing | 90 |
| Nut of the bolt securing the rear support of the power unit to the subframe/transmission bracket | 68 |
| Nuts and bolt securing the right power unit support bracket | 55 |
| Upper/lower front and rear timing cover bolt | 10 |
| Cylinder head cover bolt | 10 |
| Bolt securing the automatic timing belt tensioning mechanism | 25 |
| Camshaft pulley bolt | 67 |
| Camshaft bearing cap bolt | 16 |
| Cylinder head bolt | 25add 70°add 70°add 50° |
| Accessory drive pulley bolt | 95add 30°add 15° |
| Flywheel bolt | 35add 30°add 15° |
| Main bearing cap bolt | 50add 45°add 15° |
| Connecting rod cover bolt | 25add 30°add 15° |
| Air filter mounting bolt | 12 |
| Nut securing the intake manifold to the cylinder head | 25 |
| Throttle body bolt and nut | 15 |
| Thermostat housing mounting bolt | 20 |
| Nut securing the expansion tank of the cooling system | 4 |
| Coolant pump screw | 10 |
| Nut securing the exhaust manifold to the cylinder head | 25 |
| Intermediate pipe fastening nut | 40 |
| Coolant temperature sensor | 20 |
| Fuel rail mounting bolt | 25 |
| Crankshaft position sensor mounting bolt | 10 |
| Ignition coil mounting bolt | 10 |
| Exhaust Gas Recirculation Valve Bolt | 20 |
| Knock sensor mounting bolt | 20 |
| Phase sensor mounting bolt | 10 |
| Oxygen concentration sensor | 40 |
| Low oil pressure sensor | 40 |
| Pan drain plug | 35 |
| Spark plug | 25 |
Transmission
- Reversing light switch M14x1.5 28.4-45.1 (2.9-4.6)
- Bolt securing the clutch housing to the engine M12×1.25 53.9-87.2 (5.5-8.9)
- Nut securing the clutch housing to the gearbox M10×1.25 31.8-51.4 (3.25-5.25)
- Nut securing the clutch housing to the gearbox M8 15.7-25.5(1.6-2.6)
- Rod clamp cover bolt M8 15.7-25.5(1.6-2.6)
- Rear cover mounting nut M8 15.7-25.5(1.6-2.6)
- Nut of the rear end of the secondary shaft M20x1.0 66.6-82.3 (6.8-8.4)
- Intermediate shaft bearing clamping washer bolt M12×1.25 79.4-98.0 (8.1-10.0)
- Bolt securing the fork to the gearshift rod MB 11.7-18.6(1.2-1.9)
Tightening torques for Chevrolet Aveo T250 threaded connections
| Application | Nm, (rotary angle) |
| Compressor piping screw | 33 |
| Compressor mounting screws | 27 |
| Compressor mounting screws | 50 |
| Air filter housing mounting screws | 12 |
| Generator adjusting bolt | 20 |
| Generator mounting bolt | 20 |
| Connecting rod bearing cap bolts | 25 +30° +15° |
| Coolant pump mounting screws | 10 |
| Coolant temperature sensor | 20 |
| Camshaft bearing cover screws | 50 + 45° + 15° |
| Crankshaft pulley mounting screw | 95 +30° +15° |
| Camshaft Position Sensor Bolt | 10 |
| Cylinder head mounting screws | 25 + 60° + 60° + 60° +10° |
| Ignition coil mounting screws | 10 |
| Ignition coil plate mounting screws | 10 |
| Engine lift bracket bolt | 25 |
| Engine mount nuts | 40 |
| Engine Mount Fastener Bolts | 60 |
| Engine Mount Bolts | 60 |
| Exhaust Pipe Bolts | 40 |
| Nuts securing the exhaust pipe to the catalytic converter or connecting pipe | 30 |
| Nuts securing the exhaust pipe to the exhaust pipe | 40 |
| Exhaust pipe heat shield mounting screws | 15 |
| Exhaust pipe nuts | 25 |
| Flex plate mounting screws | 60 |
| Flex Plate Inspection Cover Screws | 10 |
| Flywheel mounting screws | 35 +30° +15° |
| Flywheel inspection cover mounting screws | 12 |
| Beam bolts | 25 |
| Intake manifold nuts | 25 |
| Intake manifold support bracket mounting screws | 22 |
| Fastening screws for the lower cover of the timing belt of the camshaft drive | 10 |
| Oil sump mounting screws | 10 |
| Oil pan drain plug | 55 |
| Oil pressure sensor | 40 |
| Oil pump mounting screws | 10 |
| Screws for securing the support bracket and oil pump (supply tube) | 10 |
| Oil pump pressure reducing valve | 30 |
| Oil pump rear cover screws | 6 |
| Power steering pump mounting screws (hereinafter referred to as power steering) | 25 |
| Power steering pump pulley mounting screws | 25 |
| Screws for securing the rear cover of the camshaft drive timing belt | 10 |
| Right shift bracket mounting screws | 60 |
| Spark plug | 40 |
| Thermostat housing mounting screws | 20 |
| Throttle cable bracket mounting screws | 8 |
| Automatic tensioner bolt for camshaft timing belt | 20 |
| Screws for fastening the gear shift basket housing | 75 |
| Shift mechanism mounting screws | 45 |
| Screws for fastening the upper cover of the camshaft drive timing belt | 10 |
| Valve cover screws | 10 |
Video about “Tightening torques for threaded connections” for Chevrolet Aveo
Tightening torque, torque wrench, fastener strength and handy table
Tightening the connecting rods, checking the correct installation of the pistons
The tightening torque of threaded connections, why is it so important?
Removing the cylinder head cover
Tightening torques for the main threaded connections of lawn next since 2014
Place the machine on a pit or ramp.
First, the holders of the brake booster pipe and the throttle valve drive cable should be disconnected from the cylinder head cover. They are mounted on special brackets on the left and right sides of the block.
Next, use a 10mm wrench to unscrew the bolt securing the air duct couplings. Move it aside. Next, using a screwdriver, slightly loosen the clamp of the crankcase ventilation pipe, which connects it to the air duct. Now use a 10mm socket to unscrew the bolts holding the cylinder head cover. The order is not important here.
OLYMPUS DIGITAL CAMERA
After that remove:
- brackets for the throttle cable and motor screen;
- lid pressure washers;
- ventilation and air hoses.
Next, all that remains is to remove the cylinder head cover.
How to determine the tightening torque
This tool should be selected in such a way that the tightening torque of the fastener is 20-30% less than the maximum torque on your wrench. If you try to exceed the limit, the key will quickly fail.
The tightening force and type of steel are indicated on each bolt; how to decipher the markings was described above. For secondary broaching of bolts, several rules must be taken into account:
- Always know the exact tightening force required.
- When checking the tightening, it is worth setting the force and checking all the fasteners in a circular order.
- It is forbidden to use a torque wrench as a regular one; it cannot be used to tighten parts, a nut, or tighten a bolt to the approximate force; control pulling is done with a torque wrench.
- The torque wrench must be spared.
Without torque wrench.
To do this you will need:
- Socket or open-end wrench.
- Spring canter or scale, with a limit of 30 kg.
- A table indicating the tightening force of the bolts and the tightening torque of the nuts.
The tightening torque is the force applied to a lever measuring 1 meter. For example, we need to tighten the nut with a force of 2 kgf/m:
- We measure the length of our spanner; for example, it was 0.20 meters.
- Divide 1 by 0.20 to get the number 5.
- We multiply the results obtained by 5 by 2 kGf/m and ultimately get 10 kg.
Moving on to practice, we take our key and scales, attach the hook to the key and tighten it to the desired weight, according to the calculation described above. But even this method will ultimately turn out to be better than pulling from “hand to eye”, with an error, the higher the effort, the smaller it is. This will depend on the quality of the scales, but it is better to purchase a special key.
When carrying out vehicle maintenance, questions often arise that are only briefly discussed on forums or in the literature. One of them is the tightening torque of the fastenings of the main components of the car. To clarify all the nuances of fastening the cylinder head bolts, we will concentrate on the engine, the “heart” of the car. And if you understand the principles of tightening torque for threaded connections, the knowledge gained will be easy to extrapolate to any vehicle component.
Adjustable hydraulic supports (hydraulic compensators).
REPAIR AND TECHNICAL CENTER “NIVA”
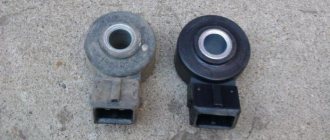
Old style hydraulic compensators.
Everyone knows what a hydraulic compensator (hereinafter referred to as hydraulic compensator) is and what function it performs. Worse than these g.k. I haven't seen anything, and their price isn't bad. The weakest point of these tensioners is that they tend to constantly unscrew (tightening torque is from 1.7 to 2.5 kg), tighten it harder, it simply will not work. Many people try to install them on various thread clamps, but I think this is not a solution. AvtoVAZ has already stopped producing cars with such cylinder head, but there are a lot of cars with cylinder head, old model, but not everyone has the opportunity to change the cylinder head to a new model. There is a good way, already tested on many cars, to avoid unscrewing the main gearbox. Everything is very simple - tighten them not by 2 kg, but by 4 kg. We did it!!!
Consequences of an unscrewed g.k.
When starting a cold internal combustion engine, a knocking sound is allowed. for 2 – 4 seconds. If the knocking continues for more than this time or appears on a hot internal combustion engine, it is advisable to contact a service station as soon as possible to eliminate the malfunction of the engine.
And now the most important thing for those who are delaying repairs. An unscrewed cylinder head first breaks the oil drop ramp, wears out the rocker and camshaft cam due to incorrect clearance adjustment and knocks out the threads in the cylinder head, which leads to the replacement of the cylinder head with a new model)))
Timing chain tensioner
Installed on Niva 21214 and 2123. After passing 1 maintenance, I recommend getting rid of this part and replacing it with Pilot 214 (mechanical tensioner). The hydraulic chain tensioner is very unreliable, especially when starting a cold internal combustion engine. The main malfunction of the chain tensioner is that the oil from the tensioner flows back into the system (the tightness of the tensioner is broken), and accordingly, the chain tension has weakened. And what we get: when starting the engine if the tensioner is faulty, the oil needs time to fill the tensioner and bring it into working condition. And then there are only two scenarios: the chain will rattle for 5 seconds and become tense, or the chain will simply fly off, which threatens a very expensive repair of the cylinder head.
New type hydraulic compensators.
I don't see any drawbacks in these hydraulic compensators. A very good option for the Niva family of cars. The only thing I had to deal with was unscrewed glasses, but the car mechanic who did not tighten them is to blame here (tightening torque up to 11 kg). When tightening glasses less than 4-5 kg, there is a possibility of them unscrewing. The consequences are the same as with the old sample
Please note that they are very loosely tightened at the factory.
Motor mechanic "RTC" NIVA"
Other site materials: Niva repair
Articles: Strengthening the front beam
Watt's parallelogram
Niva cylinder head bolts, installation
To work with bolts, a special tool is required. E16 head, which is not always included in universal tool kits, and a torque wrench. To make the process logically complete, the price list includes an E16 head (Sata or Force) and a torque wrench (JTK).
I won’t invent anything about the installation technology, just completely follow the factory manual.
- Submerge the bolts in a container of engine oil.
- Let it drain. Exposure for at least 30 minutes.
- Wrap and tighten according to the diagram.
Stage 1 – tightening with torque (12…20) N.m;
Stage 2 – tightening torque (50...70) N.m;
Stage 3 – turning the bolts by 90-110 degrees;
Stage 4 – turning the bolts 90-110 degrees.
Tightening torque of bolt 11 (at the cylinder head tail): preliminary – (14…16) N.m; final – (32…40) N.m.
This article will describe in detail the most important aspects of installing a camshaft for the famous domestic SUV NIVA.
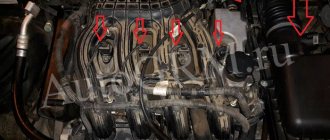
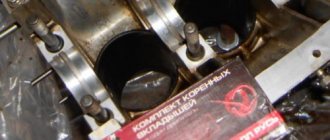
Block plane and broken gasket
A “punched” cylinder head gasket on Nivas and Shnivas is a birth defect. At some point they just went en masse. There is no need to be surprised. With modifications to the engine to meet new environmental standards, the designers are pushing the fan operating temperature further and further. This gives us an element of “glow” ignition. At a mileage of 15-25 thousand, the cylinder head gasket breaks, and so on down the list. Antifreeze to oil, oil to antifreeze. What do they do in the Papuan service? They buy a Fritex metal bag, install it, and 10 thousand later the client comes back with a new one, with the same question. Or rather, with two. How long? And the classic “what should I do?” It is not the Niva cylinder head gaskets or bolts that are to blame, it is the factory quality of processing of the block plane and the cylinder head plane that is to blame. Below I publish a photo of one of the blocks. I personally changed the gasket on it twice until I found the optimal set, which I now recommend. The metal bag does not help, but rather hinders. It cannot be crimped and does not fill uneven surfaces of the block. You need a shrink gasket that will completely accept the topography of the surface and the bolts that will constantly press it. This is the reason why hardened bolts are not rolled here. For a long time, the plant installed the Yaroslavl metal package “Fritex”, and now they have switched again to shrink gaskets. In a decent production facility, it would be easier to update the machine park and equipment, but at AvtoTAZ it turned out to be easier to go back ten steps along the road of technical progress.
In what cases is it necessary to change the cylinder head gasket on a Niva?
In principle, the element of the main cylinder block in question does not have a certain resource, that is, the gasket is replaced when it is damaged, which, however, usually occurs after 60,000 or 80,000 km. A breakdown is indicated by:
- air entering the antifreeze circulation system;
- lack of operating pressure in the combustion chamber of the air-fuel mixture;
- the presence of coolant in the lubricant or, conversely, the latter in the antifreeze (an oil film appears in the expansion tank).
All these problems lead to unstable operation of the Chevrolet engine.
In these situations, the gasket must be replaced immediately.
VAZ 21213 | antifreeze | Niva
The cooling system is filled year-round with a mixture of water and antifreeze with an anti-corrosion additive from the vw/seat concern. This mixture prevents freezing and corrosion of the cooling system, salt deposits and, in addition, increases the boiling point of the coolant. In the circulation circuit, as a result of the expansion of the liquid when heated, increased pressure is created, which also contributes to an increase in the boiling point of the coolant. The pressure is limited by a valve located in the expansion tank cap, which opens at a pressure of 1.4 - 1.6 bar. For the engine cooling system to function flawlessly, a high boiling point of the coolant is required. If the boiling point is too low, vapor locks can form, causing poor engine cooling. Therefore, the cooling system must be filled with a mixture of water and antifreeze all year round.
It is necessary to use antifreeze g12 plus (purple color, exact designation g 012 a8f) or another con, for example, glysantin-alu-protect-premium/g30.
If the cooling system is filled with a mixture containing g12 antifreeze (red, exact designation g 012 a8d), then red g12 antifreeze or another con, for example glysantin-alu-protect/g30, can also be used to replenish the coolant level. Note: g12 purple can be mixed with g12 red.
Attention: Do not mix red g12 antifreeze and the older green g11 antifreeze, because
this can cause severe engine damage. Coolant that is brown (the result of mixing antifreeze g12 and g11) must be replaced immediately.
Note: If a liquid with an antifreeze additive of the wrong specification accidentally ends up in the cooling system, the system must be flushed. To do this, all liquid from the cooling system should be completely drained and the system filled with clean water. Leave the engine idling for two minutes. Drain the water again and blow out the system from the side of the expansion tank with compressed air to completely empty it. Close the drain plug and fill the cooling system with a mixture of water and g12-plus antifreeze.
Attention: To replenish the cooling system (also in the warm season), only use a mixture of g12-plus (purple color) with soft, clean water. The proportion of antifreeze, also in summer, should not be lower than 40%
Therefore, when replenishing the cooling system with water, you should always add antifreeze.
In our latitudes, the coolant should provide protection against freezing down to -25 °C, or even better - down to -35 °C. The proportion of antifreeze should not exceed 60% (antifreeze protection of the coolant down to -40 °C), otherwise the antifreeze protection and cooling effect of the liquid are reduced. Note: depending on the vehicle equipment, the amount of coolant added may differ slightly from the values indicated in the table
Ratio of coolant components in liters
| engine's type | Frost protection | Quantity, l | |||
| Up to -25 °C | up to -35 °C | ||||
| g12 | Water | g12 | Water | ||
| Petrol | 2,3 | 3.3 | 2,8 | 2,8 | 5,6 |
| Diesel | 2,0 | 3,0 | 2,5 | 2,5 | 5,0 |
Spark plug torque
To repair and install spark plugs, a special tool is used, which is called a torque wrench, and this should not be forgotten. You also need to understand that not only the diameters of the threads in the engine housing itself differ, but also the tightening torque for each car manufacturer is different.
Therefore, experts talk about the importance of understanding the “torque” of the spark plug being installed. Everything depends not only on the structure of the thread itself, but also on the force with which installation is carried out
If you need to mount a candle, but there is no specialized tool at hand, then installation using improvised tools is allowed. In order to understand with what force the candle should be tightened, you first need to become familiar with it. Most often, manufacturers leave information of this nature on the packaging or in the product manual. In addition to a detailed diagram, as well as the correct installation sequence, such instructions most often include information about the thread of a given candle. Before you begin installing candles, a number of necessary conditions must be met. The first rule that must be followed is to carry out installation only when the engine is cold. You should also thoroughly clean the threads from carbon deposits.
Initially, the candle should be screwed in by hand, but you should not be too fanatical in this matter and screw it in all the way. After you have secured the spark plug, you should tighten it with a spark plug wrench a few turns. The number of revolutions in this case depends on the type of gasket used, as well as the size of the thread. For example, for a standard type of spark plug with an M14 thread, 180 degrees, that is, 20 Nm, will be sufficient. Information about the thread size can be found on the packaging or on the candle body itself (sometimes engraving is done on the insulator).
You should not screw the part all the way in, as in this case you can damage the already fragile threads not only on the spark plug itself, but there is also a high probability of damaging the groove in the engine, which is fraught with more serious consequences. In order to install a candle you do not need a lot of experience or knowledge of technical literature
The most important thing in this matter is to be careful, and it is also a good idea to familiarize yourself with the information provided by manufacturers
Bolt torque
You can easily determine this indicator yourself without resorting to the services of specialists in the table, but you should keep in mind that for this you need to know exactly what information is contained on the marking, which is located on the top of the bolt. The marking located on the bolt head must contain the following information:
The mark of the factory that produced the product. Information about the strength class of the product. The thread on the right side does not contain markings, but the thread on the left side contains markings, which are located clockwise. Carbon steel bolts are marked with a strength class, which is indicated by two numbers separated by a dot. For example: 12.8,10.5,8.7 The first digit of the marking informs about 0.01 nominal value of tensile strength. This value is measured in MPa. If the value class is 8.7, then the first number 8 means 8 * 100 = 800 MPa or 800 N/mm2 or 80 kgf/mm2 The second indicator on the marking informs about the ratio of tensile strength to yield strength, this value is multiplied by ten. That is, with marking 8.7 it turns out 8*7*10=560 N/mm2
This indicator is the maximum possible load of the bolt used.
Stainless steel products are marked with the appropriate steel marking, that is, A2 or A4 and the corresponding tensile strength equal to 50, 60, etc. For example: A2-60 or A4-70. In a special table you can find out the practical tightening torques for the corresponding bolts made of carbon steel N/m. It should be taken into account that the bolt still has a margin of safety so that, as they say, it does not “drip”. However, this does not mean that all connections should be tightened to the maximum. Most often, such force leads to the connection becoming unusable, that is, there is a high probability of pushing through, damage to the elastic gasket, etc. It turns out that the values given in the tables are acceptable, but the load level in this case is approximately 60-70% of the yield strength.
Torsion bolts (plastically deformable)
cylinder head bolt of a new type
Part number: 21213-1003271-01-0. Name: Torx cylinder head bolt. This name (torsion bar bolts) is fundamentally incorrect, but what can you do if they are called that on all forums and in all stores. According to science, when they say torsion bar, they mean deformation from twisting. And in this case, tensile deformation. In stores, these bolts are also called cylinder head bolts for Niva Chevrolet or cylinder head bolts of a new type. I also came across the name torx or chamomile. These bolts, unlike hardened ones, provide a constant load. That is, in a very primitive way we can talk about the grommet effect, that is, about the constant force to compress the cylinder head gasket in the axial direction of the bolt. These bolts are widely used on imported engines because they avoid human factor errors. In fact, you don't need to tighten with the precision of a torque wrench. The final values are taken as angular values. I don’t really like this approach, but such things are now commonly called “assembly guarantee”.
Rear suspension
Chevrolet Niva is designed for driving on asphalt and off-road. Therefore, the car, in addition to all-wheel drive, has increased ground clearance. The latter performs three functions:
- Reduced shock loads on the body, wheels, bearings.
- Providing traction.
- Reduced body vibrations when driving over uneven surfaces.
The pendant is divided into two parts:
- The front one is shown in the diagram below. Includes four control arms (two on each side), ball joints, telescopic shock absorbers, coil springs and anti-roll bar. The front suspension is independent - vibrations of one of the levers do not affect the position of the other.
- The rear is shown in the diagram below. Includes rear axle beam, torque rods, telescopic shock absorbers and coil springs. The beam rigidly connects the wheels. They cannot oscillate independently. Accordingly, the rear suspension is dependent. This slightly reduces comfort and maneuverability. But the beam increases the rigidity and reliability of the structure.
In addition to the listed parts, the suspension also includes other elements: rubber bumpers, silent blocks, bolts, nuts, fasteners, gaskets, brackets. All of them are subjected to large dynamic and static loads. In addition, the rubber parts of the silent blocks and the boots of the ball joints dry out over time and need to be replaced even after the car has been stored in a garage for a long time.
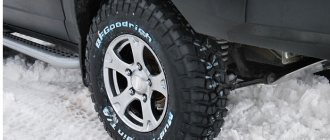
What kind of disks can be installed?
The manufacturer recommends installing R16 standard wheels. It is allowed to mount smaller wheels R15 on the car. It’s easier to choose tires for this size; there are plenty to choose from compared to 16-inch wheels.
The depth of the body arch of the Chevrolet Niva allows the driver to install 17-inch cast wheels on the car. Correct installation of wider wheels will allow you to:
- improve directional stability and vehicle control;
- reduce braking distance in case of unexpected braking;
- increase the vehicle's maneuverability in off-road conditions.
It is worth noting the negative aspects of such a replacement:
- the likelihood of damage to the integrity of the disc increases when the tire is damaged, for example, from a side impact;
- the smoothness of the ride decreases, the movement on it becomes harsher, and vibration increases.
Self-replacement of the cylinder head gasket Niva Chevrolet
The process of removing the cylinder head is not a frequent task, but if you have such a situation when replacing a gasket, you should know how to do it. Replacing the gasket may be necessary due to leakage of engine oil, antifreeze or antifreeze. The cylinder head is an important part of the car, with a complex structure, but you can disassemble it and replace the gasket.
To ensure that the connection between the head and the cylinder block itself is sufficiently tight and airtight, a gasket is used. It performs three functions:
- seals the cooling system channel;
- prevents oil leakage;
- distribution - the cylinder functions normally, as a result of which the mixture of gasoline and air does not leak out.
The seal is used only once and is changed during any engine repair. You can use the following types - asbestos, non-asbestos, steel. Each gasket is good in its own way: metal gaskets distribute mechanical stress well, asbestos gaskets are more elastic and can withstand high temperatures.
General rules suitable for any car, including the Chevrolet Niva:
- When disassembling, mark all attached parts with a marker - this way you will not get confused during the reverse process;
- when purchasing a gasket, buy exactly the type recommended by the engine manufacturer;
- be sure to remove any oil deposits on the fastening bolts;
- perform half or one turn when loosening the bolts to reduce the pressure;
- The cylinder head is assembled using special bushings;
- The bolts are finally tightened with a special wrench very carefully so as not to twist.
After replacing the gasket, carefully observe to see if there are any signs of leakage to ensure that it is properly replaced on the Chevrolet Niva.
- We remove the battery wiring and drain the antifreeze.
- We free the carburetor from cables and hoses.
- We dismantle the controller with voltage wires.
- Carefully remove the starter screen and heater tube from the manifold.
- Remove the antifreeze temperature sensor.
- Remove the brake booster hose.
- Remove the hoses from the cooling system and heater.
- Disconnect the camshaft and valve levers.
- We dismantle the chain and secure it.
- We unscrew the fasteners and remove the cylinder head with the pipe, carburetor and manifold.
According to reviews from Chevrolet Niva owners, you need to pay attention to the following subtleties:
- you should buy a metal seal as it is more durable and of higher quality;
- If the head fastener does not unscrew, you need to tap it with a hammer - this way you will minimally damage the surfaces and the key will not turn.
Removing the cylinder head
VAZ 2107 1982+: Appendix 1. tightening torques of threaded connections* VAZ 2107 Lada
How to remove the cylinder head is described in detail in the vehicle's operating instructions, so here we will only briefly describe the general procedure for performing this work. Typically this operation is performed as follows:
- Place the car on a level surface, secure it with the hand brake, set the gear shift lever to neutral;
- Disconnect the ground wire (negative) from the battery;
- Using the marks on the pulleys (or gears) and the engine, set the first cylinder to TDC (on new models, for this you must first unscrew the timing drive protective cover);
- Drain the engine coolant;
- Disconnect all wires connected to the cylinder head - spark plug armor wires, sensor wires, ground terminals, etc.;
- Disconnect the cooling system pipes, fuel hose and other pipes from the cylinder head;
- On some models - unscrew the distributor, generator and other parts;
- Free the carburetor or throttle assembly from pipes, wires, cables and other parts;
- Unscrew the muffler exhaust pipe from the exhaust manifold;
- Using a special tool, remove gears, tension rollers and other timing drive parts;
- Remove the cylinder head cover;
- Unscrew the ten bolts securing the head to the block;
- Remove the cylinder head.
Now you can replace the gasket or repair the head, for which the intake and exhaust manifolds are unscrewed from it, and it is disassembled further (the valves are cracked and removed, the camshaft is removed, etc.). But in any case, the removed head must be thoroughly inspected and its condition checked, as described below.
It is necessary to pay attention to two very important points. Firstly, the head bolts must be unscrewed in a certain order and according to a certain pattern
Typically, unscrewing begins with the central bolts, and the outer bolts are unscrewed last, and first all the bolts must be loosened (no more than one turn), and only then completely unscrewed.
Secondly, removal of the block head must be done very carefully so as not to damage it, especially its lower (matting) surface. Therefore, when removing the cylinder head, you should never pry it with a screwdriver or other tools; it is better to move the head to the side and then lift it with your hands. In some engines, you can lift the head using an improvised lever from a screwdriver placed under the exhaust manifold.
The removed head must be placed only with the bottom side on smooth and clean wooden blocks - this will prevent the bottom part from scratches and deformations. And, of course, under no circumstances should you throw the head, as if it falls, it can be seriously damaged and will be unsuitable for further use.
When is it necessary to change the cylinder head gasket?
The need to replace the cylinder head gasket of a Chevrolet Niva and, accordingly, the need for its tightening torque arises in some cases. The gasket in a vehicle needs to be changed if it is damaged. This refers to the occurrence of cracks and breakdowns in the structure of the cylinder head gasket. In this case, the owner of a Chevrolet Niva will be faced with a breakthrough of gases into the cooling system, as evidenced by the regular bubbling of antifreeze.
Tightening diagram for cylinder head screws for Niva Chevrolet
In addition, the need to replace the Chevrolet Niva cylinder head gasket appears due to insufficient compression levels in the combustion chambers. Perhaps the gasket has worn out and is no longer able to fully perform its tasks. In addition, if a crack appears in the cylinder head gasket, antifreeze will leak into the engine fluid and vice versa.
In these cases, replacing the cylinder head gasket is simply necessary. If you let this matter go, things could turn out even worse. Therefore, if at least one of these signs mentioned above is found in your Chevrolet Niva, you need to start replacing the cylinder head gasket as quickly as possible.
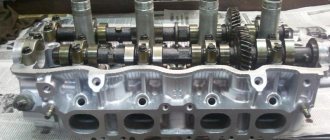
Cylinder head assembly and installation on a Chevrolet Niva engine
The Chevrolet Niva engine head is not particularly different from other VAZ heads. On VAZ 21213 engines, hydraulic compensators were installed from the factory to avoid problems with valve adjustment. But on our engine head, someone has already replaced the hydraulic compensators with ordinary toy soldiers with manual adjustment of valve clearances.
The engine was disassembled due to the formation of an emulsion in the lubrication system. The cylinder head was being crimped and a rotten cooling system plug was discovered. The formation of holes in the cylinder head plugs is a very common problem in VAZ engines. This happens mainly due to poor quality coolant. Car enthusiasts save their money and purchase low-quality antifreeze, and then wonder why their power unit failed so quickly... After the above manipulations, the engine was reassembled and continued normal operation
This photo report will show step by step the process of assembling the Chevrolet Niva cylinder head and its installation on the engine block. The engine head plugs were welded, the head was planned, and the valves were ground in.
Instructions for tightening cylinder head bolts
The next tightening of the cylinder head must be carried out during each routine repair or maintenance of the power unit (change of oil or consumables). It is mandatory to carry out the procedure after intervention in the internal combustion engine structure, and additional tightening after 500-700 kilometers. It is not recommended and there is no need to climb into the mechanism anymore. After full tightening, the bolts sit firmly in their sockets and do not loosen due to vibration. Otherwise, leaks or burnout of the cylinder head gasket may occur, which can lead to major repairs.
Modern motors manufactured after 2010 do not require periodic tightening of the studs due to the updating of the device and mechanism.
Recommendations for replacement
When servicing VAZ 2121, 2131, 21213 and other modifications, we advise you to pay attention to the following points:
- there is no need to use a sealant, as some experts advise: its presence will lead to the seal slipping and compromising the integrity of the joint, which can lead to oil leakage;
- when working, it is important not to deform the cover: if this happens, the product will not “sit” in place, installing a new seal will be useless;
- if the problem persists after the change, the reason may be broken fastening bolts, poor-quality rubber, or deformation of the perimeter of the cover.
Causes of cylinder head gasket failure
A crack or burnout of a gasket is a fairly common occurrence on a Chevrolet Niva. The vehicle is operated in extreme conditions; the engine runs at high speeds or with poor cooling off-road. The temperature in the combustion chambers reaches 1000°C, so the appearance of the slightest crack leads to rapid burnout of the gasket in this place.
A damaged node can be easily identified by the following symptoms:
- white steam from the exhaust pipe of the car (antifreeze enters the cylinders);
- drop in coolant level in the expansion tank;
- bubbling of antifreeze in the expansion tank;
- the appearance of an emulsion on the oil dipstick and timing components under the valve cover;
- increase in oil level due to antifreeze entering the crankcase;
- oil leaks from under the gasket outside the engine;
- the engine begins to stall and run intermittently;
- low compression in the cylinders.
The manufacturer does not regulate gasket replacement on a Chevrolet Niva. It is designed for the entire service life of the engine - 125 thousand km. This part is disposable and is replaced with a new one every time the cylinder head is removed. Dismantling the engine head may be necessary to repair valves and their seats, replace pistons and piston rings.
Results
If everything was done correctly, then the replaced gasket will not bother the entire remaining service life of the machine, and the symptoms of its burnout will disappear. Otherwise, you will have to contact a service center to more thoroughly troubleshoot the engine and find out the reasons. In general, self-replacement of the cylinder head gasket on a Chevrolet Niva is within the capabilities of car enthusiasts with minimal repair skills. The main difficulties lie in using a special tool and competently assessing the condition of the nodes.