The Chevrolet Niva SUV, produced by VAZ, is popular among car enthusiasts due to its good cross-country ability. To overcome muddy roads, steep climbs, and various obstacles, it needs impeccable engine coordination. One of the negative factors that negatively affects the performance of a car’s heart is detonation. Its increased level creates strong vibration of the vehicle, leading to increased wear and breakdown of internal engine parts. To avoid this, a knock sensor is used on a Chevrolet Niva car, which monitors and normalizes the fuel combustion process in the engine, eliminating potential malfunctions.
Where is the knock sensor located and what is it responsible for?
Depending on the make of the car, the location of the sensor may vary, but it is always located on the engine body.
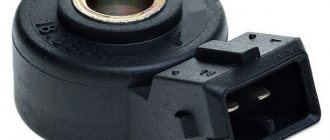
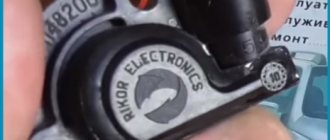
The part itself is very small, about the size of a matchbox. Detonation is one of the main defects of an internal combustion engine; it has considerable force and cannot be neglected. Among a dozen different sensors used to optimize the operation of internal combustion engines, the knock sensor is directly used to prevent detonation combustion of fuel.
The process of fuel detonation can be well controlled thanks to its main feature - the appearance of high-pitched and ringing metallic sounds, which, based on symptoms, are sometimes mistaken for the clicking fingers of the cylinder-piston group.
The force of detonation is enormous; if the detonation prevention systems malfunction, the engine will fail after 5-6 thousand kilometers.
You can check the sensor:
- using a multimeter;
- testing the ECU mode with the engine running;
- equivalent replacement with a working sensor.
The first sign of a malfunctioning knock sensor is an error indication on the dashboard.
The functionality of the sensor or its malfunction is checked by the computer, and if there is no control signal of the required shape and level, the microcomputer switches to the mode of checking the sign of sensor malfunction.
If the adjustment does not help, the ECU increases the level of enrichment of the fuel mixture, while simultaneously reducing the ignition timing. Such an algorithm is dictated by the need to prevent, first of all, timing malfunction and further destruction of parts of the cylinder-piston group.
One of the most popular domestic passenger cars is the Chevrolet Niva. This all-wheel drive vehicle has a gasoline engine and is classified as an SUV. Based on this, the Niva has a tendency to frequently travel over bumps and off-road. The operating conditions of this vehicle are conducive to providing maximum engine protection.
The first sign that can be noticed is the so-called detonation. In other words, a knocking sound in the engine. One of the parts of electronic vehicle control systems is the knock sensor. Despite its small size, it performs the most important functions in a car.
Error P0325
Error code P0325 is called “malfunction in the knock sensor circuit.” In English it sounds like: Knock Sensor 1 Circuit Malfunction. It signals to the driver that the engine control unit does not receive a signal from the DD. Due to the fact that some problems have arisen in its power supply or signal circuit. The cause of this error may be very low or very high voltage coming from the sensor due to a break or poor contact in the wiring harness block.
Possible causes of the error
There are several reasons why error p0325 may occur. Among them:
- broken knock sensor wiring;
- short circuit in the DD wiring circuit;
- malfunction in the connector (chip) and/or contact DD;
- high level of interference from the ignition system;
- malfunction of the knock sensor itself;
- malfunction of the engine control unit (abbreviated as ECM).
Conditions for recording error code 0325
The code is installed in the ECU memory on a warm engine at a crankshaft speed of 1600-5000 rpm. if the problem does not go away within 5 seconds. and more. The archive of fault error codes itself is cleared after 40 consecutive cycles without fixing a fault.
To find out exactly what problem caused the error, additional diagnostics must be performed.
External symptoms of error P0325
External signs of this error may include the following situations. However, they can also indicate other errors, so you should always perform additional diagnostics using an electronic scanner.
- The Check Engine light on the dashboard is activated;
- the engine control unit operates in emergency mode;
- in some cases, engine detonation is possible;
- loss of engine power is possible (the car “does not pull”, loses its dynamic characteristics, accelerates poorly);
- Unstable engine operation at idle.
In general, the symptoms of failure of the knock sensor or its wiring are outwardly similar to those when the ignition is set late in the car (on carburetor engines).
Error diagnosis algorithm
To diagnose error p0325, you must have an electronic OBD-II error scanner (for example Scan Tool Pro Black Edition ). It has a number of advantages over other analogues.
32-bit Scan Tool Pro Black
allows you to scan engine blocks, gearboxes, transmissions, auxiliary systems ABS, ESP in real time and save the received data, as well as make parameter changes.
Compatible with many cars. Can be connected to a smartphone and laptop via Wi-Fi or Bluetooth. Has the greatest functionality in the most popular diagnostic applications. By reading errors and monitoring sensor readings, you can determine malfunctions of any of the systems. The error detection algorithm will be as follows:
- First, you need to make sure that the alarm was not false. To do this, you need to reset the error using the scanner (if there are no others, otherwise you need to deal with them first) and perform a test drive. If error p0325 occurs again, then we continue further.
- You need to check the functionality of the knock sensor. This can be done in two ways - using a multimeter and mechanically. Using a multimeter, you first need to measure the voltage of the sensor when pressure is applied to it. And also check its circuit to the ECU for an open circuit. The second, simpler method is to simply hit the engine at idle speed in the immediate vicinity of the sensor. If it is working properly, then the engine speed will drop (the electronics will automatically change the ignition angle), which is true that this algorithm does not work on all cars and in some cases, reading the BC signal from the DD works under other additional conditions).
- Check ECM functionality. In rare cases, the program may crash. It is unlikely that you will be able to perform the check yourself, so it is better to seek help from an official dealer of your car manufacturer.
How to get rid of error p0325
Depending on what exactly caused the p0325 error, several options are possible to solve this problem. Among them:
- cleaning contacts or replacing wiring connectors (chips);
- repair or replacement of wiring from the knock sensor to the engine control unit;
- replacing the knock sensor itself, most often this is what is done (this unit cannot be repaired);
- flashing or replacing the engine control unit.
Error p0325 itself is not critical, and the car can get to a car service center or garage under its own power. However, there is a risk that if detonation occurs in the engine, the ECU will not be able to react properly and eliminate it. And since detonation is very dangerous for the power unit, you need to get rid of the error and carry out the appropriate repair work as quickly as possible after its occurrence.
Sensor operation
The DD housing contains a piezoelectric element that converts mechanical vibrations into electrical impulses. These signals are sent to the electronic control unit. During normal engine operation, the frequency characteristics have a certain character. If deviations occur in the signal parameters, the ECU makes adjustments to the operating processes of the motor, thereby eliminating the causes of detonation.
Detonation very often occurs when going uphill. In this case, the car is moving slowly, and the speed is increased. But do not worry, since this phenomenon is called glow ignition, and it does not indicate that the engine is not working properly.
Any internal combustion engine works according to the following principles:
- A mixture of gasoline and air is supplied to the combustion chamber of the cylinders, where it is ignited by a spark on the spark plug. Moreover, the piston should be literally a few millimeters from top dead center. As soon as the piston reaches the top position, the greatest pressure is generated in the cylinder. At this moment, the entire air-fuel mixture will completely burn.
- During normal operation of the knock sensor on the Chevrolet Niva, signs of this phenomenon will not appear. This device will help get rid of the manifestation of detonation. And it appears when the mixture begins to ignite much earlier than it should. This usually happens halfway to top dead center. And when the air-fuel mixture burns, a force is exerted on the upper part of the piston, which pushes it in the opposite direction. At the same time, the engine power is reduced, and significantly, and its parts wear out.
There is a "Check" icon on the car's dashboard. In English this translates as check or control. If it is not active, then the knock sensor is working and working as expected.
The operating principle of the knock sensor is based on a piezoelectric mechanism. Inside the sensor there is a plate with a piezo effect. When detonation occurs, voltage is created at the input and output, and the engine vibrates. Otherwise, this is called the creation of a potential difference. If the voltage level at one end is too high, the sensor corrects this process.
If for any reason the sensor breaks down, the “Check” icon will light up on the dashboard. This will mean only one thing: urgent repair or replacement of the element is required.
How to remove and replace the crankshaft position sensor on a Chevrolet Niva
To synchronize the position of the shaft with the electronic unit, the design of the Niva Chevrolet car is equipped with a crankshaft position sensor.
This device is located not far from the drive disk, and is located on the timing cover of the mechanism drive itself.
This disc is a wheel with fifty-eight teeth, and to create a certain impulse between the TDC (top dead center) and the ECU, a couple of teeth are specially removed.
Due to the fact that the crankshaft rotates, the drive disk rotates. The position of the ECU shaft is determined due to the fact that during the rotation of the disk at the sensor, magnetic fields change, thereby forming an alternating current pulse.
Sensor device
The structure of this element is the simplest, it consists of:
- Nylon frame
- This frame is wrapped in copper wires
- Has a steel core
- Insulation is provided by enamel, the base of the sealant is a compound resin
They come in different types, namely:
- The stroke sensor also distributes the ignition.
- Magnetic
- Optic
Symptoms of a problem
Sooner or later, the sensor becomes unusable, this leads to problems starting the Chevrolet Niva car, and sometimes even to the inability to stop the car while moving. The fuel supply and ignition timing depend on the position of the sensor.
- If while driving you notice a decrease in the dynamics of the car, this will indicate that this element is not corrected,
- This malfunction can also be indicated if the Check light comes on.
- In addition, a faulty sensor can be determined by the generator and timing drive.
- The revolutions go up and down and it all happens without your participation.
First of all, the position of the sensor is checked; the reason for checking may be the slightest resource cost. Also, using diagnostics, you can simply determine whether the device is fixed or not. Diagnostics means removing the product and reinstalling it; it will be in good working order if its values are approximately from 550 to 750 Ohms.
Removal, installation and inspection
Also, the first sign that it has failed is the occurrence of detonation under heavy loads on the engine itself, instability of idle speed, and a decrease in engine power. The state of the node can be understood in several ways. You just need to have the necessary equipment. If the necessary devices are available, we proceed to removing the element.
To remove it and check it, you need to do the following procedure:
- We remove the block with all the wires from it
- Unscrew the screw that secures the crankshaft sensor itself and remove it
- We check with a tester whether it is working or not
- We install the new element in place in the reverse order of removal.
By external signs you can determine the condition of the pads, the DPKV housing and whether the contacts are damaged. If no visual defects are detected, then we proceed to the inspection itself. It is carried out by means of ringing, and as mentioned above, the winding resistance should not exceed 759 Ohms, and not less than 550.
To summarize, we can conclude that this unit is the main one in the electronics, which is responsible for controlling the engine, since if it fails, then starting the engine will be impossible, so it is best to always carry it with you to insure yourself against such unpleasant consequences spare part.
If you do diagnostics and subsequent replacement, it will not take you much time and effort. The main thing is to adhere to clear rules for installation and dismantling. To extend the service life of all important elements of the Chevrolet Niva engine, timely and proper care should be carried out, not only for this device, but also for other parts.
How to replace a faulty knock sensor on a Chevrolet Niva
From time to time, malfunctions occur on any car. One of the causes of malfunctions that cause problems may be the occurrence of detonation. This can be seen by the engine running for a long time after the ignition has been turned off. It usually occurs due to explosive ignition of fuel in the cylinders.
There is a general principle of operation of an internal combustion engine:
- The fuel-air mixture enters the cylinder and is ignited by a spark from the glow plugs at the moment when the piston remains a few degrees before reaching top dead center. Complete combustion occurs at the moment when the piston reaches the top point, creating maximum pressure.
- If a detonation effect occurs, then ignition occurs much earlier, when the piston is still in the middle of the compression stroke. Therefore, during combustion, a force acts on it in the opposite direction, reducing engine power and leading to increased wear of parts.
If an indication of errors in engine operation appears on the instrument panel, this does not mean that the problem lies precisely in a faulty sensor. But if corresponding problems also arise when driving, then its urgent replacement is necessary. It should be done in accordance with the table.
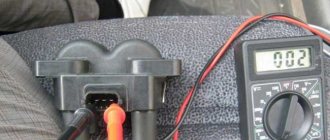
· Switch the multimeter to DC voltage measurement mode
Connect the connectors to the sensor output
· tap the sensor with a small hammer. In this case, the voltage should change.
· If the voltage does not change, then the sensor is most likely faulty
The cost of a knock sensor on a Niva is 500-600 rubles, so you shouldn’t delay replacing it so as not to spend much more on engine repairs.
From time to time, malfunctions occur on any car. One of the causes of malfunctions that cause problems may be the occurrence of detonation. This can be seen by the engine running for a long time after the ignition has been turned off.
Also interesting: Review of the standard Niva Chevrolet alarm system
It usually occurs due to explosive ignition of fuel in the cylinders. It appears gradually, you can notice it when going uphill at low speed when the gear is in high gear.
This effect is classified as glow ignition and does not indicate malfunction of the engine.
- The fuel-air mixture enters the cylinder and is ignited by a spark from the glow plugs at the moment when the piston remains a few degrees before reaching top dead center. Complete combustion occurs at the moment when the piston reaches the top point, creating maximum pressure.
- If a detonation effect occurs, then ignition occurs much earlier, when the piston is still in the middle of the compression stroke. Therefore, during combustion, a force acts on it in the opposite direction, reducing engine power and leading to increased wear of parts.
Symptoms of a problem
Visually, it is quite difficult to determine a sensor failure, but if the sensor fails, it entails several standard symptoms that will undoubtedly affect the operation of the engine.
- Loss of dynamics and power. The loss of engine power will be noticeably felt when driving a vehicle with passengers or cargo. When the engine is under load, it will stop developing its former power, and every kilometer will be difficult for the car.
- Increased fuel consumption. Due to incorrect adjustment of the ignition timing, fuel consumption begins to increase.
- Black smoke from the exhaust pipe. This problem occurs due to an excess of fuel in the combustion chamber, which does not have time to burn out completely and burns out in the exhaust manifold, forming black smoke. It should be noted that black smoke can also form for other reasons.
- Increased vibrations of the internal combustion engine. Vibrations occur due to uncontrolled detonations and improper combustion of fuel during engine operation.
If the knock sensor malfunctions, the “CheckEngine” lamp on the instrument panel lights up.
Is it possible to avoid detonation?
- When going uphill at a high incline, select a lower gear or one that will allow the engine to operate between 2500 and 3500 rpm.
- Do not use fuel with an octane rating lower than that recommended by the car manufacturer.
- Check the condition of the spark plugs in a timely manner. During scheduled maintenance, monitor the condition of the spark plug wells and check the compression in the piston.
On a Chevrolet Niva, a knock sensor error can be read using a special diagnostic scanner.
If there is an on-board computer, an error code will be displayed on it:
- 0327 - excessively low signal level from the knock sensor. Most likely, there is a break in the circuits connecting the sensor to the control unit.
- 0328 - signal level too high. The cause of this error may be a malfunction of the device itself.
The Chevrolet Niva is a very specific car, as it is designed for driving in conditions where there is practically no road. Therefore, any problems with it can simply be fatal. The risk of stopping in the middle of the forest increases several times.
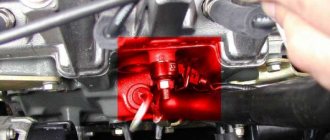
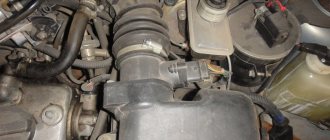
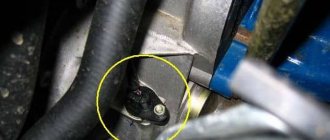
Pay attention to where the knock sensor is located on the Chevrolet Niva. It is located in the center of the engine block. The distance from the sensor installation location to the 1st and 4th cylinders is the same, thanks to this it allows you to capture all detonation knocks that appear in the internal combustion engine.
And in order to eliminate the possibility of detonation, it is enough to follow a few simple rules:
- When you drive your car uphill or off-road, you need to downshift. It is desirable that the engine operates at a frequency of 2500..3500 rpm.
- Monitor the condition of the spark plugs - the quality of ignition of the mixture depends on them. It is better to occasionally check the compression in each cylinder.
- It is not recommended to use gasoline with a low octane number. It is advisable to fill the tank only with fuel recommended by the car manufacturer.
Error p0326
Error code p0326 during diagnostics is deciphered as “ out of the permissible range of the knock sensor signal .” In the English version, the code description is Knock Sensor 1 Circuit Range/Performance. It is very similar to error p0325 and has similar causes, symptoms and solutions. The electronic control unit detects knock sensor failure due to a short or open circuit by checking that the analog input signal from the sensor is within the required range. If the difference between the signal from the knock sensor and the noise level is less than the threshold value over a certain period of time, then this becomes the reason for the formation of error code p0326. This code is also registered if the signal value from the mentioned sensor is higher or lower than the corresponding permissible values.
Conditions for generating an error
There are three conditions under which error code p0326 is stored in the ECM. Among them:
- The knock sensor signal amplitude is below the permissible threshold value.
- The electronic engine control unit (ECU) operates in fuel knock control mode (usually enabled by default).
- The error is not entered into the memory of the electronic device immediately, but only during the third drive cycle, when the engine is warmed up to operating temperature and at a speed above 2500 rpm.
Causes of error p0326
The reason for the formation of error p0326 in the ECM memory may be one or more of the situations described below:
- Poor contact
- An open or short circuit in the car's knock sensor circuit.
- Malfunction of the knock sensor itself.
Diagnosis and elimination of error code P0326
First of all, you need to make sure that the alarm was not false. To do this, as described above, you need to reset (erase from memory) the error using the program code, and then make a test drive in the car. If the error occurs again, you need to look for the cause of its occurrence. So, the check must be performed using the following algorithm:
- Turn off the ignition and disconnect the wires connecting the computer and the knock sensor from one and the other device.
- Using a multimeter, you need to check the integrity of these wires (in other words, “ring” them).
- Check the quality of the electrical connection where the wires connect to the ECU and the knock sensor. If necessary, clean the contacts or carry out mechanical repairs on the chip fastening.
- If the wires are intact and the electrical contact is in order, then you need to check the tightening torque in the knock sensor seat. In some cases (for example, if it has already been replaced and the car owner tightened it “by eye” without observing the required torque value), the sensor may not be tightened enough. Then you need to find out the exact value of the torque in the reference literature for a specific car and use a torque wrench to correct the situation (usually the value of the corresponding torque is about 20...25 Nm for passenger cars).
The error itself is not critical, and the car can be operated with it. However, this is risky because if fuel detonation occurs, the sensor may report incorrect information to the ECU, and the electronics will not take appropriate measures to eliminate it. Therefore, it is advisable to eliminate both the error itself from the ECM memory and the reasons why it occurred as quickly as possible.
How does detonation occur in a Chevrolet Niva car?
Like any car equipped with an internal combustion engine, the Chevrolet Niva may experience problems with detonation over time. And considering that it is mainly used to overcome obstacles and drive off-road, the risks increase several times. Therefore, it is important to listen to the operation of the engine under load and, if a metallic clatter appears, visit diagnostics, so as not to develop a number of problems over time:
- destruction of the cylinder head and crank mechanism
- burnout of the cylinder head gasket. This is due to the fact that during detonation the operating temperature of the engine increases significantly.
- piston burnout. occurs as a result of corrosion of the piston day.
Therefore, when moving up at low speeds and in a selected high gear, it is necessary to control the operation of the engine. If you give an increased load and contribute to the occurrence of detonation, you can ultimately damage a large number of car components, which will lead to the need for expensive major repairs.
Causes of knocking hydraulic compensators
The knocking sound of Chevrolet Niva hydraulic compensators can be easily detected by ear; it knocks at a frequency half the engine speed. It can knock both on a cold engine and on a hot one, and the reasons for this are different.
Reasons for knocking when cold:
- Thick oil. As the engine warms up, the oil heats up, becomes thinner, and the knocking noise goes away.
- Dirt. A bad filter or old oil can cause dirt to get into the channels and holes and clog them.
- Worn or broken plunger. The cause may be natural wear or abrasive contaminants that have entered the oil.
"Hot":
- Plunger jamming. Scuffing on the plunger pair increases its wear significantly and blocks it.
- Oil with incorrect viscosity. When changing the oil seasonally on their own, sometimes owners make mistakes and fill in oil with the wrong viscosity. If it is too liquid, it quickly flows out through those. gaps.
- Increased oil level in the engine. If this is due to coolant getting into the oil, it will foam in contact with the crankshaft.
All these reasons can be eliminated yourself if you carefully monitor your car.
Sensor cost
The knock sensor has extremely low maintainability. Usually, when it fails, it requires replacement with a new DD. The original General Motors sensor has part number 21120-3855020-02-0. Its price is 450-550 rubles. If there is a need to change the DD, then you can purchase an analogue. The table below presents the best alternative options for a branded product.
Table - Good analogues of the original Chevrolet Niva knock sensor
| Manufacturer | vendor code | Approximate cost, ruble |
| Bosch | 0 261 231 046 | 850-1000 |
| Fenox | SD10100O7 | 500-850 |
| Lada | 21120-3855020 | 190-250 |
| AvtoVAZ | 211203855020020 | 300-350 |
| EPS | 1.957.001 | 400-500 |
Price and article
Below is a table with prices for knock sensors for Niva from manufacturers that have proven themselves well in the market.
| Manufacturer | vendor code | Price, (rubles) |
| LADA (original) | 21123855020 | 200-400 |
| "Road map" | 21123855020 | 250-360 |
| Fenox | SD10100O7 | 200-400 |
| ERA | 550489 | 300-400 |
| Decaro | 2112-3855020 | 380-500 |
Typical breakdowns
Be sure to listen to how the engine operates as the load increases - if even the slightest metallic clatter appears, be sure to make a diagnosis.
Otherwise, you may experience the following problems:
- Burnout of the gasket under the cylinder head. When detonation occurs, the engine temperature increases.
- Destruction of the pistons, as they all corrode.
- Very often, elements of the crank mechanism and cylinder head are destroyed.
If you are driving your car up a hill and the gear is in high gear, be sure to monitor the engine. If you subject the engine to heavy loads, you will contribute to the appearance of detonation knocks. As a result, many elements of the car will fail, and this is the first step towards a major overhaul.
Failure of the pressure sensor circuit occurs for various reasons. Any of them can cause engine detonation. A thorough examination and diagnosis will help determine which one.
It could be:
- unsuitability of the piezoelectric element itself;
- outgoing cable break;
- sensor short to ground;
- lack of contact in the connector block;
- damage to the shielding braid.
Under no circumstances should you delay troubleshooting. The consequences of detonation can be very serious, namely, they will cause damage to the engine itself.
Detonation combustion of the fuel-air mixture
Problems rarely arise with the knock sensor, but you should never rule it out. It serves to control the level of engine knock. The fact is that a small part of the fuel-air mixture in the engine cylinders burns out precisely with detonation. This happens provided that the mixture is somewhat removed from the spark plug and, when heated, burns with the formation of an “explosion”. In this case, a characteristic knocking sound occurs in the crank mechanism of the engine; some drivers say that “the fingers are knocking.”
The occurrence of detonation combustion is usually influenced by the chemical composition of gasoline (fuel with a higher octane number is somewhat more resistant to detonation) and the design features of the engine (as a rule, the higher the compression ratio in the cylinders, the higher octane fuel the car needs).
What to do if there is a malfunction of the knock sensor on a Niva Chevrolet
A malfunction of the engine is usually indicated by atypical engine behavior.
Main features:
- persistent metallic knocking sound in the engine;
- significant reduction in power;
- strong heating of the fuel combustion chamber;
- exhaust smoke;
- increased gasoline consumption.
The presence of the mentioned signs indicates a potential sensor failure. Its subsequent verification is mandatory. The non-working part should be urgently replaced with a new device.
The failure of the engine is indicated by the illuminated “Check-engine” icon located on the dashboard, as well as by pronounced noise in the engine. Replacing the part will help eliminate the cause. You will need a 13mm wrench and a screwdriver. The sensor seat is located between the second and third cylinders.
Sequencing:
- For ease of access to the exhaust pipe, unscrew the bolt securing the front exhaust pipe strut; move the spacer to the side.
- Disconnect the connector connecting the sensor wire to the cable of the electronic control unit.
- Unscrew the sensor mounting bolt.
- Remove the sensor.
- Check it for serviceability, replace if necessary.
Also interesting: Where is the Niva Chevrolet knock sensor located, its installation and malfunctions
Installation is carried out in reverse order.
If you determine the breakdown yourself, then it’s not far to independently diagnose the sensor, as well as replace it yourself. In principle, this is not difficult, but it requires some understanding of the process.
Before running to the auto shop, it is better to check the electrical connection circuit. But if the spare part is still faulty, then it is recommended to replace it.
How to Replace a Knock Part
To do this, we need a new sensor, a “13” key and 20 minutes of free time.
Next we perform three simple steps:
- Turn off the ignition. Carefully disconnect the sensor terminal.
- Using a wrench, unscrew the bolt that secures the spare part to the cylinder block.
- We remove the sensor from the hood.
To install a new element, we perform the same algorithm of actions, but in reverse order. A properly functioning sensor ensures power and long service life for your car's engine. A new DD costs around 12-15 dollars. Therefore, sometimes it is better to carry out routine checks of the serviceability of this part, because repairing a car engine is much more expensive.
Next we perform three steps
Knock protection
The engine management system contains a knock sensor - it allows you to determine the presence of knocks, as well as evaluate their strength. If detonation suddenly appears and the sensor is faulty, the electronic engine control unit will generate an error signal. On the contrary, when the sensor is working properly, it will begin to produce a signal.
The design of the device is based on a piezoelectric element, which generates energy under the influence of impacts. And after that, the electronic control unit processes the signal and analyzes its level. After this, it sends a signal to change the ignition timing.
see also
Comments 15
Old man, what is the effect?!
The error disappeared, but a few weeks later it appeared again. She disappeared and reappeared, and so on until May of this year. The Ignition Module burned out, and after replacing it, the error disappeared on its own. So far she has been gone for a little over a month.
What a wild dog! And what did she want?!)
Maybe he wasn't just swearing? Maybe there really was some kind of detonation.
There is a lot of truth in your words!
No matter how much I knocked on the sensor, I still didn’t understand what it was showing, but if I squeeze it or press it on both sides, for example, even with my fingers, then it begins to change readings.
When I tapped it on the hammer, small voltage surges appeared, and when I squeezed it with my fingers, it also appeared.
No matter how much I knocked on the sensor, I still didn’t understand what it was showing, but if I squeeze it or press it on both sides, for example, even with my fingers, then it begins to change readings.
Not long ago I wrote about this diagnostic method.
Replacing the sensor
The procedure for replacing the knock sensor on a Chevrolet Niva is quite simple. You need to adhere to the following sequence:
- Find the location of the element on the engine block. And it is located in the middle part of the block; a wire made of a corrugated tube is connected to it.
- Prepare your tools. A 13mm wrench and a screwdriver will be enough.
- For convenience, you need to unscrew the bolt securing the front tube strut in the gun. After carrying out the necessary manipulations, this spacer must be moved to the side.
- Press the latch to disconnect the block from the sensor.
- Using a 13mm wrench, unscrew the bolt that secures the sensor to the engine block.
- Install the new element in reverse order.
It is advisable to check the integrity of the electrical wiring before installing a new sensor to ensure that it is working correctly. Depending on where the knock sensor on the Chevrolet Niva is purchased, its price may vary between 450-650 rubles.
Engine operation is often accompanied by various types of failures. One of these failures is detonation, which involves prolonged engine operation when the ignition is turned off. From the technical side, this occurs as a result of explosive ignition of the combustible mixture in the engine cylinders.
1. When a combustible mixture enters the cylinder, it ignites when the piston does not reach top dead center by several degrees. Complete combustion of the mixture is completed when the piston reaches the top point. This is how the normal operation of any internal combustion engine is carried out. 2. The phenomenon of detonation occurs when the piston reaches the middle of the compression stroke. At this moment, the piston receives a counterforce, resulting in reduced engine power.
Problems with engine detonation on a Chevrolet Niva car
Replacing the rear brake wheel cylinder
If during operation there are traces of brake fluid leakage on the brake drum and the inside of the wheel, replace the working cylinder.
Repairing the working cylinder often does not lead to positive results, and this requires special tools. Therefore, it is recommended to replace the cylinder assembly.
You will need: a 10mm wrench and a special wrench for the brake pipe nuts.
1. Engage first gear and install support blocks under the front wheels.
2. Remove the corresponding wheel.
3. Clean the brake pipe mounting area and the brake cylinder mounting bolts on the back side of the brake shield from dirt. To make it easier to unscrew the cylinder mounting bolts and the brake pipe mounting nut, apply WD-40 to the threaded connections.
4. Remove the brake drum.
5. Raise the parking brake lever until the upper ends of the shoes come out of the piston grooves.
6. Unscrew the nut securing the brake pipe to the working cylinder and...
7. ...plug the hole in the tube, for example with the cap of the air release valve
Unscrew the two bolts securing the working cylinder, holding it on the other side, and remove the working cylinder
After long-term use, the brake pipe nut “grows together” with the pipe into one piece, and when you try to unscrew the nut, the pipe twists and breaks.
In this case, just move the tube nut a little, then unscrew the cylinder mounting bolts and disconnect it from the tube, unscrewing the cylinder from its nut.
After disconnecting the cylinder from the tube, the mobility of the freed nut can be restored by moistening it with brake fluid and turning the nut with a wrench alternately in both directions.
10. Install the slave cylinder in the reverse order of removal.
11. Bleed the brake system (only the working cylinder on the wheel being replaced is allowed).
12. Be sure to install the protective cap on the air release valve.
Purpose of the knock sensor
The knock sensor has the shape of a round torus. There is a hole in the middle through which the fastening bolt passes. There is also a connector on the DD. It provides an electrical connection between the meter and the electronic control unit of the power plant. There is a piezoelectric element inside the torus. The vibration that occurs during detonation leads to shaking loads, which the DDs convert into an electrical signal of a certain frequency and amplitude.
The ECU controls the voltage coming from the motor. If the amplitude and frequency do not correspond to the normal range of values, this indicates the occurrence of detonation. To eliminate it, the control unit adjusts engine operation.
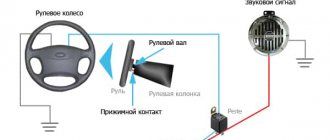
Elimination of excessive vibration and detonation makes it possible to reduce parasitic destructive loads affecting the power unit. Therefore, the main purpose of DD is the task of timely detection of the occurrence of detonation and increasing engine life. The image below shows the DD connection diagram.
This part is equipped with vehicles that run exclusively on gasoline and have an injection type engine. Knock sensors (DS) control the combustion process of liquid fuel, normalizing engine operation. This happens with the help of an electronic control unit (ECU), which, in the event of a sensor malfunction, ceases to see the detonation processes occurring in the cylinders.
Under high loads on the vehicle (steep climb, off-road), an imbalance occurs in the engine combustion chamber between the moment of fuel injection and its ignition. This affects the appearance of strong mechanical vibrations. DD eliminates such phenomena by sending a specialized electrical signal to the ECU.
The cause of detonation may be low-quality gasoline with a low octane number or design features of the engine. The positive aspect of the sensor’s operation is that it promptly protects the power unit from destruction, produces significant fuel savings and allows the car to develop maximum power. All this is extremely important for an SUV.
Error p0328
Error code p0328 by definition means that “ the output voltage of the knock sensor is above the threshold value ” (usually the threshold value is 4.5 V). In English it is called Knock Sensor 1 Circuit High. This error is similar to the previous one, but the difference is that in this case it may be caused by a break in the signal/power wires between the knock sensor and the electronic control unit or a short circuit of the wiring section to the ECU to “+”. Determining the cause is made difficult by the fact that such an error occurs much more often not because of problems with the chain, but because of poor fuel flow into the combustion chamber (lean mixture), which occurs due to clogged injectors, poor operation of the fuel pump, low-quality gasoline or phase shift and installation early ignition.
External signs
Indirect signs by which it can be judged that error p0328 is occurring are similar to those described above. In particular, the Check Engine light on the dashboard is activated, the car loses its dynamics and accelerates poorly. In some cases, increased fuel consumption is observed. However, the listed signs may indicate other malfunctions, so mandatory computer diagnostics are needed.
The cause must be looked for by studying the symptoms, and the search itself must be done by removing the connector for connecting the knock sensor with the engine running. It is necessary to measure the reading parameters and observe the behavior of the motor.
Causes of error p0328
The causes of error p0328 may be the following malfunctions:
- Damage to the knock sensor connector or significant contamination (ingress of debris, engine oil);
- the circuit of the mentioned sensor has a short circuit or open circuit;
- the knock sensor itself is faulty;
- there is electrical noise in the sensor circuit (interference);
- low pressure in the vehicle fuel line (below the threshold value);
- use of fuel that is unsuitable for the vehicle (low octane number) or its low quality;
- error in the operation of the electronic engine control system (failure).
Another interesting reason noted by car enthusiasts is that a similar error can appear if the valves are incorrectly adjusted, in particular, they have too much clearance.
Possible troubleshooting options
Depending on what caused the p0328 error, the ways to eliminate it will be different. However, the repair procedures are completely similar to those described above, so we’ll simply list them:
- check the knock sensor, its internal resistance, as well as the voltage it outputs to the computer;
- make an audit of the wires connecting the electronic unit and the DD;
- perform an audit of the chip where the sensor is connected, the quality and reliability of the contacts;
- Check the torque value at the knock sensor seat and, if necessary, set the desired value using a torque wrench.
As you can see, the verification procedures and reasons why errors p0325, p0326, p0327 and p0328 appear are largely similar. Accordingly, the methods for solving them are identical.
Remember that after eliminating all faults, you must erase error codes from the memory of the electronic control unit. This can be done either using software (preferably), or simply by disconnecting the negative terminal from the battery for 10 seconds.
What is the Niva Chevrolet knock sensor responsible for?
There are three main functions:
- car speed;
- car power:
- fuel consumption.
This is a so-called monitoring system that displays errors on the dashboard: “high signal level” and “low signal level,” thereby signaling to us that there is a malfunction in the car. The knock sensor on the Chevrolet Niva is located on the front side of the engine cylinder block. For stable operation of the car’s engine, it is necessary that the ignition overtaking angle be within normal limits. If the latter goes beyond the limits, the engine overheats and, as a result, excessive fuel consumption.
A malfunction of this spare part can occur for a variety of reasons:
- signal wires are broken;
- the braid is broken;
- short circuit;
- control unit failure.
There are three main functions
Computer diagnostics
The most complete diagnosis is possible with a computer or laptop. In order to use this method, you must purchase an adapter. This adapter performs two functions at once. It is an adapter from a K-line port to a USB port or to a COM port. It also acts as a decoder, which allows you to transmit signals from the ECU to the PC. You will also need to install the appropriate software on your laptop. There are a lot of free versions on the Internet. There are universal programs, as well as programs written for a specific car. After connecting to the computer, you will need to turn on the ignition and launch the program. The connection will happen automatically.
The interface of the computer program is very convenient and allows even an inexperienced user to navigate intuitively. All functionality can be divided into several sections. These are parameters, errors and settings. If the first two sections are informational, then using the third section you can control the vehicle systems.
Few people know that the Chevrolet Niva has a self-diagnosis function that produces basic error codes that can be used to quickly find and fix vehicle problems. It is not difficult to carry out this procedure yourself; just press the odometer button firmly and turn on the ignition at the same time. The arrows on the speedometer will creep up, after pressing again, an information message about the firmware version will be displayed, and the next time, all error codes will appear on the monitor, naturally, if there are malfunctions in the car.
How to check the knock sensor?
Unfortunately, the knock sensor can also fail. In this case, a person without special knowledge will be able to notice this only by the lit indicator. No other obvious signs will be noticed. The car will continue to operate in the same mode and start without any signs of breakdown.
At this point, it is necessary to remember that this device is not mechanical, it is part of an electronic system, and therefore the breakdown is considered electronic.
A knock sensor malfunction can happen for a number of different reasons, including:
- There has been a breakdown inside the sensor itself.
- Closure.
- The signal wire or braided shield is broken.
- Damage to the engine control unit.
Thus, it will not be difficult to identify the breakdown. In order to determine it, it is necessary to conduct a test.
But those who are not looking for easy ways can always carry out this simple process on their own. Self-checking occurs according to the following scheme:
- First, we remove the protection in the garage. You will have to work directly with the engine block.
- Now we rule out a break in the signal wire and shielding braid. If it is torn or the braid is torn, you need to check the fastening of the plug and socket of the sensor. The integrity of the braid must be checked.
- If a break is excluded, the outlet itself is assessed. It is possible that its connection is faulty and requires replacement.
- You can detect faults in the device itself using a voltmeter. In this case, the car must be started and idling.
- You also need to check the condition of the device contacts.
Also interesting: Chevrolet Niva temperature sensor: where is it located, replacement
You can check it yourself in a slightly different way. For this you need a multimeter. This device is very often found among car enthusiasts.
Checking the knock sensor with a multimeter is carried out only after it is removed from the engine. When checking, they knock on it with something metal. This method is the simplest.
We set the range to 200 mV, connect the positive and negative wires to the sensor terminal and to the metal ring, respectively. Do not confuse ground and signal pin! Now you need to hit it with something metal, but not too hard. The sensor will have to detonate.
You can check the sensor with another device called an oscilloscope. It will allow you to study the signal more qualitatively.
Now you need to tap the sensor lightly. The device will show detonation.
If the sensor detonates, then it is working, and the breakdown must be looked for elsewhere. But if the knock sensor signal is low or there is no signal, then this is a malfunction.
Additional recommendations
Finally, it is worth noting several interesting facts that will help car enthusiasts get rid of problems with the knock sensor and directly with the phenomenon of fuel detonation.
Firstly, you should always take into account that there are sensors of varying quality (from different manufacturers) available on the market. Car enthusiasts have often noted that cheap, low-quality knock sensors not only do not work correctly, but also quickly fail. Therefore, try to buy quality products.
Secondly, when installing a new sensor, always use the correct tightening torque. Accurate information can be found in the car manual or on specialized resources on the Internet. Direct tightening must be done using a torque wrench. Moreover, the installation of the DD should be done not on a bolt, but on a stud with a nut. It will prevent the sensor from loosening its mount over time due to vibration. After all, when a standard bolt is loosened, it or the sensor itself can vibrate in its seat and falsely provide information that there is detonation.
As for checking the sensor, one of these procedures is checking its internal resistance. This can be done using a multimeter set to resistance measurement mode (ohmmeter). It will be different for each sensor, but the approximate value will be around 5 MOhm (should not be too low or even zero, as this directly indicates its failure).
As a preventative measure, you can spray the contacts with a cleaning liquid or its equivalent in order to further reduce the likelihood of their oxidation (inspect both the contacts on the sensor itself and its connector).
Also, if the above errors occur, you should always check the condition of the knock sensor wiring. When exposed to high temperatures, it can become brittle and damaged over time. It is sometimes noted on forums that simply wrapping the wiring with insulating tape can solve the error problem. But for this it is advisable to use heat-resistant electrical tape and insulate it in several layers.
Some car owners note that one or several of the errors listed above may occur if they fill the car with low-quality gasoline with an octane rating lower than that prescribed for the engine. Therefore, if after checking you do not find any faults, just try changing the gas station. This has helped some car enthusiasts.
In rare cases, you can do without replacing the knock sensor. Instead, you can try to restore its functionality. In particular, using sandpaper and/or a file, it is necessary to clean its metal surface in order to remove dirt and rust (if any) from it. This way you can increase (restore) the mechanical contact between the sensor and the cylinder block itself.
Another interesting observation is that the knock sensor may mistake extraneous sounds for detonation. An example would be a weakened fastening of the engine protection, due to which the protection itself rattles on the road, and the sensor may falsely trigger and transmit a signal to the ECU, which in turn increases the ignition angle, and “detonation” continues. In this case, the errors described above may occur.
In some car models, such errors may appear spontaneously, and they are difficult to reproduce. Indeed, in some cars the knock sensor is triggered only at a certain position of the crankshaft. Therefore, even when tapping the engine with a hammer, it may be impossible to reproduce the error and understand the reason. This information needs to be clarified further and it is better to contact a car service center for help.
Some modern vehicles have a rough road sensor that disables the knock sensor when the vehicle is driven on a rough road and the crankshaft becomes misaligned and produces a sound similar to fuel knocking. That is why checking the knock sensor with the engine running, when the engine is hit with something heavy, after which the engine speed drops, is not always correct. So it is better to check the value of the voltage it produces during mechanical impact on the engine.
It is better to knock not on the engine block, but on some fastening elements, so as not to damage the motor housing!
Conclusion
As mentioned above, all four described errors are not critical, and the car can drive to a garage or car service station under its own power. However, this will be detrimental to the engine if fuel detonation occurs in the engine. Therefore, if such errors occur, it is still advisable to get rid of them as quickly as possible and eliminate the causes that caused them. Otherwise, there is a risk of complex breakdowns, which will lead to serious, and most importantly expensive, repairs.
Additional
Location of the knock sensor on Niva Chevrolet
The location of the sensor is designed in such a way as to obtain the highest sensitivity of the sensor. In order to see where the meter is located, you need to look directly at the cylinder block. The sensor is screwed on with a bolt. You can determine the location of the sensor by following the wires in the corrugated tube running from the ECU to the sensor.
The transmission of an accurate signal from the measuring element to the ECU is very important. You can only get it directly from the cylinder block. Based on this, it becomes clear why the Chevrolet Niva knock sensor is located where the greatest mechanical shock occurs: right at the source.
Fastening is carried out using a bolt. The connection to the ECU is made through a wire protected by a corrugated tube.
Where is it located?
Many people wonder where to find this knock sensor?! The location of the knock sensor is in the engine compartment of the Niva, namely on the cylinder block near the oil filter.
The location of the sensor is determined by the fact that this is the most sensitive area for detecting various engine detonations. This helps to quickly localize the problem in order to avoid engine breakdowns.
in our VKontakte group
DIAGNOSE YOUR CAR YOURSELF!
engine crankshaft speed is more than 1300 rpm; coolant temperature above 60°C; the amplitude of the knock sensor signal is above the threshold. If a permanent malfunction occurs, the “CHECK ENGINE” lamp lights up after 2 drive cycles.
1. The existence of conditions for the occurrence of code P0328 is checked.
2. The serviceability of the screen of wires 2 B and 88 G is checked.
1. Connect the adapter cable to the diagnostic connector. Start the engine and warm up to a coolant temperature of 60°C. Set the engine crankshaft speed to more than 1300 rpm.
Code P0328 is intermittent. If it is currently inactive and there are no other codes, analyze the conditions under which the code occurred. Check by ear the operation of the engine for the presence of extraneous metallic noises and knocking (valves are not adjusted); if found, eliminate them. Make sure that the sensor wiring harness is not routed near high voltage wires. See the “Checking the Knock Control System” card.
2. Check the serviceability of the screen and the connection between the screen and engine ground. Check the tightening torque of the knock sensor mounting nut.
If comments are found, the sensor or controller is faulty.
If there are no comments, fix the problem.
After repair, start the engine, reset the codes and make sure there is no signal from the “CHECK ENGINE” lamp.
We only find out where the knock sensor is located when we encounter problems with it. And before we talk about its location, it is worth understanding what this element is and what it is needed for. Let's start with this!
Engine control system VAZ-21214
Connection diagram of the VAZ-21214 engine management system with central fuel injection under US-83 toxicity standards with controller 21214-1411010 (EFI-4 type) on VAZ-21214 vehicles: 1 - “CHECK ENGINE” control lamp; 2 — instrument cluster (fragments); 3 — electric fans of the engine cooling system*;
4 — electric heater of the intake pipe; 5 — air temperature sensor; 6 — absolute pressure sensor; 7 — coolant temperature sensor; 8 — block connected to the throttle position sensor; 9 — central fuel injection unit; 10 — block connected to the idle speed regulator;
11 — block connected to the nozzle; 12 — diagnostic block; 13 - controller; 14 — knock sensor; 15 — speed sensor; 16 — oxygen concentration sensor; 17 - adsorber; 18 — battery; 19 - main relay; 20 — fuse block of the engine control system; 21 — relay for turning on the electric fuel pump;
22 — relay for turning on the electric fan*; 23 — relay for turning on the electric heater of the inlet pipe; 24 — electric heater protection fuse; 25 — starter activation relay; 26 — ignition relay; 27 — main car fuse box (fragment); 28 — spark plugs; 29 — tachometer; 30 — electric fuel pump with fuel level sensor;
Also interesting: Chevrolet Niva central locking diagram: what to do if the lock from the key does not work, where the control unit and relay are located
31 — ignition module; 32 — crankshaft position sensor; 33 - courtesy light switch, located on the driver's door pillar; 34 — control unit of the automobile anti-theft system**; 35 — status indicator of the car anti-theft system**; A - wire going to plug “50” of the ignition switch;
The order of conditional numbering of plugs in the blocks: a - controller; b — control unit of the automobile anti-theft system; c — indicator of the state of the automobile anti-theft system; g — speed sensor; d — central fuel injection unit; e — electric fuel pump and oxygen concentration sensor; g — ignition module; h - absolute pressure sensor.
Connection diagram of the VAZ-21214 engine control system with distributed fuel injection under Euro-2 toxicity standards with controller 2123-1411020-10 (type MP 7.
0) on VAZ-21214 cars: 1 - warning lamp of the engine control system; 2 — instrument cluster (fragments); 3 — electric fans of the engine cooling system; 4 — courtesy light switch, located on the driver’s door pillar; 5 — status indicator of the car anti-theft system;
6 — control unit of the automobile anti-theft system; 7-coolant temperature sensor; 8 — air flow sensor; 9 — throttle assembly; 10 — block connected to the throttle position sensor; 11 — block connected to the idle speed regulator; 12 - controller; 13 — oxygen concentration sensor;
14 — knock sensor; 15 — crankshaft position sensor; 16 — speed sensor; 17 - adsorber; 18 — battery; 19 - main relay; 20 — diagnostic block; 21 — fuse block of the engine control system; 22 — relay for turning on the electric fuel pump; 23 — relay for turning on electric fans;
24 — main car fuse box (fragment); 25 — block connected to the additional wiring harness*; 26 — ignition module; 27 - tachometer; 28 — electric fuel pump with fuel level sensor; 29 — nozzles; 30 — spark plugs; A - rear wiring harness wire connected to switch 4;
The order of conditional numbering of plugs in the blocks: a - controller; b — control unit of the automobile anti-theft system; in - air flow sensor; g — speed sensor; d — indicator of the state of the automobile anti-theft system; e — electric fuel pump and oxygen concentration sensor; g - throttle pipe; h — ignition module.
Read news about the new Niva
- Clutch adjustment on Niva 21214 - Online reference book to help the car owner - looking for and fixing faults
- How to eliminate vibration of the VAZ-21213 transfer case
- Fuses and relays (location and purpose of fuses and relays) Niva Chevrolet "
- Mud tires for Niva 4x4: radius 15 and 16 - which one is better to install "
- Liquids used and filling volumes Niva VAZ 21213, 21214, 2131 lada 4×4
- Wheel stud M12x1.25x41 2121, 21213, 2131, 21214, 2123 rear
- Niva Chevrolet transfer case: device, connection diagram and how to use?
- How is a CV joint replaced on a Chevrolet Niva?
Methods for checking a knock sensor
If the first signs of a malfunction of the meter appear, then before making a decision to replace it, it is necessary to check the performance of the meter. First of all, you should pay attention to whether there is an error on the on-board computer screen. If the DD produces too high or low a signal level, this is detected electronically and the driver receives an alert.
You can accurately check the serviceability of the DD only on a stand. All other methods only indirectly indicate the performance of the device.
First of all, it is important to check the resistance between the contacts. In normal condition it should be about 5 MOhm. Any significant deviation indicates a malfunction of the meter.
Another test method is to measure voltage. To do this you should:
- Remove the sensor.
- Connect a multimeter or voltmeter to the terminals.
- Using a small metal object, such as pliers or a bolt, tap the working torus of the meter.
- Check the information on the device. If there are no voltage surges, then the sensor is unsuitable for further use. It is important to take into account that even if there are voltage surges, this is not a reason to consider the DD to be fully operational. The ECU operates in a narrow range of amplitudes and frequencies, the correspondence of which cannot be detected with a multimeter or voltmeter.
In order to independently change the knock sensor on a Chevrolet Niva, you must follow the instructions below.
- Disconnect the terminal block.
- Move the connector to the side so that it does not interfere with further dismantling.
- Using a 13mm wrench, unscrew the DD fastening bolt.
- Remove the sensor.
- Install a new sensor.
- Connect the connector.
It is easy to check the inoperability of the DD yourself without dismantling it by conducting preliminary testing.
How to do it:
- put the engine at idle speed (about 2000 rpm);
- lightly tap with a hammer near the sensor.
A drop in engine speed (which will be audible) will indicate the serviceability of the part. If the speed remains unchanged, then the piezoelectric element is tested additionally. To do this, the DD will need to be removed by unscrewing the mounting bolt and disconnecting the block.
Then use a voltmeter or multimeter.
The procedure is as follows:
- connect the tester to the DD contacts;
- set constant voltage mode;
- Using light taps on the sensor, monitor the meter readings.
Voltage fluctuations of up to 0.2 volts are a sign of the operating condition of the DD. If there are no voltage surges, it means it is damaged and must be replaced.