In a car, the starter is a very important component. It ensures that the engine starts by rotating the crankshaft for the first few revolutions. This is necessary to begin the process of ignition of the mixture in the chambers.
Today we will consider this unit applicable to the popular Russian model Lada Kalina. We'll tell you where it is and how to remove it.
What is the operating principle of the starter?
By turning the key in the lock of the Lada Kalina ignition unit, power is supplied to the terminals of the electromagnetic relay. This element, by means of a lever, moves the overrunning clutch to a position where the starter shaft gear meshes directly with the flywheel. In addition, voltage is supplied to the electric motor, the shaft of which begins to rotate, driving the engine. When the motor starts, the plunger moves back, bringing the assembly to its original position. Starter power is currently being cut off.
Design
The Kalina starter is an electric machine operating on direct current, powered by a battery. During operation, the starter consumes a large amount of current and, if malfunctioning, can often discharge the battery.
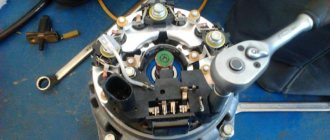
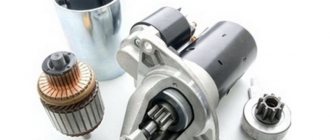
The main parts of the starter: armature, rotor, bendix, brushes, retractors. Failure of one of the elements leads to failure of the starter.
When is a starter check required?
During operation, the device may malfunction, and therefore the engine will be unable to start. The Lada Kalina car unit is characterized by the following signs of malfunction, suggesting the need for removal and diagnostics for the purpose of further repair or replacement:
- turning on the starter is accompanied by the shutdown of other devices operating at that time;
- when the device starts, reduced crankshaft speeds are observed, which is not enough to fully start the engine;
- turning the ignition key does not activate the starter;
- the unit shows signs of “viability”, but the motor flywheel does not rotate.
Next we will tell you how to remove and replace.
Lada Largus
Remove the cover (if equipped) of the electronic control unit (ECM) by releasing the two fasteners (flat-head screwdriver). Unscrew the 2 nuts (No. 1) securing the expansion tank (No. 2) (10mm wrench). Remove and move the expansion tank to the side without disconnecting the hoses.
For configurations with JR5 gearbox:
- disconnect the hinges (No. 1) of the gear selection and shift cables from the gearbox (flat-head screwdriver);
- press the clamps on both sides and disconnect the stoppers of the sheaths of the selection and shift cables from the gearbox bracket.
Replacing the starter on an 8-valve Kalina
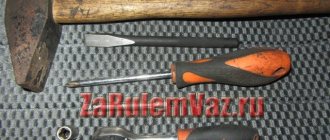
Having found out where the required unit is located, we proceed to replacement. To perform the work (removal, repair and installation), you will need the following tools and accessories:
- keys with dimensions of “8”, “10” and “13”;
- wrench with nozzles 13 and 15 mm;
- screwdrivers, both flat and cross-shaped;
- hammer, vice and pliers;
- drift (made of wood or soft metal);
- ohmmeter;
- a little lubricant of the “CV joint-4” type;
- two metal plates, a block of wood and a fine-grained sandpaper sheet.
After the preparatory work, we’ll figure out how to remove the device.
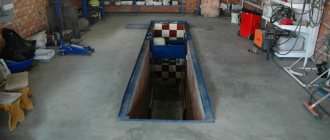
To make the replacement convenient, we place the LADA Kalina above the inspection ditch.
- We de-energize the on-board network (remove the terminals from the battery terminals).
- We dismantle the air filter housing along with the element.
- Using a wrench (socket) set to “13”, unscrew the nut holding the wire tip to the positive terminal of the battery. Remove the tip.
- Using a key set to “15” we unscrew the nuts securing the starter to the engine block. We remove the node.
The device is installed and connected to the LADA Kalina on-board network in the reverse order.
Fog lights Kalina
Lada Kalina wiper size
Kalina cooling system gets airy
What is an engine starter
Any gasoline internal combustion engine is equipped with a part called a “starter”. This unit, that is, the starter, is a conventional electric motor. The voltage “+12 Volts” is supplied to it via one electrical cord. The body acts as the second wire.
There is always voltage at the supply terminal
A relay is mounted inside the starter, the contacts of which conduct the supply current. When you need to start the internal combustion engine, the contacts close. Let us immediately note: the voltage on the power wire always remains as long as the battery is charged. Therefore, before dismantling, be sure to remove the negative terminal from the battery.
Auto electricians know: when working with any equipment, the battery is completely disconnected from the network. It is easier to do this by disconnecting the negative terminal (you will need a flat key “10”).
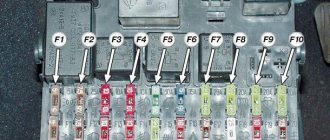
If the battery is charged, but the starter does not turn, then first you need to check whether there is voltage at the contacts of the Ka-3 relay. This element is fixed in a single mounting block, and it is called: “Additional starter relay.”
Starter repair in a Lada Kalina car
In most situations, disassembling a unit in the Lada Kalina model for the purpose of repair is carried out to replace such elements as:
- brush holder in combination with brushes;
- traction relay;
- drive components.
Naturally, repair procedures are carried out on a removed device. How to remove it correctly?
Let's sort it out.
- We take the spike at “13” and unscrew the nut that secures the lower contact bolt of the traction relay, after which we remove the wire tip.
- Using a screwdriver (Phillips), we “defeat” a pair of screws holding the retractor relay block. We remove the element.
- We remove the spring along with the armature from the front cover of the relay.
- Disconnect the housing from the front cover. Here you will need to unscrew a couple of tightening bolts (key set to “8”).
- From the released housing we remove the armature together with the brush holder and the end cover.
- This cover is removed by unscrewing two screws with a screwdriver. The bearing seat contains a wavy spring washer.
- The brush holder itself must also be dismantled, after which the brushes are removed.
- We move on to the planetary gearbox, from which we remove the cover.
- Now we remove the three satellites and the rubber plug.
- We press the end of the drive shaft with our finger, and then remove the drive assembly located in the front cover.
- We arm ourselves with two screwdrivers, with which we open the eyelet present on the support, and then remove the drive lever.
- We use a wooden block against which we rest the end of the ring gear.
- We apply the grips of the open-end wrench (size - “13”) to the ring that limits the travel of the drive gear. We hit it with a hammer, forcing the ring to compress in this way.
- The locking ring must also be removed. We use a flat screwdriver.
- Next, we dismantle the gear travel limit washer.
- We remove the overrunning clutch assembly with the drive gear.
- Using a screwdriver, remove the retaining ring from the corresponding groove on the shaft.
- We also remove the washer.
- We pay attention to the ring gear in the planetary gearbox, which we pull off the drive shaft.
- We proceed to dismantling the bearing. To do this, we use the previously designated metal plates. We insert them between the bearing itself and the armature commutator, and then rest it on a vice. Use a hammer to carefully impact the end of the shaft (a drift will be required) until the bearing is completely pressed.
This completes the disassembly procedure.
Next, we inspect the commutator and armature winding. There should be no charring here. If it is present, then use fine sandpaper to “correct the situation.” When the burning is intense, there is no alternative to changing the anchor.
If we find scratches or material coating on the shaft journal, we also use “all-conquering” sandpaper, after which we polish the treated areas.
We arm ourselves with an ohmmeter to check the short circuit between the core and the windings. We pay attention to the ends of the windings - their soldering to the lamellas must not be damaged. Blackening of the winding or separation of varnish insulation from its surface is not allowed.
If the brushes are worn out, then replace the holder assembly.
The assembly of the starter assembly is carried out according to the reverse algorithm of actions.
How to get rid of unnecessary details
Under the hood of the Kalina-2 it is easy to find an air filter module that prevents access to the unit we need. This module must be moved to the side, but first the air intake sleeve must be disconnected.
Black box – filter module
The sleeve itself, attached to the bottom of the module, is simply pulled in the “left” direction. The whole process looks like this:
Remove the sleeve from the pipe
Just in case, here is a drawing of the node in question:
Filter module design
The figure shows the connector installed on the top of the module. The plug from this connector is also first disconnected, but first, the negative terminal is removed from the battery. Why do this, we discussed earlier. It turns out that there will be three preparatory steps: disconnecting the battery terminal, removing the sleeve from the filter side, disconnecting the plug.
Theoretically, replacing the starter looks easier if the air duct sleeve is disconnected on both sides (on Kalina 2 it covers the caps of the mounting screws). This statement is illustrated by the figure:
How to remove Bendix from the VAZ Kalina starter
Lada Kalina.
How to change the bendix on the starter The installed bendix on the starter is an overrunning clutch. Serves for silent starting of the car and extending the life of the starter, protects the starter from impacts of the teeth of the rotating flywheel, and also allows it to rotate in the same direction without speed restrictions.
As a rule, in order to change the bendix, you need to remove the starter and disassemble it. Depending on the machine model, the procedure may have its own characteristics. We will describe the algorithm from the moment when the starter has already been removed and to replace the bendix it is necessary to disassemble its housing:
-Unscrew the tightening bolts and open the housing.
-Unscrew the bolts securing the solenoid relay, and then remove the latter. When repairing, it is advisable to clean and wash all the insides.
-Remove the bendix directly from the axle. To do this, you need to knock down the washer and pick out the restrictive ring.
-Before installing a new bendix, the axle must be lubricated with temperature grease (but without excess).
-As a rule, the most difficult procedure is to install the retaining ring and washer. To solve this problem, craftsmen use different methods - they open the ring with open-end wrenches, use special clamps, sliding pliers, and so on.
-After the bendix is installed, lubricate all rubbing parts of the starter with high-temperature grease. However, do not overdo it with the amount, because excess will only interfere with the operation of the mechanism.
-Before installation, check the starter. To do this, use wires to “light” the car in winter. With their help, supply voltage directly from the battery. Connect the “minus” to the starter housing, and the “plus” to the control contact of the solenoid relay. If the system is working properly, you should hear a click and the bendix should move forward. If this does not happen, it is necessary to replace the retractor.
-Before installing a new or repaired bendix, always check its operation and the drive of the unit. -All plastic washers must be intact. -When buying a new Bendix, it is advisable to have the old one with you in order to verify their identity. Often similar parts have minor differences that are not visually memorable. -If you are disassembling the Bendix for the first time, it is advisable to write down the process on paper or put the individual parts in the order in which they are dismantled.
Do-it-yourself Bendix starter repair is possible if the rollers are worn out first, or the source of the problem is contamination or frozen lubricant. The Bendix is assembled by rolling, and the outer race of the clutch is made of durable metal. It is difficult to flare it, so the fastest way is to carefully cut through the clip with a grinder.
Having knocked the weakened clip off the Bendix, we remove the gear, rollers and springs from it. After washing the insides, we check the absence of deep nicks in the grooves of the coupling and on the gear shank. We inspect the rollers: the surface should be cylindrical, without signs of wear. A replacement for the rollers can be found by disassembling a roller bearing of a suitable size (bearing parameters can be found in reference books). We stretch the weakened springs a couple of millimeters or select new ones. After assembling the Bendix dry, we check its operation by turning the gear in the direction of jamming: the rollers should block the Bendix, after turning in the opposite direction, immediately release the gear.
Before assembly, add a medium-viscosity grease to the Bendix so that it does not thicken excessively in the cold. Moreover, there should be a minimum of lubrication: its task is to protect the insides of the coupling from corrosion; excessive lubrication only gets in the way. Having put the clip in place, we fix the edges of the cut with spot welding. In this case, you cannot overheat the bendix; it is better to use a semi-automatic machine. We clean off the protruding welding so that it does not interfere with the movement of the bendix in the starter housing.
Source
Lada XRAY and Vesta
Remove the engine splash guard (instructions for Lada Vesta, XRAY).
For configurations with manual transmission: Unscrew 2 bolts (No. 1) and remove the clutch hydraulic cylinder (No. 2), without disconnecting it from the hydraulic actuator tube (No. 3). Hang the cylinder on the technological hook (head “13”).
For all configurations: Unscrew the nut (No. 1) and disconnect the terminal (No. 2) and the block with wires (No. 3) from the starter traction (retractor) relay (No. 4) (head “13”).
Remove 3 bolts (No. 1), remove the clutch hydraulic cylinder mounting bracket (No. 2) (for vehicles with manual transmission) and the starter (No. 3) (Torx E10).
Do-it-yourself Bendix repair (video)
What else is worth reading
Hall sensor in distributor
Starter operating principle
Windshield replacement
Spar
Charging a car battery without removing it
Bendix replacement
Replacing the Bendix VAZ-2110 and other front-wheel drive models begins with dismantling the starter.
- remove the “-” terminal from the battery;
- Using a 13 key, unscrew and remove the power terminal from the electric motor;
- unscrew the starter mounting bolts with a 13mm wrench (2 on top and 1 on bottom);
- remove the starter.
It is worth noting that the electric motor mounting bolts often become so sour that it becomes difficult to unscrew them. In this case, you should not try to unscrew the bolt by force. This may cause it to break. It is necessary to tap the heads with a hammer, fill them with WD-40 liquid and wait 15-12 minutes.
After this, you can try again. Another way to unscrew a soured bolt is to heat it with a gas burner.
With the electric motor removed, the retaining ring is removed from the shaft. To do this, you need to knock it out of its seat with a special mandrel (if you don’t have one, a high 15 socket will do) and remove it using pliers. After this, the part can be easily removed by hand. » alt=»»> The above procedure answers the question of how to remove the bendix from the starter. In general, at this point the main part of the repair can be considered complete, since replacing the bendix on the starter after the old element has been dismantled is a matter of one minute.
Possible causes of failure
The starter overrunning clutch consists of a small number of parts, so there can be several causes of breakdowns. The inner rollers wear out most often. Reducing the diameter of these parts makes it impossible to reliably engage the moving elements. Sometimes, flat surfaces can form on the rollers, which also interfere with the normal operation of the clutch.
All working surfaces that engage are subject to wear over time. Such malfunctions of the starter bendix are natural, but if they are present, the part cannot be restored.
Malfunctions and their symptoms
During operation, the starter may malfunction and require appropriate maintenance. It is not uncommon to have an unsuccessful attempt to start a car engine the first time. Electrical problems are common. In this case, it is customary to talk about damage in the area from the battery to the starter. There may be abrasion of the brushes or breakdown of the armature coil, lack of charge in the battery or loosening of its terminals, damage to the ignition switch cylinder. These malfunctions lead to the following situations:
- the rotor turns slowly;
- there is no reaction when voltage is applied to the starter;
- the starter does not rotate, although the retractor clicks;
- other functioning components are switched off when the starter is turned on.
Mechanical failures are also inherent in the starter on the Lada Kalina: damage to the flywheel or pressure spring, as well as damage to the shaft or defects.
Characteristic signs of problems with the starting device:
- starting the engine only after several unsuccessful attempts - there are many reasons, but the most common is contamination of the internal elements of the device;
- lack of cranking or reduced crankshaft speed - the bendix or other part of the drive is faulty;
- cranking the electric motor with difficulty - wear of the brushes, wear out of the bearing;
- the electric motor continues to rotate after starting the power unit of the machine - the spring is stuck or jammed, the contacts are stuck, the traction is faulty, the bearing is worn out;
- Starting the engine is accompanied by loud noise - wear on the flywheel crown or incorrect installation of the starter.
Performance evaluation
After completing the work, you should check how the engine starts. The starting engine should run smoothly, without knocking and grinding noises characteristic of a faulty overrunning clutch. This is a sign of a high-quality replacement of the Bendix on VAZ-2109-2115 cars.
In some cases, changing the bendix is not enough. Prolonged operation of a faulty clutch leads to wear and damage to the flywheel teeth. In this case, the symptoms of failure that existed before replacing the gear may become weaker, but do not disappear completely. In such cases, it is necessary to replace the flywheel.
Repair or replacement of the starter is required when, when turning the ignition key to the “engine start” position, the starter does not turn or turns with dips. It happens that the starter rotates, but the engine does not. This can be easily checked by a suspicious sound and lack of rotation of the generator pulley.
To check the operation of the starter we will need:
- Known good battery
- Car cords with crocodile clips
- Wire brush or flathead screwdriver
1) Reset the “+” and “-” terminals from the battery to the car. This is necessary to avoid damaging the motor controller.
2) On all cars of the Samara family (VAZ 2113, 2114 and 2115) and Priora, as well as on cars of the Lada Kalina and Granta family with an old “lever” gearbox, the starter is installed on the gearbox next to the engine on the radiator side under the air filter.
In order to carry out the work, it is necessary to remove the air filter housing along with the inlet pipe (the procedure is described in detail in the article on changing the gearbox oil).
On Kalina and Grant with a cable gearbox, the starter is also installed on the box, but on the engine side and behind it, closer to the cabin. It is extremely inconvenient to get there and check it without a lift. Sometimes it's easier to remove the starter and check it separately.
3) Unscrew the conductive wire (the thickest wire that comes from the “+” terminal of the battery). It is screwed onto the upper stud of the solenoid relay with a “13” nut (the lower arrow points to the nut, the wire itself has been removed for clarity). Remove the control wire from the male plug on the solenoid relay (top arrow).
4) BE SURE to put the car in neutral gear.
5) Install a working battery next to the car (or use an installed one if you are 100% sure of it). We put the crocodile on the “-” terminal
and hook the second end to the starter housing (by the bolt, retractor housing). First clean the connection area with a wire brush for better contact.
6) Place the crocodile clip on the “+” terminal of the battery. We bring the second end to the “male” on the back side of the solenoid relay.
7) When touched, the retractor relay should operate and a characteristic click will be heard. If no sounds are made, then check the mass again. If there is no click, then remove the mass from the body and install the crocodile “-” on the lower retractor bolt (shown by the arrow). Once again we bring the crocodile “+” to the “male” terminal.
If the solenoid relay works, then in 95% of cases the starter brushes are faulty. If it doesn’t work, then feel free to buy a new one (it cannot be repaired, but can be removed without removing the starter). ATTENTION! Do not leave voltage on the solenoid relay for more than 5 seconds. This can damage both the relay and the battery.
 We throw the crocodile “-” onto the body again. We bring the crocodile “+” to the lower bolt on the solenoid relay:
At the same time, the starter should rotate and a characteristic hum will be heard. The speed of a working starter reaches 11 thousand rpm. If the starter turns slowly, then most likely (if the battery and connection are working) the brush assembly is faulty or the armature is jammed. If the starter does not turn (when the retractor with the crocodile “-” on the body is activated), then the problem is in the winding. If the starter turns properly and the retractor works, then we check them together. ATTENTION! Do not leave voltage on the starter for more than 5 seconds. This may damage the starter or battery.
9) For a general check, we throw the “+” terminal onto the upper pin of the solenoid relay. And with a screwdriver or key we bridge the crocodile “+” and “male”.
At the same time, the starter should start working and the engine should start spinning (determined by the alternator belt). If you can hear the starter working, but at the same time various sharp sounds and crunching sounds are heard, then the problem is in the mechanical part (Bendix or gearbox). If the engine rotates slowly, there may be several reasons for the malfunction. In most cases, these are brushes, but it can also be jammed bearings or bushings. Analysis and search for defects is required.
To remove and repair the starter we will need:
- Flat screwdriver
- Phillips screwdriver
- Key "8"
- Key "10"
- Key "13"
- Key "15"
- Key "17"
- Lithol lubricant (litol, CV joint, grease)
- Rags
- Wire brush
- Brake or carburetor cleaner
1) Unscrew the two starter mounting nuts. The nuts mostly come with a 17mm wrench, but there are also 15mm nuts. We remove it from the studs and pull it out. It is more convenient to pull it out through the bottom.
2) Check the appearance. There should be no burrs, cracks or signs of heavy wear on the gear. If there is, then we change the bendix. Inspect the condition of the bushing at the end of the armature. If it bursts or there are cracks on it, then it needs to be replaced. No signs of wear on the shaft are allowed.
